Categories
Poultry

6 Ways to Extend the Shelf Life of Eggs

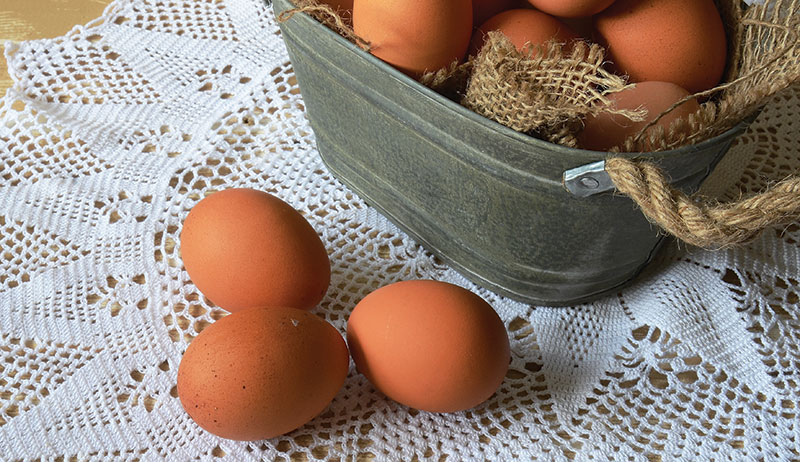
The shelf life of eggs is not something we worry about a lot when eggs are plentiful. But what do you do in the fall and winter when your girls’ egg production declines? What happens if there is a shortage of supermarket eggs? To extend the shelf life of eggs, there are several safe and easy ways to preserve fresh eggs in the shell as well as out.

Before you start, though, understand that clean eggs are important no matter which method you choose, but especially so when preserving eggs in their shells. Eggshells are porous. An oxygen exchange goes on from the time an egg is laid until it’s used or goes bad. Preserving in the shell is designed to halt that exchange, so it’s important not to remove the shell’s protective bloom. Choose clean eggs and gently wipe them—but don’t wash them—discard cracked or misshapen ones, and process them within a day or two of laying.

Also, don’t take chances when you extend the shelf life of eggs. If you’re in doubt, discard finished eggs; don’t eat them. Avoid instructions from vintage cookbooks written in times when eggs were held in springhouses and cold cellars under conditions we now know are just not safe. Break each egg into a cup or bowl before use.

Here are six ways to extend the shelf life of eggs…

1. Water Glassing Eggs

water glass preserving

Water glass (sodium silicate) is a compound that forms a syrupy gel when mixed with water. Mixed at the rate of 11 parts of cooled, boiled water to one part water glass, it has been used to preserve eggs since the mid-1800s.

According to tests conducted by the University of Arkansas in 1918 comparing egg preservation using nine products and processes, water glassing beat the others far and away. Researchers concluded that after six months in storage, the water-glassed eggs’ whites weren’t quite as thick as those in newly laid eggs but were otherwise “practically equal to fresh.” Note: Prick a small hole in one end of water-glassed eggs before boiling them.

Home-brewing companies and survivalist suppliers carry water glass labeled as sodium silicate, or you can buy it on Amazon or eBay. Prepare the mixture and let it cool, then pour it into a sterilized earthenware crock or a modern equivalent. Place the eggs in the water glass gel, pointed side down, leaving 2 to 3 inches of liquid above the final layer. Cover it tightly and store it in a cool area where it won’t freeze. Water-glassed eggs stay fresh as long as a year, and water glass imparts no odd flavors.

2. Isinglass

isinglass preserving
Shutterstock

Isinglass is a type of collagen extracted from the dried swim bladders of fish. It’s available from the same outlets that sell water glass. Prepare it according to directions on the label as concentrations vary from product to product. Follow the directions for preserving and using water-glassed eggs, allowing the isinglass solution to set to a loose, gelatinlike consistency before capping or sealing. Some say eggs preserved in isinglass taste a bit chalky, but they stay good for six months to a year and work well in recipes calling for eggs.

The Incredible Century Egg

century egg preserve eggs extend shelf life
Shutterstock

One of the oddest delicacies on Earth might be the thousand-year egg. Also known as a pídàn, millennium egg, century egg or 100-year egg, this toothsome Asian treat is a chicken, duck or quail egg traditionally preserved in a mixture of clay, ash, salt, quicklime and rice hulls for several months (but definitely not 1,000 years).

A fully cured thousand-year egg has a creamy, stinky, gray to dark green yolk with a salty-tasting, gelatinous, dark brown white. Is it popular in Asia? You bet. In fact, to feed the supply, modern purveyors of thousand-year eggs soak raw eggs in table salt, calcium hydroxide and sodium carbonate solution for 10 days, then age them wrapped in plastic for several weeks to crank them out in record time.

Thousand-year eggs have been a favorite delicacy for centuries, peeled, rinsed and eaten as is or used in a variety of dishes, including an array of tofu-based meals. Another dish is called old-and-new eggs, comprising a fresh egg omelet topped with chopped thousand-year eggs.

How stinky is a thousand-year egg? Its Thai name is khai yiao ma, meaning “horse pee egg.” Because of its pungent odor, it was once believed to be crafted by soaking eggs in horse urine.

3. Liming Eggs

pickling lime preserving

By lime, I mean pickling lime or food-grade calcium hydroxide, not slaked lime or quicklime. Used for pickling cucumbers, it’s available in the canning section of supermarkets.

To use it, combine 1 pound of pickling lime with a gallon of boiling water and stir to make a thin paste. Let it cool and then pour it into your crock or crock substitute. You might have to double or triple the recipe if your crock is big.

Use a pin to prick a tiny hole in each egg and then place it in the pickling solution, pointed side down. Add eggs, making sure all are covered with pickling solution. Cover and place in a cool location. Like the others, limed eggs stay good for as long as a year. They tend to have a slightly limy flavor.

4. Mineral Oil

mineral oil preserving

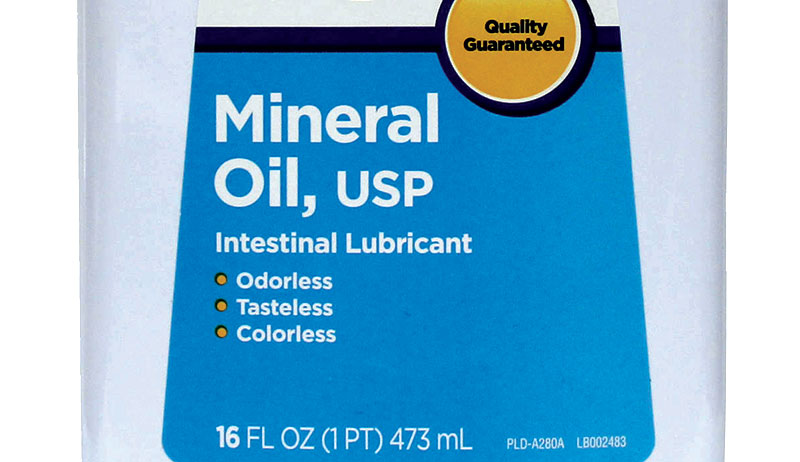
Historically, many types of fats including suet and butter were used to coat eggs for storage in the shell. For best results, use mineral oil, but know it isn’t a long-term solution. Coated, eggs must be refrigerated and used within three to four months, but it’s easy and it works. Simply coat them with mineral oil and place them pointed-side down in egg cartons in the refrigerator, turning them over once a month to keep the yolks from settling.

It’s a Crock

If you’re considering using great-great-grandma’s heirloom crock to preserve eggs, think again. Earthenware crocks were kitchen essentials from the 1700s through the mid-1900s. Known for their simple decorations, thick walls that sometimes bow out in the center, and their shiny, glass-like surfaces, they are prized today but best used as décor in lieu of practical purposes. Most were salt-glazed, but a second, lead-based glaze was sometimes applied. Unless an expert pronounces your antique lead-free and safe, don’t use it.

Modern replicas made in countries such as the United States and Canada that monitor the lead content of their products are a safer alternative and even with shipping costs factored in (crocks are heavy), usually a better buy than a vintage crock from an antique shop. Chose one with a securely fitting lid.

A cheaper and fully acceptable alternative is a repurposed food-grade plastic bucket, often available at low cost or for free from restaurants. New or used glass and food-grade gallon jars, sometimes available from the same sources, work well, too. Not usable are metal containers and plastics previously used to store toxic substances.

5. Pickling Eggs

preserve eggs extend egg shelf life
Shutterstock

One of the easiest and tastiest ways to preserve eggs is to boil, peel and pickle them. Because pickled eggs require refrigeration, you might want to buy a separate refrigerator just for this purpose.

Remember that peeling a fresh egg is not easy. Fresh eggs are difficult to peel because their lower pH whites cause them to adhere to the shell membrane. A good way to counter this is to bring a pan of water to a rolling boil and then lower eggs into the boiling water. Lower the heat to a simmer and cook for 13 minutes before carefully lowering them into an ice water bath for five minutes. Then gently tap each egg on a countertop to crack it all over and peel.

The simplest way to pickle eggs is to place them in canning jars, cover them with brine left over from home canned or commercial pickles, cap and refrigerate. But specially flavored pickled egg brines can be so much tastier.

Most any type of herb or spice can be used to pickle eggs by adding it to vinegar—amounts vary depending on the character and strength of the herb or spice—and heating the mixture to a boil, simmering for five minutes, and pouring while still hot over peeled, boiled eggs packed firmly into preheated, sterilized glass canning jars. Cool, cap and place the jars in a refrigerator.

It takes about two to four weeks for eggs to fully absorb flavor from pickling brine, but they are tasty after just a few days. They stay good in the refrigerator for three to four months, but they must be refrigerated to avoid the risk of botulism; don’t preserve them in unrefrigerated crocks as recommended in vintage cookbooks.

These delicious recipes are several from the Washington State University publication, “Pickled Eggs.”
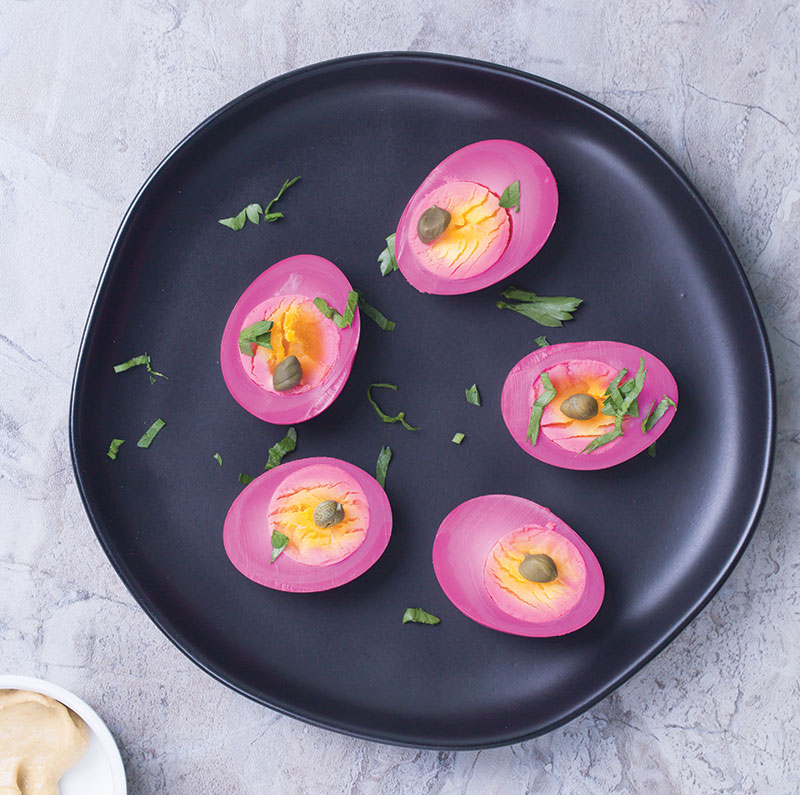
Red Beet Eggs

  • 1 cup red beet juice, from canned beets
  • 1 1/2 cups cider vinegar
  • 1 teaspoon brown sugar
  • a few canned whole tiny red beets, or several slices of beets

Dilled Eggs

  • 1 1/2 cups white vinegar
  • 1 cup water
  • 3/4 teaspoon dill weed
  • 1/4 teaspoon white pepper
  • 3 teaspoons salt
  • 1/4 teaspoon mustard seed
  • 1/2 teaspoon onion juice or minced onion
  • 1/2 teaspoon minced garlic or 1 peeled garlic clove

Pineapple Pickled Eggs*

  • 1 can (12-ounces) unsweetened pineapple juice*
  • 1 1/2 cups white vinegar
  • 2 medium onions, peeled and sliced
  • 1/4 cup sugar
  • 1 teaspoon salt
  • 1 teaspoon whole pickling spice
  • *If sweetened pineapple juice is used, omit sugar.

6. Freezing Eggs

Another easy way to preserve your hens’ bounty is by freezing excess eggs. The simplest way is by scrambling raw eggs in recipe-specific portions, pouring them into plastic freezer containers or freezer-safe canning jars, and popping them into the freezer. They’ll keep for about nine months.

You can also pour lightly scrambled raw eggs into ice cube trays until frozen, pop them out and freeze them in freezer-proof bags or containers. You can also separate white from yolks and freeze each part in ice cube trays. Either method works, though the consistency of prescrambled frozen eggs is best. In a standard ice cube tray, two cubes of scrambled egg equal one egg or 1⁄4 cup of mixture. Because they’re frozen in small portions, they keep as long as a year.

No matter which method you choose to extend the shelf life of eggs, preserving eggs is pretty easy and something to consider to make sure nothing goes to waste.

This story about how to extend the shelf life of eggs originally appeared in Chickens magazine. Click here to subscribe.

Categories
Animals

Rabbit Care Basics: 5 Vital Essentials to Know

Rabbit care basics are the same for all breeds – housing, feed, health and safety. Rabbits are known as being excellent pets, an easy meat source and a wonderful resource for quality fiber. Keeping different breeds for different uses will vary their care depending on their size, coat, use and specific health concerns. Here are five basics to know before buying your first rabbit.

#1 Housing

Rabbits are popular pets because of their size and limited need for space. They are adaptable – able to live in the house, in hutches, cages and in colonies.

Rabbits are easy to litter box train and make excellent house pets because of this. Docile breeds are recommended as pets for older people or those with limited mobility due to their ease of care and love of cuddling.

When raising rabbits in cages, it is important to make certain they have enough space for their physical and mental health. Animal welfare organizations recommend rabbits be able to have “three hops” from end to end and be able to stand on their hind legs comfortably. Does with a nest box and kits need extra space.

Many people are concerned about outdoor housing for rabbits in cold climates, but rabbits are often more resilient to extremely low temperatures than they are to the heat. Rabbits that are outside in warm climates need shade and a regular breeze. Rabbits will also regulate their body temperature by digging into the ground to stretch their bellies against cool soil, so giving them access to dirt can be helpful.

#2 Feed

Rabbit pellets are available in varying protein levels from 13-20%. The correct type and quantity are dependent on the rabbit’s size, and breeding status. Rabbits can become obese very easily if they lack the opportunity for exercise or are over-fed.

Rabbits should also be given a steady supply of good-quality hay. This not only helps provide them with enough roughage but helps prevent their teeth from overgrowing, which can cause health issues. Rabbits can also get small amounts of roughage with fresh vegetation, provided they are fed small amounts to become accustomed to it. A sudden addition, or change to their diet can cause gastrointestinal distress, which can be deadly to rabbits.

#3 Health

Before purchasing your first rabbit, it is important to make certain you have a vet who can care for them. While rabbits are a common pet, it can be difficult to find them proper medical care when in need. Not all veterinarians will treat rabbits, so check with yours ahead of time.

Individual rabbit breeds may have health concerns specialized to them, but rabbits as a whole also have a number of issues that owners will need to be on the lookout for. Infections of the upper respiratory system, urinary tract or ears are common. Parasites can be an issue, depending on where you live and how the rabbits are kept. Other serious issues that should be diagnosed by a vet include cancers, GI stasis and – most recently in the western part of the United States – Rabbit Hemorrhagic Disease.

If your rabbit becomes sick, take it to a veterinarian right away. If your rabbit’s illness is serious or prolonged, you may spend hundreds, or possibly thousands, of dollars for diagnosis and treatment. (Postponing care often increases veterinary care costs, so always bring your rabbit to the vet when it first shows signs of a medical condition.)

#4 Safety Basics

For Indoor Rabbits:

Rabbits are prey animals and intensely curious – traits that can lead them into dangerous situations, even living in your home.

While rabbits raised with house cats can get along well, this is not always a good match-up. In cases where the cat or rabbit feels threatened, they may fight. A cat scratch or bite can easily become infected and fatal.

Likewise, household dogs can be a danger. No matter how friendly your pooch is normally to animals, rabbits can awaken a predator drive by running away. Even a dog who only means to play can kill a rabbit, simply by being bigger, and by having a strong bite.

Rabbits are voracious chewers. Make sure electrical, computer and telephone cords are covered with plastic tubing and wooden table legs are covered in bubble wrap. Some rabbits like to chew on cloth, so rugs, pillows and other upholstery items may be in harm’s way if a rabbit is given the run of a room. Household plants can also be fatal. Anything they chew that may have been cleaned with household chemicals, such as baseboards, can also be a risk.

Digging is another rabbit habit, and you may find the corners of your carpet lifted up if you let your rabbit roam free in a carpeted room. You’ll need to protect the corners of your carpeting if you have a rabbit with an inclination to dig. Offer digging options in the form of untreated grass mats as an outlet for your rabbit’s digging urge, or monitor your rabbit as it roams the backyard.

For Outdoor Rabbits:

A rabbit living outdoors or in cages is at risk for any of these things they come in contact with, as well as wild predators, such as rats, raccoons, foxes and aerial predators. Finding a way to protect your rabbits from Mother Nature can be a daunting task.

#5 Away-Care

If you go on vacation or business trips, you’ll need to find someone to care for your rabbit while you’re gone. Keep in mind that caring for a rabbit is different from pet-sitting a dog or cat in both feeding requirements (rabbits need an ample supply of hay throughout the day) and interaction (a rabbit needs supervised time outside its enclosure in a stress-free environment). Make sure your caretaker is fully aware of your rabbit’s needs.

How Much Time Do Daily Rabbit Chores Take?

Your rabbit’s hutch needs to be cleaned daily. During these clean sweeps, you will also need to wash and refill its water bowl or bottle and provide fresh hay, pellets and greens. Allowing it two to four hours to exercise outside the hutch is also beneficial to your rabbit’s health and well-being.

Before embarking on rabbit ownership, think long and hard about these responsibilities and whether you really want to take them on. Rabbits can live for nine to 12 years, so providing a home for a rabbit is a serious commitment. If you decide to make this commitment, try researching breeds such as Mini Lops, Mini Rex and Tan that you are interested in to find one that suits your specific needs.

This article about rabbit care basics was written for Hobby Farms magazine by Sherri Talbot and Audrey Pavia. Click here to subscribe.

Categories
Animals

Mini Rex Rabbits: Breed Profile & Care Tips

The Mini Rex rabbit breed was developed by Monna Berryhill in 1984 by combining a Dwarf Rex and a lynx Rex. Her final product was accepted into the American Rabbit Breeders Association (ARBA) in 1988, making them one of the newest breeds in the organization. The breed is a smaller version of the Standard Rex, reaching only 4.5 pounds. Like the Standard Rex, they are raised as pets and for show due to their plush, velvety coats. However, unlike the Standard, they are rarely used for pelts or meat due to their small size. They do have the benefit of a longer lifespan than their larger cousins, with an average of eight to twelve years.

The Rex Mutation

Both the Standard and Mini Rex are known for their unusually plush fur. While rabbits usually have a dual coat, containing an undercoat and guard hairs, the distinct feel of a Rex rabbit is due to a mutation in which the guard hairs are missing. This leaves only the softer undercoat, resulting in a dense, velvety feel. Unlike many rabbit fur types, Rex coats will stay in position, no matter which way the rabbit is stroked.

Showing the Mini Rex

The Mini Rex should present at show as well-rounded, with a thick hindquarter and midsection, wide shoulders and a short, thick neck. The ears should also be thick and no more than 3.5 inches long. Feet should be proportional – not too long – and parallel with each other. The bone structure should be reasonably fine, but the rabbit should be well-fleshed. Rabbits need to be healthy, well-groomed and be alert.

As with the Standard Rex, the coat is worth a large percentage of the points in the show ring, with the coat and color being worth fifty-five out of the full hundred points. Rabbits in molt – a stage often called “blowing their coat” are generally not considered desirable at judging. Fur needs to be dense and between 1/2 and 7/8 inch long. There are twenty-two accepted colors for the Mini Rex when showing under ARBA standards.

How to Care for a Mini Rex

Mini Rex rabbits have the normal health issues found in most rabbits, including respiratory issues, GI stasis and uterine cancer in unspayed females. The risk of cancer can be significantly reduced by spaying the rabbit. In addition, the unusual texture of their fur can cause an increased risk of injury in the hocks, so proper cage flooring is extra important when housing Mini Rex rabbits.

When buying cages, a small rabbit’s housing should be no less than thirty inches by thirty inches per rabbit. Rabbits are also social animals, so considering a cage that will hold multiple rabbits can help with their well-being. Cage size should also be increased if breeding rabbits, in order to provide space for their young.

The diet for the Mini Rex should be mostly made up of high-quality hay. This provides not only nutrition, but helps wear their teeth down to prevent dental issues. Limited amounts of fresh greens also increase healthy nutrition. Importantly, while many other rabbit breeds require pellets as a substantial part of their diet, Mini Rex should only have them as treats. A constant supply of fresh water also provides hydration and keeps their digestive system working appropriately.

A Manageable & Calm Rabbit

The Mini Rex is a small breed like the Mini Lop that is enjoyed by many due to its manageable size, calm demeanor and unusual fur. While personalities vary between individual rabbits in this breed, they are often pleasant pets and a recommended choice for seniors or others looking for an undemanding animal companion. However, being small can also make them a fragile pet around dogs, cats and young children. Still, with proper attention and care, they are a popular choice with many people interested in raising rabbits.

This story about the mini rex rabbit was written for Hobby Farms magazine. Click here to subscribe.

Categories
Animals

Mini Lop Rabbits: Breed Profile & Care Tips

Mini lop rabbits are small, but not the smallest of the lop breeds. The American mini lop is actually considered a mid-weight rabbit, at around six pounds. This can cause some confusion since there is a British-recognized miniature lop – which is much smaller – and the name is sometimes also shortened to mini-lop as well. Here, however, we will specifically be talking about the American breed.

An Unfinished History

The history of the mini lop, as it is documented in the United States, begins with a man named Bob Herschbach. Herschbach discovered the breed at a German show in 1972 where it was called Klein Widder, and weighed about eight pounds. Herschbach bred his own Klein Widder’s in the United States the same year and presented them to the American Rabbit Breeders Association (ARBA) two years later. They recommended a smaller size and a name change to appeal to Americans. By 1978, the breeder association had been formed and the breed was officially sanctioned by the ARBA. It has gone on to be one of the most popular rabbit breeds in the country and one of the most common pet rabbit breeds.

Unfortunately, we have lost to history who developed those original Klein Widder rabbits. While Bob Herschbach certainly deserves the credit for his work in developing the breed, it’s a shame we don’t know more about their original creator.

How Do You Care for Mini Lop Rabbits?

Mini lops should never be heavier than 6.5 pounds, with females being slightly heavier than males. A heavier rabbit may be a sign of obesity, which carries the same risk in rabbits as in humans and other pets. Mini lops are generally calm rabbits that enjoy attention. If your rabbit becomes agitated or exhibits aggressive behaviors, this may be a sign of illness or a problem in the environment.

While mini lops have the same issues as other rabbit breeds and require much the same care, their ears also require extra attention. Lop-ears on rabbits are a product of breeding, not nature, and they are hard for rabbits to groom properly on their own. They can develop infections, mites and wax build-ups. Recommendations call for weekly cleanings and even then, warn that this will probably only reduce the risk of ear infections. Finding a good vet in your area willing to treat rabbits is a wise idea before choosing this breed. On average, mini lops live eight to ten years.

Showing Mini Lops

Out of a total of one hundred points, the mini lop’s head and body are worth sixty-three points. Judges look for a compact, thick body with a wide head and shoulders. Solid muscles, a short neck and balanced proportions are signs of a healthy rabbit with good body conformation. A long face, body or neck are faults.

The ears are worth twelve points. Combined with the crown – the point where ears connect to the head – this is one of the most complicated parts of judging. The ears must be firmly connected, hang vertically and form a horseshoe around the rabbit’s face. There should be no creases in the ear and size should be proportional to the head.

The legs, feet and bone structure combine for a worth of only five points. As with all rabbits, the feet should be straight and parallel. The bone structure should be strong and the legs short and thick enough to support the weight of the rabbit easily.

Unlike the Jersey Wooly rabbit, fur is likewise given little consideration, provided it looks healthy, is the proper length and shows no other concerning traits. Interestingly, color is not considered in mini-lops unless all other traits between rabbits have been judged equal.

Mini Lops: A Popular Pet

Like many of the smaller rabbit breeds such as the polish rabbit, mini lops are popular pets and show animals. Their size, calm demeanor and ease of care make them an attractive companion option for other people or those interested in a quieter pet.

This article about mini lop rabbits was written for Hobby Farms magazine. Click here to subscribe.

Categories
Poultry

Langshan Chicken: Get to Know This Rare Breed

The Langshan chicken is one of the rarest breeds today. These majestic dual-purpose chickens have a lot to offer homesteaders, backyard chicken owners and rare breed enthusiasts. Here’s what you need to know about the Langshan chicken.

What is a Langshan Chicken?

Langshans come in two distinct breeds, the Croad and the German. While both of these breeds make ideal chickens for both egg and meat production, the Croad Langshan is the best choice if you are looking to win a blue ribbon with this rare breed, as the American Poultry Association (APA) does not recognize the German Langshan chicken.

But besides their exhibition purposes, what else sets these two breeds apart?

#1 Croad

The Croad Langshan chicken was the first of the two breeds to be developed. With reported sightings dating back to 1872, the Croad Langshan was first imported from China to England by Major F.T. Croad.

Major Croad’s niece was later credited with establishing the breed. Miss Croad worked tirelessly to keep the breed close to its original imports. However, the Modern Langshan was quickly bred, creating a taller, more “showy” chicken for the show table.

Soon heated arguments were taking place across Great Britain with enthusiasts for both strains of the Langshan chicken claiming their birds were the best.

The Black Croad Langshan chicken arrived in America in 1878 and was admitted into the APA standard of Perfection in 1883. Just ten years later, a second color, white, was added to the breed’s standard. In 1987, over one hundred years after the breed was first admitted to the Standard of Perfection, the APA recognized blue as the third and final color variety for the breed.

#2 German

The German Langshan chicken was developed in Germany by crossing the original Croad Langshans with Minorcas and Plymouth Rocks.

There are several physical characteristics that set the Croad Langshan and the German Langshan apart. One of the most notable differences is that German Langshans have smooth legs and feet.

Another interesting fact about the German Langshan chicken is their brown-tinted feathering versus the black, white, and blue varieties the Croad Langshan is recognized in.

While they are good producers of eggs and meat, the German Langshan chicken never gained the popularity of the Croad Langshan and is rarely seen in the U.S. or Great Britain.

langshan chickens grazing in a backyard
Adobe Stock/AndyMellow

What Does the Langshan Chicken Look Like?

Tall and stately, the Langshan chicken has a large fanned tail. While the breed is recognized in three colors (black, blue, and white), black is the most popular, with hens and roosters sporting tight black feathering with a beetle-green sheen.

Unlike their German cousins, Croad and Modern Langshans have lightly feathered legs and feet, with feathering often appearing only on the outsides of the legs.

The Langshan chicken should have a medium-sized single comb, a small head, and an erect head and tail, giving them a distinct U-shaped body when viewed from above.

Is the Langshan Chicken a Rare Breed?

According to the Livestock Conservancy, the Langshan chicken is a threatened breed with fewer than one thousand annual show registrations in the U.S. and an estimated fewer than five thousand registrations globally.

While this does not paint the entire picture, as many Langshan chickens may be dwelling in backyard flocks around the world, it does showcase the need for increased popularity if breeders and other poultry enthusiasts want to prevent this majestic breed from going extinct.

Here are four facts you need to know about this breed.

#1 Average Lifespan

The Croad Langshan chicken has a life expectancy of five to eight years (about the average lifespan of most backyard chicken breeds).

The German Langshan’s life expectancy averages five to seven years, but with proper care and a good diet, some individuals may live up to ten.

#2 Health Concerns

Due to their lightly feathered legs and feet, the Langshan chicken should be checked regularly for scaly leg mites, as breeds with feathering on the shanks are more prone to this than breeds without feathering.  Also, be sure to check the feathers on the legs and feet frequently for dried, caked-on mud.

Like other feather-legged breeds, the Langshan chicken should not be given access to the outdoors during wet and muddy conditions. The coop should be kept dry and be cleaned regularly (no deep litter method for these chickens) to keep them healthy and looking their best.

When fed a well-balanced diet, with access to clean, fresh water, and kept in clean living conditions, Langshan chickens are fairly healthy birds.

Like all chicken breeds,  they can suffer from crop problems, internal and external parasites, and other common poultry diseases.

#3 Egg and Meat Production

Langshan hens are excellent layers, averaging 5 large, light brown to dark brown eggs with a purplish hue (also known as plum-colored eggs) per week. Hens yearly production varies from about one hundred and fifty eggs annually to as many as two hundred and twenty.

Hens may go broody, but they are not as likely to hatch out eggs as many other brown egg layers.

The Langshan chicken is an excellent dual-purpose breed, as roosters make delicious roasters and are often castrated into capons to help them grow larger.

#4 Temperament

The Langshan chicken has a sweet, calm, and friendly disposition. Hens and roosters are both considered to be gentle, peaceful birds and should not pose a problem for the novice. These gentle giants make an excellent addition to mixed flocks. While they do not bully other chickens, they are not afraid to stand their ground when necessary.

Because of their sweet and gentle nature, this chicken is an ideal pet for families and gets along well with children. Friendly, inquisitive, and intelligent, these chickens can even be trained to do tricks and respond well to simple commands.

For best results, handle hens and roosters several times a week and spend time interacting daily with your flock to prevent them from becoming shy and nervous.

Important note: While the roosters are usually calm and friendly, extra care should be taken to ensure that these big boys do not attack children, as roosters and children are not always the best mix.

The Langshan chicken may not be as popular as the Buff Orpington or Barred Plymouth Rock, but this ancient breed still offers backyard flock enthusiasts and homesteaders a lot of bang for their buck.  So, if helping to preserve a rare breed is on your bucket list, why not give the Langshan chicken a try?

This article about was written for Chickens magazine. Click here to subscribe.

Categories
Poultry

Chick Brooder Temperature: Raising Healthy Chickens

Chick brooder temperature is critical for raising healthy baby chicks. As with most things in life, there are pros and cons to heating a brooder.  Here are two of the most commonly used heat sources for maintaining good chick brooder temperatures and what you should know. 

Is a Heat Lamp for Chicks Safe?

Heat lamps are the most popular heat source used to keep a chick’s brooder temperature snug and warm. Let’s take a look at a few of the heat lamp pros.

heat lamp keeping the chick brooder temperature warm and baby chicks huddling underneath it
Adobe Stock/John

3 Heat Lamp Pros

#1 Created Equal

One of the main reasons heat lamps are chosen to maintain a chick brooder temperature is that all are created equal. Unlike some heating sources, heat lamps are generally crafted the same way and work fairly well, maintaining a snug 95°F. to keep chicks warm.

When it comes to the ease of maintaining chick brooder temperatures, heat lamps are hard to beat, as they work extremely well, are easy to set up and adjust, and usually last for several years.

#2 Budget Friendly

Heat lamps are one of the least expensive heat sources to maintain chick brooder temperatures, with costs usually falling between fifteen and thirty dollars. The combination of low cost and reliability is why so many chicken keepers choose heat lamps for brooding purposes.

A bonus to the affordable pricing on heat lamps is that it is more affordable to have extra lightbulbs and more than one heat lamp on hand in case of a malfunction.

#3 Availability

Another plus to choosing the heat lamp is the ease of availability. If you find yourself with a dead lamp and without a spare on hand, a new one is just a trip to the feed mill or farm supply store away.

Some farm supply stores carry heat lamps all year round, while others do not. Being prepared is always the best option, but if you do find yourself in a pinch, heat lamps are almost always available for purchase.

3 Heat Lamp Cons

Heat lamps have a lot of pros, and while they may be the most popular heat source for maintaining chick brooder temperatures, they also have some cons.

#1 Fire Hazard

It’s commonly known that heat lamps are a fire hazard. If you ever performed a quick internet search or picked up a book on how to raise chickens, you probably already know this.

The high wattage in heat lamps (what creates the heat from the lightbulb to keep chick brooder temperatures from falling) is hot enough to cause a fire, especially if the heat lamp malfunctions or is accidentally knocked over.

Heat lamps are easy to knock over, even on a stand, so avoid using them in areas with high foot traffic (kitchen, living room, or whatever rooms of your house or garage that are most frequently visited) and areas with small children and pets.

Never use heat lamps in a barn where they are most likely to cause accidental fires.

#2 Artificial Light

Another consideration when choosing a heat source to keep chick brooder temperatures steady is whether you want to introduce your chicks to artificial light.

Unless you plan on supplying your chicks with artificial light throughout their entire life, at some time you will need to remove the light source at night. Chicks find the transition to the dark to be frightening and will frantically chirp when the brooder becomes dark. This can be stressful for owners, as nothing is more heartbreaking than hearing your chicks chirping in distress.

#3 Stressed Chicks

Chicks raised with artificial light (even as a heat source to maintain chick brooder temperatures) are often more stressed and prone to behavior problems such as pecking order disputes and cannibalistic behavior than chicks raised without artificial light.

What is a Chicken Brooder Plate?

In recent years, brooder heat plates have started to gain popularity as a way to keep a chick brooder temperature steady without the risks of a heat lamp.

3 Heat Plate Pros

#1 Natural Lifestyle

One of the main reasons backyard chicken keepers choose to use a brooder heat plate to keep a chick brooder temperature cozy is a natural lifestyle.

Chicks can go under the heat plate whenever they are chilled, and then once warmed, come out to resume exploring the brooder. This behavior imitates how chicks raised by a mother hen bury into her feathers when chilled.

#2 Happy Chicks

Yes, chicks really do seem happier when raised with a brooder heat plate versus other heating sources.

With a brooder heat plate, chicks can monitor their own body heat (when to go under the brooder heat plate and to come out again once warmed), without you needing to worry about them overheating.

With no artificial light, chicks can rest well at night and experience lower stress levels.

#3 Worry-Free Heat Source

Brooder heat plates allow you to brood chicks successfully without a mama hen and keep the chick brooder temperature stable without the risk of a fire hazard.

Heat plates create a softer heat than heat lamps, offering a safe, worry-free brooding experience for you and your chicks.

These handy chick brooders are also less likely to knock over and are safe to use around children and pets.

Note: Brooder heat plates should not pose a fire hazard, but if you brood chicks in a barn, be sure to keep the area clean from dust to prevent barn fires, as the large amounts of dirt, dust, and flammable materials such as hay and straw in a barn make any electricity usage more risky.

3 Heat Plate Cons

While there are many pros to using a brooder heat plate to maintain chick brooder temperatures, there are also a few cons. Below is a list of the most common problems poultry keepers face when using this heat source.

#1 Not Created Equal

Unlike heat lamps, brooder heat plates are not all created equal. While some work well for maintaining chick brooder temperatures, others give off very little heat, causing chicks to become chilled and stressed.

After purchasing a brooder heat plate, be sure to test it out before setting it up in your brooder. Raise the legs to the height of a newly hatched baby chick and place a thermometer underneath for several hours. Check the thermometer reading multiple times during the tryout period to see if temperatures are holding a steady 95°F.

Reading reviews online can help you avoid purchasing lesser-quality brooder heat plates with problematic features, such as inadequate heat, lack of height adjustments, or other malfunctions.

#2 Pricey Purchase

Most brooder heat plates are more expensive than heat lamps. However, if you do not want to worry about the risk of fire while ensuring the chick brooder temperatures are warm enough for chicks to thrive, the peace of mind is well worth the cost.

There are many kinds of brooder hot plates available; check out reviews to see what other poultry keepers are saying. A general rule of thumb when purchasing a brooder heat plate is you get what you pay for, so purchasing the most budget-friendly heat plate may not be a wise choice.

#3 Scared Chicks

While this isn’t usually the case, some chicks are scared of the brooder heat plate and refuse to go under to get warm. Have a spare heat lamp or other heat source as a backup just in case a chick doesn’t take to the brooder heat plate.

This behavior seems to only happen with certain brands, so research a brand well before making a purchase.

Chicks seem to prefer darker-colored heat plates, so stay clear of brightly colored ones.

Choosing a heat source to keep your chick brooder temperature warm is an important decision. While these heat sources have pros and cons, they both work well to help you raise your next generation of chickens successfully.

This article about your chick brooder temperature was written for Chickens magazine. Click here to subscribe.

Categories
Poultry

Broiler Chickens: 6 Tips to Raise Healthy Birds

Broiler chickens are one of the most commonly raised meat sources by people who want to grow their own food. 

What is a Broiler Chicken?

If you eat chicken, whether it’s from a high-end organic store or the corner grocery, you’re almost certainly eating what’s known as a broiler breed (unless it’s a stew hen or labeled “heritage”). And, yes, they’re kind of genetically modified. They’re produced via a strict breeding program that’s been used for decades to produce birds that eat voraciously, mature quickly and do look pretty weird, with huge legs and feet and oversized breasts.

When we use the term “genetically modified” in reference to broilers, we’re not talking about lab coats, pipettes and microscopes, but rather deliberate breeding intended to reproduce and amplify desirable traits. This kind of breeding is common practice on many farms—hog farmers swear by the offspring of Berkshire and Yorkshire pigs—and the most common of barnyard dwellers are bred for desirable (and profitable) traits. As with plants, there are heritage breeds such as Red Rangers that boast minimal cross-breeding as well as hybrids, such as the Cornish Cross, that are the product of breeding programs.

The term “broiler” predates the birds we eat now; it came into use in the early 20th century when it was used as a catchall for birds sold for meat. In the 1940s, however, a promotion kick-started the breeding program that led to today’s meat birds.

According to the document “A Brief History of Broiler Selection,” produced by Aviagen International, The Great Atlantic & Pacific Tea Co.—better known as the A&P, the largest U.S. grocery chain at the time—partnered with the U.S. Department of Agriculture to stage its first-ever “Chicken of Tomorrow” contest in the mid-1940s. This tasked breeders with producing superior meat-type chickens. Chickens were hatched and raised by a third-party hatchery, where they were slaughtered and rated in several categories.

Henry Saglio’s Arbor Acres White Rocks won the 1948 and 1951 purebred contests, and Saglio was, upon his death in 2003, called the “father of the poultry industry” by The New York Times. A few other breeders gained notoriety from the event as well, including Vantress Hatchery, whose Red Cornish crosses were eventually bred with Arbor Acres birds to produce what we commonly call “chicken” today: the Cornish Cross.

broiler chickens in chicken tractor in a backyard
Rodney Wilson

In 1964, Nelson Rockefeller purchased Arbor Acres because of its dominance in the poultry industry. Over the years, big-name breeders consolidated and sold to multinational corporations, and today’s broilers are known by a few different “product” names, variations on the ever-popular Cornish Cross.

So what did midcentury breeders produce, exactly? The program aimed to create chickens that ate a lot over a handful of weeks to produce carcasses with more breast meat and bigger drumsticks. Secondary traits were bred into the chickens later, such as greater tolerance for cage-raising and easy-to-pluck feathers, but bigger, faster has driven broiler production over the years.

Since the 1950s, Chickens of Tomorrow have gone from a growth time of 16 weeks to, for breeds such as Cornish Cross X and Jumbo Cornish Cross, a finish weight of 5 pounds in just six weeks (harvested earlier than that, the chickens are known as Cornish game hens).

Broilers boast large breasts and giant legs. Commercial breeders—by and large corporations—rely on artificial insemination to fertilize eggs, as the broiler’s body proportions make mating difficult to impossible. They grow faster than they produce feathers, so you can often see patches of exposed skin. They’re hardly hearty, with a propensity for heart attacks and overheating that requires constant management.

Much of that sounds pretty bad, and, for chickens raised in battery cages on industrial farms, life can be pretty rough. But many sustainable farmers, raise Cornish Cross chickens, for their family’s dinner and to sell at market. Here are six tips for raising healthy broiler chickens.

#1 Monitor Light and Feed

Monitoring the light and feed intake of young chicks is critical for raising healthy broilers. Unlike egg-laying breeds, commercial broiler chickens (i.e., Cornish Rocks and Cornish Rock crosses) suffer from Sudden Death Syndrome (SDS). This syndrome causes healthy broilers to go into a sort of seizure before dying.

There are no known treatments for SDS, so prevention is the best way to control it. To prevent this fatal condition, allow broiler chickens access to feed twenty-four hours a day for the first day only.

After the first day, reduce feeding times by removing the feed and light source at night to prevent stress and overeating.  Feeding a low-carbohydrate feed will also help to prevent SDS.

Consider using a red light bulb in heat lamps to avoid excessive amounts of light at night.

#2 Clean Water

Just like our laying hens, broiler chickens need access to fresh, clean water at all times. Water should be changed twice daily, and water founts rinsed thoroughly before filling to ensure they are kept clean and free from dirt and manure.

Due to their larger bodies, broiler chickens are prone to heat-related illnesses, such as heat stroke, so providing cool water at all times is critical.

Encourage broilers to drink more by placing water founts in shady locations to keep water cool. Provide plenty of water founts to ensure all flock members have access to water.

#3 Feed Them Right

“You are what you eat” is a common saying to remind humans to make healthy food choices. Just like we make good food decisions for ourselves, the same rule applies to our flocks.

Raising healthy broiler chickens means raising healthier meat for you, your family, and potential customers. The good news is that raising good quality meat does not mean breaking the bank. In fact, all you need is a little extra garden space and some beneficial herbs.

You may have heard that Perdue has been adding oregano to their broiler chickens’ diet since 2002, and for good reason, too. Oregano has many health benefits for broilers, including being considered antiviral, an excellent immune booster, anti-coccidial, and helping to fight off E. coli infections in chickens.

Oregano is also known for its natural ability to fight against and prevent Ascites syndrome. In a research study, broiler chickens fed oregano saw a decrease in mortality rate of fifty-nine percent caused by ascites.

Other herbs to boost longevity and support a healthy immune system in broiler chickens include fennel (fennel being very beneficial in preventing heat stress in both layers and broilers), parsley, and thyme.

#4 Pasture-Raised

Everyone thinks of free-range eggs as a healthier option, but did you know that pasture-raised broiler chickens are also healthier for the consumer?

Pasture-raised broilers contain higher levels of omega-3s, iron, and vitamins A, D, and E.  And have lower levels of saturated fat and lower omega 6:3 levels than commercial broiler chickens.

While broilers should be allowed access to green pastures, confining them to a chicken tractor is necessary for predator protection, as due to their large bodies, broiler chickens can not move quickly and are picked off easily by predators.

#5 Coop and Run Maintenance

Once fully feathered, broiler chickens require good airflow to ensure they don’t overheat. To solve this problem, many small-scale farmers house them in chicken tractors.

Chicken tractors allow plenty of airflow and access to pasture and are easy to move daily. They also feature a tarped roof to protect against rain and aerial predators. However, the downside to chicken tractors is that they do not offer much protection from digging or nighttime predators.

If digging predators are a concern in your area, consider lining the perimeter of the coop and run with a 19-gauge half-inch hardware cloth. Run the wire twenty-four to thirty-six inches out. Hammer stakes every couple of feet into the ground to hold the wire in place, creating a makeshift predator skirt.

If weasels try to attack your flock during daylight, attach half-inch hardware cloth to cover the larger-gapped wired sides of the chicken tractor.

House broiler chickens in a completely predator-proof coop attached to the chicken tractor. The coop should have a wooden floor. Holes larger than one half inch need to be covered with half-inch hardware cloth. Leave plenty of windows to allow airflow and ventilation. Cover windows and openings with half-inch 19-gauge hardware cloth to keep predators out and good airflow moving through the coop.

#6 Add Probiotics

Probiotics are long recognized and proven to have a positive effect on laying hens and chicks. But what about meat birds? Broiler chickens fed probiotics have reduced amounts of harmful bacteria and other pathogens in their meat, including reduced amounts of E. coli and salmonella. In fact, chickens raised without probiotics are ninety-nine percent more likely to spread these harmful pathogens onto consumers.

Probiotics also help prevent coccidiosis and internal parasites in broiler chickens and help to produce an overall healthier chicken for consumers to enjoy.

Raising broiler chickens is a great place to start if you are looking to raise your own meat and become more self-sufficient. By following these six tips, you can raise healthier broilers for you and your family to enjoy and provide your meat birds with a healthy life.

This article about raising broiler chickens was written for Chickens magazine by Erin Snyder and Rodney Wilson. Click here to subscribe.

Categories
Equipment

How to Wax a Tractor & Protect Your Farm Investment

Learning how to wax a tractor will climb your priority list as soon as you learn all the benefits a well-applied coat of wax provides.

You might doubt whether the effort is worthwhile. Isn’t waxing for fancy cars? Why should you wax your tractor when it’s going to be tackling dusty and dirty farm work the next day?

Well, tractors aren’t inexpensive. Think of waxing as taking care of your investment. Waxing can keep your tractor looking nice for years to come, potentially raising its resale value.

3 Benefits of Waxing a Tractor

The benefits of waxing a tractor include:

1. Protection from UV rays. Waxing protects against harmful ultraviolet (UV) rays that can otherwise fade and degrade paint.

2. Protection against grime, corrosion, and more. Waxing creates a layer of protection against dirt, grime, residue, water, bird droppings, etc. that might otherwise damage the surfaces of your tractor. It can also help guard against corrosion and oxidation.

3. Protection from scratches. Waxing helps protect your tractor against the scratches that come with life around a farm, such as when driving around brush and low-hanging tree branches.

How to Wax a Tractor

Before waxing your tractor, carefully and thoroughly clean the exterior surfaces so they’re free of dirt and debris. Otherwise, there’s a good chance the grime will damage the paint in subsequent steps.

Speaking of which, once your tractor is clean, you’ll want to polish it. This will help remove minor scratches and make the paint shine.

Now you can tackle the actual waxing. Don’t wax your tractor out in the sunshine; park in a shady location. Wait for a warm day, and don’t attempt to wax in cold weather—definitely not if the temperature is below freezing.

Exactly how to wax a tractor will depend on the type of wax you use. There are natural waxes (like carnauba wax), synthetic waxes, and combinations of both. Some are pastes, some are liquids, and some can be sprayed on. Paste waxes tend to last the longer, but they’re the hardest and most time-consuming to apply.

Whichever wax you choose, follow the instructions carefully. If a particular wax shouldn’t be applied to some types of surfaces, you may need to cover parts of your tractor for protection prior to waxing.

Based on the instructions, make sure you have all necessary tools and supplies before you begin. You’ll likely want to have a microfiber cloth on hand, as a well as a tool for buffing the wax. A powered buffing tool can reduce the time and effort involved.

How Often Should I Wax My Tractor?

Knowing how often to wax a tractor is just as important as knowing how to wax a tractor. If you let the wax coating wear off, you’re tractor will no longer be protected.

Many factors influence how often a tractor needs to be waxed. A tractor that spends all its time outdoors in the weather and sunlight needs to be waxed more often than one that lives in a warm garage. Plus, different types of wax can last for different lengths of time. How much wear/tear/dirt/grime your tractor encounters on a daily basis plays a role too.

Figure on waxing your tractor at least twice a year, and even more often if—for one reason or another—the wax coating isn’t lasting. Drop a small amount of water on one of the waxed surfaces; if the water forms small beads, the wax layer is in good shape and doing its job. If not, it may be time for a new wax application.

Cleaning, polishing, and waxing a tractor takes time. But the benefits are worth the effort.

This article about how to wax a tractor was written for Hobby Farms magazine. Click here to subscribe.

Categories
Farm & Garden

Digging Fence Post Holes: 6 Tools to Get the Job Done

Digging fence post holes is easy when you have the right tools. Whether you’re replacing an old fence post or putting up a whole new fence line, here are six tools you can use to dig the holes for your fence posts.

1. Shovel or Spade

If you’re in a pinch and have no better tools available, a simple shovel or spade can be used for digging fence post holes. Just be aware it’s not the easiest or fastest way to complete the job, and you may have to dig a wider hole than ideal to get down deep enough.

2. Manual Post Hole Diggers

Manual post hole diggers are a solid step up from a shovel or spade. They’re basically two digging/scooping blades hinged together and operated with long handles. Using post hole diggers, you can dig a narrow hole straight down to suit your post.

The manual nature of post hole diggers does make them slower and harder to use than powered machines. But if you’re digging fence post holes only occasionally, they’re an effective and relatively inexpensive option.

3. Handheld Manual Auger

A handheld manual auger can drill narrow, vertical holes into the ground by rotating handles at the top of the auger. It generates much the same result as manual post hole diggers, but with a different approach. If you’re able to put in time and effort, a handheld manual auger is another satisfactory option for occasionally digging fence post holes.

4. Handheld Powered Auger

If you want to reduce the time you spend digging fence post holes, consider using a handheld powered auger. They operate in much the same way as a manual auger, but replace human muscle power with a small gasoline engine or electric motor to turn the auger.

You’ll still need strength to guide and steady the auger while it does its drilling—some are even designed to be operated by two people—but the speed and power boost shouldn’t be underestimated if you have a lot of holes to dig.

5. Tractor-Mounted Auger

An awesome tool for farmers digging fence post holes is a tractor-mounted auger. While designs can vary, they typically mount on the three-point hitch and are powered via the PTO.

Tractor-mounted augers offer many benefits. They’re fast and can quickly drill a large number of holes. They’re easy to use because the tractor does all the work. And since tractors are strong, you can dig deep or wide-diameter holes more easily than with other options.

The one downside is price, as tractor-mounted augers can be a bit pricey compared to manual tools. But buying or renting one may be worth the investment if you have dozens of holes to dig.

6. Towable Auger

If you don’t have a tractor with a three-point hitch, but you want the benefits of a large, powered auger, consider using a towable auger. Hook it up to any vehicle with a suitable hitch (your ATV or UTV, perhaps) and you can tow it wherever you need it.

A typical towable auger uses hydraulics powered by an onboard gasoline engine to operate, so it doesn’t need to borrow power from a tractor. Large models are strong and capable of digging wide, deep holes. They don’t come cheap—they’re generally the most expensive option we’ve outlined—but a towable auger makes digging fence post holes fast and easy.

This article about digging fence post holes was written for Hobby Farms magazine. Click here to subscribe.

Categories
Farm & Garden

Starting Seeds Indoors: 5 Benefits for Your Farm

Starting seeds indoors can start as early as mid-January. There are many plants that need a longer head start for growing than the warm season in many parts of the country will allow for, such as rosemary, onions and leeks.

Have you considered starting your own seeds but haven’t given it a try yet? Here are five reasons why it’s worth trying.

5 Benefits to Starting Seeds Indoors

1. Seed starting is less expensive overall. There are some upfront costs to growing your own seeds but many of them are a one-time expense. Once you have the supplies (seed starting containers, supplemental light, heat mats), you’ll be able to use them year after year. But honestly, I’ve started my seeds in reused plant containers and clean plastic food containers (yogurt and cottage cheese) for over a decade and I just bought my first heat mat this past spring. Besides grow lights, I haven’t purchased anything specialized and each year I start hundreds of seeds. I’m telling you this so you understand that expensive seed-starting equipment isn’t required.

Consider how much you pay per plant at the nursery and what it would cost to grow that plant yourself. For example, one nasturtium plant start at the nursey near my house is $5. I can purchase a packet of nasturtium seeds for $3 and grow 20+ starts. Better yet, once you grow your own, you can save the seeds from them and grow them the following year without spending a dime on seeds.

2. Starting seeds indoors allows you to grow a larger variety than what’s available at the nursery. Have you ever paged through a seed catalog? Wow, they have some unique plants that are sure to surprise you. Did you know there are 19 different options for beets that range nearly every color of the rainbow? There are many more plant options in seed form compared to what you can find at your local nursery. It makes growing your own food and plants even more exciting.

3. Starting seeds indoors generally results in healthier plants. When you start your own seeds with a quality seed starting mix, lovingly tend to them for months and make sure they are watered and healthy, they generally result in a more quality plant than what you can purchase.

4. Starting seeds indoors is a great way to get through the long winter, at least for the northern gardeners. A lot of people have great setups for growing inside but I don’t and end up taking over the living room of my house as my growing space. Thankfully, my family enjoys the plant starts being inside – it helps make the cold and brown winter a tad easier to navigate. It somehow shortens our cold season by starting our summer gardens in the dead of winter.

5. It’s incredibly satisfying. I relish the fact that nearly all of my vegetables and flowers are grown from seed (and most from saved seeds!). It’s so satisfying to harvest flowers and food from teeny tiny seeds you started months ago. All the effort of watering and weeding paid off and now you get to enjoy the literal fruits of your labor.

This article about starting seeds indoors was written for Hobby Farms magazine. Click here to subscribe.