The USDA plant hardiness zone map is something that any gardener or horticulturist with meaningful experience shopping for plants is familiar with. (If not, check out the online version here.) Like an imposing arbiter of vegetation dispersal, the color-coded map breaks the U.S. and Puerto Rico into 13 zones based on the average annual extreme minimum temperature—in other words, the lowest temperature each zone experiences in a typical year.
Each zone is further divided into two half-zones, labeled “a” (colder) and “b” (warmer). These zones are used to label the hardiness of plants, determining whether they’re suited for planting in any given region. A variety of raspberry bush, for example, might be rated for success in zones 5 through 9.
Some zones are too warm for certain plants. Apple trees, for example, need a certain number of “chill hours” (below 45 degrees F) during the winter in order to grow properly and produce fruit. But for much of the U.S., cold temperatures are arguably the greater limiting factor than heat. Cold temperatures can quickly damage and kill plants that aren’t suitably cold-tolerant.
But before you assume you can never grow a plant that isn’t rated for survival in your hardiness zone, keep in mind the zone delineations aren’t perfect. The hardiness zone map borders can change over time and no nationwide map can capture every local temperature nuance.
The Magic of Microclimates
The last point is worth reiterating because it’s good news for those of you with ambitious green thumbs. Just because a general region fits within one hardiness zone map doesn’t mean every acre of land within the region occupies that zone. A “microclimate” is exactly what its name suggests: a small area with a different climate than nearby or surrounding areas.
Let’s explore a large-scale example. Large swaths of the state of Wisconsin are labeled either hardines zone map 4a or zone 4b, with average annual extreme minimum temperatures ranging from -20 to -30 degrees F. But in the southwest portion of Wisconsin, there are many regions labeled zone 5a surrounded by zone 4b territory. Small variations in regional climate can make the boundaries between zones quite messy. Certainly, they’re not linear bands, even though a birds-eye view of the entire U.S. might give this impression.
But microclimates can be smaller—too small to show up on a map. The north side of a hill can be meaningfully different than the south side. Multiple microclimates can exist across a single property, and the key to growing plants outside of your hardiness zone is recognizing and capitalizing on these subtle microclimates.
Your Hardines Zone Map Microclimates
Picture the scene: You live in zone 4b, you’re perusing seed and garden catalogs, and you’re lamenting the number of lovely plants that claim zone 5 as their cold-weather cutoff. That flowering shrub would be beautiful! That apple variety sounds so tasty. And you dare not imagine the taste of those blackberries!
But take heart, just because you live in zone 4b doesn’t mean the entirety of your property diligently obeys the USDA plant hardiness zone map boundaries. The average annual minimum winter temperature for your area might be 20 to 25 degrees below zero. But there could be areas of your property where the temperature never dips below minus 20 degrees, falling squarely in the zone 5a range.
Warmer-than-average microclimates may exist in the following locations:
On Hills & Slopes
Warm air rises, and cold air sinks. The same fact that powers hot-air balloons means the tops of hills and slopes can stay warmer than valleys and low ground in between. Cold air settles in low spots because it can’t sink any further, so if you’re looking for a warmer microclimate, head for the hills.
Near Buildings
While you don’t want to grow plants right up against a building (this is especially true for large trees and shrubs), each side of a house, barn, shed, etc. can produce a different microclimate. For example, prevailing winds in North America tend to blow from the west and northwest, so planting to the east and southeast allows buildings to act as windbreaks, sheltering plants from cold winter winds. (They may receive less rain, too, so bear that in mind when watering.)
South-Facing Slopes
In the Northern Hemisphere, the sun is found in the southern sky. This means south-facing slopes receive more direct sunlight than north-facing slopes and tend to stay warmer. However, keep in mind some fruiting trees may benefit from the milder temperature swings found on north-facing slopes, helping protect them from sun scald (cracking of the bark caused by extreme temperature shifts) and also from exiting dormancy too early in the spring.
Urban Heat Islands
Cities are warmer than the countryside. Buildings, concrete, pavement, etc. absorb the heat of the sun and prevent temperatures from dropping as much as in surrounding areas. The heat islands generated by some large cities are labeled in the USDA Plant Hardiness Zone Map. Chicago, for example, is marked as zone 6a even though the surrounding areas are zone 5b.
If you live in a smaller city, consider the possibility that your local heat island isn’t marked. Your local winter temperatures might actually stay half a zone warmer than the map indicates.
Read more: You can use these 4 items as emergency cloches.
Enhance Your Microclimates
Choosing a naturally favorable microclimate is half the battle and might be all you need to successfully grow a warm-weather plant in a colder zone. But you can also take steps to maximize the benefits of a microclimate and further ensure that your plants escape the harshest winter weather.
The exact steps you take will vary depending on the zone in which you live. For example, mulching plants is an excellent way to lock in soil warmth and protect sensitive roots.
In a relatively warm zone such as 9a (where the average annual extreme minimum temperature ranges from 20 to 25 degrees), mulching might involve covering the ground around a plant with a protective layer of leaves, pine needles, straw, wood chips, shredded bark etc. For trees, mulch should extend as wide as the canopy overhead. So long as you make the layer deep enough (2 to 6 inches, depending on the material) and avoid piling the mulch within an inch or two of plant stems, you’ll be good to go.
But the situation may be different in colder zones. In areas that receive significant snowfall, the snow itself can serve as a surprisingly effective “mulch” for overwintering plants. Where I live in zone 4a, the coldest temperatures tend to occur in January, when there’s a thick blanket of snow across the ground. A foot of snow can insulate the ground quite nicely and help protect plant roots from those frigid 25- to 30-degree-below-zero temperatures.
Of course, not every area of the country consistently receives that volume of snow (or those subzero temperatures), and there are other steps you can take to protect plants from moderate cold weather. If a plant is small enough, you can cover it during nighttime cold snaps with a cloche, a transparent cover (often bell-shaped) made of glass or plastic that essentially serves as a miniature greenhouse. Less formal coverings can also be employed—buckets, garbage cans, boxes, planting pots, etc.

For larger plants, try covering them with sheets of cloth or plastic. Use stakes or even wooden scaffolding to construct a protective framework around the plants, making sure you don’t allow plastic to touch the foliage. Make sure the covering stretches all the way to the ground (and is pinned to the ground with stakes, rocks, etc.) or warmth will escape from under the covering. The idea is to build a tent or canopy to catch heat radiating up from the ground, so cinching a cover around the base of a plant isn’t ideal.
If you have a large garden (or simply wish to take a less cobbled-together DIY approach), row covers provide similar benefits for beating frost and mitigating the effects of cold weather. The materials are specifically designed to cover plants (either by draping over them or by riding on top of a support frame) and allow water and varying amounts of sunlight to pass through. This means they can be left in place for long periods of time while plants grow happily underneath, protected not only from cold but also wind and pests.
Watering plants before a cold snap is beneficial, too. Moist soil loses heat more slowly than dry soil, helping protect roots. And plants that are in prime condition (i.e., not struggling from lack of water) are more likely to survive cold temperatures than those already dealing with stress.
Windbreaks can also make a difference. Planting rows of windbreak trees is a big commitment that may require years to reap full benefit. But windbreaks on the west and north sides of garden and orchard plantings can block bitter winter winds and provide shelter for cold-sensitive plants.
On a smaller scale, buildings, rock walls and similar obstacles can protect plants so long as they block the prevailing wind.
Read more: Check out these tips for using trees as a farm windbreak.
Plants in Pots
Finding and enhancing microclimates not featured on the USDA hardiness zone map can only go so far in extending the number of cold-sensitive plants you can grow. There’s nothing I can do in zone 4a to grow a lemon tree that thrives in zones 10 and 11.
Or is there? If you’re willing to grow potted plants and move them indoors when cold weather strikes, a whole world of possibilities opens up. And yes, it’s even possible to grow citrus fruit.
Growing potted plants is a skill unto itself, especially if you’re raising dwarf trees in pots. Here are some tips and pitfalls to keep in mind.
- Potted plants are more susceptible to cold temperatures than plants in the ground because their small pots can’t hold as much heat as the earth. When cold temperatures are in the forecast, you have to be extra careful about bringing potted plants indoors to protect their roots.
- Some plants, particularly trees, will readily outgrow their pots. As they grow, you have a couple of options. You can replant in a larger pot, providing more room for growing. Or you can trim back the roots and branches, reinvigorating the plant while keeping it in the same pot.
- When it’s time to bring plants indoors for the winter, don’t make the transition too abrupt. You’ll risk shocking the plants. Instead, prepare before cold weather hits, placing your plants in a shady spot for at least a few days (maybe even a week or two) before bringing them indoors. The same strategy should be employed in reverse when bringing potted plants back outdoors in the spring.
- Once indoors, place your sun-loving plants in southern windows so they can receive direct sunlight. If you live in a region with short winter days, you may want to invest in some full-spectrum grow lights to compensate and help your plants thrive.
Hoop Houses, Greenhouses, Cold Frames & Hot Boxes
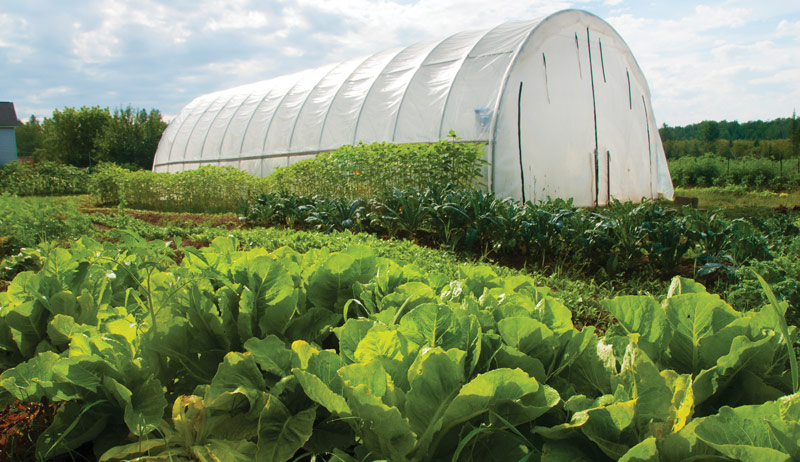
If you want to dive headfirst into creating favorable microclimates from scratch, consider building a hoop house or greenhouse.
- A hoop house is the simpler option. It’s made of plastic installed over an arched framework and captures sunlight to warm its interior.
- A greenhouse is similar but more sophisticated. It’s an actual building constructed with the walls and roof transparent to allow sunlight penetration.
Full-fledged greenhouses armed with heating, cooling, ventilation, grow lights and other features are expensive to build but offer amazing possibilities for growing plants outside their natural hardiness zones. Hoop houses can be built at a lower price point but are arguably more effective at extending the growing season in the spring and fall than providing full winter protection, especially if sunlight is your only source of heating. Care must be taken to ensure your hoop house is sturdy enough (and warm enough) to handle winter weather if overwintering plants is your goal.

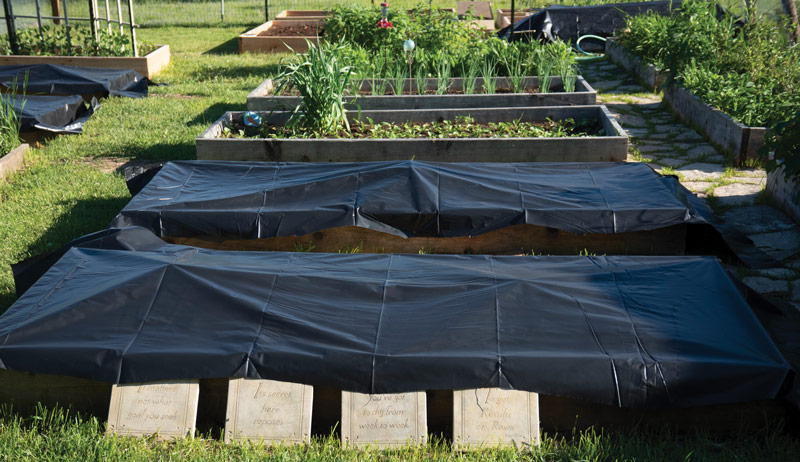
Gardeners growing small plants can also consider cold frames and hot boxes, which are boxy enclosures with transparent tops and—in some cases—transparent sides, making them resemble miniature greenhouses. A cold frame operates by the same principle as a hoop house, capturing sunlight to create a warmer microclimate for plants growing inside. A hot box features another heat source aside from the sun. The heat source can be electric, or you can prepare a layer of fermenting horse manure underneath the gardening soil.
Cold frames and hot boxes are commonly used to extend the growing season in spring and autumn, but they’re also effective for hardening off plants transitioning from warm conditions (such as those found in a greenhouse) to life outdoors. In some climates, and with certain plants, cold frames and hot boxes can even provide suitable protection throughout the winter.
Risks & Rewards
Even when you put everything in your favor, growing plants outside of their preferred hardiness zones can be a risky business. Hardiness zones are based on the average annual extreme minimum temperature. A colder-than-average year may come along and damage or kill cold-sensitive plants despite your best efforts.
If you live in zone 4, I can’t recommend landscaping your entire property with plants rated to grow in zone 5 and warmer.
But if your property offers a favorable microclimate and you want to try growing a few warmer-weather plants, by all means, give it a go. A little thought and effort when it comes to planting location and winter preparation can expand your horizons beyond the hardiness zone map and guide you on a fun new adventure. Good luck!
This article about the USDA Hardiness Zone Map originally appeared in the March/April 2023 issue of Hobby Farms magazine. Click here to subscribe.