Pasture-raised chickens might seem unusual as modern practices mean meat is purchased from the grocery store from birds raised in an industrial setting. We forget, sometimes, that this practice of mass-raising chickens is relatively new, having become commonplace in only the last 50-70 years.
Before that, pasture-raised chickens were almost exclusively the norm. Either “free range” – entirely unpenned and free to roam – or “yarding.” As the name suggests, this was where birds were fenced into someone’s yard, otherwise unrestrained but with less territory than they might have wanted otherwise.
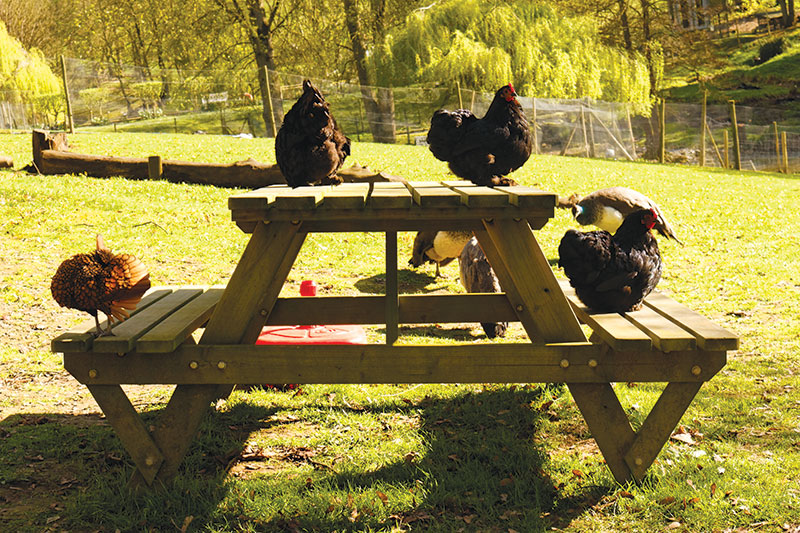
Pasture chickens
These methods of raising birds are beginning to increase in popularity again, as customer demand for humanely raised and organic meat grows. In one study, only trained taste testers could tell the difference between pasture-raised chickens and conventionally-raised birds, but untrained consumers still expressed preference for birds raised with outdoor access.
The Problems with Pasture-Raised Chickens
Pasture raising is, by no means, a perfect system. Many farmers moved to raising birds in confinement out of necessity, especially once raising large numbers of birds became more common. Free-ranging requires more area, and when dealing with thousands of chickens, this can result in significant costs to the breeders.
Some studies suggest that, without environmental enrichment, few birds will even use the outside areas if they are provided. However, birds placed in pastures or runs that included shaded areas, places to hide and spaces for dust bathing were not only more likely to use the outdoor areas but suffered lower rates of predation.
Loss of chickens due to predation is a serious risk that can cut into profits. Since many farmers sell to middlemen who set their prices, these added expenses can make it impossible to break even. Protecting birds while still allowing access to pasture means building special, portable shelters and having the people to move them daily.
Stressed About Sickness
Surprisingly, while industrial breeders regularly express concerns about illness in pasture-raised chickens, results on this have been mixed. With rates of salmonella causing the recall and destruction of thousands of pounds of chicken in 2023, one of the concerns is that outdoor access may put birds at greater risk of contamination. According to the Humane Society (2002) no evidence can be found that pasture-raised birds are more likely to develop salmonella. In fact, they may be less likely due to the decrease in crowding.
One 2015 study showed that fast-growing birds had higher rates of mortality than slow-growing breeds when both were raised on pasture. However, this is generally the case in industrial chicken-raising as well, since fast-growing broilers are known for leg, heart and other health issues. In another, 2011 study, fast-growing broilers raised outdoors had a significantly lower level of mortality than those raised indoors, suggesting the outdoor birds were healthier. Many studies concluded that the mortality rates of pasture-raised birds likely vary based on the breed of birds and the experience of the breeder with this type of breeding.
Why Freedom is Fantastic
Pasture-raised chickens have been shown to be higher in protein than industrially-raised birds, as well as having less abdominal fat. Some studies also suggest they may also have higher levels of healthy vitamins and minerals. Despite the lower fat content, the flavor of pasture-raised birds had been deemed preferable by most professional testers. The unique herbs, clovers or grasses the chickens eat can give the birds a richer, more distinct flavor than grain alone.
For those who can overcome the issues with pasture raising, the benefits can far outweigh the downsides. Many farmers who practice pastured poultry gain a niche market that attracts those interested in both humanely raised birds and those interested in better nutrition. They can often sell directly to consumers, allowing them a higher profit margin than those going through major grocery-chain suppliers. All of this while giving their birds a higher quality of life.
This story about pasture-raised chickens was written for Chickens magazine online. Click here to subscribe.
Free-range chickens are among the healthiest and happiest of chickens, and they produce amazingly nutritious eggs. Plus, they have no rivals when it comes to simplicity.
The term “free-range” describes a method of farming that allows animals to roam free outdoors. The term is often loosely applied when it comes to egg carton labels. A true free-range bird, however, is allowed to roam without the boundary of interior fences. A free-range chicken is a rare breed but arguably the best chicken to keep, raise and provide breakfast. Free-ranging does more than provide healthy chickens and eggs, though; it provides a healthier setting for the chicken keepers and the environment. To properly keep them, you need only a nighttime coop and plenty of space.
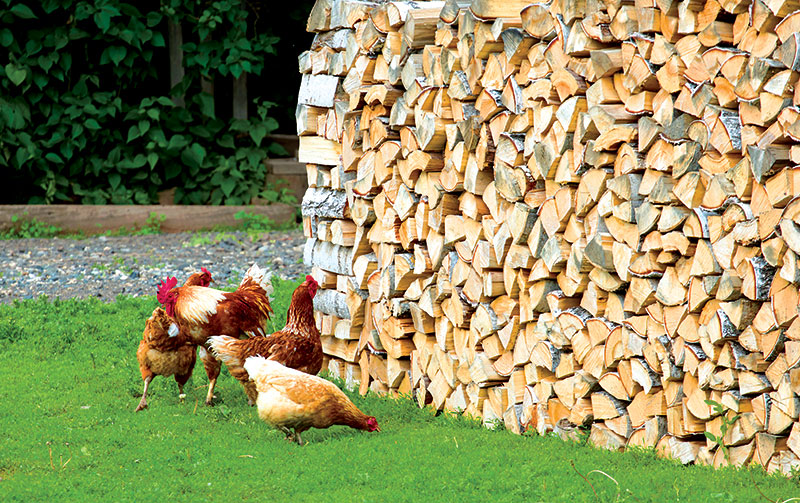
Free range chickens
A Higher Place
In order to remain healthy, a chicken needs exercise, a healthy living environment, plenty of fresh water and a nutritious diet. The free-range bird gets it all.
Foraging for meals does more than produce healthy eggs. Free-range chickens get more exercise and sunlight and are generally happier. A hen that is allowed to spend her day roaming the fields and woodlines searching for her next grub or treat is a happy hen. Observe a few chickens for a short time, and you’ll undoubtedly see how much they enjoy the “hunt.” Scratching and pecking are more than just a pastime; it’s what chickens do. A mother hen wastes no time before teaching her brood of chicks the art of scratching out a living.
Free-range chickens get a lot of exercise, so weight is rarely a problem. When chickens are fed too many treats and don’t get enough exercise, it can result in health issues. Chickens that roam free typically burn more calories on their quests for food and snacks, keeping them svelte and fit.
A chicken’s nutritional requirements are also simplified with free-ranging. With an accommodating landscape at her beak, a hen will naturally consume a healthy diet. A chicken’s native sustenance consists of berries, seeds, insects, grubs and greens. These naturally sourced foods provide the carbohydrates, oil, protein, vitamins and minerals the chicken needs.
Breakdown
Farmers have paired chickens and cows together for years for sustainable agriculture. When this duo is allowed to coexist, the farm, the animals and the environment benefit: Cows keep the grasses mowed down so the chickens can get to all the bugs and seeds, and the cows “feed” the chickens for free, as chickens love breaking down and scratching through cow pies.
An amazing amount of nutrition can be scavenged from cow droppings: undigested grain, seeds, maggots, grubs and even bits of manure. As unappetizing as it sounds, manure provides many essential vitamins and other nutrients to the chicken.
“There is a benefit to keeping chickens and cows together or to allowing chickens to forage on pastures previously used by cows,” notes Jacquie Jacob, poultry extension project manager at the University of Kentucky in “Interactions of Chickens in Small and Backyard Poultry Flocks with Other Species.”
“The chickens will eat any feed that the cows have dropped and will peck through cow manure looking for larvae. A cattle-chicken rotational system is good for reducing fly problems.”
This team is also great for the pastures because the chickens scatter the cow pies, allowing the manure to compost more quickly and easily into the earth. This prevents dead spots, reduces diseases and controls bug populations. Perhaps one of the best ways to keep the flies off the farm is to get a flock of free-range chickens.
Learning to Fly
Free-range chickens also are beneficial for farmers and farms. Because the chicken is allowed to scour the land for food, it will consume less commercial chicken feed, especially in lush landscapes flourishing with chicken delicacies. This can save the farmer substantial amounts of money. During most seasons in moderate climates, a chicken with the freedom to explore can be quite resourceful. There are plenty of edible feasts found on homesteads everywhere. The pastures, the ground under rabbit hutches, pig pens, gardens, compost bins and even the barn floor provide meals to the unrestricted chicken.
Shutterstock
The chicken keeper can save money on grit as well with free-ranging. Because chickens don’t have teeth, they rely on their gizzard and a bit of grit to “chew” their food. In most circumstances, free-ranging chickens gather all the grit they need from the wild. Bits of rock, sand and rubble will make their way into the chicken’s diet naturally.
Ultimately, a healthier chicken means healthier eggs for the farmer to consume and sell. The diet of the free-range chickens is fresher, more organic and less processed. Just like humans, chickens are healthier when they eat a fresh, raw, natural diet. Likewise, the eggs from these free-range flocks pack more nutrition than those of their confined counterparts. A free-range chicken egg has a yolk that glows with nutritional supremacy. The bright-orange color isn’t a sign of freshness; it’s a sign of excellent nutritional value within the egg and a sign of a healthy hen.
Another benefit of keeping free-range chickens is the simplicity of this farming method. No fences must be erected. No gates need to be hung. No runs, birdcages or chicken tractors are needed. The only necessity of the free-range chicken is its home. By keeping chickens free, the amount of space necessary inside the coop is also reduced. When chickens are allowed to roam free, they need only enough space on the roosting bars to comfortably sleep at night, at least 8 inches of roosting bar per bird.
Shutterstock
Free Falling
Free-range chickens are also great for the environment and cause less pressure on land. With free-ranging, the chicken keeper never faces the problem of a desolate, disgusting chicken run. When chickens are penned in, it’s only a matter of time before they have their way with the area. It happens all the time. A well-intentioned, egg-loving soul decides to raise a few laying hens. She fences off a beautiful chicken space in the corner of the yard and puts up a coop.
Before much time passes, the pretty, green yard is transformed into a desert, void of all life. Inevitably, nothing remains to scratch and peck, leaving the chickens to rely solely on their keeper—and usually a bag of feed—for sustenance.
This is never the destiny of the free-range bird. The world is her buffet, and as long as she is up for the hunt, the food is there for the taking. Because free chickens are not concentrated to one section of the land, the landscape doesn’t suffer from too much pressure.
Farmers can also reduce the insect and bug populations on their property with free-ranging. Chickens are excellent exterminators. They eat just about any insect or bug. Chickens enjoy ticks, creepy-crawly bugs and even eat the fly larvae out of manure.
Shutterstock
Here Come My Girls
Getting started with a flock of free-range chickens is easy. Start by choosing the right real estate for the flock’s new abode. When deciding where to erect the chicken coop, consider the following.
First and foremost, the location should be a safe one. Thick, wooded areas or wood lines might not be the ideal location for the chicken coop. Although tree cover can provide some protection from overhead predators, such as hawks, the woods are often home to many other predators seeking a chicken dinner. A vulnerable flock of hens is often safer with the coop in a field or other open space with only a few trees.
Once you’ve selected the location, you can move the birds to their new home. Free-range chickens must be trained to come home to roost at night. This is a simple process that begins with “chicken camp.” After the chickens are old enough to be free from a brooder, they can be safely welcomed to the coop.
Begin by confining the chickens to the coop for a few days. During this time, you’ll need to provide a high-quality chicken feed and plenty of fresh water inside the coop. Refill the food and water each day. To train a flock of chickens to come when called, simply say “here-chick-chick-chick” each time food is replenished. They will quickly learn that this call means dinner, and they’ll come running when they hear it.
After about four days, open the chicken door and let the chickens come out at their own pace. They will return to their home through the same door each day at sundown. For the first days or weeks, the chickens will probably stay close to their home. Before long, they will adventure over the hills and through the barns looking for good things to eat.
Timid chickens can be encouraged to free-range. Lead the flock to the areas that contain some good chicken snacks and simply sprinkle down a little feed. You can also encourage chickens to free-range by offering a variety of foods. Chickens that eat only commercial feed might not recognize greens or seeds as food. Providing healthy kitchen scraps or garden scraps to chickens regularly opens their eyes to new and delicious chow. The more experience a flock of chickens has with free-ranging, the more proficient it becomes.
Keep watch over the chickens and offer free-choice feed as needed to supplement their diet. The free-range chicken soon learns where to find the best meals and probably starts to ignore the store-bought feed, greatly reducing your feed bills and producing a happy farmer.
If removing all the chicken tractors, runs and fences seems irresponsible and risky, just relax. Free-range chickens might be some of the safest of chickens. Because they are constantly on the hunt for nutrients, they are usually healthier, slimmer and more energetic. This makes the escape from a hungry predator far more likely.
Additionally, with the freedom to forage also comes the freedom to evade predators. Many attacks on chickens happen right in their homes or runs. Being trapped in a run can also mean having no way to escape a hungry varmint.
Shutterstock
You’re So Bad
Predators can pose a real risk to free-ranging situations, suggests Terry E. Poole, principal agent emeritus at the University of Maryland Extension, in “Introduction to Developing a Free-Range Poultry Enterprise.”
Building an effective perimeter fence around your property is a good start. Poole states that the fence should be at least 6 feet high and have a small enough mesh that predators cannot squeeze through. He also recommends that the perimeter fence be buried at least 6 inches in the soil to prevent predators from digging underneath. Electric wire can be added near the base of the fence to stop diggers and at the top to prevent predators from climbing over the fence.
“Another good preventative practice is to keep pastures mowed or grazed down,” Poole says. “This practice eliminates much of the cover preferred by predators that are more comfortable approaching prey unseen in the tall grass.”
Free-ranging, like other chicken-keeping methods, is not perfect; however, it does provide a great life for chicken and chicken keeper alike, and it’s better for the environment. Free-range chickens live healthier, happier lives filled with fresh, real foods.
The free-range method is simple to embrace and put into action. It undeniably provides the tastiest, most nutritious eggs and meat on the planet while allowing chickens to fulfill their destiny as hunters and peckers.
This story about raising free-range chickens originally appeared in the May/June 2018 issue of Chickens magazine. Click here to subscribe.
If you are searching for your dream farm, this podcast episode with Bonnie Warndahl has you covered. Bonnie searched for years to find the property that is now her Winnowburrow Farm and Florals, in Colfax, Wisconsin. Listen to Bonnie’s story about how she came to be interested in gardening and stewarding land. (Thanks, Barbara Kingsolver!) Follow her journey through various programs to learn about farm business, renting farmland as a beginning farmer, losing a farmland deal, and finally finding and purchasing her dream farm.
Warndahl talks about the Renewing the Countryside nonprofit that she works with as a farmland access specialist. From food hubs to farm-to-childcare and connecting farmers with farmland, the organization is building a regional network to prop up farmers of all kinds. The Farmland Access Hub helps assess farmers’ readiness for land access, guides farmers in their loan applications, and provides resources to help farmers with their land search and purchase.
Dive into the facts about why farmland access is so hard as well as why it’s so vital. “It’s important for people to understand how dire of a situation we are in, unbeknownst to so many people,” Warndahl says. She continues, talking about an impending food crisis facing the US, given the confluence of the advancing age of farmers, farmland real estate prices and fewer new farmers coming in to replace those who are retiring. Hear about federal and state policy solutions that may help ease some of the issues complicating the current farmland-access crisis.
Get Warndahl’s best advice for your farmland search, from her lived experience as a beginning farmer trying to purchase land as well as her professional experience as a farmland access specialist. Start by preparing yourself, knowing how and why you’re farming, and exploring all manner of outlets to search for land. Best of all, find out how you can get connected to farmland access assistance!
Finally, hear about Warndahl’s Winnowburrow Farm and Florals. While Bonnie is currently focusing on her farmland access specialist work, she has big plans for this farm and retreat space.
Tomatoes growing on cattle panel trellis. Photo by Michelle Bruhn.
A cattle panel trellis can be a great way to add vertical growing space to your garden for pennies on the dollar compared to other arbors and trellises!
Cattle panels, also called hog panels or hog wire, are welded wire panels originally manufactured for easy-to-move fencing sections to hold cattle and hogs. They’re usually made with sturdy 4-gauge wire and measure 50 inches wide by 8 or 16 feet long. For roughly $25 for the 16-foot size, these are an affordable way to add vertical growing space to your garden, especially for vegetables. They’re covered with a thick zinc coating, called galvanized, to last at least 20 years outdoors.
While there are many ways to use a cattle panel trellis in the garden, we’ll focus on making a trellis and arbor. Before you start, make sure you’ve selected a sunny spot to place your trellis and consider the great screening effects of these structures as well. Since these will be covered in green by mid-season, you can easily add privacy and grow more food at the same time.
Tomato Wall Trellis
Materials
1- 16’ x 50” cattle panel/hog panel
3- T-posts, 8-10’ tall or so (your decision)
3-4’ – 14 gauge tie wire cut into 6” sections (or heavy-duty zip ties about 3 per t-post)
Tools
Sledgehammer or post-driver
Measuring tape
Gloves
Bolt cutter
Directions
Using your bolt cutter, cut the 16-foot cattle panel in half so you have two 8-foot x 50-inch pieces. You can also clip another row of the cross sections at the bottom of the cattle panel pieces to open up more space to push the panels deeper into the ground or rely more on the T-posts for stability.
Measure where you’ll place the three T-posts from the center point of your tomato wall trellis, making sure to keep all three posts in a very straight line. Hammer the three T-posts a few feet into the ground, you should leave at least 6 feet above ground to support the cattle panels.
Cut your tie wire into 6” sections. Place the two sections of cattle panel upright in front of the T-posts and secure with tie wire or zip ties in 3 places on each T-post.
Cattle Panel Arch
Materials
1 16’ x 50-inch cattle panel/hog panel
4 T-posts, 4-8’ tall or so (your decision)
4-5’- 14 gauge tie wire cut into 6” sections (or heavy duty zip ties about 3 per t-post)
Tools
Sledgehammer or post-driver
Measuring tape
Gloves
Directions
Hammer two T-posts 4’ apart (just short the width of the cattle panel) a few feet deep. You can vary the width of the arch depending on the space you have. Measure to make sure the two sets of posts are perpendicular to create a straight arbor.
After the T-posts are driven in, you’ll need a few people to bend and place the cattle panel on the insides of the T-posts. Shape and bend the top of the arch, then secure with multiple pieces of tie wire or zip ties.
Growing Vertically
These trellis walls are some of the most productive square feet in our garden. Plants like tomatoes, pole beans, cucumbers, melons and squash will all grow healthier off the ground. These trellises give plants great air flow which means less disease. You can also capture more sun hours by creating a south-facing wall of plants. These cattle panel trellises also give gardeners easy access for tying up or weaving through plants, along with easier pruning and harvesting.
These cattle panels are truly the Swiss army knife of the garden. Once you start growing with them, the possibilities are endless.
This article about cattle panel trellis vertical gardening was written for Hobby Farms online. Click here to subscribe.
A pickled Brie cheese recipe is essentially Brie stuffed with flavorful ingredients, submerged in an oil with herbs and seasonings and infused. It’s quick and easy to put together, but you’ll want to allow at least one week for this recipe to infuse before serving. It’s a fantastic appetizer that can easily be tailored to your liking.
I was inspired to make my own version of it and it turned out fantastic! Here is how I made it:
Pickled Brie Cheese Recipe
Yield: 8-ounce wheel of Brie cheese
Ingredients
8-ounce wheel of Brie cheese
1 whole small yellow onion, sliced thinly
Dash of salt
2 cloves of garlic, chopped
1 dried bay leaf
1 tsp. Hungarian paprika, or other sweet paprika
5 sprigs of fresh thyme
1 tsp. whole black peppercorns
1-2 cups of extra virgin olive oil, extra for sautéing
By Stephanie Thurow
Directions
Slice through the wheel of Brie cheese horizontally so that you have two even circular layers (like a cake).
In a small frying pan, add a couple of tablespoons of olive oil and heat to medium-high. Sauté the onion with a sprinkle of salt until softened (2-3 minutes), then add in the garlic and cook for a couple more minutes. Set aside to cool. This will be the filling of the Brie.
In the bottom of a glass dish or jar, add the thyme, peppercorns and the bay leaf.
Lift off the top layer of Brie and spoon the cooled onion and garlic mixture over the half. Spread the mixture out evenly and sprinkle the paprika over that. Place the top of the other half of the Brie back over the bottom layer.
Use a sharp knife to cut the Brie wheel into eight even pieces, first in half, then in half again and so on.
Place the stuffed Brie triangles in the jar or dish carefully, trying not to let them fall apart. Once packed into the jar, you are ready to cover them in oil.
Pour the olive oil over the cheese until completely submerged. Wipe the rim of the jar/dish with a dampened paper towel to remove any oil or food. Add a tight-fitting lid or the canning jar lid and ring if you are using a jar.
Transfer the pickled Brie to the refrigerator and allow the cheese to infuse for at least 3-4 days, ideally at least one week. The longer it infuses, the more flavor it will have.
Allow the pickled Brie to rest at room temperature for at least 30 minutes before serving, as the oil will harden when cooled. Enjoy the pickled brie with warm toasted bread, sliced vegetables, or with my personal favorite, almond crackers.
Check the expiration date on the Brie cheese package and enjoy before that date.
Brie Chees Recipe Notes
Get creative with this recipe! Different ingredients will offer different flavor outcomes.
Pickled brie cheese recipes are traditionally made with Camembert cheese, but mozzarella is another suitable option to use.
Other ingredients found in pickled Brie cheese recipes include hot peppers, juniper berries, and ginger.
Vertical gardening not only leaves room to grow more of the veggies you love, but it also helps improve plant health and vigor and facilitates harvesting. Here are seven methods of training plants in the veggie patch.
Why Vertical Gardening?
Trellising, caging and staking plants—the three common methods of vertical gardening—are smart moves in the vegetable garden for many reasons. First and foremost, it prevents the plant’s foliage from contacting the soil. Many blights, as well as some types of bacterial and fungal diseases, dwell in the soil. By keeping the foliage and fruits off the soil surface, you’re helping to keep those issues at bay. Secondly, the air circulation around trellised and staked plants is greatly improved; reducing the occurrence of fungal diseases, like powdery and downy mildews. Staking also keeps fruits cleaner and makes harvesting a breeze. Plus, by growing vertically, you really can maximize production from even the smallest of gardens.
7 Ways to Train Plants to Grow Vertically
1. Natural Staking
Insert branched sticks and twigs into the soil at the base of twining plants, such as peas and beans. The tendrils quickly grasp the rough bark, and when it comes time to pull the plants at the end of the season, the stakes can go right in the compost pile with them. This type of staking is very discrete and my personal favorite.
2. Wire Fencing
Hammer in a 1×1 hardwood stake every 5 to 6 feet down the length of the garden row. Using a staple gun, fasten a 4-foot-high vinyl coated box wire or chicken wire fence to the wooden stakes. Plant a row of beans, peas or cucumbers down both sides of the fencing; this way, one fence will support two rows. Picking beans grown on such a support is easy on the back and production is enhanced as pollinating bees can readily find the blossoms.
3. Cages
My favorite tomato cage is made from concrete reinforcement wire. This heavy-duty “fencing” has 6-by-6-inch, square openings that make it easy to simply reach in and harvest fruit—even Brandywine tomatoes can be picked right through the openings. Cut a piece of the wire about 8 feet long and bend it into a cylinder, overlapping the cut ends to close the circle. Place it over top of new transplants and secure it with a stake hammered firmly into the ground. Unlike the wimpy wire cages you can buy at the garden center, these cages will last for many, many years and they can support an incredible amount of weight.
4. Existing Fencing
For gardeners whose veggie patch is already enclosed in a fence, here’s an easy way to grow plants right on it. Cut a piece of vinyl-coated box wire fence to the length of your row. Bend over the top 4 inches of the wire and hook it over the top of your existing fence. Plant seeds of vining veggies at the base of the wire fence. As the tendrils grasp it, their weight will hold it in place.
5. Hardwood Stakes
To support peppers, eggplants, tomatoes, tomatillos and the like, purchase plenty of 6-foot, 1-by-1-inch hardwood stakes. Don’t use treated lumber, as the chemicals used in the treatment process will leach into the soil. Hammer the stake in at planting time so you won’t harm newly formed roots, and fasten the plant to the stake using nylon stockings, jute or hemp twine, or strips of cotton sheets.
6. Tepees
Use fallen branches to construct garden tepees. I use four branches about 1 to 2 inches in diameter and 6 or 7 feet tall fastened at the top with several go-rounds of jute twine. I then wrap the whole tent in a swirl of grapevines that I prune from the woods behind our house. (Make sure you’re using grapevines and not poison ivy!) If you don’t have access to grapevine, you could also make a webbing of twine between the legs of the tepee. Grow Kentucky Wonder pole beans, Sugar Daddy snap peas, sweet peas and cukes from seeds planted around the base of each of the four legs. An added bonus: The shady areas underneath the tepees are a great home for summer crops of cool-season veggies like lettuce and cabbage.
7. Living Supports
Grow a row or two of sunflowers in the vegetable garden and don’t pull the plants out at the end of the growing season. The birds will enjoy the seeds through the winter and the following spring you can plant early peas at the base of the now dead stalks. The peas will twine up the sunflower stems and be finished bearing by the time any new sunflower seedlings grow tall enough to shade them.
Cantaloupe, winter squash, small melons and other vining crops will also perform well when grown vertically. Just be sure to choose extra sturdy trellis materials and build a sling made of cotton sheets or another breathable fabric to support the weight of each ripening fruit.
This article on vertical gardening ideas was written for Hobby Farms magazine. Click here to subscribe.
PHOTOS BY BRUCE INGRAM / ALEKSA MARC/ STOCK.ADOBE.COM
Broody hens are a fact of life during spring and summer in the chicken coop. Here’s a look at one coop and the five different broody hen types that the author experienced and that you’re likely to encounter at some point.
Mary tends to several of her young chicks.
1. The “Come Hell or High Water” Broody
Because of one factor or another, our 4-year-old hen, Charlotte, has twice had to endure summers of being on the nest for more than 40 days each time — never slacking in her desire to raise chicks. The first time was apparently because the sperm of our then 4-year-old rooster, Friday, wasn’t quite up to previous standards. So we had to put her with a younger, more virile roo. The second time was because of Charlotte’s own misjudgment.
When I opened her coop one morning, I discovered she had spent the entire night keeping a sole egg outside the nest warm. Panic-stricken, I then lifted her off the stray egg and plopped the mother hen back into the nesting box. On day 22, Elaine candled the “main” eggs and found that, as we feared had happened, the eggs contained dead embryos.
Nevertheless, both summers Charlotte persisted, finally being able to rear the chicks she’s hard-wired to produce — come hell, high water or stray eggs.
The stress of brooding can sometimes cause feather loss in a hen. Here, Mary shows her offspring the joys of dusting.
2. The “Brawling” Broody
One spring, we had three hens become broody at the same time: Charlotte, her mother Mary and a hen we named Ethyl, also one of Mary’s offspring. Fortunately, we have two fenced enclosures, so Elaine and I moved the other hens and roosters to the adjoining run figuring the trio could work matters out among themselves.
The decision proved disastrous. The hens tolerated each other reasonably well during the incubation period, although Ethyl “growled” any time her two peers wandered near her nest or even entered the henhouse. But the goodwill rapidly dissolved after the chicks hatched. It was entirely Ethyl’s fault. Elaine and I set up multiple feeders and waterers so there would be no competition regarding the provisions. We also positioned the feeders and waterers around the run.
Mary and Charlotte were more than content with this situation. I even noticed that some of the chicks wandered back and forth between the duo, and sometimes the two hens even brought their chicks to the same feeder at the same time without any issues.
However, Ethyl wasn’t satisfied with the arrangements. She went out of her way to make sneak attacks on her two fellow mothers. On one of her raids, several chicks were trampled during the melee. I witnessed the skirmish and the plight of the chicks and realized that for the sake of all the little ones, Ethyl couldn’t remain in the enclosure.
Upon Ethyl’s removal, Mary and Charlotte quickly adopted their oppressor’s chicks and harmony was restored. Sadly, though understandably, for two weeks Ethyl paced back and forth along the barrier between the two adjoining runs trying to find an entrance and regain her chicks. She never went broody again.
We’ve been fortunate to have some great mother hens such as Mary and Charlotte.
3. The “All The Eggs Are Mine” Broody
People who have never experienced a broody hen may not know that the eggs a hen sits on almost certainly won’t consist solely of the ones she has laid. When a hen goes broody, she collects/rolls eggs from other nesting boxes to hers with her beak. Usually, the prospective mother stops doing this at some point. From our experience, it’s somewhere between six and 12 eggs. I would guess the reason for 12 being the maximum is that number equates to the ones that a hen can physically cover with her rump and keep warm.
However, chickens can’t count or at least one we named Six couldn’t. So named because she was the last of a half dozen that hatched one summer, Six obsessively stole eggs from other hens until she had accumulated 20 of them. Apparently, in that chicken head of hers, she had decided that 20 was the correct number. Thus, she spent much of each day trying to keep all 20 eggs under her and warm at the same time —an impossible endeavor.
This Sisyphean task continued for about a week before Elaine and I, rightly or wrongly, decided to intervene. Fearing that none of the eggs would hatch and that Six would spend the entire summer on the nest, we took away all 20 of her eggs and replaced them with four recently laid ones. We then gave Six’s original eggs to a friend who agreed to incubate them. As we had guessed, none of Six’s original clutch hatched, but 21 days after the “big switch,” she was the proud mother of four chicks.
We created a birthing room in our basement where our hens could hatch and raise their chicks in peace.
4. The “I’m Not so Sure About This Baby Chick-Thing” Broody
A hen we named Daisy waxed hot and cold over brooding her eggs. Some days she would dutifully spend all day sitting on them with the requisite reprieve to eat, drink and wander about the run a bit. But on other days, she took to spending what we felt was far too long an absence, or as Elaine said, “She’s just putzing around.”
On day 20, we moved Daisy and her nest to what we call the “birthing room,” which is an enclosure we assemble in our basement for hens and their offspring. We have learned that the other hens will kill newly hatched chicks no matter how fiercely the mother hen tries to protect them. The mama simply can’t fend off the other hens while they are attacking the little ones. And since the other hens and rooster were already in one enclosure, and Charlotte and Mary occupied the other with their young flocks, we simply had to take Daisy to the basement.
Upon arrival in the birthing room, Daisy abandoned her nest. We observed her for over an hour merely wandering around the small enclosure and ignoring the nesting box and eggs. She spent the night away from the nest and she never returned to it during the day as far as we observed. We then put the eggs into an incubator, but after several days and candling was accomplished, it was clear that Daisy’s earlier walkabout had proved fatal to the developing chicks. Like Ethyl, Daisy never became broody again.
Broody Hens: Basic Necessities
Once you’ve established your broody hen in her own place — be it a coop, a brooder or a large plastic tote — be sure to give her what she needs for a three-week stay.
Broody hens spend most of their days in a trance state. Biology tells them to set the eggs and occasionally turn them, and that’s what they do almost 24 hours a day. They do, however, get up occasionally to eat and drink and poop.
Don’t be alarmed by the size of a broody poop. Just equip your brooder with plenty of absorbent bedding or, even better, scoop it out daily to keep your hen’s nesting place clean.
Offer plenty of fresh water and make sure her feeder is topped off. You might want to increase her protein ratio right now, as turning her body into a miniature oven to properly heat her clutch takes a lot of energy. If you live in a cold region and the weather is cold, consider offering your broody hen a safe heat source, such as a ceramic-panel heater, to keep the brooder’s temperature ambient.
— Ana Hotaling
5. The “My Way or The Highway” Broody
The “my way or the highway” attitude is another attribute of Charlotte. She’ll only sit on eggs in the far left nesting box in our second coop. Once when I attempted to move her nesting box and eggs to the basement’s birthing room, she emitted squalling sounds that I can only describe as caterwauling. Fearing another Daisy-like situation, I acceded to her demands and returned Charlotte to the second coup where her eggs hatched on schedule.
A chronic complainer about everything the rest of the year, but a great mother, Charlotte possesses other peculiarities. Many hens only take care of their offspring for six to eight weeks, but not Charlotte. She willingly nurtures them to 10 to 12 weeks of age, settling disputes between young, hormonal-charged cockerels, belting out the food cluck, and quickly shepherding them away from some perceived threat.
Another personality trait is that Charlotte has no interest in running after treats and competing with the other hens and roosters for tidbits. Elaine and I have long enjoyed saying “looky, looky” and then tossing bread or vegetable bits into some corner and watching our chooks charge the chow. Charlotte, instead, marches directly toward us with the expectation that we held back some delicacy just for her, and she’s right; we always do.
Diligent mother hens, such as Charlotte often nurture their chicks longer than six to eight weeks.
Of course, I guess Charlotte has become accustomed to a little pampering. When hens go broody, I always make it a point to bring fresh blueberries to them at least once a day. I think on some level, they appreciate the gesture, and I believe that the moisture and nutrition that blueberries possess must be beneficial for a creature undergoing three weeks of maternal stress.
That subhead best describes the attitude of Mary, the best broody we’ve ever had. She had little interest in interacting with the other hens, racing after tidbits, or dealing with amorous roosters. Her whole purpose in life seemed to be brooding eggs and raising chicks. Mary is also the only hen we’ve ever had that went broody twice in one year.
I’ve often pondered Mary’s place in the pecking order. She was clearly not the alpha, but I also never witnessed any of the other hens bullying her as female chooks often do to each other. She just seemed to live in this rarified world where she was a gamma girl. The gamma female is not at the top of the hierarchy, but she is also not a victim of abuse. Mary simply went her own way, and that meant the whole year was a prelude to going broody once again. Mary died the winter she turned five, and I believe she would once again have tried to raise a clutch if she had survived the stress of the cold weather period.
If you are fortunate enough to have a hen or hens become broody, relish what is to come. The nesting period, the glorious day of hatching, the rearing of the young, a young chick’s first dust bath, chest-bumping wanna-be cockerels, and a host of other fascinating events are all part of the experience. And may you have broodies such as Mary and Charlotte and not like Ethyl and Daisy.
This story about broody hens and their types was written for Chickens magazine. Click here to subscribe.
A warm potato salad recipe, which can also be served cold, is a picnic staple. This picnic potato salad swaps hard-boiled eggs for the jammy yolk of soft-cooked eggs and combines them with tender potatoes and crunchy bacon. It’s dotted with leafy greens and dill and tossed in a lemon mayonnaise-mustard dressing. It’s easily doubled when you need to serve a crowd.
Yield: 4
Ingredients
2 large eggs
3 slices thick-cut bacon, chopped
1 pound baby potatoes, halved or chopped into similar size pieces
1/2 cup diced green bell pepper, about half a medium pepper
1 tablespoon chopped fresh dill
2 tablespoons mayonnaise
1 teaspoon spicy brown mustard
1 teaspoon fresh lemon juice
1/2 teaspoon fine sea salt
1/4 teaspoon ground black pepper
handful of watercress leaves, about 1/4 cup
ground black pepper and dill sprigs for garnish
Preparation
Fill a medium saucepan with water, and bring to a boil over medium-high heat. Gently transfer the eggs to boiling water and cook at a low boil for 6 1/2 to 7 minutes. Remove the eggs from the cooking water, rinse with cold water and set aside.
Heat a large nonstick skillet to medium-high, and cook the bacon until the pieces are browned and crisp, about 7 minutes. Turn off the heat, and transfer the bacon to a bowl, leaving behind the bacon grease.
Place the potatoes in the warm grease, cut-sides down. Return the heat to medium-high. Cook until all sides are browned and the potatoes are tender, about 7 minutes. Transfer the potatoes to a medium bowl. Let cool for 5 minutes.
Add the bacon, green pepper and dill to the bowl. In a small dish, stir together the mayonnaise, mustard and lemon juice. Pour the dressing over the potatoes. Add the salt and pepper. Stir well to coat all ingredients with the dressing.
Peel the eggs, and halve each. Transfer the dressed potato salad to a serving dish. Top with watercress leaves. Arrange the egg halves over the potatoes. Garnish with black pepper and dill. Serve potato salad with soft-cooked eggs warm or at room temperature.
Preserved Feta with Oil and Herbs. Photo by Stephanie Thurow
Knowing how to store feta cheese can extend its use by date and infuse flavors that make feta a perfect addition to varied dishes. Ready to level up your next charcuterie board? Make a couple of variations of this homemade preserved herbed feta cheese and you’ll have your guests begging for more! It’s as simple and marinating feta cheese with oil, red wine vinegar and any herbs of your choice. The flavor combinations are endless.
This feta cheese stored in olive oil and herbs can be enjoyed over crackers, toasted baguette, mixed into pasta or crumbled into salads. Once the cheese is gone, the leftover oil can be used to make salad dressings, marinades or used as a drizzle for roasted or grilled veggies.
Feta Cheese with Herbs
Yield: 8 oz cheese
Ingredients
8 oz feta cheese
¼ cup red wine vinegar
1 cup extra virgin olive oil (as needed)
1 garlic clove, minced
Herbs and seasonings as desired.
Cut a brick of feta into bite-sized cubes and place cubes into a clean pint jar or other glass dish with a fitting lid. Be careful not to break or crumble the cheese while filling the jar.
Add garlic and herbs of choice over the cubed cheese.
Pour the red wine vinegar over the cheese. Next, add the olive oil, but just enough until the cheese is completely submerged in oil.
Gently shake the jar upside down to blend the oil and vinegar, being mindful not to break up the cubed feta.
Softly tap the bottom of the jar on the counter to rid any air bubbles that may be trapped between the feta and jar.
Wipe the rim of the jar with a damp paper towel to remove any food. Apply the canning lid and tightly screw on the ring.
How to store feta cheese is also a process of time. Infused cheese should be kept in the refrigerator for at least 48 hours before sampling. The longer the cheese infuses with the herbs, the more flavorful it will become.
Enjoy the preserved feta with oil and herbs within one month for the best flavor and texture. Be sure that the cheese stays submerged in the vinegar-oil mixture for best preservation.
Flavor combinations pictured include:
1 garlic clove minced with ¼ teaspoon dried oregano and 2 sprigs of fresh rosemary.
1 garlic clove minced with 1 tablespoon crushed red pepper flakes.
1 garlic clove minced with 1 tablespoon fresh minced parsley.
Other delicious flavor combinations:
Chopped garlic with dried oregano, dried basil, and dried thyme.
Lemon zest and fresh dill.
Mint and parsley.
Thyme, rosemary, and garlic.
How to Store Feta Cheese Notes
There is a debate on whether soft feta or hard feta in brick form make better-preserved feta cheese. My answer to that is: there is no wrong choice here when you know how to store feta cheese. Both offer delicious outcomes. However, if you want to make a more spreadable preserved herbed feta cheese for crackers or bread, you’d be better off with a softer option. If you intend to use the preserved feta in salads or in something you’d prefer it to stay firm in, then use that firmer option to preserve.
It’s worth using a decent quality olive oil when making preserved feta since it’s such a large part of the recipe.
This article about how to store feta cheese was written for Hobby Farms online.Click here to subscribe.
The Rex rabbit was first shown in Paris in 1924 and was brought to the United States in the same year. Known as the King of Rabbits, the Rex remains the most commonly used rabbit for pelts, due to its plush coat. The breed was developed in 1919 from a mutation found in a litter of wild rabbits. The mutation had no prominent guard hair, giving the rabbit a softer, denser coat.
Like most rabbit breeds, the rex is a fairly docile animal. According to PetMD.com, the average lifespan of a rex is 6 to 8 years, giving it a shorter lifespan than the average 7 to 10-year lifespan of most domestic rabbits.
Rex Rabbit Breed Standard
According to the American Rabbit Breeders Association (2018), the Rex rabbit should have a broad head set close to the shoulders, the eyes and ears should be alert and ears should be held upright. Hips should be well-rounded with a wide loin, rib and shoulders. Feet should be parallel, and not too long.
Fur should be between half to seven-eights of an inch. Sixteen different colors are recognized in show-quality rabbits.
The Rex is considered a medium-weight rabbit. Bucks should weigh between 7.5 to 9.5 pounds, does 8 to 10.5 pounds. While smaller than most common meat rabbit breeds, the Rex is often raised as a dual-purpose, meat and fur, animal.
Rex Rabbit Fur
While Rex are used for meat, show and as pets, the breed is primarily known and raised for the plush fur. Rabbits usually have a dual coat, the undercoat and the “guard hairs.” The distinct feel of a Rex coat is due to a mutation in which the guard hairs are missing. This leaves only the softer undercoat. It’s similar to goslings or ducklings before their feathers grow in – the down is always softer.
The quality of this coat can vary, depending on the rabbit’s genetics. In meat rabbits, a thick skin is considered a detriment because it ends up being part of the offal during butchering. However, for those interested in using the pelt, a thicker skin has been shown to be beneficial to the Rex, as the hide is less likely to tear and the fur less likely to fall out. The journal “Animal” published a 2023 study suggesting that Rex be processed in the winter, due to the significantly thinner and poorer quality coat the rabbits produced in the summer.
Rex Rabbits: Care
As with most rabbit breeds, Rex are curious, social animals. Many raise rabbits in a colony because of this. Stimuli and enough space to move around improve the quality of the rabbit’s life. Those raising for production may consider this a waste of resources, but a study of Rex rabbits in China showed that the quality of meat and fur improved when the rabbits were given access to stimulation, rather than just food and water. The study was done with two rabbits per cage, a practice recommended by the Rabbit Welfare Association and Fund (RWAF).
Suggested cage size varies, depending on your source. The Michigan State University website suggests 3 to 4 feet of cage space per rabbit, depending on their weight. However, the RWAF and other organizations suggest that, at the very least, rabbits should be able to hop three times from end to end and stand on their hind legs without hitting the top.
Several studies were presented at the 8th World Rabbit Congress in 2004 about the feeding of Rex rabbits. These studies showed that Rex rabbits require at least 12% crude fiber in their diet. Below that and the rabbits had diarrhea and significantly lower weight gain. At 14% crude fiber, the efficiency of feed versus growth weight decreased, suggesting that feed should be around 12% crude fiber.
Research was also done on the protein levels for pregnant and lactating rabbits. Does fed a minimum of 17.5% protein showed higher numbers of kits in a litter, heavier young at birth and a better survival rate in the kits. Lactating mothers who were continued on this feed had kits with a faster weight development, with the best fur density.
This story about the rex rabbit was written for Hobby Farms magazine online. Click here to subscribe.