Categories
Animals Waterfowl

Bantam Ducks: 3 Breeds For Backyard Flocks

Bantam ducks are a great option if you’ve decided to start your own or expand your duck flock. Consider one of these three breeds of bantam ducks when raising waterfowl.

Silkie Ducks

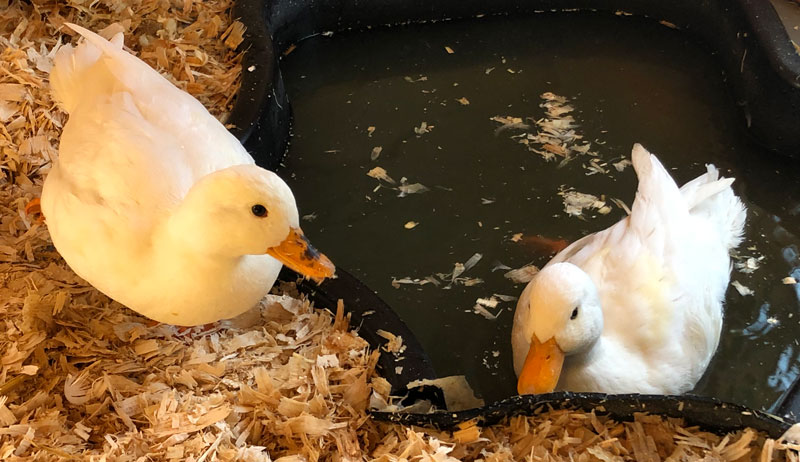
These delightful little bantam ducks will catch your eye and capture your heart. Their soft, fluffy feathers lack barbicels (as do the feathers of Silkie chickens), adding exponentially to this breed’s plush-toy appearance.

bantam ducks
Ana Hotaling

Reaching an adult weight of approximately two pounds, Silkie ducks are gentle, friendly and inquisitive birds that make affectionate pets. They forage ably and make short work of the slugs, grubs, beetles and other insects they come across during their explorations.

Available in an array of colors, including black, snowy, grey and white, you probably won’t want Silkie ducks for their egg production. But they more than make up for that with their charm.

Our Silkie ducks were quite content being toted around the yard, happily nestled in our sons’ arms. 

Call Ducks

Enormously popular with waterfowl breeders, Call ducks are the crowned cuties of duckdom.

Fully grown at just over 1 pound, you can easily recognize Call ducks by their large eyes, tennis ball-shaped head, teensy beak and round, compact body.

Their tiny size results from the reason for their domestication. They were the original decoy duck, used by Dutch hunters centuries ago to lure wild Mallards.

These days, Call ducks are raised primarily as exhibition birds, although their ultra-friendly nature makes them perfect pets. While there are multiple varieties of Call ducks, the colors recognized by the American Poultry Association include white, snowy, grey, buff, blur and pastel.

One important note: although the name “Call” is believed to originate with the Dutch kool, or trap, a reference to their role as hunting decoys, Call ducks are also known for their calls. According to duck expert David Holderread, author of Storey’s Guide to Raising Ducks, the Call is one of the noisiest of all duck breeds … something to bear in mind if you have nearby neighbors.

Australian Spotted Ducks

Despite their name, these bantam birds were developed in Pennsylvania. They are the result of cross-breeding Mallard, Call and Northern Pintail stock with an unidentified wild Australian duck.

Australian Spotteds inherited the best features from their progenitors. They have the Call duck’s friendly, lovable nature, the Pintail’s teardrop-shaped body and the Mallard’s hardiness and excellent foraging skill. Topping out at about two pounds, the Australian Spotted is also the best layer amongst the bantam ducks. The breed produces between 50 to 125 cream, blue or green eggs per year.

Three varieties are available: greenhead, bluehead and silverhead. All feature the distinctive flecks that give the breed its name.

Australian Spotteds are the perfect choice if you have standing water anywhere on your property. They love gobbling up the larvae mosquitoes lay on the surface of still water. Although they are capable flyers, Australian Spotteds are homebodies, preferring to stay near their coop. 

This article about bantam ducks was written for Chickens magazine online. Click here to subscribe to Chickens magazine.

Categories
Poultry Waterfowl

What to Feed Baby Ducks for Proper Nutrition

What to feed baby ducks should be top of mind for anyone raising ducks. Can chickens and ducks share feed is often the first question asked when people raise both. Though sometimes considered to have the same nutritional needs as chicks, ducklings require more vitamins than chicks do during the growing stage and throughout their adult lives. Young ducks grow faster than chicks and this requires different dietary needs. Failing to meet these nutritional requirements may result in deformities and poor egg production.

While their nutritional needs may vary from those of their chicken cousins when given the proper nourishment, baby ducks are easy to raise. There are many duck breeds to choose including bantam ducks for small backyards and duck breeds for eggs.

what-to-feed-baby-ducks

What to Feed Baby Ducks: Choosing a Feed

Many feed brands do not offer duckling starter and grower feed, so many duck owners feed their baby ducks a starter and grower formulated for chicks. What to feed baby ducks begins with a starter feed for the first two weeks of life. When choosing a feed for ducklings, look for a non-medicated feed with twenty-two percent protein. (If a twenty-two percent protein starter is unavailable in feedstores near you, feeding ducklings a nonmedicated twenty percent starter for the first four weeks of life will work in a pinch.)

Because ducklings consume more feed than chicks, feeding a medicated starter may result in accidental poisoning from consuming too much medication.

Since chick feed does not contain all the vitamins that baby ducks need to thrive, supplementing their feed with essential vitamins will help ducklings stay healthy. (More on that later.)

After the first two weeks of life, what to feed baby ducks switches to a lower-protein grower feed. Due to their rapid growth rate, ducklings require switching to a grower feed sooner than chicks to prevent growth deformities. Just as when feeding starter, never feed a medicated grower. Feed ducklings a seventeen to nineteen percent protein grower feed from two weeks of age until the point of lay.

Bring on the Supplements

Most feeds formulated for growing chicks do not contain the niacin and riboflavin baby ducks need to thrive into healthy adults. A deficiency in both vitamins could result in ducklings developing weak or bowed legs, and some individuals may also be stunted in growth and development.

Growing ducklings require fifty-five mg/kg of niacin (B-3) and 4 mg/kg of riboflavin (B-12). Since chick starter and grower feeds do not meet ducklings’ niacin and riboflavin needs, supplementing their diet with Brewer’s yeast is the best way to ensure both baby ducks and adults get these essential B vitamins. Mix three cups of Brewer’s yeast into ten pounds of feed to avoid joint and leg deformities.

Probiotics and prebiotics work together to keep a duckling’s immune system in tip-top condition. Prebiotics are found in high-fiber plants and feed the healthy bacteria in a duckling’s gut. Sea kelp is one of the best prebiotic foods to feed ducklings, as it promotes growth and works best when fed with Brewer’s yeast.

Healthy bacteria found in the gut, also known as probiotics, work to control E. Coli, salmonella, and other harmful bacteria found in the digestive tract. Adding probiotics daily to a duckling’s diet may also help prevent other health concerns, such as bumblefoot.

What to Feed Baby Ducks: Healthy Treats

Raw, uncooked oatmeal is an essential part of what to feed baby ducks. It contains antioxidants, thiamine, riboflavin, niacin, choline, magnesium, calcium, and zinc, and helps develop strong legs and wings. Oats should be added to a duckling’s diet soon after hatching and gradually added until twenty-five percent of a growing duckling’s diet is oats at three weeks old. Consuming this beneficial grain helps to decrease the chance of angel wing, a condition caused by too much protein.

The best way to help ducklings reach their potential weight is to give them daily access to pasture. When temperatures are 75° F or above, allowing baby ducks outside in a predator-proofed run will help supplement their diet with essential vitamins and minerals, reduce feed consumption, and lessen the chance of cannibalistic tendencies.

Healthy treats such as herbs (including basil, mint, oregano, parsley, and yarrow), dandelions, leaf lettuce, kale, peas, and black soldier fly larvae should be included in a what to feed baby ducks routine to help them develop a healthy immune system. These nutritious snacks are also packed full of beneficial vitamins and minerals.

When feeding ducklings fresh greens, feed only tender young grasses and herbs and avoid picking greens treated with pesticides or herbicides.

Ducklings are a joy to raise. And with proper nutrients and protection from predators, ducklings will soon grow into healthy adults and fill your egg basket with those deliciously beautiful eggs.

This article about what to feed baby ducks was written for Chickens magazine online. Click here to subscribe to Chickens magazine.

Categories
Crops & Gardening Farm & Garden

Seed Starting Soil Temperatures for Success

Seed starting soil temperatures can be overlooked as gardeners focus on air temperature. This causes many gardeners to miss out on a few days, or maybe even a month, of growing time.

Seed-starting basics include what seeds need to break their dormancy including temperature, moisture, light and oxygen. Once these basics are met, watching this process happen will always be a miracle to me! Being a part of bringing seeds from dead-looking inanimate objects to living, photosynthesizing, food and pollen-producing plants is a source of joy and sustenance for more than our bellies as most gardeners know.

Seed Starting Soil Temperature vs. Air Temperature

Seed starting soil temperatures tend to warm slowly but consistently and can depend heavily on microclimates within your growing area. While air temperatures fluctuate much more, they’ll also catch up in the weeks it takes the seeds to germinate and get high enough above ground to be more affected by air than soil temperatures.

Some of the easiest seeds to get growing early in your garden require a lower seed starting soil temperature than you might think to germinate. As gardeners, we know that the health of our soil is key. Remember walking on and working in waterlogged or still frozen soil can leave you with compacted soil and damage the existing soil life, so make sure the garden space and soil you’re working in has completely thawed out and dried out a little from snow melt.

When pushing the seasons as early as possible remember you’re playing with Mother Nature. If you decide to plant at the minimum temperatures required for germination, and there’s an unexpected cold swing for a few days that brings soil temperatures back down, you may lose some seeds to rot, but if things go as planned, you’ll be eating from your garden weeks earlier than if you’d waited. If you choose to wait until the soil is even 5°F warmer than the lows listed below, you’ll end up with a higher percentage of seeds that germinate.

Having a soil thermometer or two on hand to be able to leave in place and get an accurate reading of soil temperatures both in the morning and afternoon.

Crops to Start as Early as Possible

  • (35-70°F) Spinach – from 40-50 days to maturity – low temp threshold 30°F
  • (35-75°F) Lettuces – from 45-70 days to maturity – low temp threshold 26°F
  • (40-70°F) Peas –  50-60 days to maturity – low temp threshold 28°F
  • (40- 80°F) Beets –  from 50-70 days to maturity – low temp threshold 28°F
  • (45-70°F) Onions – 100 days + to maturity – low temp threshold 28°F
  • (45- 70°F) Arugula – 40-50 days to maturity – low temp threshold 28°F
  • (45- 70°F) Kale – 45-70 days to maturity – low temp threshold 24°F
  • (45-80°F)  Radish – 30-40 days to maturity – low temp threshold 30°F
  • (45- 80°F) Carrots – 60-85 days to maturity – low temp threshold 28°F
  • (45- 85°F) Broccoli – 50-70 from transplant – low temp threshold 28°F
  • (45- 75°F) Cauliflower – 50-70 from transplant – low temp threshold 28°F
  • (55- 75°F) Cabbages –  60-90 days from transplant – low temp threshold 24°F
seed-starting-soil
Spinach Seedlings

Tips for Getting Seed Starting Soil to Warm Faster

There comes a time when we all just want to start planting in our gardens again, and a low tunnel provides this earlier-is-better option.

  1. Cover the soil with plastic like a low tunnel, a cold frame, or individual cloches
  2. Choose a spot that gets full sun.
  3. Add a layer of dark compost to increase heat absorption.

This article about seed starting soil temperatures by Michelle Bruhn was written for Hobby Farms magazine online. Click here to subscribe to Hobby Farms magazine.

Categories
Food Recipes

Eggs Baked in Avocado Recipe

Eggs baked in avocado is a unique way to cook eggs and a delicious recipe that’s hard to resist; especially when your hens are laying on a regular basis during the season. With lots of backyard chicken eggs in the refrigerator, this is a way to use those delicious eggs in meal planning.

Eggs Baked in Avocado

This recipe makes a quick, easy and healthy breakfast or brunch dish.

Serves: 2

Ingredients
  • 1 avocado, seed removed
  • 2 eggs
  • A pinch of salt, a dash of pepper and any additional seasonings you’d like to add.
  • Oil, as needed to grease a baking dish
Directions

Preheat the oven to 425°F.

Wash the outside of the avocado, dry it well and slice it in half lengthwise. Remove the seed. Leave the avocado flesh in the shell.

If the avocado has a small seed pit, use a spoon to carefully scoop some of the avocado flesh out to make room for the egg.

Lightly grease a small baking dish. I prefer a small baking dish with sides, just large enough to fit my two avocado halves. That way, the dish helps support the avocado and keep it from tipping over. Place the avocado halves in the greased baking dish.

Crack eggs into each avocado half. Season with salt, pepper, and any other seasonings you’d like. We prefer a Cajun seasoning blend.

Bake uncovered for 15-20 minutes. Bake 15 minutes for a creamier yolk and closer to 20 minutes for a harder yolk.

Serve straight from the shell or scoop out the flesh, the choice is yours. Or, spread the warmed avocado over toast as it’s effortlessly spreadable once baked.

This recipe is easily adaptable to many tastes by adding toppings such as bacon, feta, tomatoes and parsley.

Enjoy!

This eggs baked in avocado was written for Hobby Farms magazine online. Click here to subscribe to Hobby Farms print magazine.

Categories
Crops & Gardening Farm & Garden

Flower Farming At Firmly Rooted Flower Farm

Flower farming wasn’t in Tori Carver’s mind when her mother passed away in the summer of 2019 and she began to question her purpose in life. “I knew I needed to find something to occupy my heart, my brain and my body,” explains Carver, who is based in the city of Clayton in Georgia and had just turned 50 when the tragedy struck.

Having always found comfort in gardening, cooking, arts and crafts and sewing—”I was the nerdy, fair-skinned, freckled-faced girl who took sewing classes instead of playing sports,” says Carver—she remembers having “an idea for a craft involving dried flowers.” That inkling resulted in Carver coming across cut flowers and, in turn, pursuing a calling to found Firmly Rooted Flower Farm.

Taking time out from the blooms, we spoke to Carver about the joys of flower farming with tulips in the spring and the problems that come with growing in high humidity. We also got to meet the farm’s resident felines, Olive and Penny Sue.

The Roots Of A Flower Farm

“For me, the idea was born out of grief and a lifelong desire to own my own business,” says Carver, when she looks back on the decision to start Firmly Rooted Flower Farm after the passing of her mother. “I have always been drawn to flowers whether it be as a hobby gardener in my early teens, a painting of flowers in a vase or field or even floral paper or fabric—so flower farming seemed like the perfect fit!”

Carver adds that, initially, she only intended to grow flowers for drying but soon “became obsessed with all flowers.”

Growing In Georgia

Being based in Clayon, Georgia means that Carver’s farm is located in Zone 7b. “Although we are 7b, we are just a few miles from the Eastern Continental Divide and because of our unique climate we are home to a wide array of flora and fauna,” she explains. “We are cold enough in the winter months to grow plants like peonies but yet warm enough in the summer to successfully grow warm crops like zinnias, dahlias and heirloom chrysanthemums.”

When it comes to the climate challenges that affect Firmly Rooted Flower Farm, Carver says that “the unrelenting humidity and high pest pressure” top the list.

Spotlighting Tulips And Dahlias

The most popular flowers at Firmly Rooted Flower Farm are speciality tulips in spring and dahlias in late summer.

“This year I am growing over 14,000 tulips in the field and hope to grow between 500 and 1,000 dahlias,” says Carver. “I also hope to add peonies to the most popular list this year. Peonies take three years to mature enough to cut from and we have been building our peony stock every year since the spring of 2021. If all goes well 2024 should be a beautiful spring.”

All Aboard The Daffodil Train

While tulips and dahlias remain best sellers at Carver’s farm, she says that daffodils are a particularly underrated flower.

“There are so many specialty varieties of daffodils that look nothing like the roadside versions we are accustomed to,” she explains. “As an added bonus, moles and voles don’t like them, nor do deer or rabbits [and] they come back year after year and naturalize. What’s not to love? I really wish people would get on board the daffodil train.”

The Mischievous Resident Felines

Beyond the blooms, Firmly Rooted Flower Farm also hosts a couple of kitties named Olive and Penny Sue. Although, Carver says, the feline duo don’t exactly contribute to the farm’s flower output.

“Olive and her cohort Penny Sue wreak havoc in my flowers most days,” says Carver. “Normally they want to be in every picture I take or follow me around on fish fertilizer application day, but lately they are on the hunt for the voles that drift through my ranunculus beds. While it is great that they are able to hunt the voles, my beds unfortunately look like a war zone from all their crazy digging.”

This article about flower farming with Firmly Rooted Flower Farm was written for Hobby Farms online. Click here to subscribe to Hobby Farms magazine.

Categories
Farm & Garden

Sugar Maple Trees: 5 Farm Uses

Sugar maple trees offer a wide variety of benefits to hobby farmers. Some are obvious—maple syrup, anyone?—but you might not be aware of all the ways these trees can provide useful products and materials on your farm.

Sugar Maple Tree Facts

Sugar maple trees are widespread throughout the eastern U.S. and Canada. They’re long-lived deciduous hardwoods that can grow tall and straight in a forest setting or wide and spreading out in the open.

If you have a stand on your farm, congratulations, it’s a wonderful asset. Here are five beneficial items sugar maple trees can yield on your farm:

1. Lumber

Like its almost indistinguishable relative the black maple, sugar maple trees are considered “hard maples” due to the hard, heavy, and durable lumber they produce. This is opposed to “soft maples” like red maple and silver maple, which yield softer, lighter and less durable wood.

The wood of sugar maple trees is attractive, and it’s regularly used to make hardwood flooring, furniture, musical instruments and more. If your farm features a stand of forest-grown sugar maple trees with tall, straight trunks, you’re looking at a source of high-quality and valuable lumber, provided you’re willing to harvest them.

2. Firewood

Sugar maple trees also produce high-quality firewood. The dense wood burns longer and produces more heat than many other types of wood. It is also known for burning with a pleasant smell and relatively few sparks.

Given all their other benefits (awesome lumber, maple sap, etc.), turning a large number of living trees into firewood might not be the best use of your asset. But felling an occasional misshapen or old sugar maple tree to burn as firewood can be a sustainable practice if your sugar maple stand is large enough. You can also take large branches from specimens harvested for lumber and use those as firewood.

3. Maple Sap

Tapping maple trees for their sap is an age-old practice in late winter and early spring, yielding sugary sap that can be put to use in many ways. Boiling down the sap to make maple syrup is a common practice, but making maple sugar candy from the syrup is another delightful option.

Producing maple syrup requires a lot of trees since you need 40 gallons of sap to make a single gallon of syrup. But if your stand of sugar maple trees is large enough, and you’re willing to invest in time and equipment, harvesting maple sap can be an enjoyable and even profitable endeavor.

4. Leaf Mulch

Mature maple trees produce a lot of leaves each year—thousands upon thousands. When they fall to the ground in autumn, they provide an excellent source of leaf mulch. Before winter each year, I shred sugar maple leaves and pile them several inches deep around the base of a Contender peach tree in my orchard, which helps guard the peach tree’s roots from cold winter temperatures.

5. Leaf Compost

Shredded sugar maple leaves can also be incorporated into compost and used to improve soil quality in garden beds. They provide carbon, calcium, magnesium, and more while being quicker to break down than some other types of leaves.

Don’t let a valuable stand of sugar maple trees go unused. Whether you’re harvesting trees for lumber and firewood or enjoying the annual benefits of sap and leaves, there are many ways to use sugar maple trees on your farm.

This article was written for Hobby Farms online. Click here to subscribe to Hobby Farms print magazine.

Categories
Crops & Gardening Farm & Garden Homesteading Urban Farming

How to Get Rid of Virginia Creeper & Choking Vines

How to get rid of Virginia creeper (native) and invasive vines like euonymus (wintercreeper) and English ivy is important as these vines can be devastating when allowed to climb high onto trees. “If they get established and get big, as they often do, they can cover the whole tree and then rob the tree of nutrients and sunlight,” says Emily Mayo, executive assistant and member of the Nashville Tree Conservation Corps.

“The vines are competing for the things that the tree needs to survive. That’s, ultimately, what kills the tree.”

Fortunately, winter is a great time to rid your trees of choking vines. “Winter is my favorite time partly because there are no chiggers,” Mayo laughs. With the leaves off of the trees—and because many invasive vines remain leafy year-round—visibility is better now, too.


Read more: Poison ivy and other opportunists are on the rise.


The Right Stuff

In part, how you’ll tackle problem vines on your own trees depends on the vines’ ages and sizes. For how to get rid of Virginia creeper vines that are only about the diameter of a pencil or smaller, you can usually pull these away from a tree without damaging its bark. But for a much larger vine, Mayo cautions, “You don’t want to pull it off of the tree, because it can take the bark with it and then open the tree up to disease.”

If you have just a few young vines to snip off, a good set of pruning shears will do. But for bigger jobs, you’ll need some extra equipment, including:

  • a sharp knife
  • small pry bar
  • hammer or mallet (optional)
  • small handsaw

You might also want to wear a pair of gloves, long pants and long sleeves—especially if you’re removing poison ivy. “Some people have a reaction to English ivy as well,” Mayo notes.

Step by Step

Because large, thick vines likely will have had many years to integrate themselves with their host tree, removing them can take real patience. What follows are instructions for freeing a tree from the grip of some very well-established vines. (See numbered steps in image below for reference.)

vines trees
Susan Brackney
Step 1

If your vines have attached themselves to the tree’s bark via root hairs, use a sharp knife to gently cut through these on both the right and left sides of the vine.

Step 2

In the same area where you cut through the vine’s roots, carefully slide a pry bar behind the vine. You may need to use a hammer or mallet to tap the pry bar in place. Do this very gently, taking pains not to damage the tree’s bark in the process.

Slide the pry bar between the front of the tree and the back of the vine along both the left and right sides of the vine. (Ultimately, you want to isolate just enough vine segment so that you can saw through it without cutting into the tree itself.)

Step 3

Use a small handsaw to cut all the way through the vine. Be sure to stop cutting before you reach the front of the tree.

Step 4

Locate another spot along the vine that’s about 6 inches above or below the cut you just made. Repeat steps 1 through 3 in this area. Once you’ve finished cutting through the vine in this second spot, you should be able to remove a 6-inch section of vine from the tree. If you need to, you can use the pry bar to help pop out this piece of cut vine.

(Notice in the “Step 4” image that, although the tree’s bark looks discolored from long-term contact with the vine, the tree bark itself is still intact.)

“Cutting the vine basically cuts off its supply of water and nutrients from the soil and then the vine on the tree will just die and eventually fall off,” Mayo explains.

She continues, “Once you’ve got it cut off at the tree, then you can kind of pull back what’s growing from the ground.”

vines trees
Susan Brackney

How to Get Rid of Virginia Creeper Vines – Extra Help

Even after you’ve cut away the vines, you should periodically check the area for any growth trying to re-sprout. And for very serious infestations of poison ivy and euonymus in particular, you might want to paint a chemical herbicide onto the cut portion of the vine stem. This will kill these plants at the root.

Rather not vanquish the vines on your own? “If it seems like a daunting task, I would definitely recommend reaching out to certified arborist to come take [vines] off the tree,” Mayo says.

To find a board-certified arborist near you, try the International Society of Arboriculture‘s online search tool.

This article about how to get rid of Virginia creeper vines was written for Hobby Farms online. Click here to subscribe to Hobby Farms print magazine.

Categories
Crops & Gardening Farm & Garden

Planting Trees: Potted Vs. Bare-Root Trees

Planting trees is a pleasant way to start the growing season and lays the groundwork for harvests and blossoms for decades to come. You may wonder if it’s best to plant potted or bare-root specimens.  The truth is, that each approach offers different advantages.

Sometimes you can only purchase a particular specimen one way or the other. But if you have a choice, it’s worth pondering which advantages best suit your needs.

Let’s explore the pros and cons offered by potted and bare-root trees.


Read more: Planting trees? Check out these 10 tools for the job.


Planting Trees: Potted Trees

Pros

Simplicity of planting is the big upside offered by potted trees. Their roots are already growing in soil, so all you have to do is dig a hole two or three times as wide as the root ball. Then you loosen the soil at the bottom of the hole and plop the tree into the hole.

Loosen the outer roots from the root ball (even cutting some if they’re rootbound), and backfill the area around the root ball until the plant is snugly secured in place.

There are other advantages as well. You can plant potted trees during the summer if you desire, so long as you water them thoroughly. If you’re shopping at a nursery in the spring, potted trees are likely to be leafed out, giving you a good chance to select healthy and vigorous plants.

And potted trees can be purchased in larger sizes than bare-root specimens, which—in the case of fruit trees—can cut down on the amount of time you spend waiting for your first harvest.

Cons

Root balls can be heavy. I’ve bought trees planted in 15-gallon pots, and wrestling such trees into their holes can be a two-person job. If you want to handle even larger potted specimens, you may need the assistance of machinery.

Potted trees also require frequent watering. You need to water daily for at least the first few weeks, followed by a weekly regimen for a year or two.

If a convenient water source isn’t close to your planting location, this can be quite a commitment.


Read more: A 35-gallon leg tank can really simplify the chore of watering.


Planting Trees: Bare-Root Trees

Pros

Whereas potted trees require ample watering, bare-root trees aren’t as needy. They can get by with weekly watering for the first year after planting. This is a big benefit if you’re planting far from a handy water source or if you’re pressed for time.

Bare-root trees are also lightweight and easy to handle, since their roots are free of heavy soil. Even a fairly large bare-root tree can be handled with relative ease. And as a general rule, they’re less expensive than similar potted specimens.

Cons

Perhaps it’s just me, but I find planting bare-root trees to be a little trickier and slower than planting potted specimens. It can be harder to gauge the proper planting depth (there’s no potted soil line to judge by!). And spreading out the bare roots so they aren’t bent or curled over in awkward directions requires diligence, especially as you start backfilling the hole.

There’s also the issue of planting bare-root trees immediately, before their roots dry out. A potted tree will happily sit in your yard until you’re ready to plant, even if planting is delayed for weeks. There’s no such leeway with bare-root trees. While keeping the roots moist can buy you a little time, you’ll want to plant as soon as possible.

You also need to plant during the right season. Summer is not recommend, with early spring and late fall being the suitable times.

Ultimately, both potted trees and bare-root trees offer meaningful pros and cons. If you’re new to planting trees and have time for diligent watering, planting potted trees might be the perfect choice.

On the other hand, if you’re on the ball planting bare-root trees as soon as you acquire them, you can grow nice trees at a lower price point with less long-term watering needed.

No matter which route you choose, the best time to plant a tree was 20 years ago. So you’d best get started!

This article about planting trees was written for Hobby Farms online. Click here to subscribe to Hobby Farms print magazine.

Categories
Crops & Gardening

Growing, Harvesting & Enjoying Mustard Greens

Mustard greens are an easy-to-grow spring plant that loves cool weather. Mustard greens are also delicious, lending their zippy flavor to salads when the greens are young and stir-fries when they’re mature. If you’ve never had the pleasure of tasting the spicy bite of mustard greens, you’re missing out on one of the garden’s greatest treasures.

How To Plant Mustard Greens

Mustard greens are cool-weather crops that should be planted either in the early spring or the late summer. During hot weather the plants will bolt or go to flower, altering their flavor and stopping the production of new leaves. Though I plant two crops of this green per year, I find fall harvests particularly flavorful.

Best grown by direct seeding, mustard greens are one of the easiest cool-season vegetables to grow. Simply plant seeds about 1/4 inch deep and 1 inch apart in rows or blocks. The seeds will germinate just a few days later.

Harvesting Mustard Greens

Most mustard greens are ready to harvest as baby greens 20 to 30 days after sowing. That said, I prefer to let mine reach maturity, when their large, velvety leaves have reached peak flavor. Baby greens can be harvested with a sharp pair of shears, snipping off the whole plant just above the crown. To harvest mature mustard greens, simply snap off the outermost leaves with your thumb and forefinger, leaving the growing point intact. Picking them in this manner enables the plant to produce subsequent flushes of harvestable leaves, extending the harvest for many weeks.

Mustard Greens & Heat

When summer’s heat arrives, mustard varieties will bolt or go to flower. When this happens, the leaves turn either very spicy or bitter. When the harvest ends, pull the plants out and toss them in the compost pile, or leave the flowers for pollinators. Eventually, seed pods will form and dry on the plants. These seeds can be allowed to drop to the ground where they’ll re-sprout in the fall when the weather cools again. The seeds can also be collected and saved for replanting the following spring. The resulting plants may or may not be the same variety as the parent plants, depending on whether the variety is open-pollinated or hybrid, but there’s a good chance they’ll be flavorful and well worth growing.

mustard-greens
Jaesung An/Pixabay

The Best Varieties Of Mustard Greens

These gorgeous and pungent greens are absolutely beautiful plants, too. Many varieties, such as Dragon Tongue, Red Giant and Garnet Giant, have deep purple leaves with green venation, making them real stand-outs in the garden. Other varieties are solid green. Frilly leaf types add even more interest with their deeply serrated, feathery foliage. Excellent frilly leaf mustard varieties include Red Splendor, Ruby Streaks, Golden Frills and Scarlet Frills, all of which pack a flavorful punch in their gorgeous good looks.

In addition to the classic varieties of mustard greens mentioned above, another variety is well worth growing. Though it isn’t a true mustard, Malachai is worth including in your fall and spring garden. This variety is a Komatsuna type that’s a mixture of mustard green and spinach. The leaves are deep green, thick and shiny. They taste like mustard greens but have the more succulent texture of spinach. And, unlike true mustards, Malachai doesn’t seem to be bothered by flea beetles.

The following five mustard greens are top-notch:

1. Red Giant

The standard for purple-leaved mustard varieties, Red Giant produces gigantic leaves that are deep purple with medium green veins. Ready to pick at the baby stage at just 25 days or the full-leaf size in 45. Their spice is unforgettable, and their good looks in the garden can’t be beat.

2. Ruby Streaks

Prized for its lacy, soft leaves, Ruby Streaks has purple-tinged leaves with green mid-ribs. It’s also a great mustard green variety for late-summer planting. Baby greens are ready to harvest in just 20 days from seed, the flavor is mild with a tangy bite.

3. Green Wave

The highly ruffled, bright green leaves of Green Wave look a bit like kale, but their flavor is far more spicy. Green Wave cooks beautifully and holds up in the pan. Highly productive and ready to harvest in 45 days as mature mustard greens. This is one of the most bolt-resistant mustard varieties on the market.

4. Dragon Tongue

Another wine-colored mustard variety, these large leaves are crunchy and crinkly with white mid-ribs. Drop-dead gorgeous and flavorful, this is a variety that’s a bit on the mild side compared to some others.

5. Tye Dye

Fast growing with highly serrated, feathery leaves, Tye Dye makes a stunning ornamental when mixed with flowers and foliage plants in containers and raised beds. Plant more seeds every few weeks for a continuous harvest.

How To Enjoy Mustard Greens

No matter which varieties you grow, enjoying their flavor is always the best part. Baby mustard greens, harvested early in their growth cycle, can be added raw to salads or sandwiches where their spicy flavor will wake up your taste buds. Baby, as well as mature mustard leaves, are also excellent when braised, steamed, sautéed or stir-fried. One of my favorite ways to enjoy mustard greens is sautéed in olive oil with minced garlic and then topped with a drizzle of balsamic vinegar.

Managing Flea Beetles On Mustard Greens

If flea beetles become problematic, know that most plants will outgrow this little pest, and though the insects leave pock-marked foliage behind, flea beetle feeding does not alter the flavor of mustard greens. I simply put up with the damage they cause and ignore the small holes they create in the leaves.

If you’re growing commercially and can’t tolerate marred foliage on your market stand, place yellow sticky cards down your rows of mustard greens to attract and trap the adult beetles. Other options include sprays of kaolin clay-based products (such as Surround) to protect the plants from feeding damage and spring soil applications of beneficial nematodes to attack and kill the ground-dwelling flea beetle larvae. As a last resort, pyrethrins will also suppress this pest, but use them with caution.

This article about mustard greens was written for Hobby Farms online. Click here to subscribe to Hobby Farms print magazine.

Categories
Poultry Sponsored

Humidity in Incubation

If you’ve ever incubated before (or even if you haven’t), you probably know that there are a lot of variables you need to keep track of. There are four primary factors to consider: temperature, ventilation, turning and humidity. The Incubation Specialists at Brinsea are here to explain the possibly the most difficult factor to control and measure: humidity..

What Does Humidity Do?

Eggshells may look solid, but they’re actually porous. While eggs are incubating, they naturally lose weight. It’s important to have your humidity set to the right percentage so that your eggs are losing an ideal amount of weight so that developing chicks can use the available air space to breathe and move around.

If Humidity is Too Low

Low humidity will cause the eggs to lose too much weight, which means the air space will be larger than ideal. A large air space means the chick will be smaller and weaker and might not survive. However, low humidity is typically less of a problem than high humidity.

If Humidity is Too High

High humidity results in not enough weight loss. The air space will be smaller than ideal, and the chick will be larger. A small air space can lead to respiratory problems and make it difficult for the chick to move around and break out of the shell.

If a chick pips in a shell that hasn’t lost enough weight, they can die due to weakness from lack of air or because they can’t maneuver to break out the rest of the way.

Measuring Humidity

Humidity is calculated by measuring the water vapor in the air. One of the easiest ways to measure the water vapor is by figuring out the Relative Humidity percentage, also known as RH%. The other way is with a wet bulb.

Note, humidity isn’t a strict variable; it’s more of an average variable. High humidity at the beginning of incubation can be corrected later with lower humidity and vice versa.

Relative Humidity

When you see the RH% on our incubators, you’re seeing the measurement of water vapor in the air compared with the maximum that could be absorbed at that temperature. The RH% is based on the temperature of the air, so 50% humidity at 70 degrees Fahrenheit is different from 50% humidity at 90 degrees.

Maximum possible water vapor capacity increases as the temperature increases, so raising the temperature in an incubator without adding water will cause the RH% to drop. Therefore, it’s important to note the temperature when measuring humidity.

Wet Bulb Temperature

You can measure humidity with the wet bulb (WB) technique by checking the temperature of a thermometer with a moist cotton wick around its bulb. As the water from the wick evaporates, it cools the bulb.

The WB technique takes the difference between the WB and dry bulb (DB) temperatures to determine humidity. There are only two instances where the WB and the DB temperatures would be the same— when the air has absorbed all the water it can (100% RH), and when the wet wick has dried out. It should be noted that it is very difficult to measure the WB in a still air incubator.

Also WB temperature should not be confused with % RH – 90 degrees WB temperature is 45% RH not 90% RH.

How to Achieve Correct Humidity Levels

What can you do if you don’t have a  hygrometer, or you aren’t sure if your hygrometer is accurate? If you’re hatching in an incubator without a reliable hygrometer, we recommend periodically weighing your eggs to check on their progress.

Most bird species (except for the ostrich family) need to lose between 13% to 15% of their weight from the first day of incubation to the day they hatch. By weighing the eggs every few days, you can accurately adjust the humidity to compensate for too much or too little weight loss.

Altering the Humidity During Incubation

Water surface area and fresh air are the two controllable factors to consider when altering the humidity during incubation. The more water surface area there is inside the incubator, the higher the humidity will be.

All Brinsea incubators have two water pots or channels to give you flexibility in water surface area and evaporation rates. To increase the humidity, all you need to do is put water in both channels and reduce the ventilation. Never block off all the holes in the incubator as the chicks require oxygen to breathe.

Evaporating pads or blocks are available and can help raise the humidity if you’ve put water in both water channels and still can’t achieve the correct humidity level.

The Brinsea EX units come with a built-in hygrometer and humidity pump to automatically control humidity. Similar to temperature control, the humidity level can be adjusted on the incubator and the pump takes care of adding water as necessary.

Ambient Humidity

Ambient humidity will influence the humidity inside the incubator. Factors that can cause the humidity in the incubator to fluctuate include whether there is a humidifier or dehumidifier in the room, if you’re running the heater, turned the A/C off and opened the windows, and others.

Should I Spray My Eggs with Water?

Spraying eggs with water only raises the humidity for a short time before the small water droplets on the eggs evaporate and is therefore not an effective solution to low humidity. It’s also not recommended due to the fact that the water could be at much lower temperature than the eggs, which can cause issues as well.

Humidity During Hatching

For virtually all birds, humidity needs to be higher at hatching than during incubation. We recommend raising the humidity during “lockdown” or the last few days of incubation. If you have been weighing your eggs, the weight loss should be right around 13% to 15%, and raising the humidity at the end won’t significantly affect this.

High humidity is necessary because of the membrane that the chicks must break through to hatch. If the membrane is allowed to dry out (due to low humidity), then it becomes too tough for the chicks to tear. They’re then unable to hatch.

During hatching, the humidity should be at least 60% RH. To keep the humidity stable, always keep the lid on the incubator. If the lid is lifted after a chick has hatched, the humidity will immediately drop which could cause other chicks to become shrink wrapped.