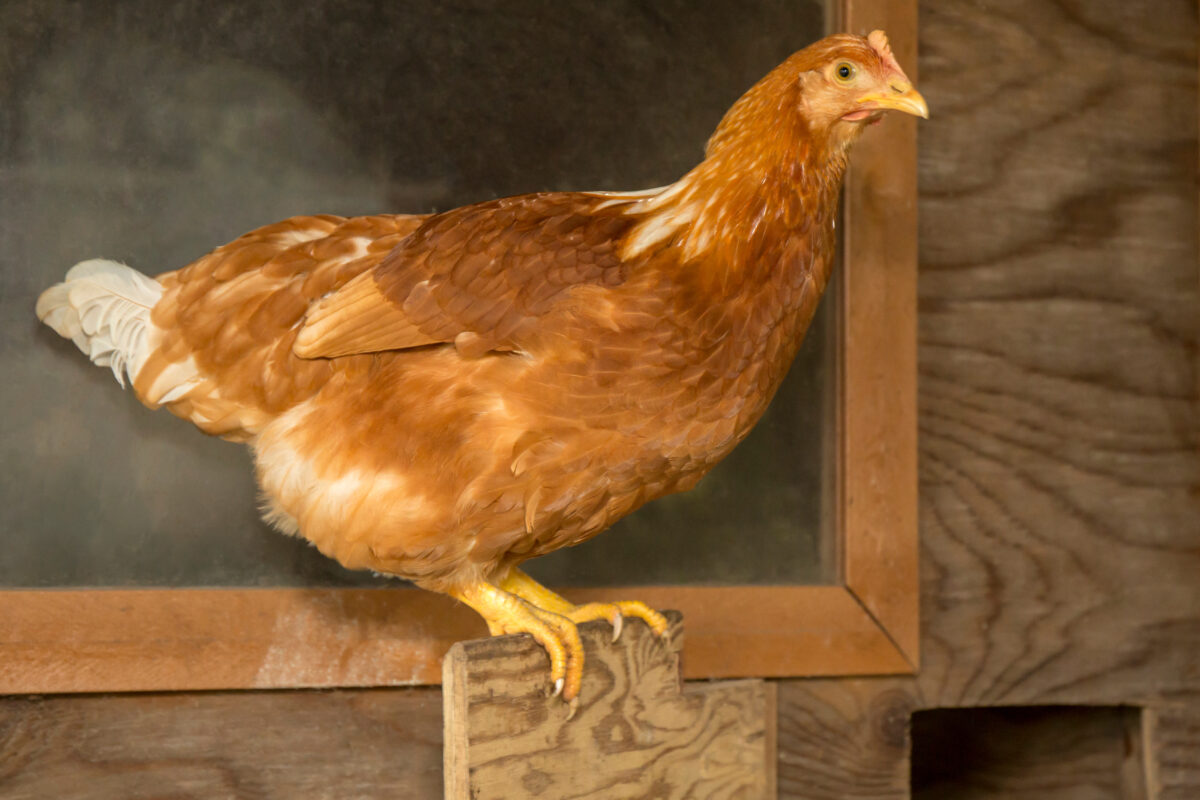
Keeping a closed flock of chickens comes with pros and cons, but for many chicken keepers, it is the best way to prevent disease from entering the coop.
Understanding What is a Closed Flock of Chickens
A closed flock means no adult or adolescent flock members are allowed to enter the coop or property.
While this may sound rather bleak to the backyard chicken enthusiast, many flock owners simply put a ban on adding adult chickens to their already existing flock.
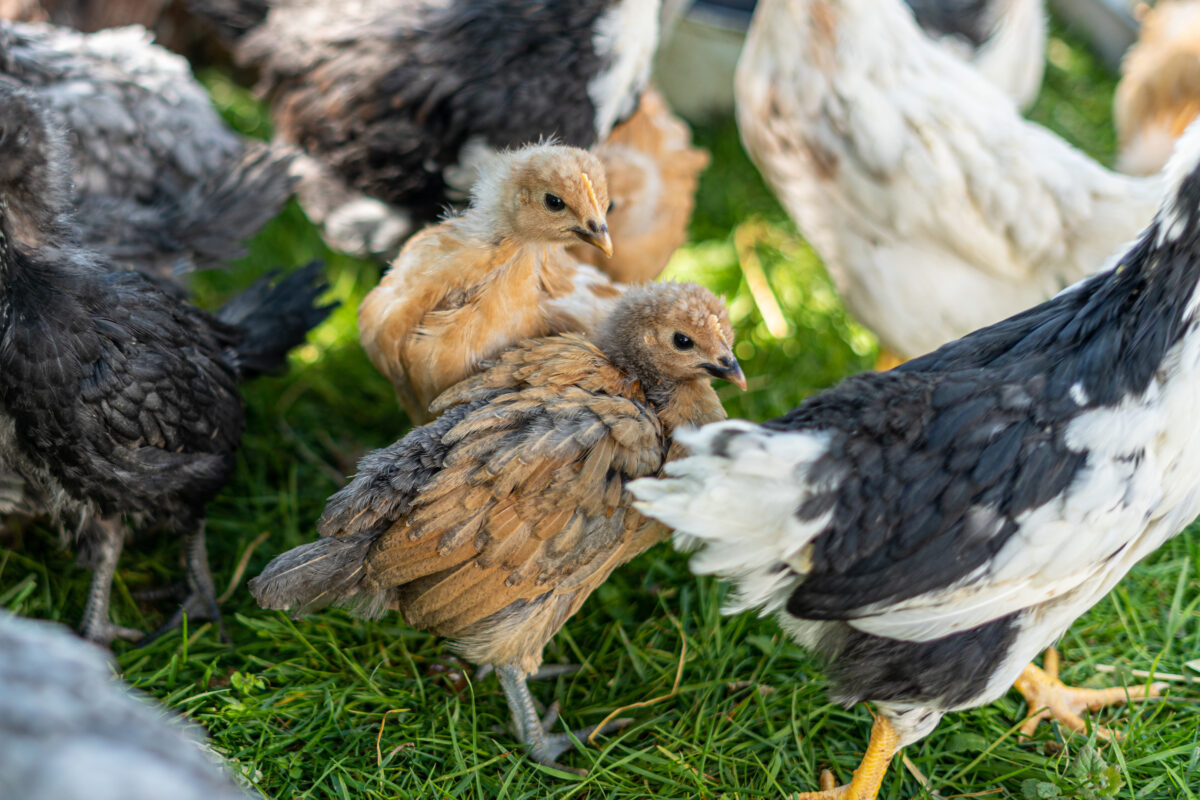
Chicks are the perfect way to expand your closed flock of chickens without needing to worry about the spread of disease. However, care should be taken to avoid introducing vaccinated chicks to an unvaccinated flock and unvaccinated chicks to a vaccinated flock to avoid certain diseases from being spread.
Note: Chicks should be introduced to the flock by hatching your own eggs or by purchasing hatching eggs or baby chicks through a hatchery that supports the National Poultry Improvement Plan (NPIP).
Why Maintain a Closed Flock of Chickens?
A closed flock of chickens helps to reduce the chances of your flock contracting diseases and harmful bacteria from other poultry entering the flock or property.
Tips for Maintaining a Healthy Flock
Keeping a closed flock should involve more than refusing to add adult chickens to your flock. It should also include practicing a few biosecurity tips to keep your flock healthy and free of contagious diseases and pathogens.
As mentioned above, in a closed flock of chickens, no adult or young poultry (with the exception of chicks) should enter the flock or property. In addition, chickens entering the show ring should not be allowed to re-enter the property after visiting a show.
If possible, never visit other poultry flocks, as coming into contact with chickens and other poultry can make your own birds sick. Disease is often spread from flock to flock through a human carrier, so staying clear of other people’s poultry is wise when maintaining a closed flock.
Do’s and Don’ts for Your Flock
Keeping a closed flock of chickens is a practical disease-prevention tip for most backyard flocks. However, there are several things you should or should not do to help make this technique work.
Do’s
When expanding your flock, be sure to acquire chicks or hatching eggs from hatcheries that support the NPIP, as these hatcheries routinely check adult poultry for certain diseases and pathogens to ensure the guaranteed health of the chicks.
Continue to practice good biosecurity tips to keep your flock healthy.
When purchasing chicks, stay clear of birds that appear sick or injured.
Don’ts
Don’t allow your flock to die out. Chickens are flock creatures and need the companionship of another chicken to keep them happy.
Never allow visitors to enter your flock’s enclosure to prevent diseases from being spread via footwear from one flock to another.
Don’t bring home adult chickens. If adult chickens do enter the property, be sure to quarantine them for thirty days before introducing them to the rest of your flock.
Advantages of a Closed Flock of Chickens
There are many benefits to keeping a closed flock. Highly contagious poultry diseases such as avian influenza, Marek’s disease, and coccidiosis are just a few chicken diseases that can be spread by adding adult chickens to your flock.
In a flock of chickens, it’s the smaller, “less harmful” pathogens, such as bacteria, yeast, and parasites, that cause many flock members’ demise after being introduced to a newly acquired adult chicken.
Another consideration is the health of the new chickens in the coop. All chickens, including your own flock, carry a certain amount of bacteria and coccidia in their droppings. These pathogens are not bad in small doses, as your flock has built up an immunity to them. However, a newly acquired adult hen or rooster has not had the ability to build up an immunity to these pathogens, and can become sick or die.
Challenges of Keeping a Closed Flock
Tending to a closed flock is not for everyone, as this practice can have some disadvantages.
For chicken enthusiasts looking to purchase a rare breed or color, acquiring adult stock may be the best way to attain these chickens.
Staying clear of poultry shows and swap meets, and refusing to bring home new stock, may not be something some flock owners want to put into practice.
Another downside to keeping a closed flock of chickens is the inability to rehome chickens in need. For many chicken keepers, being able to adopt a hen or rooster in need is very rewarding.
Keeping a Flock of Chickens Healthy Without Closure
It is possible to keep your flock healthy by practicing good biosecurity if keeping a closed flock is not for you. Examining chickens and other poultry before the time of purchase is necessary to prevent bringing home diseases to your existing flock is a good place to start to keep your flock free of diseases.
Quarantining newly acquired adult and young chickens (excluding chicks) for a minimum of thirty days can go a long way to helping your flock stay healthy.
Final Tips for a Safe and Healthy Flock
Keeping a closed flock is a practical and inexpensive way to maintain the spread of disease in backyard flocks. Whether you raise your chickens for pleasure or purpose, this practice will help to ensure your flock stays happy and healthy.
How long do chickens lay eggs? The answer to this common question varies based on the health of the hen, genetics, breed, and even stress levels in the coop. Knowing what breeds to choose, managing stress and boosting egg production through nutrition can help hens produce more eggs for a longer period of time.
Annual Egg Production: How Long Do Chickens Lay Eggs
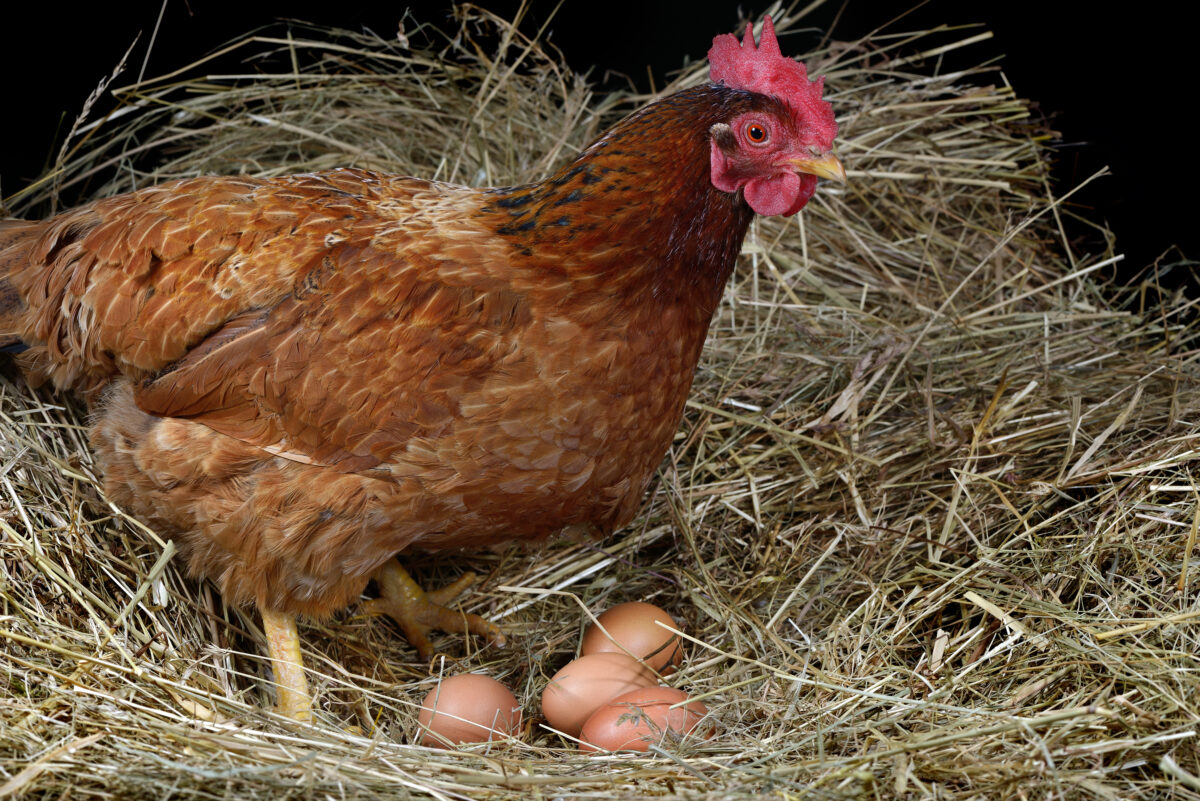
Novice chicken owners may be surprised to learn that chickens do not lay year-round. When a pullet reaches maturity and produces her first egg, she will lay throughout the entire year until the start of the autumn molt. (about the age of eighteen months).
After molting, hens spend the winter months recovering from the wear and tear of the previous egg-laying season. In all but the most northern regions, laying hens resume egg production in late winter or early spring.
When averaging how long do chickens lay eggs annually, a reasonable expectation is about seven to eight months per calendar year.
Dual-Purpose Hens and Extended Egg Laying
How long do chickens lay eggs can vary since not all breeds are created equal. If looking for a chicken to lay an abundance of eggs for several years, choosing a laying breed is essential. Egg-laying breeds fall into two categories: high production layers and dual-purpose chickens.
High production breeds, such as sex links (Golden Comets) and Leghorns, lay an outstanding number of eggs for two years before production drastically declines. Though rare, some sex link hens have been reported to consistently lay eggs until the age of five, and some can lay for even longer.
During the peak of their production, these hens can put out three hundred eggs annually, and will easily outlay all your other chickens. However, their short laying seasons can be a disadvantage to flock owners looking for longer production.
Dual-purpose breeds consistently produce fewer eggs than high-production hens (about two hundred to two hundred and fifty eggs annually per hen). While these hens lay fewer eggs, they tend to lay for more years, creating a more even flow of eggs for a longer period of time.
While all these breeds are excellent layers, Sussex and Plymouth Rocks are especially known for their longevity in egg production. Exceptional egg layers, these two heritage breeds consistently produce medium-sized brown eggs for the first four years of their lives, before egg production begins to drop off.
Keep in mind, chickens are individuals, so some hens may outlay expected numbers while others can produce significantly less than average production.
Mixing high-production breeds with dual-purpose chickens is a good way to help balance out a good flow of eggs consistently for several years without needing to add more hens to the coop each spring.
Egg Count Over a Hen’s Lifetime
The number of eggs a hen lays throughout the course of her life can vary, but a typical backyard hen should produce an average of six hundred to one thousand eggs over the course of her life.
Stress and Its Impact on How Long Chickens Lay Eggs
How long do chickens lay eggs will also depend on their environment. Is your henhouse a place of bliss? Or are chickens squabbling over the right to use the nesting boxes? Do predators frequently prey on your flock, whether in the coop or free-ranging in the backyard?
These questions may not seem like they would contribute to a chicken’s production, but high stress levels can cause egg laying to slow down or even cease.
Keep your flock happy and laying by providing plenty of nesting boxes and space in the coop and run for chickens to move about. Avoid housing aggressive breeds/chickens with easily bullied hens to help lower stress levels.
Last but not least, house chickens in a completely predator-proofed coop and run to prevent predator attacks from occurring in your backyard flock.
Chickens can become stressed for many reasons. Spending some time observing your flock will help you notice problems that arise and allow you to resolve stress factors more quickly.
Nutrition Tips for Hens to Maximize Egg Laying
Chickens are what they eat, so it’s little wonder that a chicken eating a healthy diet is more likely to outproduce a chicken eating foods with little nutrition. How long do chickens lay eggs is greatly affected by diet, so here are a few helpful hints to feed your flock for healthier, more abundant eggs.
Feeding for Longevity: How Long Do Chickens Lay Eggs
Probiotics work to keep your chicken’s gut and immune system healthy. Without poultry-specific probiotics, bad organisms can enter a chicken’s body, causing sickness and a decrease in egg production.
Prebiotics work to feed the probiotics and are a necessary part of a chicken’s diet. These two supplements work together to keep a chicken’s body healthy and in prime condition for egg laying.
Herbs That Support Long-Term Egg Laying
Many culinary herbs are chicken-safe and help reduce inflammation throughout the body, including the reproductive tract.
When left untreated, this inflammation can cause reproductive tumors and cancer. These medical conditions not only affect how long do chickens lay eggs, but they will also shorten a hen’s life.
Treats and Their Effect on How Long Hens Lay Eggs
The perfect treat during the winter months, scratch can cause as much harm as it can good. High in fats, calories, and carbohydrates, scratch can cause fat buildup around a laying hen’s organs.
As more fat accumulates, the hen’s body begins to weaken, and egg production ceases. Unlike humans, a chicken’s body can not lose the excess weight around their organs, so the best treatment for this diagnosis is prevention.
Did You Know? If a chicken’s body does not receive enough nutrition, she will withhold certain nutrients from her eggs. While this is vital for the hen’s existence, it’s bad news for the consumer eating eggs with less nutritional value.
Final Thoughts on How Long Chickens Lay Eggs
How long do chickens lay eggs varies for each hen, but with proper nutrition, reduced stress levels, and selecting long-laying breeds, filling your egg basket for several years without needing to replace your layers is possible.
This article about how long do chickens lay eggs was written for Hobby Farms and Chickens magazines. Click here to subscribe.
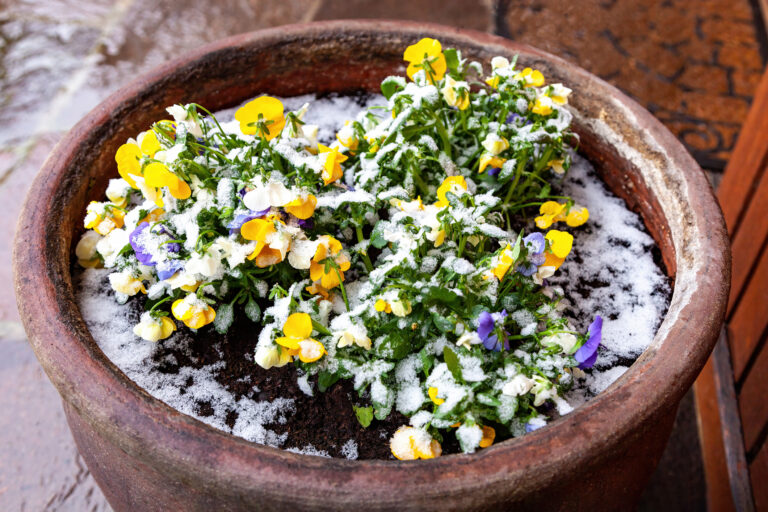
Pansy flowers in a ceramic pot covered with snow outdoors
The cold has arrived. As gardeners, we find ourselves longing for spring, when our gardens come back to life and we can spend time outside. It’s tempting to believe we can’t plant anything now, but there is a way to plant seeds for next spring. Winter sowing is a type of planting that involves planting seeds outdoors in winter. It sounds too easy, but it works! Many hardy annuals and perennials can be sown in winter to give plants a head start in spring.
What is Winter Sowing?
To answer this question, we’ll look at the basics of seed physiology. Many seeds require a period of cold and moist conditions to grow. The plants we observe in nature often have this requirement. This process is known as stratification. Plants typically form their seeds during late summer. These seeds fall to the ground and wait to grow. If those seeds germinate in the fall, they would be too weak to survive the winter cold. Stratification protects the seed, allowing it to germinate in spring when conditions are suitable for growth. Winter sowing involves planting seeds outdoors in a container during winter. This process allows the seeds to experience cold weather and germinate in spring.
Benefits of Winter Sowing
This planting method protects your seeds from animals and harsh weather conditions. You can scatter seeds in your garden during winter, but they will be at risk for several problems. Animals can eat them, rain can wash the seeds away, or winter winds may dry them out. Containers protect the seeds while giving them the proper cold treatment. Planting the seeds in containers allows the plants to harden off and stay compact naturally. Gardeners typically use milk jugs for winter sowing.
What Can I Winter Sow?
You can sow a variety of annuals and perennials using this method. Seed packets can provide information on germination requirements. For annuals, you’ll want to plant hardy species that tolerate frost. A few examples are sweet alyssum,pansies, and petunias. As you read the seed packets, you may see terms like reseeds or self-sows. Some annuals, like sweet alyssum, regularly self-seed in the garden, a sign they can be winter sown. Annuals prone to frost damage can be winter sown but should be planted later than hardier annuals. Many tropical annuals require warm soil and weather to germinate, making it better to start them in a home or greenhouse. A few examples are annual geraniums,impatiens, and coleus. Hardy perennials often have a cold requirement, making them an excellent choice for winter sowing. The seed packet will give you insight into their germination requirements.
When Should I Winter Sow?
As the name suggests, winter is ideal, but the exact timing will vary for different plants. Perennials and hardy annuals can be winter sown from December to March. Tender plants, like veggies and some annuals, should be sown in March or April after the threat of extreme cold has passed. Tender plants don’t require a cold treatment for germination.
Sowing The Seed
Winter sowing is a simple process and only requires a few materials. Here are the steps to successfully plant your seeds.
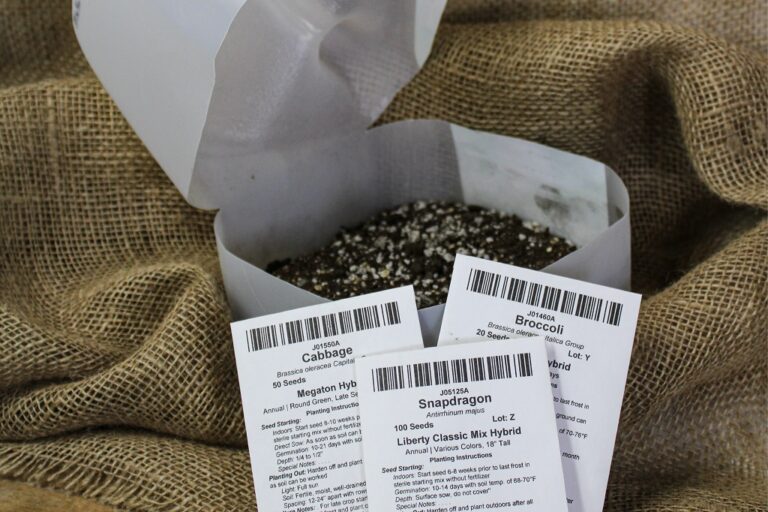
Step By Step Instructions For Sowing Seeds
Find a clean container- A milk jug is ideal, but you can use other containers too.
Cut the container- If using a milk jug, insert a serrated knifeabout 1.5 inches under the handle and work around the container, but don’t cut the hinge point under the handle. This cutting method allows you to open and close the container while keeping it in one piece. Marking the cut line is recommended before you start cutting.
Create drainage holes- Poke several holes in the bottom of the container to allow water and airflow. A milk jug will require a few holes toward the top for airflow and to avoid overheating on warmer days.
Add soil- Put a 2-4″ layer of seed starting potting mix in the container. Soil from the garden is unsuitable as it creates drainage issues and may contain weed seeds.
Moisten Soil- Add water to the mix to lightly moisten the soil and allow excess water to drain. Remember, you want the soil to be moist, not wet and soggy.
Sow the seeds- Sprinkle them on the soil and cover them with a thin new layer of soil. Read the seed packet to determine the proper planting depth for different seeds. Gently press the soil down to ensure the seed has firm contact with the soil.
Seal the Container- Use tape to seal the cut edges of the container. The container top should be left open to allow airflow and moisture for the seeds.
Label the Container- Use a plant label to record the type of seed and planting date. Tags will help you keep track of each plant and let you evaluate the results to prepare for next year.
Place the Containers outside- Find a sunny spot for your containers and leave them alone until spring. Make sure they’re in a location that receives rain and snow. If you live somewhere windy, consider using a milk crate to hold the containers in place. Return in spring to see the results!
Observe Seedling growth- Keep an eye on the emerging seedlings to ensure they have enough moisture and ventilation. You may need to open the container on warm days to avoid overheating the seedlings. Just make sure to close the container at night. Eventually, the seedlings can be separated and planted in the garden.
Plants To Consider
Here are some common plants to consider for winter sowing.
Note: This list is only a few plants suitable for winter sowing.
Winter sowing teaches us about seed germination while having fun in the process. You can use this activity tointroduce kids to gardeningtoo! As you plan for next year, consider sowing your seeds in winter to get a running start in spring.
At Jung Seed Co, we strive to be your go-to guide for all your gardening needs. Our YouTube channel,The Garden Doctor by Dick Zondag, is where he provides gardening tips for all levels of gardeners. When you need reliable gardening advice, turn to the trusted experts at Jung.
View our new catalog onlineor browseour website for your gardening favorites. Sign up forour weekly emailto receive info on new products, exclusive deals, and specials. Join our Facebook pageto discuss all things gardening!
About the Author: Matthew Olson is a professional horticulturist and garden writer. He has a bachelor’sdegree in horticulture from UW-River Falls and is a certified professional with the Minnesota Nursery and Landscape Association. His enthusiasm for plants and the outdoors brought him to the green industry. He regularly writes articles about gardening for both gardeners and industry professionals. He can be reached at matt@mattolsonhorticulture.com.
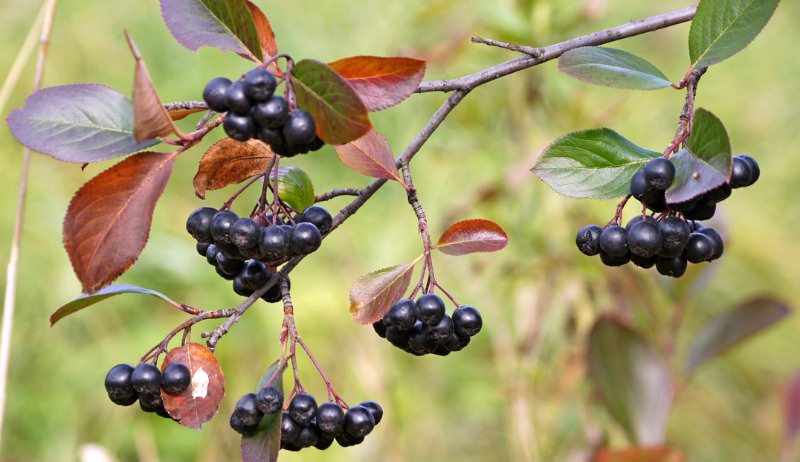
Aronia berry is a little-known native fruit that deserves a spot on your Thanksgiving table. Often called black chokeberry, this humble shrub produces glossy black fruits packed with antioxidants, vitamins, and flavor. While it may grow unnoticed along hedgerows in the Midwest, its health benefits and culinary versatility make it a perfect addition to your holiday dishes, from sauces to baked goods.
What Is the Aronia Berry?
The aronia berry is a “trash tree” in the Midwest. It grows in hedgerows and goes virtually unnoticed. It’s often called black chokeberry. They’re often used by landscapers as ornamentals. In the spring, you’ll see them decorated with beautiful white flowers, which are then followed by dark, black berries. Finally, the shrub puts on a fall display of deep rust-colored leaves that is not to be missed.
Health Benefits
Aronia berry has three to four times the antioxidant content of blueberry, goji or pomegranate. It’s currently being studied for its beneficial effect on the cardiovascular system (blood pressure, cholesterol levels, heart attack prevention and recovery), the digestive system, the urinary tract (even better for UTIs than cranberry) and even cancer. Specifically, it is being tested against breast and colon cancer. In laboratory environments, it’s been shown to kill colon cancer cells with no damage to surrounding tissue. Very exciting stuff!
Aronia berry, aka chokeberry, is high in pectin. The first settlers added it to other fruits for a natural set for jams and jellies. It’s not likely that the chokeberry was at the first Thanksgiving, but that shouldn’t stop you from using it if it’s native to your area.
Growing and Harvesting Aronia Berry
Aronia grows very well in Midwestern soils. It’s a medium-sized shrub that tends to spread in clusters. The fruit is ready to pick in the fall, and it’s a real battle to get it before the birds do, so you might consider covering it with netting. It likes full sun and will perform very well year after year with very little input from you, the grower.
Using Aronia Berry in Thanksgiving Recipes
Aronia berries are versatile and can add a unique, tangy flavor to your Thanksgiving table. Here are some ideas to inspire your holiday menu:
Aronia Cranberry Sauce: Combine aronia berries with traditional cranberries for a naturally sweet and tart sauce. Add a touch of orange zest or cinnamon for extra warmth.
Holiday Baked Goods: Use aronia berries in pies, tarts, muffins, or quick breads. Their high pectin content helps jams and preserves set naturally.
Stuffing or Grain Salads: Toss dried aronia berries into cornbread stuffing, wild rice, or quinoa salads for color, texture, and a subtle tartness.
Festive Drinks: Make a warm aronia punch, add aronia juice to sparkling water, or create a spiced cocktail for a seasonal beverage.
Garnishes: Fresh or dried aronia berries can decorate desserts, cheese boards, or roasted vegetables, adding both color and a nutrient boost.
Aronia berries are at their peak in the fall, perfectly timed for Thanksgiving preparations. If fresh berries aren’t available, frozen aronia or aronia juice works beautifully in most recipes, making it easy to include this native superfood on your holiday table.
Including aronia berries on your Thanksgiving table is a simple way to celebrate a native, nutrient-packed fruit. Whether you use them fresh, frozen, or as juice, their unique flavor enhances sauces, baked goods, and drinks alike. Next year, consider planting your own aronia berry shrub and enjoy the satisfaction of serving a local superfood that’s good for both your family and the environment.
This article about the aronia berry was written for Hobby Farms magazine. Click here to subscribe.
Farmers’ market items can be a big hit during the Thanksgiving season. Whether your customers are shopping for gifts, preparing a holiday meal, or looking for unique seasonal treats, the right products can make their lives easier — and boost your farm business at the same time. From creative condiments and holiday spice mixes to meal kits, gift baskets, and seasonal décor, there are plenty of ways to offer shoppers convenient, thoughtful, and locally made options for the holidays.
1. Creative Condiments are Perfect Farmers’ Market Items
Every part of the holiday meal has room for the kinds of condiments you produce and sell at the market. Pepper jelly can be served with fresh goat cheese for a winning appetizer, and it makes a flavorful spread for a leftover turkey sandwich. Pickled vegetables can be added to an appetizer platter or complement a cheese tray. Canned cranberry sauces, ketchup and barbecue sauce can be served alongside the turkey.
Market these farmers’ market items in a way that highlights their value to a traditional Thanksgiving meal, and the leftovers that everyone looks forward to. Add a gift tag or provide a postcard with suggested uses. Just remember that when preparing value-added foods to sell, you will need to consult with your state’s commercial kitchen and prepared food laws to ensure you work within appropriate guidelines.
2. Holiday Spice Mixes for Thanksgiving
Everyone has that jar of poultry seasoning or pumpkin pie spice in the pantry that is used only during the holidays, and each passing year it loses more of its flavor. Packaging single servings of these classic spice mixes are appealing to shoppers who do most of their cooking during the holiday season.
Consider putting together a multi-pack of a seasoning to be combined with sour cream for an appetizer dip, poultry seasoning for dinner, pumpkin pie spice for desserts, and a mix of curry and other spices to stir into turkey salad for leftovers. Package a combination of herbs and spices, like chili powder, coriander and cayenne, to make roasted nuts, a seasoning mix for stuffing, and dried herbs to stir into roasted root vegetables. These are the types of products that are both helpful in the kitchen and can be given as a gift.
Chili Seasoning Mix Recipe
1/4 cup chili powder
1 T. seasoning salt
1 T. ground cumin
1 T. dried oregano
1 T. dried minced onion
2 T. sugar
1 T. dried parsley
Preparation: Mix all ingredients together. Store mix in an airtight glass jar in a dark place at room temperature. Use within six months for the best flavor. Shake well before using. (Yields approximately 3/4 cup.)
3. Easy Meal Kits and Mixes for Holiday Shoppers
Mixes and kits for side dishes and desserts are simple farmers’ market items that make it simple for your customers to put together a fresh, locally sourced meal. Do you sell freshly baked bread? Dry bread cubes and combine them with herbs and seasonings to package as a complete stuffing mix. Put together a pie or cobbler kit that includes a small pie pumpkin or canned fruit filling with all of the dry ingredients needed for a crust. A jar of dry ingredients for biscuits paired with sliced country ham and farm-fresh cheese makes an easy breakfast for a holiday morning.
If you still have fresh vegetables available, combine baskets of root vegetables like turnips, parsnips and carrots that roast well together and include a seasoning mix. Make a salad kit with fresh kale, dried fruits, nuts and seasonings to make a dressing. You can even package products like honey, nuts, cinnamon and homemade marshmallows and sell them with fresh sweet potatoes for a casserole.
Just remember that your customers will need guidance with these types of farmers’ market items. Prepare a recipe card that includes the additional ingredients necessary to complete the dish, as well as instructions on how to prepare it. Butter, milk and eggs are just a few of the additional ingredients they will need to have on hand. If you sell these items, add them to the kit. If not, consider working with another vendor to provide additional resources and increase sales for both of you.
4. Thanksgiving Gift Baskets Are Farmers’ Market Items That Sell
Selling gifts allows you to pull together multiple items that you have for sale and dress them up in bags or baskets so that they are ready to give as soon as the customer leaves the market. These items are perfect as hostess gifts or just to say “I’m thankful for you.”
Give the gifts a theme. For example, a pie basket for the baker may have winter squash, sweet potatoes, persimmons, citrus, canned pie fillings, crust mix, and fresh eggs and butter. A juice lover’s basket might include greens that can be juiced, such as kale, as well as carrots and apples. Consider adding glassware with your company logo for drinking the juice. Don’t limit your basket to food. A relaxing retreat basket might include alpaca yarn, knitting tools, a pattern, a mint herb mix for tea and a tea mug with your logo.
5. Seasonal Décor and Centerpieces for Farmers’ Market Items
Take advantage of selling your products for more than preparing the Thanksgiving meal. Consider offering holiday décor. Sets that include haystacks, winter squash, mums and flint corn can make you a one-stop shop for your customers’ decorating needs. Make wreaths with fresh herbs to hang on the door as a welcome to dinner guests or a vase of herbs for a centerpiece. Baskets in a variety of sizes with small squash and pinecones also make a great gift or centerpiece.
This article about farmers’ market items to sell at Thanksgiving was written for Hobby Farms magazine. Click here to subscribe.
When should you stop mowing your lawn before winter? It’s a good question. In the spring and summer, it can sometimes feel like you must get the lawnmower out every other day. And when you own farm property with large open grass spaces around the farm buildings, this may really be the case. Even late into the fall, cooling temperatures can actually have a rejuvenating effect on cool-season grass species—meaning that you might have a lush, tall, green lawn right up until the snow flies. But this brings up a question: Should you cut your lawn right up until the last moment before winter? Or is it better to leave a few inches of growth intact in the fall? What’s better for the lawn’s overall health?
When Should You Stop Mowing Your Lawn Before Winter? Keep It Up!
It’s best not to leave your lawn height too long over the winter. Continue your regular mowing schedule—never removing more than about 1/3 of the total length, and maintaining a height of around 2.5 to 3 inches. Keep this up until either the snow falls or there have been a few solid frosts that send the grass dormant. In very warm climates, there may not be a frost at all, and you may be mowing the lawn into December before it goes dormant. But in all cases, try to keep mowing as long as the grass is growing.
Why Mowing Before Winter Keeps Your Lawn Healthy
It might seem like leaving the grass long might help it stay resilient against winter weather. But long grass will end up lying down or being crushed down by the weight of snow, where it becomes a potential breeding ground for mildew and other lawn diseases. Tall, dead lawn grass is also a prime habitat for destructive voles, who will happily use the tall grass to form an elaborate series of tunnels and nesting areas.
How To Store Your Mower For Winter
Eventually, snow will cover the grass or it will simply go completely dormant. But before you park your lawn mower for the next few months, it can be beneficial to do a little maintenance to make sure that it starts up strong next spring. Consider pulling the battery and storing it ideally in a safe location where it won’t freeze. Adding some fuel stabilizer to the gas tank can help keep the fuel from going stale or gumming up the lines as it sits unused. And if you really want to get ahead on next spring, go ahead and change your mower’s oil and filter now. You’ll thank yourself later.
This article about when should you stop mowing your lawn before winter was written for Hobby Farms magazine. Click here to subscribe.
Looking for Thanksgiving table decor that’s inexpensive, fast, and still looks handcrafted and cozy? This DIY appliqué table runner uses simple materials like burlap and fall-colored fabric scraps to create a rustic, farmhouse feel. Best of all, you don’t need to be an expert seamstress. In fact, this project can be done with minimal sewing — or even no sewing at all if you choose to skip the topstitching.
Materials
2 yards of burlap
1/4 yard (each) of 3–4 fall-colored cotton fabrics
1 yard double-sided fusible web (such as WonderUnder or Steam-A-Seam 2)
Thread (contrasting color looks best)
Scissors
Iron and ironing board
Sewing machine (optional, but helpful)
1. Prepare the Table Runner Base
Cut a 14-by-65-inch piece of burlap.
Finish the edges by serging or folding under and hemming to prevent fraying. (Burlap sheds — be prepared!)
2. Create Your Appliqué Leaves
Print or draw simple leaf shapes.
Trace the leaves onto the paper side of the fusible web and rough-cut around each shape.
Place these traced pieces glue-side down on the wrong side of your fall-colored fabrics.
Fuse with a hot, dry iron (no steam) according to product instructions.
Once bonded, cut each leaf shape neatly.
Tip: This is a perfect task while watching TV or waiting in the car.
3. Arrange Your Design
Lay the burlap runner flat.
Arrange your fabric leaves in a scattered or clustered pattern — both styles look great.
Once satisfied with the layout, peel off the backing paper and press the leaves into place using a pressing cloth to protect your iron and the burlap.
4. Optional: Topstitch the Leaves for Perfect Thanksgiving Table Decor
Using a straight stitch and contrasting thread, sew around the edges of each leaf. This adds extra security and gives the runner a polished, handcrafted look.
Note: If you skip the topstitching, some edges may need reheating later — fusible web doesn’t always perfectly adhere to burlap.
Thanksgiving Table Decor: Final Notes
This DIY appliqué project is perfect for beginners, kids, or anyone looking to create personal Thanksgiving table decor without spending much money or time. The finished piece adds texture, color, and warmth to your holiday table, and you can customize it with any seasonal shapes or fabrics you like.
Just don’t forget: burlap sheds. Your sewing machine (and your clothing) might need a good brushing after.
Happy Thanksgiving, and happy crafting!
This article about DIY Thanksgiving table decor was written for Hobby Farms magazine. Click here to subscribe.
Abnormal chicken eggs are a fact of life if you’re keeping backyard chickens. One day, you find something that looks like an egg, but it’s not the same as all the others.
Maybe your unusual egg is unusually big, maybe it’s very small or maybe it doesn’t have a shell at all. You’ve discovered an abnormal egg, and you aren’t sure whether you can eat it, throw it away, or take a pic and post it to your Instagram account with your other photos of eggs.
For the most part, it’s normal for hens to lay abnormal chicken eggs. But sometimes it’s also an indicator of something you need to watch out for or a signal that your flock needs a change in their diet.
Abnormal chicken eggs come in all shapes and sizes. But you’ll see the following types most often.
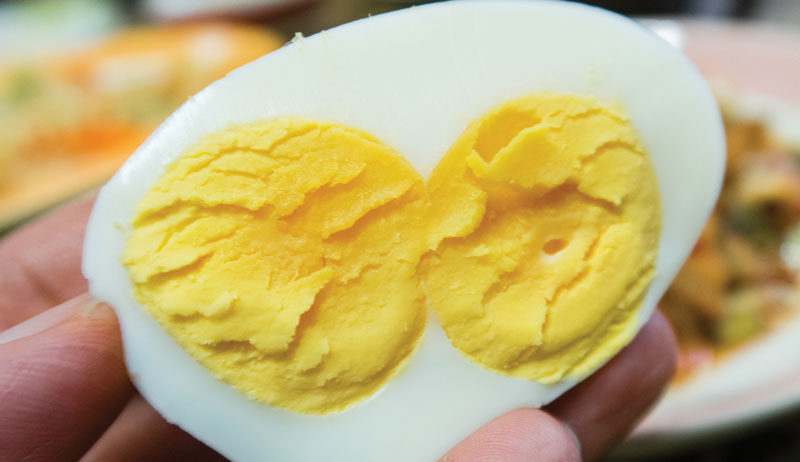
Double Yolk Eggs: A Little Something Extra
When you find an egg in the nesting box that’s quite a bit larger than your other eggs, you’ve probably found a double-yolk egg. You won’t be able to confirm until you crack it. When you do, though, you’ll find two normal-sized yolks inside.
A double-yolk egg happens when your hen releases two eggs in her oviduct and both eggs are included in the shell. While eggs like this are considered abnormal, it’s only a cause of concern if your hen becomes egg-bound because she can’t pass it.
Most hens, though, usually don’t struggle to lay the occasional larger-than-average egg.
Eating double-yolk eggs is like cracking two eggs at the same time. They’re such a popular treat that some shops in the United Kingdom offer a dozen guaranteed double-yolk eggs. If you decide not to eat it and you’d rather try incubating your double-yolk egg, your odds of succeeding are slim.
One embryo will almost always die before the hatch. Yet some people have successfully welcomed two chicks from a double-yolk egg.
Yolkless or “Fairy” Abnormal Chicken Eggs
When you crack an egg over a bowl or into a pan, you expect a yolk to come out. With a yolkless egg, the only thing you’ll see when you crack it is egg white. Abnormal chicken eggs with no yolk tend to be smaller in size, too.
If you raised chickens 100 or more years ago, you might have called this type of egg a witch’s egg or a fairy egg. It was common back then to think a rooster laid the egg. There were various superstitions attached to finding an egg of this type.
But the real reason it happens is that the pullet wasn’t quite ready to lay yet, or some reproductive tissue broke away. The egg-producing glands think it’s a yolk, and that fragment gets wrapped up in the egg-laying proces,s so yolk isn’t produced.
You can still eat a yolkless egg. It’ll be just like you’re eating an egg white after you’ve separated it from the yolk.
Egg Inside an Egg: A Rare Abnormal Chicken Egg
These abnormal chicken eggs might make you do a double-take. You crack an egg over a bowl, and instead of a yolk and egg white dropping out, you see another shell. These types of abnormal chicken eggs are technically called a counter-peristalsis contraction. More commonly, though, we call it an egg within an egg.
Finding this abnormal egg is definitely strange, but it’s not a cause for concern. It happens because the egg stops going through the normal laying process and reverses direction within the oviduct. The egg in reverse is added to another egg, giving you a normal egg within an eggshell. It’s pretty rare, but it can be caused by stress in the henhouse or just happen for no reason at all.
Once you crack the second eggshell, there’s no reason why you shouldn’t eat this type of egg.
Dirty Eggs (Causes and Cleanliness Tips)
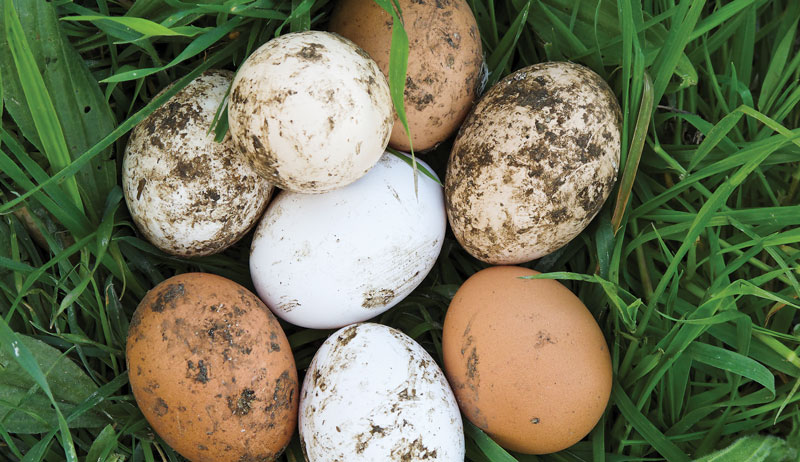
Mud, chicken manure, or some other type of debris covers these types of eggs. Eggs commonly get dirty when it’s raining outside, and a hen walks into the nesting box with muddy feet. This type of egg is streaked with debris or has large spots of dirty manure on the egg. Dirty eggs can also happen if your hens roost in their nesting box, using them as a place to sleep, go to the bathroom, and lay their eggs.
David Salcedo/Shutterstock
If your eggs are dirty because of the weather, you’ll want to ensure your hens have a clean nesting box and you check for eggs more frequently. If your hens are sleeping in their nesting box, redirect them to the roost, if possible.
Do you regularly get dirty eggs? It could also be a sign of a problem in your flock. Your hen could have watery droppings that they can’t control, resulting in a mess in the nesting box. Watery droppings can be caused by a virus, something in their food that doesn’t agree with them, or something in the water source, such as an electrolyte imbalance.
You can wash dirty eggs and eat them if you’d like. Some people, though, opt to toss them. Eggs are porous, and although you can’t see the tiny holes in the shell of the egg, the concern is that some of the debris will have made its way into the egg.
That’s usually not the case. You’ll know as soon as you crack it whether the egg is spoiled or if it’s safe to eat.
Shell-Less Abnormal Chicken Eggs
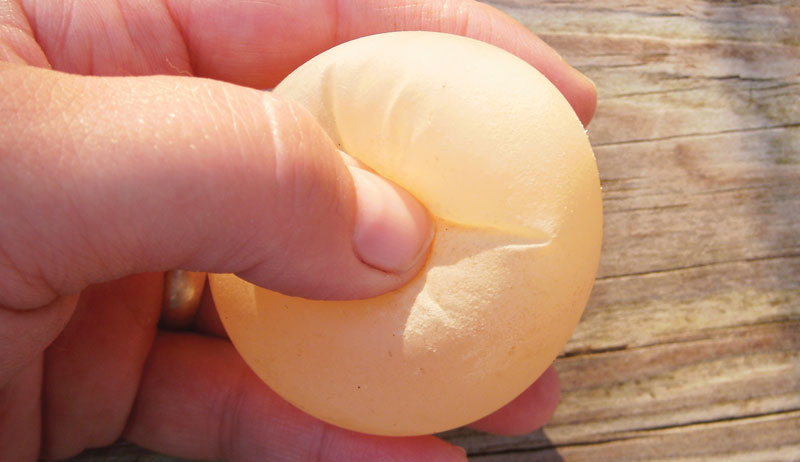
As far as abnormal chicken eggs go, an egg with no shell is quite a find. You’ll look into the nesting box and see a rubbery-looking egg shape with a clearly visible yolk. If you pick it up and hold it, you’ll find it’s fairly durable, but there is no eggshell at all.
An egg with no shell, also known as a shell-less egg, is rare. But almost all chicken keepers will find one at one time or another.
This occurs because the pullet is just starting to lay and its body is sorting out the kinks along the way. It can also be an indicator of a disease or infection. It may be a dietary issue or an indicator that your flock needs more vitamin D or calcium in their feed.
There is no problem with eating a shell-less egg. But you’ll have to cut it open with a knife to access the white and yolk.
Soft-Shell Abnormal Chicken Eggs
When your egg has a shell that feels paper-thin and you can easily pull it open without cracking it, you have a soft-shell egg. These types of abnormal chicken eggs show up in nesting boxes looking like they have an incomplete shell or a shell that’s missing a spot. They might even feel powdery and look as though you could keep wiping until the shell disappears entirely.
Denise Cogliando/Shutterstock
A soft-shell egg isn’t as rare as other types of abnormal chicken eggs. It can happen to a hen that’s at the end of her laying cycle. It can also happen due to heat or stress. But more often than not, farmers who find soft shell eggs in their nesting boxes keep flocks that need an added dose of calcium or minerals.
The first thing you can try? Add oyster shell or ground-up eggshells to their diet.
Eggs with soft shells are generally safe to eat, although you may want to make that decision once you crack it. On occasion, the eggshell could be so thin that you have an open spot in the egg. You’ll want to take a good look at it before eating.
Chicken Eggs with Blood Spots
Finding blood spots in your eggs is rare, but it does happen. It can occur when blood or tissue is released during the laying process after a blood vessel breaks. This will leave a spot or a streak of blood on the yolk or in the egg white.
Blood spots can happen because of a lack of vitamins in your hen’s food. It can also be a genetic issue. If a hen consistently lays eggs with blood spots, her pullets may also lay blood-spotted eggs as well.
It’s up to you whether or not you’d like to eat an egg with blood spots. Most people will find them a bit off-putting and toss them if there is a lot of blood or the blood looks bright red.
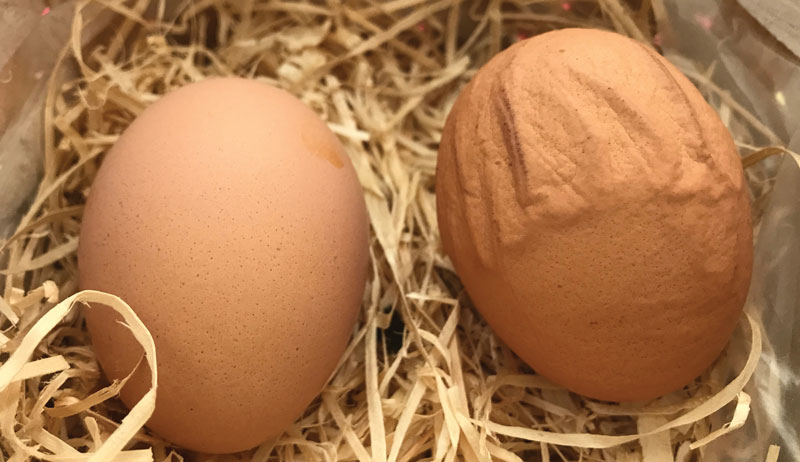
Internally Cracked Abnormal Chicken Eggs
If you find an egg with a line or seam in the shell, but it looks like it’s just below the surface, you may have an internally cracked egg. There may be a ridge on the egg that looks like it’s been patched or repaired. That’s almost exactly what’s happened.
kai foret/Shutterstock
During the egg-laying process, the egg cracked. But when calcification occurred, the eggshell was repaired.
An internally cracked egg can happen if the hen sustains an injury of some kind while her body is creating the egg. Sometimes it’s because of an aggressive rooster. Other times it’s because of a fall.
Internally cracked eggs are usually safe to eat, but you’ll want to crack it before you make that decision. If the egg is off-color or has an odor to it, you’ll want to toss it.
Two-Tone or White-Banded Eggs
Two-tone eggs look like your hen has decided it’s Easter and they’re going to decorate a few eggs for you. One half of the egg will be one color, the other half will be another.
Also called white-banded eggs, it can happen when two eggs touch during the egg development process. The first egg will have all of the calcium required to make a shell. The second egg will look like a shrunken balloon.
Two-tone eggs are usually caused by stress in the flock. The best course of action is to evaluate what could be causing stress and work to make your henhouse happy again. They are generally safe to eat. Some farmers, though, will toss them just in case the white and yolk have been affected during the laying process.
It’s always an adventure raising chickens, so you shouldn’t be surprised if your hens lay a few surprises for you once in a while. Abnormal eggs are all part of the process and adventure of keeping poultry.
Lash Eggs: The Most Serious Abnormal Chicken Egg
Out of all the types of abnormal eggs, a lash egg is probably the most concerning. Lash eggs are also called salpingitis eggs. If you find one, your hen is already quite ill.
Eggs like these will look very abnormal. It may have a bumpy, uneven surface, be an odd shape, or have a very thick interior with multiple layers inside. It may look so strange you aren’t even sure it’s an egg at all. Often you’ll see pus or some other indicator of infection on the surface.
Salpingitis or egg lash disease is a bacterial disease where your chicken’s oviduct is inflamed. Your hen has an infection, and that infection is ejected in egg form.
Depending on what type of salpingitis your hen has, it could be contagious to other birds in your flock. It’s almost always terminal unless you immediately take your chicken to a vet for evaluation or you treat with an antibiotic such as tetracycline.
You shouldn’t eat a lash egg. And you should be very careful with how you handle it as well. Bacteria can transfer from chickens to humans, so you’ll want to wear gloves when disposing of the egg.
Abnormal Chicken Eggs: Final Thoughts
Abnormal chicken eggs happen to every flock, and most are completely harmless. Keep an eye on patterns, offer a balanced diet, and make small management adjustments when needed. With a little observation and care, your hens will get back to laying normal eggs in no time.
This article about abnormal chicken eggs was written for Chickens and Hobby Farms magazines. Click here to subscribe.
What chickens lay eggs in winter? Many chicken breeds can lay eggs in winter with the use of artificial light and supplemental heat. However, these six breeds outshine other winter egg layers and have friendly personalities to boot.
#1 Golden Comet: Dependable Year-Round Layer
If you’re wondering what chickens lay eggs in winter, look no further than the Golden Comet. These hens are hands down the best winter egg layers for those looking to start an egg business, or for families who eat a lot of eggs.
The only downside to this breed as a winter egg layer is that their production lifespan is short, so hens need to be replaced every two or so years to keep egg production high.
A dependable year-round layer, Golden Comets produce an average of three hundred plus large brown eggs. Hens are usually early morning layers, making it convenient to let hens out in the run earlier in the morning without having unnecessary egg hunts.
Golden Comets are friendly, sociable, and enjoy interacting with their handlers. These sweet hens thrive on human attention, so if raising them also as pets, be prepared to spend a little extra time with them.
#2 Brahma: Superior Winter-Layer
If you have ever researched what chickens lay eggs in winter, you have probably noticed that the Brahma is one of the top winter egg layers. But did you know? Brahmas lay most of their eggs from October through May.
While this large breed rarely lays during the hot summer months, they are a dependable winter layer, averaging two hundred medium-large brown eggs annually. Brahmas are such good winter egg producers, the American Livestock Conservancy reports them as being “a superior winter-layer.”
Brahma hens are calm, easy-going, and tend to get along well with other chickens in a mixed flock. Despite their large size, the breed often acts as a peacemaker in flock disputes. The breed is also patient and tolerant in the coop.
With their handlers, Brahmas are friendly and make good pets for children and novices. A gentle giant, the Brahma is a good addition to any flock with its sweet and fun-loving personality.
#3 Salmon Faverolles: Friendly and Affectionate Winter Egg Layers
What chickens lay eggs in winter, and sport a fifth toe? The Salmon Faverolles. These delightful hens are a wonderful addition to the backyard flock as they dependably lay eggs throughout the cold winter months without the use of artificial light or heat.
While they may produce fewer eggs than other heritage breeds (about one hundred and fifty medium-sized cream-colored eggs annually), the Salmon Faverolles is a steady winter egg layer and during the coldest months will out-produce other breeds in the henhouse.
Friendly, sociable, interactive and affectionate, Salmon Faverolles make ideal pets. They love to interact with humans and are not considered to be an independent breed. (Meaning, they must have human interaction.)
The breed’s calm and gentle demeanor puts them at a disadvantage in a mixed flock, as they are frequently bullied.
#4 Orpingtons: Novice and Kid-Friendly
Orpingtons probably come to mind when considering what chickens lay eggs in winter. These fluffy hens are good winter layers, producing eggs during the winter when other breeds have halted egg production.
During the first year of laying, Orpington pullets will lay an egg every day without the use of artificial light. After the first molt, Orpington hens will continue to produce eggs throughout winter, but production will decrease. Therefore, artificial light is needed for those looking to see a consistent flow of eggs year-round.
Producing an average of two hundred to two hundred and fifty large brown eggs annually, Orpington hens are dependable layers.
Orpingtons are gentle, calm, active, friendly, and affectionate. With their people-loving personalities, the Orpington is a good breed for children and novices.
While the breed can be bullied when housed with more aggressive breeds, they often dominate the top of the pecking order when housed with other docile chickens.
#5 Plymouth Rock: Quirky and Curious
An iconic American breed, Plymouth Rocks are often overlooked when considering what chickens lay eggs in winter, as they lack the dense feathering of many of the breeds mentioned above. However, these hens are one of the best heritage breeds for year-round egg production.
Producing two hundred to two hundred and eighty large brown eggs annually, the Plymouth Rock often stops laying in late summer/early fall to molt before egg production picks up again in the late fall or winter months.
During the winter months, young laying pullets produce an egg almost daily without the use of artificial lighting. Mature Plymouth Rock hens will produce eggs throughout the winter months, but for daily egg production, adding supplemental lighting to the coop may be necessary to keep egg numbers consistent.
Docile, quirky, curious, and sweet, Plymouth Rock hens are a great addition to the backyard flock. They make good pets if handled frequently as chicks, but it can take them longer to become friendly and trusting than other, more sociable breeds. Therefore, they are not recommended for children or novices.
#6 Rhode Island Red: Year-Round Layers
It’s not surprising when researching what chickens lay eggs in winter, that the Rhode Island Red is one of the best winter egg layers. This hardy breed consistently produces eggs year-round and will even lay throughout the cold winter months with the use of artificial light.
Excellent egg layers, the Rhode Island Red is one of the top egg-producing heritage breeds, with each hen averaging 270 large, light brown eggs annually.
Friendly, calm, and curious, the Rhode Island Red does not require as much human attention as other breeds, but that doesn’t mean they should be overlooked as a pet chicken. While they may appear to have more of a standoff personality, they enjoy snuggling for a few moments with their favorite human and following them around the yard.
Bear in mind that Rhode Island Reds can be noisy, so they may not be the best choice for flock owners with neighbors close by.
Final Thoughts on Winter Egg Layers
What chickens lay eggs in winter? The breeds mentioned above are just a few of the best winter egg layers for backyard flock owners. With their good winter production and friendly personalities, these six breeds will make a wonderful addition to the backyard flock.
This article about what chickens lay eggs in winter was written for Hobby Farms and Chickens magazines. Click here to subscribe.
Native bee habitat protection is an important step toward keeping these helpful pollinators thriving from season to season. When winter approaches, many honey bee farms work to help their hives survive the cold and overwinter safely by providing additional food sources and keeping humidity in control. But while honey bees get much of the attention, there are actual steps you can take in the fall to help native bees make it through the winter as well, so that they’ll be ready to pollinate your garden next spring.
Encouraging the presence of native bees is something beneficial to all gardeners. You can help support the existence of these helpful common pollinators, including:
Bumblebees
Mason bees
Carpenter bees
Leafcutter bees
Miner bees
Sweat bees
Leave the Leaves to Protect Native Bee Habitat
When fall colors fade and the leaves fall to the ground, the first impulse is often to break out the leaf blower and rakes for yard cleanup. While this no doubt makes for a nice-looking lawn—and the leaves can even be used for mulch—it may also be beneficial to “leave the leaves” as is until spring. Native bees will often use leaf litter as shelter, and providing the insulating leaves until after the bees have reawakened in the spring can help avoid disrupting their hibernation.
Plant Stalks Provide Shelter for Native Bees
It’s nice to get your vegetable garden and flower garden beds cleared out before winter. After a hard frost, the amount of brown, faded plant vegetation is considerable, and cleaning this out in the fall gets you a nice head start before next spring. But for the sake of native bees, you might consider leaving some plants intact through the winter as bee shelters:
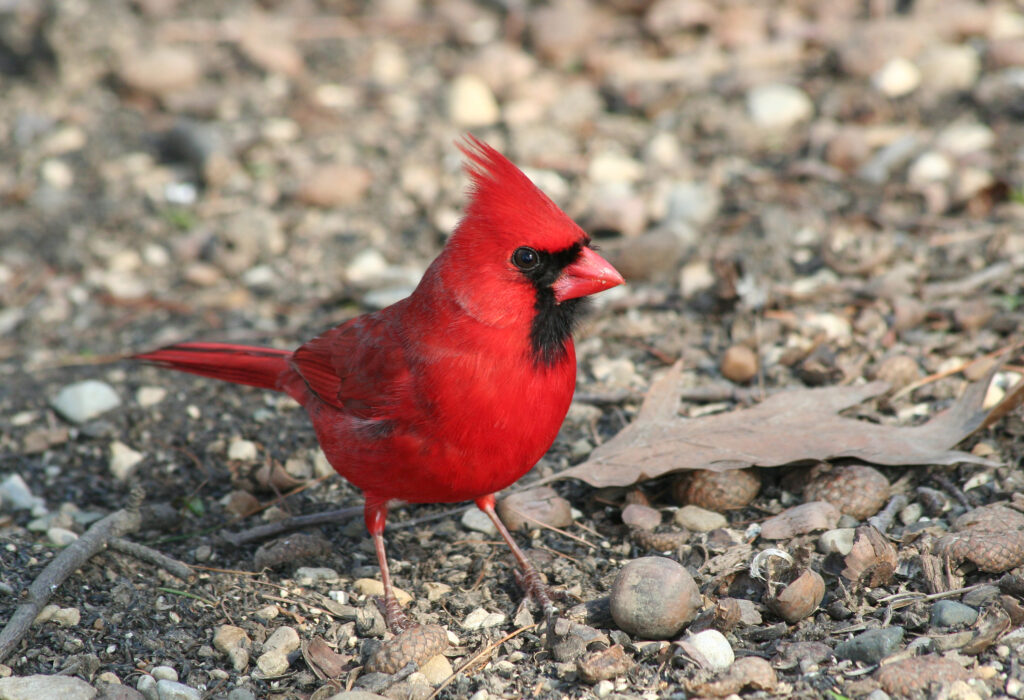
Sunflowers — Hollow regions in the dead stalks can be useful winter shelter for cavity-seeking native bees. Plus, the sunflower stalks themselves can make visual interest in the garden during the dormant season. Chickadees and other birds will also appreciate feeding on the spent sunflower heads.
Goldenrod — You might not purposely grow this attractive plant/weed, but leaving the thick stalks of goldenrod can also be a nice way to provide native bees with a hollow area for burrowing.
Coneflower — Another excellent option to leave intact; it provides winter visual interest and a hollow area for native bees to shelter in.
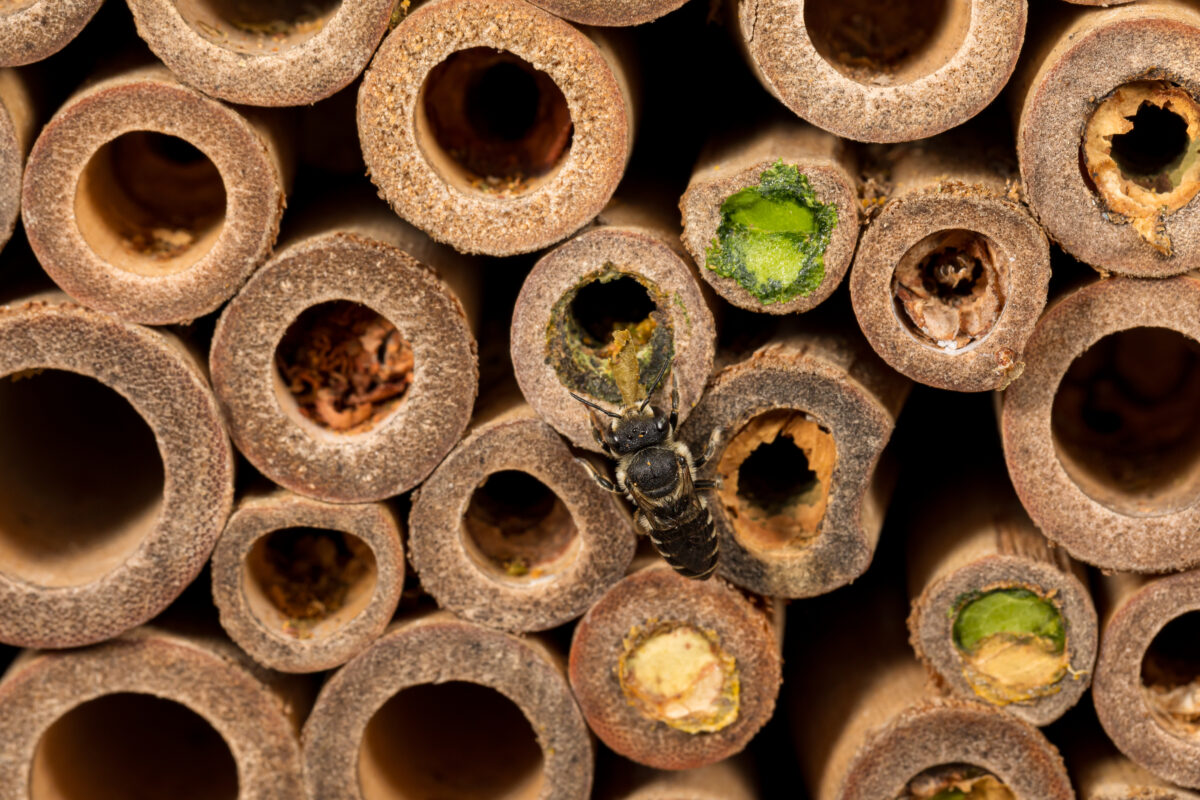
Build a Bee House to Expand Native Bee Habitat
This is a fun project that can be as elaborate and decorative or simple and utilitarian as you like. You can create a bee house that may attract native bees by drilling holes of various sizes into a block of wood—or even a stump—and leaving it in the garden. Alternatively, you could create a bee shelter containing numerous paper “straws” of various diameters and place them in a homemade “house” of your own design. Each bee will choose the diameter hole suitable for them. These can be great craft projects!
Supporting native bee habitat through the fall and winter ensures these essential pollinators return strong in spring. A few small changes in your yard—like leaving leaves, stalks, or building a bee house—can make a big difference for native bee survival.
This article about native bee habitat was written for Hobby Farms magazine. Click here to subscribe.


")