Categories
Beginning Farmers Equipment Farm Management

7 Barn Practices for Better Food Safety

For small-scale farmers wanting to show they’re serious about food safety, the Good Agricultural Practices certification is accepted industry-wide. GAP is USDA’s voluntary program to assess efforts in minimizing the risk of microbial contamination of produce and food items. Every farmer should take food safety seriously and have a food-safety plan in place, regardless of whether he is seeking GAP certification.

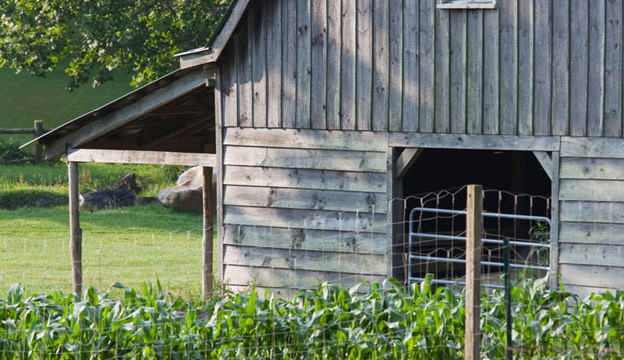
Many GAP guidelines are common-sense practices, yet some are easily overlooked. Here are seven things you can implement in your produce-processing barn, in particular, to build your food-safety plan and boost your GAP audit score.

1. Have a restroom with toilet paper, a sink, soap and disposable towels.

Chris Blanchard, owner of Flying Rutabaga Works and Rock Spring Farm in Decorah, Iowa, says there are three keys of food safety:

  • Keep poop off food.
  • Keep poop from spreading.
  • Keep poop from growing.

A primary means of achieving these objectives is by washing hands. Blanchard says you don’t necessarily need hot water or antibacterial soap, but you do need a dedicated sink for hand washing—ideally with hands-free handles—that drains away from food-handling and foot-traffic areas.

Post hand-washing protocols in the bathroom and at the hand-washing sink. According to the Food and Drug Administration’s “Guide to Minimize Microbial Food Safety Hazards for Fresh Fruits and Vegetables,” the importance of food workers understanding and practicing proper hygiene cannot be overemphasized. Workers can unintentionally contaminate fresh produce, water supplies and other workers, and transmit foodborne illness if they do not understand and follow basic hygienic principles.

Do not dry your hands on cloth/reusable towels—and especially not on your dirty jeans—as these tend to carry more germs than what you washed away. Let your hands air-dry or use paper towels. If the idea of using paper towels makes your sustainable-living side anxious, compost after use.

Keep the restroom clean and well-stocked.

2. Keep a first-aid kit.

Prompt treatment of cuts, abrasions and other injuries is an obvious good practice for your own health, and it reduces the likelihood of produce contamination.

Post health policies for all to read. These should include guidelines for not working when sick, seeking immediate first aid for injuries, and reporting illnesses and injuries.

3. Provide a separate break area.

Your own food—as in the food you’re eating—should remain separate from the food you’re selling. Designate an area for eating and smoking away from the processing area, and emphasize washing hands before returning to work with the produce.

4. Secure harvesting equipment.

Take measures to prevent critters from accessing your harvesting crates, knives and gloves. Outdoor crate storage might sound like a good idea if you’re short on covered space, but passing birds and wildlife can contaminate surfaces before the produce even comes in contact with the equipment.

Don’t use harvesting equipment for anything other than produce, and designate separate containers for washed and unwashed produce.

Keep a regular schedule for sanitizing harvesting equipment and document it. Wash off visible dirt after each use. Think about ease of sanitization when choosing your harvesting equipment, too: Plastic crates are easy to clean; wooden crates are not.

5. Reduce physical contaminants.

Physical contamination is a danger in processing barns, too, and often comes from above. Cover light bulbs and screen windows so shattered glass cannot fall onto your produce. Shield machine parts so grease, oil or metal shards can’t accidentally fall into processing areas. Have recovery procedures in place in case these accidents occur.

6. Exclude pests from the barn.

Insects, birds and rodents find their way into processing areas under eaves and through open doors and windows. You don’t need to shut everything up tight, but secure these areas with bird netting, screens or clear-plastic strip doors.

Repair physical damage to the barn, such as cracks or crevices in the floor or walls, that would allow pests to pass through.

7. Clean up.

Sanitize all areas of the barn and sweep up regularly. Keep in mind that brick, dirt and gravel floors and brick and wood walls are not sanitizable—this should be taken into account when applying for GAP certification.

Floor drains should be unobstructed; trash should be picked up; items not related to harvesting and processing should not be stored in the processing area; and objects above the processing area—pipes, light fixtures, fans and ducts—should be kept clean.

These processing-barn guidelines are just some of the ideas you should implement to boost your GAP compliance and make your food-handling practices safer. Your processing barn and your produce will be better for it.

Categories
Crops & Gardening

Crop Profile: Onions

While tomatoes and potatoes are often in the garden limelight, onions (Allium cepa) and other members of the allium family, are more widely used in cuisines around the world. They’re easy to grow, easy to store, good for you and delicious to eat. Originating in Asia and the Middle East, they’ve been cultivated for more than 5,000 years, are used for both food and medicine, and include hundreds of species—some are purely ornamental and make striking displays in our gardens, while others we use every day in our kitchens.

Onions come in a variety of shapes and colors: globe, flattened disks (cipollini) and torpedoes, and in various shades of red, yellow and white. They range in size from tiny boilers less than 1 inch in circumference to the whopping 5-pound Ailsa Craig, a sweet globe-shaped heirloom variety.

Plant Onions
Onions are classified by flavor (sweet or hot) and light requirements. According to the Penn State Extension, several factors can affect their sweetness, the main measure being variety, though climate and soil composition also play a role. Sweeter onions should be grown in consistently irrigated soil with naturally low sulfur levels, and should be harvested in moderate temperatures. Evenly spaced, less-dense plantings will result in less-pungent crops.

Light requirements for onions are broken down into two categories: long-day, needing 13 to 16 hours of sunlight to form bulbs, or short-day, needing 10 to 12 hours of sunlight to form bulbs. Plant short-day varieties in southern states and long-day onions in the North.

To grow all onion varieties, choose a plot in full sun, and pay close attention to soil preparations. Onions prefer pH levels between 6.0 and 6.8. Dig compost or aged manure into the bed in fall to break down over winter and be ready for early spring planting. Planting in raised beds is ideal because they have good drainage. Onion tops grow in cool weather, and the bulbs develop when the weather turns warm, so you can plant onions as soon as the soil is workable in spring.

Begin the onion plot one of three ways: seeds, transplants or sets. Seeds require the longest grow time—four months from seed to bulb—but give you the greatest number of variety options. Start the seeds indoors under artificial light about two months before you transplant them into the garden. Transplants (aka young seedlings) and sets (aka small bulbs) are the easiest to plant and the earliest to harvest. They are available from local garden centers or through mail-order catalogs.

Mix a 2-inch layer of compost over the row, and plant the sets 2 inches deep and transplants 1 inch deep, so the roots are covered but not too high up the leaves. Space plants 4 to 6 inches apart to give them plenty of room to mature. At time of planting, use a liquid organic fertilizer according to the directions on the bottle to get them off to a good start, and repeat when bulbs start to form.

Keep onions watered and weed-free to encourage large bulbs. As they start to mature, pull the soil away to expose the bulbs. The sun and air will help thicken the outer skin to ensure better storage.

Harvest Onions
When the green tops wither and start to turn brown, the onions have matured and are beginning to go dormant. Once most of the tops are brown, tip over each whole onion to break the roots. When soil is dry, gently lift the onions from the ground by pulling or using a fork to avoid bruising. Lay in a single layer on a screen in a warm (75 to 80 degrees F), airy spot to cure for about three weeks.

Store Onions
Sweet onions can be stored for a couple months in a cool, dry and dark place, such as the crisper drawer of your refrigerator or a root cellar. They have thinner, paler skin than hot onions with a variety of names, including Spanish, Walla Walla, Bermuda and Vidalia. (Only onions grown in a 20-county region in Georgia are distinguished as Vidalia onions, but they’re shipped to consumers around the world.)

Hot varieties, which have more pungent flavors, store better because they develop thicker tough layers on the outside. Hot varieties include Copra, Stuttgarter and Yellow Globe. Store hot onions at 40 to 50 degrees F in a dry, dark, well-ventilated area in baskets or mesh bags, or braid the stems and hang from the rafters. When ready to use, peel, chop and store in the refrigerator for up to a week or in the freezer for 10 to 12 months. Hot onions can also be dried in a dehydrator at 155 degrees F for eight to 10 hours (best done outdoors or in a garage, due to the pungent odor) and stored in canning jars for one to two years, but the equipment can be costly and requires more time to process than other storage methods.

Use Onions
Sweet onions can be eaten raw or slow-roasted to bring out their best qualities. High heat makes all onions bitter, so use medium to low heat, and don’t cut the onions until you’re ready to cook them, as their flavor deteriorates over time. A good rule of thumb when reading recipes: One medium onion equals 1 cup chopped.

Other Alliums to Rave About
While onions are a mainstay in most kitchens, other members of the allium family can add depth and interest to your meal preparations. Take a look at some other alliums to consider growing.

  • Scallions (Allium fistulosum, Allium chinense, Allium x wakegi, Allium x proliferum)
    Any onion can be pulled early and used as a scallion; however, there are specific varieties called bunching onions, or Welsh onions, that never form bulbs, which are more frequently used as scallions. Use in place of bulb onions for a milder flavor, or add raw to salads.
  • Leeks (Allium porrum)
    The perfect answer to a longer season of fresh onion flavor, leeks can withstand frost and be left in the ground until it freezes. Start indoors eight to 10 weeks before the average last frost, and plant as soon as the soil can be worked. Plant different varieties (early, middle and late season) at the same time in spring for a rolling harvest.
  • Garlic (Allium sativum)
    You’ll find two main subspecies of garlic: softneck and hardneck. Use the mature bulbs, or harvest young as green garlic and use like scallions, slicing the white part and tender greens. Scapes and green garlic are both milder than the mature bulbs.
  • Shallots (Allium ascalonicum)
    A favorite in France, shallots taken on a “fancy” onion status in the U.S. Like garlic, plant one bulb to grow a cluster. Related species include Egyptian (or walking) onions and multiplier onions, sometimes called potato onions. The flavor of shallots is sweeter, milder and a bit more complex than onions, and they are often paired with white wine, butter and cream.

This article was excerpted from the March/April 2014 issue of Hobby Farm Home.

Categories
Crops & Gardening

3 Herbs from the Carrot Family to Grow This Year

3 Herbs to Grow from the Carrot Family - Photo by Jessica Walliser (HobbyFarms.com)
Photo by Jessica Walliser

I’m planning to try a few new herbs in my garden this year. Although old standby’s like oregano, dill, thyme and basil will always have a home, I’m hoping to get a little more adventurous in both the garden and the kitchen this year by trying these slightly out-of-the-box herbs.

1. Caraway
A common ingredient in everything from rye bread to sauerkraut, caraway (Carum carvi) lends itself to a diversity of culinary experiences. A native of Asia and Europe, this 2-foot-tall herb is a biennial member of the carrot family. Grow it first for its enticing blooms and thread-like foliage, then let it go to seed for use in the kitchen.

Caraway is most often grown as an annual or biennial in northern regions and as a winter annual in the South. Because it typically doesn’t flower until its second year of growth, gardeners in the extreme north (zones 3 and below) may find it doesn’t always overwinter. The soft pink or white flowers it bears are small and diminutive, but gathered together like other members of the carrot family, they make a striking umbrella-shaped inflorescence (called an umbel). Caraway’s stems are hollow and the leaves are finely divided and feather-like. The leaves and flowers both have a licorice-like flavor and scent, and both can be used in the kitchen.

Caraway is a hospitable host to syrphid flies, minute pirate bugs, big-eyed bugs, lacewings, parasitic wasps and other beneficial insects.

2. Cumin
Another annual herb in the carrot family that I plan to try this year is cumin (Cuminum cyminum). The plant looks nearly identical to a caraway plant, but the foliage and seeds smell and taste completely different. Because it’s an annual, cumin will flower and set seed the same year it is planted. It bears white umbels of small flowers that also support many pollinators and beneficial insects. Ground cumin seed is a necessary ingredient in my homemade guacamole and pasta primavera. I’m excited to give it a go in the garden.

3. Chervil
And one last herb I’m going to try for the first time this year: chervil (Anthriscus cerefolium). Yes, this is yet another member of the carrot family, but this one is prized for its delicate and delicious foliage rather than for its seeds. A cool-season annual, chervil is easy to grow and has beautiful, soft green, ferny foliage. Its delicate flavor is mildly licorice-like. I’ve grown it in salad mixes but never as a stand alone crop. I think chervil gives its best flavor when in a fresh state; in my opinion, dried chervil tastes “muddy”.

I plan to start all three of these herbs by directly seeding them into the garden as soon as the danger of frost has passed this spring. With any luck, they’ll all eventually produce flowers and drop some seeds on their own, returning from year to year and providing me with many future harvests.

« More Dirt on Gardening »


Categories
Crops & Gardening

Garden Planning: The Cure for Winter Doldrums

Beat the winter doldrums by planning your garden. Photo by Dawn Combs (HobbyFarms.com)
Photo by Dawn Combs

In the dead of January, it can be particularly difficult to imagine that you’ll soon be needing to prepare the ground for planting. Just last week, we had an arctic blast of record cold weather, and the snow was piled up high against the back door. Here in Ohio, it can be a bit easier. One thing that is well-known about Ohio is that the weather is quick to change. This week, we have temperatures in the 50s, and the rain is bringing up the smell of wet grass and exposed earth.

Of course, it is still the middle of January and I must resist the temptation to break out the Mainliner. Next week, it will be cold again and the intoxicating smells luring me out into the garden will be muted. In the meantime, I have to find a way to keep myself on this side of the patio doors.

Whiling Away Winter Hours
When I can’t garden, I plan my garden. I suppose when the technology age delivered us online farming and gardening games, many of my fellow sufferers found an outlet. I never got into the games. Instead, I spend my time designing the next space. Last winter, I curled up with my seed catalogs and planned out how I was going to plant our seven-circuit labyrinth in the front yard.

Next Year’s Garden
Right now, I’m sitting in the middle of my favorite catalogs: Johnny’s Selected Seeds, Territorial Seed Company, Horizon Herbs, Companion Plants and Seed Savers Exchange. The floor is littered with the possibility of food, medicine, color and texture. We will definitely be expanding several of our current medicinal plantings. Sage will figure prominently in this expansion, and will most likely escape from their boring rows and out into a modified knot garden. We are planning a formal rose garden and a kids’ garden, whose hedge will be entirely made up of elder (Sambucus canadensis). The food gardens will be even more intermixed this year with the herbs. I am always exploring new companion planting combinations in hopes of greater and greater bounty for the table.

One of my favorite spaces that awaits is our outdoor classroom. For Earth Day this year, we will be inviting our community to come and help us build the decking and plant all around. As I will be sharing about how to grow and use our plant allies within this space, it’s important that we surround it with native medicinals. My husband has his M.A. in Landscape Architecture, and I’ve promised to get out of his way and let him have full control. I can’t wait to see what this next year will bring.

Winter is not a time of dormancy. The plant holds its energy in the root, dreaming of the leaves it will send forth into the sunlight in the spring. So, too, are we holding space for the dream of our continuing relationship with the land we tend. Dream big! The land is waiting to fulfill your garden plans.

« More of the Prescription Gardener»

Categories
Recipes

Pumpkin Curry Soup

There’s one real remedy to winter in Wisconsin: hot soup. It’s a good thing, especially this year, because our temperatures are regularly dropping below zero—not including wind chill. The garden gifted us with a bumper crop of pumpkins this past fall, so we entered the new year stocked with soup supplies. Below is our favorite new recipe of the soup season: Pumpkin Curry Soup.

Keep in mind a couple tips when cooking up Pumpkin Curry Soup:

  • We like to use the elongated New England Pie and Long Pie pumpkin varietals for their dense, rich pumpkin flavor. Any cooking pumpkin varietal will work, and you could even substitute a hard winter squash like butternut.
  • Make your own pumpkin purée. We make ours in the slow cooker. Pumpkin purée freezes wonderfully. We freeze it in 2-cup proportions in quart-sized freezer bags so we always have some on hand for easy soup (or for when a sweet craving kicks in). If you don’t have a fresh pumpkin on hand, you can use a 15 ounces canned purée, the equivalent of 2 cups fresh purée.
  • Make a double or triple batch and freeze it. Big-batch cooking works exceptionally well if you’re puréeing a lot of pumpkins at once. Freeze the soup purée before adding the coconut milk. Defrost and then add the milk; the milk tends to not freeze well.
  • The coconut milk adds a nice, subtle coconut flavor. We like to stock up on cans of coconut milk when we’re in the city and have access to an international or Asian grocery store where, coconut milk tends to be much less expensive. Don’t use “cream of coconut,” which has sugar and other sweeteners and thickeners added. Save that for the pina coladas! If you don’t have coconut milk, you can substitute evaporated milk.
  • While this soup tastes great on it’s own, we’ll often dress it up a little for a heartier meal. Try adding in some cooked wild rice or sprinkle croutons on top. (Check out our make-your-own-crouton recipe in our Farmstead Chef cookbook.) Cooked cut-up potatoes or chicken would also round out a nice meal. Play around with adding more curry for stronger flavor (and sinus clearing).

Check back next week for the perfect accompaniment to soup: make-your-own bread bowls.

Recipe: Pumpkin Curry Soup

Yield: 6 servings

Ingredients

  • 2 T. butter
  • 1 small leek, cleaned and chopped (or one medium onion, chopped)
  • 2 cloves garlic, minced
  • 2-3 tsp. curry powder
  • 3/4 tsp. salt
  • 2 cups chicken broth
  • 2 cups pumpkin purée (or one 15-ounce can purée)
  • 1 13.5-fluid-ounce can coconut milk

Preparation

In stockpot over medium-low heat, melt butter. Add chopped leeks and garlic, and sauté until very tender, about 15 minutes. Add more butter or dash of water if needed to keep leeks from browning and burning.

Increase heat to medium-high. Stir in curry and salt, and cook for 1 more minute, stirring constantly.

Stir in chicken broth and pumpkin purée. Bring to boil, reduce heat and simmer uncovered for 30 minutes.

Remove from heat and stir in coconut milk. Serve immediately.

Categories
Urban Farming

Almond Pinwheels

/images/blogs/pinwheels_490.jpg

Photo by Judith Hausman

Almond pinwheels are easy to make.


This not-exactly-local (in New York’s Hudson Valley anyway) offering began life as a spread that intrigued me. Instead of the usual olives, almonds are the base for this tapenade. Almonds are, after all, just as Mediterranean as the other stirring flavors in it: anchovies, capers and garlic.

Easily created from pantry items, this unusual hors d’oeuvres was a hit at book group and a conversation starter for sure. You can just enjoy the tapenade that way, served with crackers or pita triangles, but as I had so much leftover, I went further. I pulled a sheet of my trustee puff pastry (one of my secret weapons) out of the freezer. While it defrosted, I chopped up a few scallions for color and added them to the remaining tapenade, which I then spread all over the pastry. With a quick roll up, slice and bake, I turned the spread into adorable accompaniments for bowls of warming soup. And it was fun to make Sunday night leftovers into something special.

Classic olive tapenade or the pesto you froze last summer will also work beautifully as pinwheel filling. Maybe you even have leftover New Year’s champagne, instead of leftover soup, to enjoy with these easy but impressive canapés.

TAPENADE INGREDIENTS
  • 2 cups blanched, slivered almond
  • 1 1/2 cup water
  • 3 tablespoons Sherry or red wine vinegar
  • salt and pepper, to taste
  • 1/3 cup olive oil
  • 1/2 can oil-packed anchovies (4 to 5 filets)
  • 1 large garlic clove
  • 2 tablespoons capers

TAPENADE PREPARATION

Pulse the almonds in a food processor until finely ground. Add the garlic, and pulse again briefly, as chunky or smooth as you prefer. Stir in the water and vinegar, and let stand for 20 to 30 minutes. Then add the remaining ingredients, and pulse briefly again just until mixed. Note: The recipe makes about 2 cups, considerably more than necessary for the pinwheels below.

PINWHEEL INGREDIENTS

  • 2 scallions, finely chopped
  • 1 sheet frozen puff pastry, defrosted according to instructions on the box
  • 1 egg

PINWHEEL PREPARATION

On a lightly floured board, roll the pastry sheet out a little thinner. Then beat the egg with 1 tablespoon of water and brush the wash over the sheet. Mix the chopped scallions in with the tapenade and spread about 1/2 cup of it over the sheet, nearly to the edges. Then carefully roll it up, starting at the shorter end. Brush on more egg wash, and chill the roll for 20 to 30 minutes to make it easier to slice. 

Heat the oven to 400 degrees Fahrenheit. With a serrated knife, carefully cut the roll into 3/4-inch slices and arrange them on an ungreased cookie sheet. (Parchment paper or a silicon baking sheet is helpful.) Brush on a bit more egg wash. Bake for about 20 minutes or until golden. Cool slightly on a rack and serve.

Makes about a dozen pinwheels.


Read more of Locavore Recipes »

Categories
Homesteading

8 Budget-friendly Tips for a Farm Birthday

“Iddy up, orsey!” (child-speak for “Giddy up, horsey!”) is heard in my house at least six times a day, usually as Ollie, my soon-to-be 2-year-old, tries to convince our dog to give him a ride.  When we decided to throw a combined birthday party for him and four friends, the farm theme immediately came to mind.

We held the 100-guest birthday-party brunch at Zoomars Petting Zoo in historic San Juan Capistrano, Calif. Guests enjoyed a light brunch, pony rides, hands-on interaction with animals and plenty of games to keep them entertained. Best of all, thanks to some smart planning and a little bit of elbow grease, the five families who hosted didn’t have to break the bank to plan a memorable party.

Whether you live on a farm or in a big city, dreaming of your chance to return to rural bliss, the following tips and printable projects can help you plan your own budget-friendly farm festivities.

1. Themed Invitations
8 Budget-friendly Tips for a Farm Birthday - Photo by Emily Lawrence Mendoza (HobbyFarms.com)

An easy way to get your guests into party mode is to send them a fun, themed invitation. If you’ve got a stash of scrap-booking supplies, you can make these yourself. Otherwise, choose one of Hobby Farms’ free printable invitations and print it on quality cardstock. 

Download Farm Invitations »

2. Easy Decorations
8 Budget-friendly Tips for a Farm Birthday - Photo by Emily Lawrence Mendoza (HobbyFarms.com)

Printable bunting banners can be personalized with your guest of honor’s name, used to highlight food and activity stations, or simply hung along walls or ceilings to add little pops of color and an extra hint of party fun. Coordinating paper rosettes, look great hanging from fences, eaves or trees, and can even be used to create prize ribbons for game winners.

Download DIY Farm Decorations »


3. Simple Spreads

8 Budget-friendly Tips for a Farm Birthday - Photo by Emily Lawrence Mendoza (HobbyFarms.com)
A roll of plastic, gingham-print table covering paired with an 18-inch-wide craft-paper runner lends is the perfect palette for an array of budget-friendly centerpieces.  Vintage stoneware pitchers, tin cans or glass milk bottles make excellent vases for wildflowers. Alternative centerpieces include plants or baskets of fruit or berries. When your party is over, encourage guests to take the items as a favor. At the end of the day, the plastic and paper table coverings can be tossed in your recycling bin, making for very easy cleanup.

Tip: We stamped our paper runner with little custom name stamps found on Etsy to add a personalized touch.

100-foot roll of Gingham Table covering, $21 from OrientalTrading.com; 765 ft x 18 inch Brown Kraft Paper Roll, $24.82 from Amazon.com; Personalized Stamps $10.50 each from Etsy.com/shop/cupcaketree


4. Finger Foods and Snacks

8 Budget-friendly Tips for a Farm Birthday - Photo by Emily Lawrence Mendoza (HobbyFarms.com)
Brunch is an excellent time for a party. Not only does it accommodate little ones’ nap schedules, it lends itself to easy, no-mess, no-heat appetizers and snacks. Pastries, croissants and crackers are usually affordable and easy to buy or make the day before; plus, they keep well in most weather and usually don’t require utensils or refrigeration.

A basket of apples placed next to an apple slicer and cutting board encourages guests to help themselves to some slices without forcing you to waste time cutting fruit that doesn’t get eaten.  A platter of pre-sliced cheese pairs well with both the baked goods and fruit.

Stage the food with crates, baskets and dishtowels that color-coordinate and can be re-used on another occasion. Place beverages in a clean vintage cooler or galvanized bucket, or forgo all containers and offer a nice glass of signature drinks, such as lemonade, water with fruit, or iced tea in a large dispenser or carafe. 

If you have guests with special dietary needs or are serving food people might not recognize, consider labeling the items. The coordinating place cards available for download with each Hobby Farms party theme can also double as food tags. 

Download Farm Place Cards »

Tip: A crate flipped upside down works well for hiding extra food or napkins while serving as a riser for a platter or basket adding height to your bountiful buffet.


5. Cupcakes

8 Budget-friendly Tips for a Farm Birthday - Photo by Emily Lawrence Mendoza (HobbyFarms.com)
No birthday is complete without cake, but bakery cakes can be expensive, and slicing and serving cake can be tedious and time-consuming. Instead, opt to serve cupcakes. They’re pre-portioned, and best of all, you won’t need a bunch of forks or extra plates. Simple white-frosted cupcakes won’t stain clothes or teeth and can be easily decorated with the DIY Cupcakes Picks.

Download DIY Cupcake Picks »

6.  Smart Venue and Entertainment
8 Budget-friendly Tips for a Farm Birthday - Photo by Emily Lawrence Mendoza (HobbyFarms.com)
Having a friend play guitar for a fun sing-along is a simple way to add to the party’s ambiance, and activities are a must. Games and other activities can be as simple or complex as you want them to be—take a look around your venue for inspiration.

If horses or ponies are available, kids will love the chance to go for a short ride. Have friendly animals that need to be fed? Prep some baskets of feed and let the kiddos do your chores. If your location is more plant-oriented, set up an activity station where each kid can plant some seeds or start their own mini-garden. 

Feature that nice big tree with a classic party piñata. Piñatas are always a hit—pun intended!—but for younger guests, look for a pull-string piñata as a non-violent alternative. Each child takes a turn pulling a ribbon off the bottom and one finally opens a trap door releasing the candy and prizes.

Tip: Lay out blankets first and designate one for each age group to avoid smaller kids getting trampled in the candy-collecting frenzy.

Barn Piñata (pictured), $18 from Amazon.com. The barn doors on it even swing open revealing animals inside.


7. Fun Favors

8 Budget-friendly Tips for a Farm Birthday - Photo by Emily Lawrence Mendoza (HobbyFarms.com)
Continue the farm theme to the end by providing guests with a packet of seeds (packet templates available with each party theme package) or basket of berries. Or consider a favor that can be used during the party, like a bandana or a straw hat.

You can also send little guests home with a coloring book and some crayons.  Repurpose old, broken crayons by melting and pouring them into farm-animal-shaped molds. Put together your own coloring book by printing off HF’s farm-themed coloring pages.

Small, personalized containers of bubbles are an affordable favor and big hit with little kids during the party. You can even incorporate them into a fun party activity.

8. Photos and Thank Yous
8 Budget-friendly Tips for a Farm Birthday - Photo by Emily Lawrence Mendoza (HobbyFarms.com)
Don’t forget to take a lot of photos! Try to get at least one photo with each guest, and you’ll have a perfect item to send along with your thank-you cards.  (Coordinating thank-you cards are also available for download with each party theme package.

Download Farm Thank-you Cards »

About the Author: Emily Lawrence Mendoza is a graphic designer and mom who loves planning themed parties and going on fun adventures with her family. She lives in Orange, Calif., with her husband, almost 2-year-old son and a new baby on the way.


Categories
Homesteading

Farm Birthday Party Theme

View more party themes »

Invitations
Farm Birthday: Invitations

Thank-you Cards
Farm Birthday: Thank You Cards

Place Cards
Farm Birthday: Place Cards

Bunting
Farm Birthday: Bunting

Rosettes
Farm Birthday: Rosettes

Cupcake Picks
Farm Birthday: Cupcake Picks

Bag Toppers
Farm Birthday: Bag Toppers

Seed Packets
Farm Birthday: Seed Packets

Use these seed packets to capture the heart of your farm efforts and share them with your guests. Assemble the packets, fill them with your favorite seeds, and use them as party favors at your next event. For more information on creating seed packets and saving seeds, read “Tied Up in Seed” by Rachel Dorroh in the May/June 2012 issue of Hobby Farm Home.

Seed Packet Assembly:

  1. Print seed packet template on preferred paper.
  2. Trim away white areas of page, and cut along dashed line; you will have two packets to work with.
  3. Fold along dotted lines to create three flaps. The left side of the paper will become the back of the envelope.
  4. Fold down Flap 1 so it overlaps the back of the envelope. Insert 1/2 inch double-sided tape underneath it and press down. Repeat for Flap 2.
  5. Fold down Flap 3, but do not tape. Punch holes over marked circles, making sure to punch through the flap as well.
  6. Wind yarn or ribbon through holes, and tie shut with a bow.
  7. Write name of seed variety or paste a photo in the box located on the front of the packet.
  8. Write or paste seed name, growing instructions and other details on the back of the packet.

View more party themes »


Categories
Homesteading

Coping: Baseboard Installation

The title might lead you to believe that I’m just hanging on by a thread, but despite the myriad challenges and setbacks on the farmhouse-renovation journey, I’m doing relatively OK in the emotional department. When I refer to coping, I’m actually talking about the baseboards, not my mental state. (Don’t get me wrong, though— I’m one stressed out chick these days.).

When installing baseboards and matching them up at the room’s corners, there are two common options for making the ends meet: mitering and coping. The first involves cutting the ends of the boards at 45-degree angles so that they form a 90-degree angle in the interior and exterior corners. Coping involves cutting the end of one board so that it matches the profile of the other on an interior corner—you still have to miter exterior corners. Both techniques are designed to give your wood a finished look without any gaps where the boards intersect.

The method you choose is up to you, as they both require basic to intermediate carpentry skills, specialized tools and a considerable amount of patience. My husband was intrigued with coping because it was used in our previous house, and he wanted the same in this house.

Our home came with amazing 7¼-inch baseboards that we carefully removed and saved; however, the expanded floor plan meant that we wouldn’t have enough material, so we worked with a lumber mill to create a knife to match our baseboard profile. We then used it to make 16-foot lengths of primed poplar baseboards.

One of the biggest challenges to working with thick moulding has been its lack of flexibility. The wider the plank is, the more rigid it is. This meant we would need to use a shoe moulding, which is much more flexible, along the bottom to hide any imperfections or spaces where the floors and baseboards meet. Even this moulding received the coping treatment so that the end of one piece wrapped around the curved side of the other.

Another consideration I recommend addressing when using wide baseboard is how you plan to install the moulding where steps or other obstructions occur, such as making multiple cuts to wrap it around said obstruction or to notch the bottom of moulding so it runs along the tops of the stairs. As with all decisions in this process, it is a matter of preference and patience that will pay off in the end.

I can’t say with certainty that this method has added time to the overall project, but knowing that most of our volunteers would prefer to work with miter cuts has made me slightly leery of the coping technique. If you have helpers involved in any renovation project, I recommend making sure they’re on board with your decision so you can keep your project on schedule. I’ve been happy with the result so far and can’t complain too much—especially because I’m not the one doing the installation!

There are two methods of aligning the corners of baseboards: midering and coping. - Photo by Stephanie Staton (HobbyFarms.com)
Photo by Stephanie Staton

« More Restore Farmhouse Order»

Categories
Homesteading

A Roo Awakening: Nighttime Lists

A rooster provides a rude interuption for Kristy's nighttime list making. Photo by Kristy Rammel (HobbyFarms.com)
Photo by Kristy Rammel

As I attempt to drift off to sleep, my mind is reviewing my day’s to-do list, working on tomorrow’s list and remembering all the things I forgot. It seems like hours before my body’s exhaustion finally transcends my mind and rest begins. Yet in the midst of my winter slumber, I am awoken by the crows of an insolent rooster. My eyes strain to make out the blurry numbers on my alarm clock. 5 … no, S? What? 2—2:25! “Stupid rooster,” I mumble as I attempt to return to dreamland. Milk! I can’t forget milk at the store tomorrow. And so my list begins again.

Now, please understand, normally a rooster making a racket at such an unreasonable hour would cause concern, for my crew anyway. And it did—the first several nights, that is. Actually, the first three nights, you would have seen my husband and me outside in our PJs, muck boots and coats, armed with flashlights and a shotgun. On two prior occasions, this premature alarm signaled danger in the chicken yard and consequently saved all of its inhabitants. However, because the flock has been going to bed so early, this particular rooster feels 2:30 a.m. is a great time to get up and going. Stupid rooster!

It was in the midst of my nocturnal list making that I began to think about my January homestead list. January is half over all ready—can you believe it? It’s hard to envision spring planting when you’re wearing four layers of clothing, but she’s a comin’. Not to mention, if you sell bunnies around Easter like we do, breeding time is rapidly approaching. Is everybody healthy and happy and ready for their upcoming cavort? Are the nesting boxes clean? Do I need any more waters? Feeders? Do I have enough cream cheese for tomorrow’s dessert? (Yes, this is where my mind goes at 2:30 in the morning!)

Because I tend to forget at least half the things I’m supposed to do on any given day, I’ve become a calendar person. I put everything on the calendar. Yes, everything! But with four kids, one husband and a young growing homestead, a single calendar has become too cluttered for my ADD mind. My brain just cannot grasp the action to “breed bunnies” on the same day as “PTA meeting.” Something is just wrong with that picture! So, I have a calendar just for my little homestead and it hangs proudly next to my large family one.  

In addition to parent meetings and pre-romp preparations, January also brings about garden planning, seed ordering and even starting a few plants indoors. (Black dirt! Oh, how my fingers have missed you!)

This is also a prime time to take stock of your little farm hands’ supplies. Any tools of the trade they did not receive at Christmas, or needing to be replaced or repaired, can be purchased, sorted, cleaned and mended now. It’s amazing, but in the 18 years I’ve been a mother, I have never actually seen my children walk around the yard with a tool box and nonchalantly scatter its contents as though it were pixy dust, yet I pull back the frozen mud, snow, ice or straw to find a great surprise. A left glove, perhaps? An army dude? Hot Wheels car, flat-head screwdriver, snippers, clippers or cutters? Oh, what a treat every spring to see our pre-sowing harvest.

I do not toss the left glove I find “growing” under the winter terrain. I simply wash it and stash it away with all the other loners. When pulling out thorny weeds and prickly bushes it will not matter if your little one is sporting a red glove on one hand and a Spongebob glove on the other.  It will only matter that you, their caretaker, their protector from the pricklies, was prepared. So get their tools lubed, tightened and washed, and hide them until they’re needed.  Heroes don’t always wear capes; sometimes they wear aprons and muck boots.

Another January day has come and gone, and once again, I find myself making and checking my many lists. Typically all my greatest ideas come to me just as I slip from this realm to the land of sleep, but alas,  they always seem to evade me when the sun returns. (Sigh.) But on this night, my grocery list, my to-do lists and my “forgot-to-do” list is far from thought and mind. On this night, my thoughts are on the recipes I keep stored in my brain, and as my eyes close I try to decide roast chicken or chicken and dumplings. Maybe I will decide in the morning after I get a full, uninterrupted, night of sleep!

Kristy Rammel at Kids on the Homestead—Uncensored
About Kristy Rammel
A self-admitted former city girl, Kristy Rammel was “promoted” from AVP of Operations in a Fortune 200 company to VP of Homestead Operations and team leader of her family’s Animal and Child Disaster Response Unit. While many people work desperately to avoid the monotony of daily life, she prays for it. Come back each week to follow her wild, crazy, but never boring homesteading adventures with four boys.

« More Kids on the Homestead—Uncensored »