People have been keeping honeybees for thousands of years, and they have used the same beekeeping techniques for almost as long. Beekeepers or apiarists will inspect the frames inside the hive, monitor the queen’s behavior, check and treat for mites, and (if they’re lucky) collect honey when there is a surplus. While these methods are effective if everything is going right, there hasn’t been much a beekeeper can control when everything goes wrong.
Swarming, wasp attacks and hive theft cause farmers thousands of dollars in losses every year. Honey bees, while not yet in danger of extinction, are also suffering global losses in large part due to the use of herbicides and the constant threat of the varroa mite. These are just a few reasons why smart devices have moved into the world of beekeeping.
GPS-enabled smart devices and smart sensors will now monitor your hives without you needing to open the lid. You can use these smart devices to assess hive health, improve beekeeping productivity, and create healthier colonies.
They are also an excellent way to protect against hive theft.
How do smart monitors work for beehives?
Smart beehive monitoring uses a variety of sensors and GPS devices to track and monitor your hives. With these devices you’ll be able to keep a watchful eye over your bees from an app on your phone.
Here’s a quick look at what they can track.
Hive location
Honeybee hive theft is rising in the United States. In many states bees are considered livestock, and the theft of a single hive can cost the farmer a minimum of $500.
With a GPS device placed in your hive, you will know your hive is always right where you left it. These devices are helpful if your property is large and you have your hives placed in different locations. If the hive is moved due to theft, you’ll be able to track it in real time and possibly reclaim it.
Hive health
Smart devices can also track the conditions inside the hive. You’ll be able to ‘see’ inside without having to open the hive up at all, and they can track temperature, humidity, weight and other environmental factors.
With a sensor in your hive, you’ll know if you’ve placed it in an optimal location or if it’s facing in a direction causes the hive too much humidity or temperature change. You’ll also know when it’s time to look inside, and that can save you from needing to open it up too often.
Smart devices can’t prevent varroa mites. But they may be able to give you an indication of infestation by monitoring your hive population or tracking to see if there is a sudden drop in hive health due to illness or attacks.
Prevent bee swarming
There’s nothing like heading out to what was a busy beehive and seeing it empty. In the past a farmer had to make an educated guess as to whether the colony had swarmed. Today, smart devices can alert you to swarm behavior before it happens.
If you’re monitoring your hive on a day-to-day basis and you note potential swarming behaviors, you may be able to prevent it by splitting it or adding frames or hive boxes immediately.
What smart devices are available for beekeeping right now?
There are several smart devices designed to keep a watchful eye over your hives, but not all are available at the retail level or in the U.S.
Gobuzzr is a beehive monitoring system that uses sensors and an app to provide you with instant notifications about changes to the temperature, weight or humidity levels in your hive.
Beebot is another smart device that’s placed in the hive. It will track temperature, humidity and even monitor the bee’s buzzing for changes.
While these devices offer a lot of detailed information on your hives, if you’d like a quick and easy way to track the location of your bees in the event of theft, some beekeepers are using Apple Airtags. Airtags are not designed for use with livestock or pets, but if you add one to your hive, you would always know the GPS location of your bees and may even be able to track them if they are on the move.
It’s a little thing, but it could give you peace of mind knowing your bees are always where you left them.
When I first spotted the deer in my orchard, I assumed part of my fence must have been damaged. My orchard is surrounded by forest on three sides, and the fence weaves among trees to use them as fence posts, so the fence can’t be examined at a glance. I had to take a walk through the woods (braving mosquitos along the way) to check its integrity.
I was confused to find the fence in (mostly) good shape, still standing tall. There were a couple little issues here and there causing the fence to sag, but nothing too dramatic. And this remained the case even after the deer made its way into the orchard again … and again … and again.
Look Down
But on one occasion, I startled the deer and it promptly escaped by slipping underneath the fence, pushing up the black plastic with its nose and darting off into the woods. Suddenly, a lightbulb went on in my head.
It turns out that during the course of my many perimeter checks, I’d focused too hard on the height of the fence (to prevent the deer from jumping over) and not enough on the bottom of the fence where it meets the ground. When I’d built the fence, I’d folded the bottom 6 inches outward and pinned it down with metal stakes to discourage deer from pushing underneath.
But wear and tear over time had caused the bottom of the fence to break free of the stakes in some places. This provided opportunities for the deer to push the fence up, slip underneath, and wreak havoc.
Patching Things Up
At the moment, I’m in the middle of making significant fence repairs and improvements to end the deer invasion. Years of maple leaves blown against the bottom of the fence mark places where the deer clearly isn’t nosing under, but any place where the bottom of the fence is exposed is getting enhanced.
In some places, I’m stapling blocks of wood or old wooden fence posts to the bottom of the fence to pin it down. In other places, I’m installing sections of welded wire to create a strong barrier that can’t be pushed away so easily. I’m also planning to use a metal detector to locate the original metal stakes (which are buried under leaf litter at this point) and put them back into proper use.
It’s a time-consuming project, but I’m making progress. And I don’t think the deer has returned to my orchard in several days now.
It goes to show that when installing a deer fence, the integrity of the bottom is every bit as important as the height. Come to think of it, this is true for other types of fences as well. The key to constructing a garden fence to keep out rabbits, squirrels and other small animals is to bury the bottom of the fence underground so critters can’t burrow underneath.
Have deer been breaching your orchard fence? Give the bottom a thorough examination. Maybe, like me, you’ve been overlooking an obvious trouble spot.
Aheritage breed that originated in the late 1700s from the South Downs of Sussex County, England, Babydoll Southdown Sheep were imported to the United States in the early 1800s. Over the years, they grew in popularity in England and America, thanks to their cute faces, small size, sweet temperament and hardiness, with a lifespan of 12 to 16 years.
Typically, you’ll often see lambs available in white or black. As the black Babydoll sheep grow, they may appear browner, as the sun can lighten their coloring. Such is the case with my ewe, Coco. Babydoll sheep are commonly referred to as “smiling sheep” because they always look like they’re smiling.
Babydoll sheep offer organic grass and weed control, and with their small size, they’re much easier to handle than many other farm animals. Nitrogen-rich Babydoll pellets don’t create brown patches in the grass, too.
This breed makes great family sheep, especially if your kids want to get involved in 4-H. Once trust has been established, the sheep will eat treats right out of your hand. My family’s flock especially loves the occasional animal cracker.
With their gentle temperament, Babydoll sheep can easily become prey. Most of their injuries result from an attack, thus proper predator protection is key!
While they require annual shearing, their wool is one of the finest of all British breeds—short (typically 1 1⁄2 to 2 1⁄2 inches) with a micron count ranging from 24 to 29. Many sheep owners use the wool for needle-felting, but we typically send our wool to America’s Natural Fiberworks, a full-service fiber-processing mill in Somerville, Ohio, to have it blended and turned into various types of yarn.
Preparation
Before purchasing Babydoll sheep, assess your land and resources. Every five ewes and their lambs require about an acre of good grass pasture. Because Babydolls are flock animals, they should always be kept with at least one other sheep.
Clean, fresh water should also always be available. We have a pond on our property that our sheep have constant access to, but we always make sure we have fresh water as well.
Consider shelter, fencing and other predator protection options. Many breeders and hobby farmers have a livestock guardian dog (LGD) or guard llama.
Babydoll sheep are easy-keepers and require only grass or good-quality hay and sheep minerals for maintenance. Depending on your geographical location, you may need to consider multiple sources to purchase quality hay. As we have seen in recent years, depending on climate and inflation, the cost of hay can fluctuate. In some situations, hay may even become scarce in winter months. Finding a local farm to source your hay directly is always a great option. You’ll likely get a better price and higher quality hay. We live in a farming community and have partnered with a local farmer to source our hay for many years now.
Consulting a veterinarian is always a good idea prior to purchasing your first sheep. Locally, we have a veterinarian who makes farm calls, which is a great option—we don’t have to haul our sheep to be seen.
At a minimum, our veterinarian visits our farm once a year and is always just a phone call away.
Getting established with a good veterinarian who specializes in livestock in your area is highly recommended. Based on your conditions, your sheep may need to be dewormed a few times per year. Annual vaccinations are also recommended yearly for adult sheep.
We enjoy following along on various Babydoll Sheep Facebook groups, as they can be valuable resources for questions.
Amy Mings
Proper Shelter
As you assess your land and resources, consider where your Babydoll sheep can seek shade and shelter. Having a pasture with trees is ideal for natural shade in the warmer months. Depending on your geographical location, you will likely also need at least a 3-sided shed. The sheep will require cover and shelter from strong winds, rain and potentially cold weather elements such as snow and ice.
As you consider your structure, note which direction prevailing winds come from.
Fortunately, our property had a barn when we purchased it, and my husband added a shelter to protect our animals against the elements and offer plenty of shade in the warmer months. Keeping sheep closed in a barn is not a healthy environment for them. We have found that our sheep are much more comfortable in cold weather than in hot.
Along with proper shelter, consider where you will also store hay, grain and other equipment.
Predator Protection
Babydoll sheep typically don’t challenge fencing as much as other animals, so our primary concern has always been protection from predators such as dogs, coyotes and foxes. For our fencing, we opted for 2-by-4-inch welded wire verses hot wire or even hog panels.
My husband and I built the fencing ourselves, and while we felt it was secure, we knew we should also consider adding a LGD or guard llama to the farm. Llamas are known to instinctively bond with other animals and provide a high level of protection from predators such as coyotes.
After talking to other sheep owners, we decided a llama would be the best option for us. We loved that they would eat the same things as our sheep, and we were lucky enough to find a guard llama that had previously been with Southdowns.
Registered Lambs
While you can purchase adult sheep, it’s most common to start with lambs. They’re curious and loving, and have a little spunk! When purchasing lambs, registration is very important unless you are buying wethers (neutered males). Nonregistered sheep have a much lower perceived value and are only worth their weight in meat.
I would warn against purchasing lambs through Facebook or other online groups, as we have heard of many instances of scamming situations. Never put down a deposit for a lamb without thoroughly checking out the farm you are purchasing from. This is where registration is so important. Each breeder should be listed on one of the registries.
When purchasing lambs, make sure they’re registered so the necessary paperwork can be transferred. Note that the ear tag in the ear of the sheep matches the ear tag number on the paperwork. If you plan to breed your lambs in the future, registration will be worth the cost and effort.
Additionally, make sure rams and ewes are registered with the same registry. If not, you may not be able to register lambs produced.
Homecoming
Once you have found a reputable breeder and confirmed registration, consider how you will transport your lambs. We typically purchase one or two lambs at a time so we can use a large crate for transport. This allows us to put the crate inside our vehicle, so we don’t have to worry about outside weather conditions.
Transport services and delivery options exist with most breeders. As always, research your area and contact others that have used the service or delivery option before.
When you bring your lambs home for the first time, have a small area ready with hay and fresh water. Take some time to let the lambs acclimate to you and their surroundings. During the first few days, we like to offer grain (lamb-specific feed) as a treat.
Building trust is a process and takes time. Treat-training is a great way to help your lambs learn to trust and come to you when called. With our ewes and wethers for the first few days, we would spend a few hours a day near them, so they became comfortable in our presence. This is a great activity for younger children with proper supervision. To this day, our girls still love to sit in the pasture and sing and read to our Babydoll sheep! If you have other animals or livestock guardians, take introductions slow.
As flock animals, sheep need other sheep for constant companionship. If you’re looking for Babydoll sheep to assist with mowing or for harvesting fiber, a wether (which can’t reproduce) may be your best option. They cost less, are great with children and can be housed with ewes, rams and lambs. We started with wethers and can’t recommend them enough.
We now have ewes but not for breeding purposes. If you plan to purchase a ram for breeding, consider obtaining a wether or an additional ram for his companion. It takes Babydoll sheep two full years to mature into adult size, and breeders in the Midwest typically plan for lambing to occur in late March or early April.
Lambs are fed by their mothers or bottle-fed, if needed, and are ready for their new homes in about 60 to 80 days. Many reputable breeders have a waiting list, so keep that in mind as you consider the timing of starting your flock.
Amy Mings
Babydoll Maintenance
Babydoll sheep are fairly low maintenance, but they must be shorn each spring. Shearing doesn’t hurt them and is necessary so they don’t overheat and die in the summer months.
Thus far, we haven’t opted to shear our sheep ourselves. We usually try to partner with a local farm to have our flock shorn, and we have also used a traveling shearer that comes directly to us. For small flocks, it can be difficult to reserve a traveling shearer as they tend to make appointments early in the spring and gravitate toward booking larger farms first.
Last year, the traveling shearer we reserved canceled on us more than once. Luckily, nearby farming family members were able to help.
CDT vaccination is required yearly for adults, and we typically administer it the day our sheep are sheared. We also trim hooves at that time as well as when needed throughout the year, based on maintenance checks.
Deworming is another essential part of Babydoll maintenance. Worms can be a major problem for sheep and can cause them to suddenly become very ill and die. Deworming is particularly important for lambs as their immune systems are still developing.
We follow the FAMACHA system and deworm as needed. As you get to know your flock, you’ll quickly be able to point out those who may have an issue. It is imperative to have a trusted farm veterinarian that you can call during those times.
Our sheep have provided a wonderful way for our girls to learn important life lessons about responsibility, patience, constancy, communication and patience. We took our time researching the types of animals we wanted to bring to our farm, and it evolved naturally. We knew it would be important to start small so we could dedicate the attention and care required.
Our hobby farm has brought our entire family so much joy! It seems like our favorite days are ones spent outside watching the animals interact or working with our girls to help care for them. We are always learning something new, and we love doing it together as a family.
More Information
Start Small & Set a Budget
Make your plan and set goals. Many breeders raise lambs to sell, while other hobby farm owners opt for purchasing wethers and ewes for harvesting wool, 4-H projects, or strictly for enjoyment purposes. Before purchasing Babydoll sheep, consider all their associated costs, including shelter, protection, maintenance and care. As noted in the main text, the cost of quality hay can fluctuate based on climate and inflation.
This article originally appeared in the May/June 2023 issue of Hobby Farms magazine.
Building your own homestead takes time and effort. Small-farm success doesn’t just magically appear overnight. Likewise, raising your own cattle requires a commitment. You not only set up the facilities and make that initial purchase, but over time you must ensure good health, desired productivity and a quality life for them.
Cattle have some basic requirements, namely shelter, clean water and the appropriate feed to meet their various nutritional requirements. Nutritional needs will vary between animals, so it’s important to understand not only what your animal needs now (whether it’s a young calf or an older cow), but also what it will require to reach your desired goals later.
For instance, if you choose to raise a fat steer to butcher, you might want it to gain a certain amount of weight per day. In the cattle world, according to local rancher and longtime cattleman Todd Krispense, this is known as rate of gain. Todd also shared basic nutritional needs that cattle have (alongside clean water), which should be met within the appropriate feed ration.
These needs are:
Roughage
Protein
Energy
Vitamins and minerals
In this article, we’re taking a more specific peek at how our farm produces its own roughage for feeding cattle.
Roughage
Cattle require some form of “roughage” in their feed rations, which helps aid their digestive systems. This can come in the form of hay, grass, or even other feed such as milo or corn stalks. On our farm, we raise, swath, bale and feed our own brome hay and prairie hay (Bluestem grass).
Grass is generally quite high in protein content during its vegetative state, Todd shared. Once it reaches the reproductive state (when the seed head comes on), the plant begins to focus its energy into producing the seed head, sucking both the energy and protein from the plant itself. This in turn offers the cattle less nutrition as they eat it.
Once grass has reached this point and “gone to seed,” Todd suggests considering supplementing cattle with extra protein and energy sources to maintain good body condition.
Harvesting Roughage
Generally, the brome grass will reach maturity around the first of June, while prairie hay comes a little later in the season, usually around the early part of July. A swather is used to cut and crimp (break up) the grass, which is then laid behind it in a row on the ground called a “windrow,” and left to dry.
Sometimes, a tractor and large rake implement will be used to turn the windrows over to allow for more airflow and faster drying. A rake might also be used to pull several smaller rows into one larger windrow, making it easier to bale later.
Once the grass has reached about 10 percent moisture, it’s ready to bale. While some experienced farmers or ranchers might be able to gauge the moisture content by simply feeling a handful of grass, you can also get a moisture reading from a monitor inside the tractor that hooks to a baler.
Once dry, a tractor and baler will follow the windrow through the pasture, picking up the loose grass and compacting and rolling it tightly into a large, round bale inside the machine. After it reaches the desired size (round bales average around 1600 to 1800 pounds), the end gate of the baler lifts up and the bale rolls out onto the ground.
Eventually, the pasture will be dotted with round bales just waiting to be picked up and hauled back to the farm for later feeding.
Storage
When it comes to storing a large quantity of bales, my husband, Kolton Krispense, suggests not stacking them up but rather placing in rows (end to end) and leaving space to walk between the rows.
This allows sun and airflow to reach the bales easier. It also prevents moisture from just sitting in between them, causing mold and rot.
Feeding Tips
As you get ready to feed your round bales, Kolton recommended using a tub grinder or bale processor to grind them into smaller pieces that are easier for the cattle to digest. If you don’t have easy access to a grinder, in some places there are even hay grinding businesses that will come to your place and grind the hay for you. They have the set-up needed to lift the bales right into the grinder and then shoot the chopped hay into your desired location.
Good sources of roughage needn’t be limited to long-stemmed hay, either, so be open to other options such as corn or milo stalks.
While this setup seems to work for our farm, not everyone has access to their own swather, tractor, baler, etc. So it can be helpful to find a good source of quality feed that is local enough that you can haul or pay to have it hauled to your homestead. If round bales seem to be too big for you to handle or too large of a quantity of feed at one time, consider small square bales, which are usually anywhere from 60 to 70 pounds.
As you journey more into the world of cattle care and feeding, look for a trustworthy, local vet, rancher or cattleman that is willing to answer questions and help you set up a proper feeding plan.
It’s blueberry season once again, and we couldn’t be more thrilled. We preserve blueberries in a variety of ways to stretch the season throughout the year. We make preserves such as dehydrated fruit leather, water bath canned jams and sauces of various flavors. We also flash freeze them for later use in baking, smoothie making or for snacking on by the bowlful—one of my daughter’s favorite treats.
My personal favorite way to preserve blueberries is to make a classic blueberry jam. I enjoy gifting variety packs of jams over the holidays, and blueberry jam is always a hit.
There is nothing better than tasting the sweet taste of summer in the dead of winter here in Minnesota (it gives us hope and something to look forward to when it’s 15 degrees F below).
Yield: 4 (8 ounce) jelly jars
Ingredients
2 lbs. fresh blueberries (about 6 cups)
3 cups white granulated sugar
2 tbsp. lemon juice
Instructions
Wash blueberries, remove stems and any bruised or flawed berries. Add blueberries to a large heavy-bottomed, non-reactive pot, and use a potato masher to slightly break them down. Stir in the sugar and lemon juice.
Bring the ingredients to a boil, then reduce heat to medium-high and simmer for 20 minutes, until the jam begins to thicken. Stir often to avoid burning.
Water Bath Canning Instructions
Ladle the hot jam into warm prepared jars (jars that have been washed and kept warm prior to filling). Leave 1/4 inch headspace (room from the top of the jam to the rim of the jar). Wipe the rims of the jar clean, and place the canning lid on the jar.
Screw the ring on the jar until it’s fingertip tight. Just get it snug on the jar, not fully tightened.
Carefully lower the jars into a hot water bath and cover with the lid. Turn the heat to high and, once the water begins a rolling boil, set the timer and process in the water bath for 10 minutes. Adjust cook time for altitude as needed.
Once water bath processed, carefully remove the jars from the hot pot with canning tongs. Place the jars on a towel-lined surface for 12 hours without touching. After 12 hours, remove the jar rings and test to make sure that the lids have securely sealed onto the jars.
Label and date. These preserved jars of food will keep for one year in the cupboard. Refrigerate after breaking the seal.
Refrigerator Instructions
If you prefer to skip the water bath canning process, allow the jam to cool once it thickens. Fill clean jars with jam and tightly screw on the lids. Refrigerate.
Drylands don’t have to be dry. When we look at drylands across North America, they can look desolate and either devoid of greenery or lacking much in the way of green growth.But as soon as you go near a river, in the shadow of a mountain valley or anywhere where water is in relative abundance, then the trees get bigger. The density of plants is higher and the plants themselves are more lush and verdant.
This is because, of course, water is the key to life in areas of low rainfall.It is the weak link in production for states like Colorado, New Mexico, Arizona, Utah, Western Kansas, South Dakota, Eastern California and Oregon.This is similar in Canadian provinces like Alberta, Saskatechewan and Manitoba, and in areas of Mexico.
Anywhere in the world where water is scarce (or seasonally scarce), farm success hinges on water access and distribution.
Growing in Arid Environments
In New Mexico, where I have been conducting Surveys for Edible Ecosystem Design (SEED), the water-hungry farm production for fruits and vegetables is mostly allocated to narrow river valleys along the Rio Grande, Pecos River. You’ll also find farms near creeks in watersheds that feed the lowlands from the higher Sangre de Cristo, Jemez and Gila Mountains.
Ancestral systems of acequias (or water ditches) deliver water from rivers, like the Santa and Tesuque, to flood-irrigated fields in the shelter of hills and lowland woodlands. Here, historic flooding has left fertile alluvial soils.
However, land with surface and irrigation water rights is at a premium. This makes sense when you consider that every acre of land with access to river and acequia waters essentially gathers water from a much larger acreage of watershed catchment. But this land is also at a premium due to housing and tourism needs, where access to water for recreation (a river in a high mountain desert is beautiful) and watering of recreational and vacation home landscapes is also desirable.
Land with surface water rights in New Mexico, for instance, can be as high as $90,000+ per acre (without any buildings) in the desirable Galisteo watershed. It’s much more along the Santa Fe or Tesuque river, where housing is usually included with the land. When land like this experiences the pressures of tourism and dream property home owners, the fate of local farming is dire.
Key Takeaways
In this particular situation, my biggest thoughts are these.
We need policy to prioritize surface water rights for local food production and programs to help local farms own desirable properties with functional ease of irrigating food from rivers, creeks and acequias.
These lowland farms should focus on season extension to make the most of seasonal abundance from snow melt, including water holding strategies on the land such as ponds, tanks and bioswales in addition to rain catchment from roofs and drives.
New homes and rebuilds should be built on the sides (not tops) of the hills, and certainly not in the lowlands.
These mid-slope homes should have dry-land edible landscapes (edible xeriscape) that don’t require water.This can include plants like edible cacti, agaves, pinyons, wild berries and herbs, etc.
Graywater from all homes should be non-toxic and diverted to resilient edible landscapes within communities and be connected to municipal scale water catchment from roads and roofs.
None of what I say is new, but these are some of conclusions I’ve arrived at after surveying New Mexico recently. We must build on established design strategies that have been discussed for years, decades and even generations, and stop forgetting the good work done by people in brittle environments to make them more resilient to socio-economic and environmental change.
You can watch some of my Survey for Edible Ecosystem Design in New Mexico in this video.
The editors of Hobby Farms magazine are always on the hunt for great photos of livestock looking good while they say cheese.
In a recent print issue, we ran the best photos submitted by readers. Each one includes the name and city of residence of the person who submitted it.
Upload the very best digital images of your small- farm livestock toHobbyFarms.com/say_cheeseor email them directly tohobbyfarms@hobbyfarms.com, with “Say Cheese!” in the subject line. Include your name and address in the body of the email.
We hope to see your photos in an upcoming issue and on our Instagram account!
Diane Spisak / Wellsville, Kansas
Frank & Barb Ponge / Ramah, Colorado
Dawn Barnett / Herrin, Illinois
Kaitlyn D’Antoni / Moss Bluff, Louisiana
Jason Koltes / Statham, Georgia
Jamie Padovano / Richwood, Ohio
Debbie Bybee / San Tan Valley, Arizona
John Kaiser / Wood River Junction, Rhode Island
Candi Barnum / Garden Valley, California
Melissa Twine / Gilbert, Arizona
The Dokos Family / Aurora, Illinois
This “Say Cheese” gallery originally appeared in the May/June 2023 issue of Hobby Farms magazine.
The requirements to grow mushrooms are relatively simple. They need the proper temperatures to carry out various stages of growth, which is achieved simply by planting them at the right time. Mushroom inoculation (planting) can be done from March to October (whenever there aren’t regularly freezing temperatures). However, as they can struggle to thrive during the heat and dry of summer, they are best done in the spring or early autumn. Late autumn will not allow for proper establishment before winter dormancy.
Mushrooms need consistent moisture. This is imperative. If you can’t maintain adequate moisture levels, any other work will simply have been wasted.
Conveniently, mushrooms are shade tolerant. Though they don’t require it (in fact, most mushrooms do like some environmental light), this tolerance means they can occupy spaces where solar-powered plant life will not grow, and shade will help to maintain the moisture and high-humidity levels they want. However, their mycelium (the initial and underground growth of the mushroom) can’t be constantly wet, so they require adequate drainage.
The substrate, or growing media, each mushroom species prefers is an important distinction amongst them and perhaps how their production differs most from garden plants and one another. They may require straw, compost or wood chips (properly aged and not from an aromatic softwood) to provide the nutrients they want.
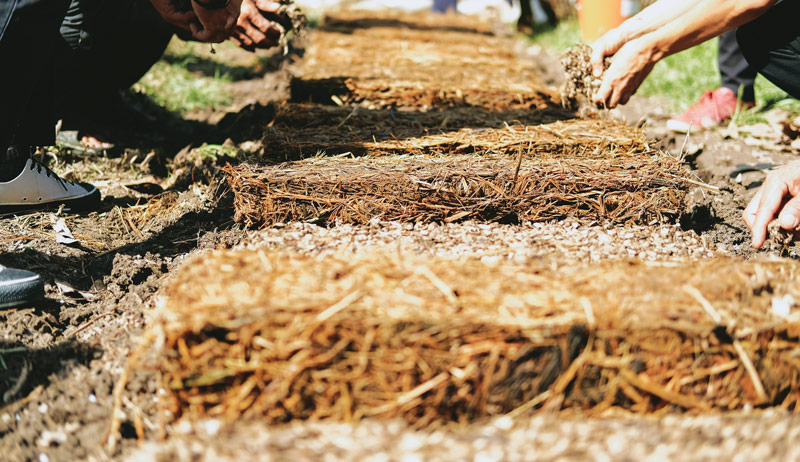
Areas are prepared for inoculation by digging a bed and laying down the proper substrate, which is presoaked for a head start on maintaining adequate moisture levels. The inoculant or spawn is then spread. Or, alternatively, thinner layers of substrate-inoculant-substrate-inoculant are used.
The completed bed is then covered with 2 to 4 inches of loose mulch (also called casing), typically of straw or chopped leaves. The casing helps maintain moisture levels and, when thickened for overwintering, protects against cold weather.
Mycelial growth uses the substrate (i.e., food source) you have provided until it’s exhausted and the area is colonized. This triggers the next stage of growth, which is the sexual reproduction of spores via the fruiting body of the organism—in other words, the mushroom. Complete colonization is very species- and growing-conditions dependent and could take from 6 to 9 months, or to 12 or perhaps longer.
Perfect Fits
Garden-friendly mushroom species are listed in this article. Within each species you can find specific strains that possess preferences in temperatures, planting times, light levels and/or substrates. Pay attention to these variations when selecting your inoculant.
Almond Agaricus (Agaricus subrufescens)
Closely related to the button mushroom, the Almond Agaricus boasts a similar shape with an off-white color. With a somewhat sweet taste and an almond scent, this mushroom fruits throughout a generous range of temperatures (50 to 95 degrees F).
Wine Cap (Stropharia rugoso annulata)
Also called king stropharia or garden giant or even Godzilla mushroom, this highly attractive species produces large, port wine caps (of 7- to 12-inch diameters) atop ample white stipes (stalks). An aggressive grower in sun and shade, the wine cap has a slightly nutty flavor.
Oyster (Pleurotusspp.)
Oysters are very aggressive and fast-growing. There are many species, which sport fluted or shelf caps and are grey, yellow, pink or various off-white shades in color.
Elm Oyster (Hypsizygus ulmarius)
With a firmer texture and richer flavor than the true oyster mushrooms it resembles, the elm oyster is larger and of a cream-to-white color.
Wood Blewit (Lepista nuda, also known as Clitocybe nuda)
The wood blewit possesses a sweet scent and an earthy, slightly yeasty flavor. It also has a sturdy stem and bluish-lilac cap.
Jimmie Veitch/Wikipedia/CC BY-SA 3.0
Bleu Foot (Clitocybe sordida)
Compared to the wood blewit, bleu foot has a milder flavor (somewhat sweet and earthy), an earlier fruiting date (due to its preference for warmer weather) and a darker cap, which is wildly wavy.
Shaggy Mane (Coprinus comatus)
This mushroom produces a bell-shaped cap with a flakey surface. It does well in exposed, grassy areas and is primarily an autumn fruiter.
Meeting Mushroom Needs
Mushrooms need to be planted on a substrate that will support their growth. While some species of mushrooms grow on very limited materials, others grow on more varied ones. Almond agaricus, bleu foot and shaggy mane grow best in compost. While wine cap mushrooms grow happily in straw and wood chips, the true oysters and elm oyster prefer straw and various organic waste materials (yard waste, coffee grounds, etc.). However, blewits can survive on compost, wood chips or waste materials.
Substrates that break down rapidly—such as straw and compost—offer a quicker mushroom harves. However, the bed as a whole will remain productive for a shorter time. Therefore, bleu foot tends to bring a very rapid late summer or autumn harvest from a spring planting (on a potentially short-lived bed), while wine cap plantings on wood chips take longer to fruit but yield repeated harvests readily.
88studio/Adobe Stock
Naturally, wine caps grown on straw yield a harvest more rapidly than when grown on wood chips. For species that can grow on many substrates, a mixture will often offer the best results.
Several components affect the speed with which mushroom colonization takes place, some of which are related to substrates and bed assembly. The larger the area you want to inoculate, the more spawn you will need for the process, or the longer it will take if you go light (“area” referring to both surface area and depth).
Thus, a 5- to 7-inch-deep bed will take longer to colonize than a shallower one but will produce larger mushrooms when it does and for longer.
The age of your substrate (i.e., state of its decomposition), its particle size (large or well chopped pieces of wood, straw, leaves, etc.) and its exact composition due to its parent species will all impact the process as well. And the season of planting, not to mention the exact temperature and moisture conditions, have their impact, too.
A wonderful aspect of mushroom production is its perpetual nature. Mushrooms will continue to grow in their established locations until they have exhausted all available substrate. Fresh substrate and mulch can be added after harvesting is done for the year to support new growth the following season.
Also, substrate colonized with mycelia (easily identified by its white appearance) can be taken from established beds and used to inoculate new areas. Properly managed, mushrooms will pop up for years!
Fungus Locus
It’s ideal to start mushrooms in areas free of perennial weed pressure. The best locations to establish your mushrooms are, quite naturally, dependent on the species and the arrangement in which you are going to place them. Those mushrooms that grow on substrate that also makes plants happy (such as compost) can more easily be grown within the same space. This would be the almond agaricus, shaggy mane, bleu foot and wood blewit.
For mushrooms that grow on wood chips and straw, some soil must be included while preparing beds for the plants’ initial growth, which is done for the oysters, elm oyster and wine cap. Alternatively, beds built solely for mushrooms can be prepared bordering vegetable rows. Mushroom mounds of this fashion are typically a foot wide.
Disturbance of mushroom mycelium means wasted growth (mycelium will have to reestablish itself wherever it is grown and destroyed, requiring the necessary resources be used twice) and lost time. Therefore, you must arrange your mushroom and produce crop planting accordingly.
Mushrooms may be planted around bed perimeters in the autumn, leaving a center space for produce planting in the spring. Following autumn-planted mushrooms with a crop in the spring often means you will harvest both that year. Crops planted in the early spring may be placed out at the same time as your mushroom inoculant, allowing simultaneous initial growth.
Nathan Wilson/Wikipedia/CC BY-SA 3.0
Some plants are better suited to fostering mushroom production than others. Plants that grow large, have large leaves and/or display a bushy growth habit later in the season when shading are ideal. Options include:
nightshades such as tomatoes, eggplants, garden huckleberries, cape gooseberries and your bushier pepper plants
brassica crops such as Brussels sprouts and broccoli (which are extremely responsive to the growth benefits described later)
some cucurbits—cucumbers, zucchini and summer and winter squash, bearing in mind that bush-type plants will allow better access to mushrooms than the extremely large, vining plants.
Other crops include straw-mulched corn (which partners well with wine caps), and pole beans or any other trellised or “teepeed” crops. Additionally, wine caps kill root nematodes, small worms in the soil which frequently damage crops. Growing them concurrently or rotationally with susceptible crops (including beets, carrots, tomatoes, peppers, cucumbers, squash and radishes) would be highly beneficial.
You should consider that integrating mushrooms into a crop you already mulch will save you from having to acquire more mulch materials beyond what you normally use, which is worth considering if your resources are limited. Also note that as an added insurance, growers sometimes do initial inoculations only on the north side of the plants, as they’ll better maintain the desired humidity levels and cooler temperatures on their shadier sides.
Finally, well-mulched and maintained perennial areas are another spot for mushrooms to grow. For example, asparagus and rhubarb beds, grape rows/arbors, perennial garden flower and herb beds and caning fruit rows are ideal.
More Than Mushrooms
The cultivation of mushrooms provides benefits beyond their value as a food source or additional revenue should you sell some harvests.
Fungi attain their nutrition by breaking down organic materials and are particularly valuable in the decomposition of cellulose and lignin, compounds that are especially persistent in woody debris. By unlocking nutrients from these materials and releasing them into the soil, their role as nutrient cyclers is invaluable and stimulates an increase in garden produce size, yield and nutrition.
Elm oyster and wine cap are extremely efficient in this role. Mushroom activity also decreases the need for additional garden fertilization. The mycelium of fungi improve soil tilth and aeration while enhancing its water holding capacity and thus increasing moisture availability for plants.
Collectively, this means improved soil structure.
Mushrooms grown within produce beds will function as weed suppressors, especially those that are larger and aggressive. Alternatively, a bed containing mushrooms may be used exclusively for vegetable production the following year, for which it will have produced a wonderfully conditioned soil.
Some practitioners of mushroom/produce intercropping and successional planting feel that with the excellent crop growth and soil benefits provided, the actual harvesting of mushrooms could be regarded as purely a bonus—a wonderful, edible, tasty bonus!
More Information
Location, Location
You can grow many of the following mushrooms in a diversity of homestead locations.
Landscaped Plantings
Shaggy mane and especially the highly decorative wine cap can be successfully grown in landscaped beds that have low-lying shrubs.
Compost Piles
They’re all about microorganisms breaking down waste materials into nutritive compost. Let the bleu foot and wood blewit have charge of your piles!
Greenhouses & High Tunnels
Almond agaricus, bleu foot and wine caps do very well underneath trellised tomatoes, cucumbers or other plants in covered production.
Straw Bales
For those who enjoy bale gardening, raising oyster mushrooms on them should feel natural.
Walkway Edges
Produce mushrooms on logs in the garden! Settle inoculated logs along your production bed perimeters or garden pathways—practical, productive and decorative. Place them on sand and cover with mulch for protection through the winter.
Certain strains of oyster are ideal for wood-based production. This is also your opportunity to try portobellos and shiitakes.
Pots for Logs
Short on space? Place your inoculated log (upright) in a flowerpot and start watering. Again, oyster, portobello and shiitake.
Plant Guilds (Orchards)
A guild is a grouping of mutually beneficial species, constructed to create an ecosystem-type setting that enhances the productivity of each member. They typically include trees, shrubs, vines and understory plants, and can easily incorporate oyster, shaggy mane and wine cap mushrooms as well.
Wooded Areas
If well-drained and weed free, the understory of trees (with dappled sunlight) provides an excellent mushroom area. You could grow elm oyster, oyster or wine cap, or even portobello or shiitake on any logs or tree stumps that need to be dealt with as part of your woodland management.
Hedgerows & Sheltered Fields
Again, if these areas are well drained, weed-free and have a protected soil surface (i.e., naturally occurring plant debris), you can introduce elm oyster, oyster or wine cap into the landscape.
Underneath Black Walnuts?
As anyone with black walnut trees knows, they produce a substance called juglone that prevents other plants from growing near them. However, mushrooms aren’t deterred as it doesn’t affect them. Furthermore, wine caps can neutralize the chemical, offering some protection to susceptible plants close by.
This article originally appeared in the May/June 2023 issue of Hobby Farms magazine.
In the second episode of the two-part series with the farmers at Urban Buds City Grown Flowers, Miranda Duschack covers urban cut flower farming, supporting farmers through an 1890 land-grant university and the realities of being a part-time farmer.
Hear about the history of the land that this farm sits on—it’s been a flower farm since 1870—and how it came into Miranda’s and Mimo Davis’ hands. Miranda gets honest about having to work off-farm to make a farm business work and her dream of farming full-time. Learn about agricultural census and National Agricultural Statistics Service data in an actually interesting way to understand the picture of small-farm profitability in the US.
Hear about Miranda’s role as a Lincoln University Small Farm Extension Specialist and how she’s using her Urban Buds farming experience to benefit the folks she serves through Extension—and how you can best work with your Extension professionals to boost your own farm dreams. Learn also about how Sustainable Agriculture Research and Education’s (SARE) grant programs work—including the Farmer-Rancher Grant and Youth Educator Grant—and the efforts of the Farm Service Agency’s new Urban Ag County Committee Pilot Program.
Listen to the first part of the Urban Buds City Grown Flowers interview, with Mimo Davis, in Episode 56.
Katy served as a specialist in the U.S. Army. Her husband, Rick, recently retired as a Chief Warrant Officer 4, also with the U.S. Army. As parents to two daughters, they had concerns as to what they were feeding their children and themselves.
Before long, this Army veteran couple founded Laetus Pullus (“Happy Chicken”) Farm and Perry Permaculture, growing fresh produce and raising chickens for eggs and meat.
Today, Katy and Rick are fixtures at their local farmers’ markets. Local shoppers clamor for their carrots, beets, garlic scapes, radishes, tomatoes, tree fruit and other delicious farm-grown vegetables. They also line up for their juicy whole chickens, boneless skinless breasts, thighs, wings and drumsticks.
As members of the Farmer Veteran Coalition, Katy and Rick not only are able to brand their farm’s products with their own logos. They can also use the Homegrown by Heroes emblem.
Homegrown by Heroes
Homegrown by Heroes (HBH) is the official branding program offered throughout America by the Farmer Veteran Coalition. The HBH logo informs consumers that the agricultural products bearing this tag were grown or raised by U.S. military veterans.
Laetus Pullus Farm
The tag is not just for poultry and produce farmers, however. Any rancher, farmer or fisherman who served in the U.S. military at any point in their life, including currently, can apply to use the HBH logo.
Eligibility requirements for the HBH branding state that veterans must have been discharged honorably or under honorable conditions. All farming, ranching, fishing and agribusiness operations must be at least 50 percent veteran owned, as well as at least 50 percent veteran managed or controlled.
In addition, any value-added products—raw agricultural products that have been enhanced or modified to have a longer shelf life, such as salsas, jams, pies, and jerky—produced by an HBH-certified veteran must contain a minimum 50 percent non-water ingredients. In other words, items actually grown or raised by the veteran.
In the increasingly competitive cottage-foods industry, having a connection with the Farmer Veteran Coalition can be the boost that a veteran-owned farm needs to gain point-of-sale recognition in the marketplace. The HBH logo—a bright red, white and blue emblem featuring saluting male and female military silhouettes—easily stands out on egg cartons, Community Supported Agriculture (CSA) farm-share boxes, packaged meats and more.
And the HBH logo’s very design invites people to ask what it stands for. This can open valuable communication with potential shoppers and help to develop connections with returning customers. Given America’s love for its military veterans, branding farm products with the HBH logo allows consumers to show their support for veteran agriculturalists.
Katy and Rick have certainly appreciated the benefits of having the HRH logo and HRH signs. Over the years, they’ve developed a loyal following of customers who love not only the quality of the chicken, fruits and vegetables that their agribusinesses produce but also that their farm products are homegrown by two local heroes.