Categories
Beginning Farmers Crops & Gardening Farm & Garden Homesteading

Tips For Getting Kids To Help Out Around The Homestead  

We love growing our own, and so do our kids—from purple carrots to the perfect green bean! By getting kids to help on the homestead from an early age, it becomes something they love, too. 

As hobby farm enthusiasts, you’re no doubt on board with getting your hands dirty and doing it yourselves. But getting kids in on the process can prove to be challenging.  

Here are a few tips and tricks we can start now to ensure years of help from our kids—before they fly the coop! 

Kids are not born farm hands, but they learn fast and love to imitate us, especially if we’re having fun. So often it was my boys who helped me stop and savor a moment in the garden—appreciating buzzing bees, the smell of a flower or stopping to enjoy a few pea pods fresh from the vine.  

Little hands can do a lot of work!  

Here are a few pointers when getting kids into around-the-farm work.

  • Set up the expectation that gardening and raising animals is a process that doesn’t need to be perfect. There will be mistakes, but we get to learn from those mistakes and do better each season. 
  • Develop a plan for what you want kids to help with ahead of time in order to keep things moving. Depending on the age, kids can usually help for one to three tasks in the garden before they are done. At first this may take more time than doing it yourself, but eventually they will be a huge help. 
  • Find jobs that have an obvious finish line, so they can feel a sense of accomplishment.  

Read more: Check out these farmhouse chores for kids of all ages!


Common Jobs for Young Children

Not sure where to start? Here are some common tasks that are right for kids as young as 5 years old. 

  • Fill up a bucket. Task your young helper(s) with filling a bucket with dandelion heads (for jelly), pinecones (for fire starters) or weeds. 
  • Plant seeds. This is a favorite for kids. Prep the area ahead of time or let them loosen the soil. Show your kid helpers how deep to dig—kids love measuring with their own body (knuckles are a favorite). Then give the children only the number of seeds you want planted and show them how big of a space they should plant in. You can also make holes first and have them fill holes with seeds, which works great with beans and corn. 
  • Watering.  Give each of your kid helpers their own watering can. A sprinkle spout can do wonders both for keeping them busy and helping your garden grow. I avoid hoses in the garden for kids under 10. 
  • Weeding. Show them one or two easy-to-identify weeds to pull at a time (creeping Charlie, grass, etc.), and give them a time limit. Define a space or a bucket to fill so they know what’s expected. 
  • Harvesting. This is everyone’s favorite part! Set a specific number of items to harvest—for example five carrots, 20 beans—to help them focus. Or let them go crazy and harvest the whole bed! Also, taking beans out of pods and corn off the cob are favorite activities for littles.  
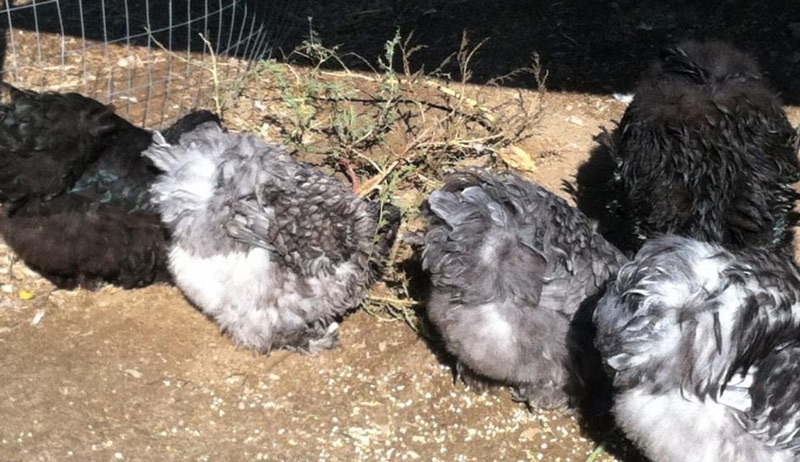
  • Collecting eggs. Tasking your youngest kids with egg collection duties help them understand the importance of gently handling our food and leads to a deeper respect for food we eat. 
  • Preparing the harvest. Having them rip lettuce leaves, scrub carrots and potatoes, or lay out herbs to dry connects them with their food and gives them a sense of pride that rivals our own joy in growing food for our families! 

As they get to around 10 years old, they can start to mow, till, and really help clean the coop and weed for longer times. And remember that, just like for us, making it fun makes a difference! So grab some lemonade and get some music, a podcast or an audio book going, and get your kids out into the homestead with you. 

And it’s OK if kids get distracted by butterflies, worms etc. They’re outside with you and, eventually, they’ll get the job done. Spending time with your kids on the homestead you love is really what it’s all about! 

—Michelle Bruhn
Founder, Forks in the Dirt
Co-Author, Small-Scale Homesteading

Categories
Podcast

Episode 54: Rachael Harrop


Hobby Farms Presents: Growing Good, Rachael Harrop

Rachael Harrop talks about agriculture in the Isle of Man, the Manx Wildlife Trust, rare British sheep and more.

Get to know the Isle of Man, a Crown Dependency island in the Irish Sea, which is the only UNESCO Biosphere Nation in the world (but is more famous for its TT motorcycle road races). Hear about how Rachael started raising rare British Teeswater sheep, which she grazes in a community orchard in Patrick and keeps for their wool. Learn about her breeding program, how to select sheep for their fiber, and the challenges of maintaining a flock on a small island. Rachael also talks about her family’s fiber arts, Willing Heart Wool, their wood processing and natural dying.

Hear about the Manx Wildlife Trust and its partnership with the Isle of Man government to manage the Agri-Environment Scheme, enabling farmers to work better with wildlife. After just two years, 69 percent of farmland on the island is enrolled in the program—which is 49 percent of all land on the island! Forty-three initiatives put forth by the program, plus those suggested by farmers for their own land, offer farmers payments for farm-management projects that benefit conservation on the island. Rachael talks about some of the farm-management projects and some of the wildlife—including fungi!—being protected through the Agri-Environment Scheme.

Listen to the end to hear about Rachael’s hopes for the future of farming in Isle of Man and her favorite all-Manx—meaning from the Isle of Man—meal.

LINKS

Categories
Animals Breeds Chickens 101 Farm & Garden Poultry

3 Endangered Ornamental Chicken Breeds

While most flock keepers choose their chickens for egg production, meat or companionship, some select birds solely for appearance. Keeping ornamental poultry is a centuries-old hobby, with fowl fanciers from 6th-century Chinese Emperor Gao Wei to 19th-century British Queen Victoria creating special spaces for their avian collections.

Keeping ornamental birds isn’t just a royal hobby, however. Anybody who admires the delicate, natural beauty of these charming chickens can create and maintain an ornamental aviary.  

Most North American chicken breeds, however, were developed to be dual-purpose birds. As a young country, the United States opted for practicality versus aesthetic in the coop. As a result, the majority of ornamental poultry found in the US originated elsewhere in the world. The following three breeds, all ornamental chickens imported before 1900, are now classified as critically endangered according to the Livestock Conservancy.

If you’re looking to add an eye-catching chicken to your backyard flock, consider one of these exquisite and endangered ornamental breeds.  

Sebright 

The genetic origins of the British Sebright (pictured above) are a complete mystery. All that is known is that Sir John Saunders Sebright—the 7th Baronet of Bedford, Worcestershire, and a Member of Parliament—traveled around Great Britain collecting oddball birds from local poultry farms. It is believed that he also imported chicken breeds from other countries.

Sir Sebbright’s goal was to create a bantam breed with a distinctive lace pattern in its plumage. The result of his breeding experiment, the Sebright, was officially introduced in 1810, decades after he began his experiment.   

A true bantam, the Sebright has no standard-fowl counterpart. The male Sebright has the same coloration and feathering as the female, with tail angled upward at a 70-degree angle and wings angled downward. The Sebright’s upright carriage causes its breast to just out prominently.

Sebrights have bright black eyes, mulberry rose combs and wattles, and slate-blue skin and shanks. They come in two color varieties, Gold Laced (orange) and Silver Laced (pearly gray), each displaying the distinctive black lacing that Sir Sebright strived to achieve. Both varieties are visually striking, with the Golden-Laced Sebright resembling monarch butterfly wings.

At maturity, the Sebright just weighs about 1.5 pounds (male) and just over 1 pound (female). 

 Sebrights are purely ornamental. The hens are not broody, make poor mothers, and produce only 60 to 80 tiny eggs per year. They are excellent flyers and will roost in trees if given the chance. They do best in warm, dry climates and, if handled frequently while young, will develop into friendly adults.  


Read more: Consider adding these 3 critically endangered chicken breeds to your homestead!


Sultan 

Originally known as Serai Taöok—the Sultan’s palace fowl—the Sultan originated in Turkey during the 14th century and was supposedly used as living ornaments in the gardens of Ottoman Empire sultans. They arrived in England in the mid-1800s during the midst of the Hen Craze. But they were in such a matted, muddy condition that it wasn’t until the chickens molted that it was realized the birds were a brilliant pure white.

meraleguz/Adobe Stock

In 1867 the Sultan arrived in America, where poultry expert George O. Brown noted that these were the tamest, most content chickens he had ever kept. In 1874, the Sultan was included in the American Poultry Association’s (APA) first-ever Standards of Perfection. Despite this, the ornamental breed almost went instinct in the 1930s and remains critically endangered today.  

The Sultan is an aesthetically stunning bird, with

  • a V-shaped comb
  • full crest, beard and muffs
  • white or pale beak
  • bay-red eyes
  • five-toed, fully feathered legs with slate-blue shanks

At maturity, males weigh about 6 pounds, while females reach 4 pounds. Sultan hens do not go broody. They lay approximately 50 small white eggs per year.

They thrive in warm, dry climates as long as they have access to shade and cool water, and do well both in confinement and as living yard ornaments. Because of their full crests, they are prime targets for predators and tend to be bullied by larger, more assertive birds.

They love interacting with humans, however, and enjoy being cuddled, often singing a contented song when they are happy.  

White-Faced Black Spanish 

The Spanish chicken’s distinctive white face and earlobes are not only what sets this elegant bird apart—they are also what led to its dramatic downfall. The breed’s origin is unknown, although it’s believed that it was developed from old Castilian stock. The Spanish arrived in America in the late 18th century and, for most of the 19th century, was one of the most popular poultry breeds.

endangered ornamentals ornamental black-faced white spanish
cynoclub/Adobe Stock

Spanish chickens were raised for their eggs—approximately 180 large white eggs per year—and as exhibition birds. The Spanish was one of the first breeds shown at poultry shows, where its lustrous black plumage, flowing tail feathers, large bright-red single comb and remarkable white face won the breed many admirers.  

 Unfortunately, it also spurred poultry fanciers to attempt to improve the Spanish by breeding the bird to make its white face even more prominent. Breeders focused solely on this trait and, as a result, the Spanish lost its hardiness and Spanish chicks became extremely frail. Farmers who once relied on flocks of Spanish chickens to provide market eggs had to turn to hardier Leghorn layers.

Displaced and exceedingly delicate, the Spanish lost favor swiftly and the ornamental breed is now critically endangered.  

Fowl fanciers still swoon over the Spanish’s stunning features, however. The contrast of the bird’s white face with its black feathers and red comb and wattles is dramatically exquisite, as if the Spanish were wearing a tailor-made tuxedo. While the chicks are flighty, adult Spanish bear themselves calmly, with an almost aristocratic bearing.

Spanish chickens are not suited for confinement. They are roamers with an inherent need to range.

They are minimally affectionate and tend to be standoffish towards other chicken breeds. Thanks to all the genetic tinkering, Spanish chickens are neither heat nor cold tolerant. Poultry enthusiasts wishing to keep Spanish chickens must be ready to put in extra effort to keep these fragile, beautiful birds healthy and, if possible, breed only those individual birds that demonstrate hardiness.  

Categories
Crops & Gardening Farm & Garden Foraging Homesteading

Forage Wild Cherry To Support Wellness

Wild cherry trees can grow in a wide variety of conditions and are often first or second colonizers in the successional growth of a recently cut forest or field allowed to go wild. They grow fast and live long. You can hope for fallen limbs after a windstorm. You can also use smaller branches or look for a stand thick enough to warrant thinning.

A large branch will easily provide enough medicine for you and your family for a long time to come.

Wild Reminders

I brought some wild cherry tree seedlings home from a landscaping project where we pulled them from garden beds. I tucked them next to the house and forgot about them. Now, 10 years later, I have enjoyed the shade, insect life and bird activity (easily viewed from my bedroom) immensely.

Spending time in a sick bed, I became enamored even more with these lovely companions and started to remember there was power in the bark. I had just used the last of an herbal glycerite of cherry bark I had procured and relied on heavily during any hint of a sore throat. But until 2020, I had never personally harvested fresh cherry bark.

Since they were right next to the foundation, though, I needed to cut them back anyway.

Identifying Wild Cherry

First I wanted to make sure I had the right cherries. Chokecherry (Prunus virginiana) is also a wild cherry-like and tree-like shrub that many use interchangeably. But its form is easily distinguished from the wild tree Prunus serotina with some basic information.

Wild cherry trees are found in many climates across the U.S., and they are especially abundant in my local temperate Appalachian forests.

To learn about the multiple uses of cherry bark, I turned first to three well-respected modern herbalists, Paul Bergner, Phyllis Light, and Matthew Wood, who share their love and uses for wild cherry in this video.

For my medicine-making experiments, I greatly appreciated this monograph from the generous jim mcdonald. He offers more detailed recipes in his online herbal intensive, too, which I highly recommend!


Read more: Forage wild strawberries for a springtime treat!


Preparing Wild Cherry

Phyllis Light (in the video linked above) notes that the tree looks like it has scarring or cuts that have scabbed over, which can be mystically compared to the healing of wounds. Many species in the rose family, of which cherry is a member, bring heart-toning qualities.

You’ll need to shave the bark of a larger branch or trunk. Whether you get only inner or both inner and outer bark depends on the branch that you’re using. I cut a limb from my tree that was about 4 to 5 inches in diameter. It was the second largest trunk of two main ones branching from about a foot off the ground.

There were also several smaller limbs growing from it.

I shaved the large trunk but not the smaller branches less than 2 inches in diameter. For the small stuff, I used pruners to chop into pieces short enough to stuff into a canning jar.  For the older branches’ bark, I used a draw knife to shave a thin slice of the outer bark, which is green on the underside. This I discarded.

Underneath was the inner bark, and the cherry bark aroma filled my senses for hours as I peeled. You’ll know that the white bark is stripped when you start to see wood pulp grain on the limb.

Making Cherry Bark Syrup

Cherry bark’s popularity in cough syrup is so old that modern cough syrup is still often labeled as being cherry flavored. This is surprisingly not for the fruits but for the traditional use of the bark (even though they fail to include its namesake in either fruit or bark anymore).

From jim I learned that a cool preparation is a heavenly flavor. My entire family agreed it smells like an almond extract. And we were very happy we had done this simple preparation when we all came down with sore throats in 2020!

Pack a jar with fresh bark, cover with cold water, and let it sit at ambient temperature for 24 to 48 hours—until it smells and tastes amazing. If it seems weak after two days on the counter, put it in the fridge to steep without danger of spoilage.

Don’t wait more than a week. If it’s still weak tasting, strain and add fresh bark to re-steep in the refrigerator (not optional this time) and doubles your extraction.

Once it tastes good and strong, this precious liquid can be strained and combined with any sugar as a basic syrup recipe. A dose can be 1 teaspoon to as little as 1 milliliter, depending on how dilute you have made your syrup. Since excessive sugar is needed to preserve a syrup to shelf stability, consider using a little alcohol instead. Or you can refrigerate or even freeze a syrup to extend its shelf life, rather than making it too sugary.


Read more: Cherry picking is both enjoyable and beneficial to the community.


Further Notes About Wil Cherry

For concerns about the use of cherry bark, the well-known phytochemist Lisa Ganora has shared insights repeated by jim mcdonald in the article linked above. To remain safe, always use extremely fresh or extremely dry bark for your ingestion.

The partially wilted state is the least desirable in the chemical pathways we want to avoid.

I write about cherry bark this spring because, while most tree bark should be harvested in winter or early spring before a tree has leafed out, cherry’s flavor is better and the product is easier to digest when it’s harvested after flowering.

So, as always, find a qualified botanist to make sure you found the right cherry tree, give thanks for the wonders of plant growth and gift, and enjoy finding almond-flavored help for your body in your backyard!

Categories
Animals Breeds Farm & Garden Large Animals

Breed Profile: Meet The Valais Blacknose Sheep

Valais Blacknose Sheep—aka “The Cutest Sheep in the World“—are new and relatively unknown to many American sheep farmers. But they’re hugely famous on social media platforms because of their attractive looks.

Although their breed goes back to 1400 AD, the breed standard dates from 1962. For hundreds of years, the sheep could only be found in the Valais region of Switzerland. However, in 2014 the breed was imported into the United Kingdom. In 2016 the United States began importing semen as part of an upgraded program. T

his makes Valais Blacknose an excellent candidate for your farm if you have an interest in rare and developing breeds. They serve as dual-purpose fiber and meat sheep.

Breed Standard

The Valais Blacknose Sheep Society USA, formed in 2016, describes the Standard of Type as follows.

The Valais Blacknose has a robust and large-framed physique. The black nose should be centered and it is preferred that it extend up to the eyes. The ears are also black and extend up to the base of the head. There should be black colorations on the ankles and on the front knees. The females have black tail spots. Helical or spiral-shaped horns are typical of both ewes and rams and should be well-balanced. The head and the legs should exhibit wool growth evenly and be well covered.”

Origins of the Breed Up Program in the U.S.

Since importing purebreds was not an option for so long, the Breed Up Program was designed to create an offspring as close as possible to a full-bred Valais Blacknose and was the only option for Americans between 2014 and 2020. The breed-up program begins by using a “foundation” ewe with as many qualities as possible as the Valais Blacknose breed.

The Scottish Blackface is the breed most widely used as a foundation ewe. 

The next step is to artificially inseminate (AI) your foundation ewe(s) with full blood Valais semen. Due to the strict protocol mandated by the USDA, there are only a few places in the U.S. where full-blood Valais semen is stored.

You can head here to learn about the USDA protocol for semen imports.

The Breed Up Program follows this generational code:

  • First generation is a F1 (50 percent Valais) 
  • Second generation is a F2 (75 percent Valais)
  • Third generation is a F3 (88 percent Valais) 
  • Fourth generation is a F4 (94 percent Valais) 
  • Fifth generation is a F5 (97 percent Valais)

Huge Advancements Came When Embryos Could Be Exported

In 2020, embryo imports from New Zealand were finally approved. Several successful farmers who were well on their way to creating the 97 percent Valais now had the opportunity to shortcut the process through this import. 


Read more: Here’s why you should consider heritage breed sheep for your farm.


Purebred Valias in the USA

The first purebred Valais Blacknose sheep were born in the U.S. in 2021 at Shepherds Lane of Oregon. The farm is located in Lebanon, Oregon, and was already a part of the Breed Up Program when the option to purchase embryos from New Zealand became available.

Owners Martin and Joy Dally were able to fast track their breeding program and become the first farm in the U.S. to have purebred Valais Blacknose in 2021.

Since then the thrill of breeding this type of sheep has taken off. Three main registries have been established to register all percentages of Valais:

Exciting Time to Learn More & Get Involved

Thanks to the work of so many breeders, it is possible to begin breeding Valais Blacknose Sheep on your farm to help establish this breed in the U.S. You can choose to enter through the Breed Up Program or buy purebreds.

If you are looking to bring these animals to your farm, research the registries for farms close to you. Call and have conversations with the current owners about their programs. Being a part of a developing breed unites so many people on a mission to help each other spur the mission of the organizations. 

Anne Davis of Davis Family Livestock is the secretary of the Valais Blacknose Sheep Society. She is a font of information. Davis can be contacted through her farm listing on the VBSS Registry website. 

If you want to interact with the breed, the first ever National Valais Blacknose Sheep Show will be in Des Moines, Iowa, September 29 through 30. This is the first show to feature all things Valais Blacknose Sheep. The first time the breed was introduced to a national audience was just last January, in Denver at the National Western Stock Show.


Categories
Animals Equipment Farm & Garden Large Animals

These Tools Are Essential For Keeping Cattle

Just like many other jobs, the right tools can make a lot of difference when working with cattle. Whether treating a sick one or simply dealing with daily chores, it’s helpful to have some basic items already rounded up and on the homestead.

If it seems overwhelming to try to collect all of these things, don’t panic! Some tools don’t need to be bought right away and can be borrowed or rented, especially if you’re not raising a large number of cattle. Remember, making smart financial choices now can help free up money that can be invested in other projects around your homestead.

Here is a basic list of several tools you might find beneficial if you’re considering raising your own cattle.

Hay Feeder

While they’re one of the most basic things to suggest when it comes to raising cattle, a sturdy bale feeder will make an effort to contain loose hay and not have it scattered over the rest of the pen. This helps prevent even more waste. 

Waterer

Even if you plan to keep your cattle in a pasture with a pond, it’s important to have a backup source of water should the pond go dry. Here in Central Kansas, windmills started very shortly after putting grass cattle out, as our ponds were so low.

Whether you have a stock tank that you can fill from a well or windmill, a pond, spring or other means of fresh water, or you have to haul water to your animals, have a plan in mind! 

Bunk or Area to Feed Grain & Other Rations

Having a raised bunk, whether made of metal or concrete, can help contain and keep any loose grain or other feed off of the ground. Keep a shovel handy, as occasionally you might want to clean out any rocks or leftover debris that they’re not eating.

Mineral Feeder

This can be as simple as a round, rubber tub that is set inside out of the rain. In our pastures, feeders are set inside a stand that has a small roof above. 

Cattle Prods

From sorting sticks and flags to a “rattle paddle” (which is a plastic paddle on the end of a stick with BBs in it that will roll around and make a noise) and other forms of cattle prods, there are a variety of tools that can be used to help move cattle through an alley or chute.

Tagger & Ear Tags

If you’re not raising multiple calves, you likely won’t need an ear tagger very often unless to replace a missing tag. However, if you do stumble across one, they’re not a large tool and can be set in a cabinet in the shed until you’re ready to use it.

Syringes

Needed to give many medications, a syringe can also be cleaned and tucked away until needed again.

Bolus Gun or Pill Pusher

Giving pills to a calf can be a tricky business unless you have a pill pusher to pop them into. These also are not a very large investment and can be reused time and time again. 

Medications

Regardless of what kind of medication you prefer to give your cattle, it’s good to have a plan in mind should you walk out to the pasture and find an issue with one of them. Even if you don’t keep a large quantity on hand, talk to your local vet to find out what they recommend for preparedness, then have their number saved in case you need help or advice quickly.

Bander & Bands

This suggestion is not something everyone will need to purchase, unless you end up with a bull at some point. Whether you’re raising your own calves (in which case you never know what you’ll get—heifer or bull?!) or just purchased some from the sale barn that need worked, it’s good to know how to castrate or where to take them to have it done.

Banding is a humane method for castrating a bull. The process generally doesn’t take long to do.

Working Chute

A rather large investment, a working chute is not something that needs to be purchased for owning one or two animals. Rather, look for local veterinarians or a trusted rancher that is willing to let you use theirs.

If you do get to the point that you’re looking to purchase one, do some research first and check out your options. Whether you choose to exercise your strength with a manual chute or spend a bit more for a hydraulic one, consider asking around to see if you can watch some others and learn how each work.

Dart Gun

Another example of an investment that you won’t need to make right away, dart guns are helpful to treat a sick calf from a safe distance away. Whether he’s agitated and dangerous to approach, or he’s out in a pasture where catching him would be a challenge, a dart gun can make treatment go much easier.

The darts can be filled with medication, then darted into the animal. Then, easily enough, the dart will fall off after the medication has been administered. 

A Small Loader Tractor

There are near endless ways to utilize a small loader tractor or skid steer around a busy homestead. Local rancher (and my husband), Kolton Krispense, shared that, if you’re keeping your cattle in an enclosed lot, you need to make sure to haul the manure out frequently to help reduce health hazards among your herd.

It can be helpful to wait until the manure has mostly dried out before removal, then proceed to fill in any holes with finely crushed rock or dirt. As he puts it, “Cattle grow better in a dry, clean environment!”

Books

This last suggestion is, of course, one of my favorites as I love to have a full library on hand. For a couple of suggestions on books to add to your library, check out ones by Heather Smith Thomas, such as Storey’s Guide to Raising Beef Cattle or The Cattle Health Handbook.

For a list of book recommendations, check out the recommended reading roundup below.


Read more: Check out these 6 books about keeping cattle for beef, milk & more! 


Other

Finally, make sure you’re well stocked with feed buckets and scoops. And a good pitchfork is a definite farm essential!

Categories
Animals Breeds Chickens 101 Farm & Garden Poultry

4 Critically Endangered Breeds Of Chickens To Consider

Monday, May 21, kicks off International Heritage Breeds Week. With so many amazing poultry breeds originating outside of the U.S., it’s the perfect time to shine the spotlight on several international chickens currently considered endangered.

This quartet of critically imperiled birds was all introduced to the U.S. prior to 1900 and now, according to the Livestock Conservancy, number fewer than 500 in America and less than 1,000 throughout the world.

Campine

The Belgian Campine has a remarkable claim to fame: Julius Caesar supposedly took several Campine chickens back home to Rome with him after he sacked Belgium.

More than 1,000 years later, the 16th-century Italian naturalist Aldrovanus mentioned the Campine in his writings. In 1893, the Campine was imported to the U.S. by a Maine poultry enthusiast, but this ancient breed failed to gain a foothold with American fanciers and was actually dropped from the American Poultry Association’s (APA) Standards of Perfection. In 1907, a New Jersey poultry fancier once again imported the Campine into the country, but, again, the breed was met with disdain due to its lack of hardiness.

However, the APA finally recognized the Campine in 1914

A small bird, the Campine only reaches 6 pounds (male) and 4 pounds (female) upon maturity. The roosters are hen feathered: Their tail feathers are identical to those of the females.

Campine hens are non-broody and lay approximately 150 to 200 medium white eggs per year. Campines are curious, friendly birds, but they do not like being handled or cuddled. They prefer free ranging to being confined in a run and do better in warmer climates. Campines come in two varieties: Silver and Golden. When Silver hens are bred to Golden roosters, the resulting chicks can be gender identified by color at one day of age, with pullets having a reddish color and cockerels being grey. 

Houdan

Descended from five-toed chickens that existed in Europe in the first century AD,  the French Houdan (pictured above) has a striking, elegant appearance, with a full beard, rounded crest and either white or mottled feathering. Imported to the U.S. in 1865, the Mottled Houdan was officially recognized by the APA in 1874, while the White Houdan—developed in America by F.D. Baermen—was accepted to the Standards of Perfection in 1914. Despite the Houdan’s affectionate nature and excellent egg production, the breed never gained popularity and was almost extinct at the start of the 21st century. 

Thanks to commercial hatcheries starting to offer Houdan chicks, the breed of chickens has somewhat recovered but is still considered critically endangered.

Houdans are medium-sized standard fowl, with unique V-shaped combs that resemble tiny butterfly wings. Houdan hens lay up to 230 large white eggs per year and lay well into winter. They thrive in warm, dry climates but require shade in extreme heat. They are susceptible to frostbite in colder climates.

Houdans are curious and like to forage, but their crests obscure their eyesight, putting them at risk to predation. Houdan chicks are easy to raise, and Houdans of all ages enjoy interacting with and being cuddled by their humans.


Also Read: Heritage breed chicken bring new life to the Heritage Nest!


La Flèche

First developed in the French town of Le Mans in the 5th century, La Flèche chickens are easily recognized by their deeply V’d combs, which purportedly reflect the arrow for which the town of La Flèche is named. Imported to the U.S. in the 1850s, La Flèche chickens were considered too delicate in the constitution to survive eastern American winters. Despite this lack of popularity, the La Flèche was accepted into the APA’s Standards of Perfection in 1874.

The La Flèche is considered the epitome of table birds in France, where both females and caponized males are purposely fattened to develop the juicy flesh so prized by gourmets.

La Flèche chickens are medium-sized standard fowl with black feathers, large white earlobes, bright red eyes and face, and dark slate shanks. They are flighty both in temperament and in ability, requiring a high fence to keep them from roosting in trees. They prefer ranging to confinement, thrive in warmer climates, and tend to avoid interaction with humans.

Though La Flèche hens make poor mothers, these endangered chickens are excellent layers, producing up to 220 large to extra-large white eggs from late winter to late fall. 

Malay

The Malay is truly a breed for the selective fowl fancier. One of the world’s most ancient chickens, the Indian Malay dates back more than 3,000 years. Its fierce, thuglike appearance—towering height, hooked beak, overhanging brow and broad skull—and its pugnacious nature prevented the Malay from being widely embraced by American poultry enthusiasts when the breed was introduced to the U.S. in 1846.

Its lean, heavily-boned body further estranged American breeders seeking meat-producing chickens. The Malay female’s poor egg production—between 20 to 100 medium-sized brown eggs—did not help the breed’s popularity. Nevertheless, the APA recognized the breed’s Black Breasted Red variety in 1883 (the White, Black, Spangled and Red Pyle varieties were recognized in 1981). 

Because of its size, the Malay is a poor choice for a backyard flock or for any form of confinement. The breed flies well and breeders may be resigned to allowing their Malay chickens to roost overnight in trees. Due to its lean body and tight feathering, the breed does better in warm climates.

As it is an aggressive bird that prefers to stand its ground and fight, the Malay is a poor choice for families with children, pets and other breeds of chickens. However, for poultry fanciers interested in helping conserve a critically endangered ancient breed of chickens, nothing beats raising the Malay. 

Categories
Farm & Garden Food Homesteading Recipes

Recipe: Classic Strawberry Rhubarb Jam 

If I had to choose my very favorite jam flavor, it would indeed be strawberry and rhubarb. The sweetness of the strawberries paired with the sourness of rhubarb is a match made in heaven. Last year I shared my strawberry rhubarb sauce recipe, and today I’m sharing my strawberry rhubarb jam recipe, with water bath canning instructions.  

Yield: 3 pints (or 6 – 8oz jars) 

Ingredients 

  • 5 cups (1.5 pounds) strawberries, hulled, quartered 
  • 4 cups (about 6 to 8 stalks) rhubarb, chipped into 1/2-inch slices 
  • 1/4 cup lemon juice 
  • 1 cup water 
  • 3 cups white granulated sugar 

Directions 

Wash berries and rhubarb well. Once berries are quartered, add them to a heavy-bottomed pot and use a potato masher to break down the strawberries into a chunky consistency.

Add the remaining ingredients to the strawberries, mix well and bring the mixture to medium-high heat. Simmer for 15 to 20 minutes until the jam thickens. Stir often to avoid burning the jam.

Cook until the jam has visibly thickened. If you have a candy thermometer, 220 degrees F is the temperature to reach for.  

Refrigeration Instructions 

Ladle the hot jam into warm prepared jars (canning jars washed with warm, soapy water and kept warm until filling). Add washed lids and tighten the rings. Once cooled, refrigerate and enjoy within two months. 

Water Bath Canning Instructions

Ladle the hot jam into warm prepared jars (canning jars washed with warm, soapy water and kept warm until filling). Leave 1/4-inch headspace (room from the jam to the rim of the jar). 

Use a clean, dampened, lint-free towel or paper towel to wipe the rims of the jars, removing any spillage. Place the canning jar lids on the rim of the jars and screw the rings on until they are gently snug (not fully tightened). 

Lower the jars into a hot water bath and cover the canning pot with its lid. Turn up the heat to high. Once the canner reaches a rolling boil, set the timer for 10 minutes. Adjust time for altitude. 

Once the water bath is processed, carefully remove the jars from the canner and place them on a towel-lined surface for 12 hours without touching them. After 12 hours, remove the rings and test that the lids are completely suctioned to the jar. Wipe jars clean, label and date the jars. 

Preserved jars of jam will keep for at least one-year shelf stable but must be stored in the refrigerator once the seal is broken.  

For more information on safe home water bath canning, check out this publication from the USDA. 

This recipe has been shared with permission from Skyhorse Publishing, Inc. from Thurow’s book Can It & Ferment It.

Categories
Animals Breeds Chickens 101 Farm & Garden Poultry

Breed Profile: The Cochin Chicken Stands Out

When my husband, Jae, and I started our poultry farm a couple of decades ago, we made the decision to raise heritage breeds that were on the Livestock Conservancy’s Conservation Priority List  —in other words, breeds that were critically endangered or threatened. One breed, in particular, stood out for me: a large, feather-legged bird that came in a variety of colors and was supposedly one of the friendliest, most gentle breeds of poultry: the Cochin.

I searched for local Cochin breeders in my state and managed to find one about two hours west of us. Soon after, we were the proud owners of one dozen beautiful Cochin chicks.

Although years have passed since our original Cochins and their descendants passed on, if I were to convince Jae to add one more breed to our farm (which currently consists of Orpingtons and Ameraucanas, plus Ancona ducks), it would hands down be Cochins. Every single Cochin we raised—and we raised several dozen over the years—started out as a gentle chick, happy to be held, and only became more affectionate as an adult.

Our Cochins got along with every breed of chicken we raised, would contentedly follow us around as we did our poultry and yard chores, and would jump up onto our laps for petting and cuddles when given the opportunity. Aside from their affection, our Cochins were fabulous garden helpers, gobbling up insects and voraciously snacking on dandelions.

Despite their heavily feathered feet, they were expert scratchers, turning over mulch in our flower beds as they searched for grubs and other treats. Our Cochins were also our best winter layers, producing eggs right through the winter holidays despite the shorter daylight hours. 

We aren’t the only ones infatuated with this beautiful breed of bird, however. Currently and in centuries past, Cochin has inspired everyone from the regular homeowner to royals to own poultry flocks. 

A Bird Fit for a Queen

Keeping chickens was nothing new in the 1800s. Most of the fowl kept at that point were descendants of the Red Jungle Fowl, with few exceptions, and resembled your basic barnyard bird: small, slender, single comb, yellow shanks, red-brown feathers. Imagine the uproar when, in 1843, Captain Edward Belcher, a British Navy officer, presented the newlywed Queen Victoria with five hens and two roosters he had acquired during his travels through Asia.

These seven birds were unlike any chicken previously seen in Europe: tall, full bodied and with striking plumage. Victoria was enthralled and had a special aviary built for her “Cochin Chinas” at Windsor Castle. Soon other European royals were raising their own flocks from hatching eggs provided by the British queen. 

cochin cochins

Cochin Fever 

The Victorian birds, however, bore little resemblance to today’s Cochin. The stout, feather-legged bird we know today took England by storm a few years after the arrival of the royal Cochin Chinas. A Mr. Moody and a Mr. Sturgeon both acquired sizable, feather-legged birds from China and began breeding what they called Shanghai Fowl.

The British public didn’t think much of the name, however. They insisted on calling these newcomers Cochins as well. Then, at the 1850 Birmingham Exhibition, these large, fluffy chickens made their official debut and astonished attendees. Word spread quickly of an immense chicken with a crow-like lion’s roar but affectionate as a pet.

The Cochin Craze quickly took hold throughout Great Britain, and America soon followed suit. 


Also Read: These rare and unique heritage chickens are odd birds indeed!


Problematic Poultry

Despite being a favorite amongst fowl fanciers, there are some drawbacks to breeding this beautiful bird. For starters, the Cochin takes the scenic route to maturity, reaching the point of lay at about eight months (versus about four to five months for other breeds) and table size at age 16 months (versus six months for other dual-purpose birds).

Because of their size, Cochins tend to move much more slowly than other chickens, making them easy targets for ground-based predators. The Cochin’s size also inhibits its ability to reach high roosts inside the coop. Lower roosts are required.

Because of their heavy feathering, Cochins suffer in the high heat of summer and require shady spaces where they can cool off. Cochin hens also have a tendency to go broody, cutting back on their egg production, which typically averages 200 large brown eggs per year. 

Beautiful Breeders

The Cochin’s proclivity towards setting eggs, however, is very much a positive for those looking to breed these gentle birds. Cochin hens make fabulous mothers. They will happily set and raise their own chicks as well as those from other breeds of poultry, even ducklings and turkey poults.

Cochin roosters have been known to help set eggs, too, and they make attentive fathers. Cochins are very cold hardy and thrive in the harshest of winter climates.

And then there’s the Cochin wow factor. Their abundance of soft, fluffy feathers adds to their immense appearance, with feathering extending down to their toes. Cochin tail feathers add to their appeal, as these feathers drape into a round bun form instead of the tall, extended tail feathers of other breeds. The American Poultry Association (APA) recognizes nine varieties of standard-fowl Cochin:

  • Buff
  • Partridge
  • White
  • Black
  • Silver Laced
  • Golden Laced
  • Blue
  • Brown
  • Barred

However, there are many other unrecognized color varieties developed by poultry fanciers. There are even frizzle Cochins and, for backyard flock owners with limited space, bantam Cochins. 

Jae and I bred and raised Blue, Black, White, Splash and Frizzle Cochins over the years on our farm. During that time, Cochin’s popularity experienced a resurgence across America, and the Livestock Conservancy considers the breed fully recovered from its previous endangered status. I would happily add Cochins back into our flock in a heartbeat. They are the breed I recommend the most to brand-new backyard flock keepers, families with small children, and basically anybody who wants to experience raising a beautiful bird. 

Categories
Crops & Gardening Farm & Garden Farm Management Homesteading Permaculture

My On-Farm Weed Suppression Experiments (Excerpt, “The Ecological Farm”)

The following is an excerpt from Helen Atthowe’s new book The Ecological Farm (Chelsea Green Publishing June 2023) and is printed with permission from the publisher. 

courtesy of Chelsea Green Publishing

My On-Farm Weed Suppression Experiments 

I was interested not only in examining the effects of tillage on soil and microorganism health, but also in evaluating the effect of tillage on weed suppression and crop yields.  

Effects of Tillage & Applying Compost

In my first experiment, my goal was to evaluate which weed species would be encouraged over two growing seasons by different tillage and fertilizer treatments, in minimally tilled crop rows, in no-till crop rows, and in my farm-made compost. An area of original 50-year-old, untilled pasture on my farm served as the basis for comparison (the control). 

The Compost Results 

The compost I made at Biodesign Farm was a mix of manure, straw, and red clover, which was heated to USDA National Organic Program standards during the composting process. To evaluate the weed seed reservoir in my finished compost, I filled 1-gallon (4 L) pots with the compost, set up the pots in my greenhouse, watered them well, and then observed what sprouted and grew. I discovered that the greatest diversity and abundance of annual weed species was present in the pots when compared with numbers and species of weeds counted in my crop fields or the untilled pasture area. In fact, there were some species that I did not observe at all in my crop fields or in the pasture area. This suggested to me that the one compost ingredient I brought in from off the farm—the sheep manure from my neighbor’s farm—was the source of the unique weeds. When I stopped using manure, annual weeds also decreased in my vegetable fields.  

The Crop Row Results 

In 2006 I tilled some experiment rows shallowly in the spring and then did no further weed cultivation after that. I also left other rows untilled altogether to measure the effects of no-tillage. I identified the weeds that sprouted and grew in the rows, and I found higher numbers of annual weed species in the minimally tilled plots compared with the no-till plots and the control area. The untilled pasture control had the most perennial weeds and no annual weeds at all (had the most perennial weeds and no annual weeds at all (for full results for the “Weed Species Found in Biodesign Farm Weed Ecology Study” see page 170, table 8.6 of The Ecological Farm). 

The lesson to be learned from this experiment is that tillage results in more annual weeds and that not tilling encourages perennial weeds over the long term. Another lesson is that applying compost can bring in new weed problems—even compost heated to 149 degrees F (65 degrees C) can be a source of weed seeds!  


Read more: Compost like a pro with this simple technique.


Exploring Complex Interactions

In 2007, I set up another experiment as part of my quest to understand the interactions among soil health and nutrient cycling, crop yield, and weed competition. I evaluated how these interactions were affected by several soil/weed management treatments.  

The five treatments were: no-tillage, minimal tillage, conventional tillage, tillage plus vinegar spray, and tillage plus paper mulch (EcoCover). The experimental area consisted of one 600-foot-long, 4-foot-wide (183 × 1.2 m) crop row split into replicated plots, three per each of the five treatments. At the start of the experiment, a 2-year-old red clover cover crop was growing in the row. I strip-tilled the treatment plots, except for the no-till plots, making three passes with the tiller in the tillage plots, but only one shallow pass in the minimal-tillage plots. Tillage plots were kept weed-free with cultivation to keep the soil surface bare all season. I applied a weed mat paper mulch over another set of tillage treatment plots and sprayed a vinegar herbicide on weeds twice during the growing season in still another set. In the minimal-tillage plots, I tilled only once and did not cultivate weeds that grew back during the season. In the no-till treatment plots, I closely mowed the red clover in the spring and then burned the remaining growth with an infrared flamer. I left the perennial red clover intact as a living mulch in the row middles on either side of all treatment plots. I planted all of the prepared plots with Brussels sprouts.  

Here are the highlights of the results of this experiment:  

Yield

Brussels sprouts plants in tilled plots covered with paper mulch had more biomass and the highest average yield per plant. Next best were the plants in the conventional tillage rows and the rows that were tilled and sprayed with vinegar before planting. I concluded that tillage increased yields by minimizing crop competition with other plants.  

The minimal-tillage rows took fourth place, and the no-till plots had the lowest yield and smallest plants. Using the flamer was not my best vegetation suppression idea. Although these plots had the highest level of mycorrhizae, the red clover grew back from its strong roots within several weeks and competed heavily with young Brussels sprouts.  

Soil Temperatures

Paper mulch and conventional tillage plots had the highest soil temperatures from April through the end of August. Thus tillage resulted in increased soil temperatures, especially early in the season. Soil temperatures were lowest in the no-tillage and minimal-tillage plots all season.  

Mycorrhizae Presence

The greatest mycorrhizal density was observed in no-tillage plots; the second greatest density occurred in minimal-tillage plots. The tillage/vinegar treatment resulted in the lowest density, followed by conventional-tillage and tillage/paper mulch plots. It was clear that tillage led to a decreased presence of mycorrhizae.  

Soil Aggregate Stability

Tillage plots tended toward lower soil particle aggregate stability, but the lower levels were not statistically significant in this 1-year experiment.  

Soil Organic Matter

SOM levels in the plots in April, one week after initial tillage, were not statistically different. But, by September levels were slightly higher in minimal-tillage and no-tillage plots and lower in tillage plots.  

In summary, my experiment showed there is a trade-off between tillage and no-tillage. The weed suppression due to tillage resulted in better yields, but the tillage led to decreased soil/microbial health. There is a possible sweet spot with a shallow, minimal-tillage approach. Yields were not quite as high as in plots that are tilled more frequently and to greater depths, but soil and mycorrhizae health were much better.  

The results of this on-farm experiment, as well as my yield and pest records from 1993 through 2010, were a great help to me in designing the farm system that I use today employing permanent living mulch in row middles and very limited strip-tilling to prepare crop beds in the spring. I like the balance this provides for an economically sustainable yield without sacrificing long-term soil health.  

I continue to try to understand how much tillage and/or reduction in weed/living mulch crop competition is necessary for economical yields with different crops in different climate conditions and soil fertility levels. It is an ongoing process: I learn from my dynamic agroecosystem even as I add and subtract management methods and strategies! (See page 172, Figure 8.10 of The Ecological Farmfor my current methods and strategies.) 


The Ecological Farm author Helen Atthowe has worked for 35 years to connect farming, food systems, land stewardship, and conservation. She farms and conducts research at Woodleaf Farm in Eastern Oregon and serves as a consultant with farmers across the United States and internationally. Helen and her late husband, Carl Rosato, co-owned and operated a certified organic orchard in California where they pioneered methods for raising apples, peaches, and other tree fruits without the use of any type of pesticides.

Her on-farm research includes ecological weed and insect management, organic minimum soil disturbance systems for vegetable and orchard crops, and managing living mulches for soil and habitat building. She is a contributing writer to The Organic Gardener’s Handbook of Natural Pest and Disease Control and other books. She has served as a board member for the Organic Farming Research Foundation and advisor for the Wild Farm Alliance. Atthowe has a master’s degree in horticulture from Rutgers University and has worked in education and research at the University of Arkansas, Rutgers University, and Oregon State University, and served as a horticulture extension agent in Montana, where she annually taught an organic master gardener course.