Categories
Equipment Farm & Garden Farm Management

Follow These Tips When Adding Any Farm Outbuilding

When you think the time has finally come to begin expanding your homestead, it’s good to not rush right into it and make any rash decisions. In a previous post (from the January/February 2023 issue of Hobby Farms), “What Outbuildings Do You Need On A Farm?” I discussed things to consider before building any outbuilding in my article.

In the article, I’ll take a look at individual outbuilding types, from livestock barns to chicken coops. 

Livestock Barns

As your herd grows, the need for more shelter and storage tends to grow along with it. The thought of building a barn can be daunting. but drawing it out on paper can help you make proper plans and carefully think through the best ways to build and design it. 

Oftentimes, people tend to focus too much on their current needs and build a barn too small without considering the future expansion of their herd or homesteading needs. If you can pinpoint a rough plan of where you project your homestead and herd to be several years down the road, it can help you prepare in advance. The type of barn you build will be based somewhat on your personal preference. From the striking gambrel barns to more A-framed gable barns, a multitude of different styles and ways to design a barn exist.

Pole barns are an option for people looking to put up a structure quickly and without having to pour a full concrete foundation. While called “pole barns,” this style of outbuilding can be constructed and used for everything from a home to a shop or shed. 

Lumber and required pieces can be precut at a factory and then taken to the building site for construction. Before construction begins, the ground needs to be cleared and leveled. But then instead of needing a concrete foundation, holes are dug and poles (whether wood or metal) are set deep into the ground (3 to 4 feet) with concrete footers. Girts are then installed on the poles to allow the siding to be screwed on. Construction continues from there.

This style of building allows for the structures to go up more quickly than a traditional stick-frame outbuilding that is constructed on top of a concrete foundation. Some people prefer to not cement wood poles in the ground, as once they start to decay they can become loose in the cement. If this causes worry, galvanized pipe or other metal material can be used in place of the wood poles. 

If choosing to build an outbuilding that requires a foundation, it should be dug and poured to reach below the frost line to avoid heaving, which can cause damage or cracks to your concrete slab. 

The flooring of your barn is another consideration that you’ll want to plan for. Will you stick with the dirt that is already present or pour a new concrete floor? While dirt is easier (and cheaper) to come by, it’s less sanitary. 

Although concrete floors are more expensive, they can be kept cleaner and drier, which can help prevent everything from thrush in equine hooves to mold in bags of feed. If putting concrete floors where livestock will be walking, add grooves or some means for them to get traction on the floor and avoid slipping. Clean up any rough edges that could be abrasive to hooves. 

Proper feed storage in the barn is another important aspect to plan out enough room for. If you hope to dedicate a single room to feed and supply storage, a cabinet and refrigerator can be placed on one end to store medications in. Other supplies such as tack, extra buckets and tools can be stored in the same room. Large, plastic or metal trash cans with lids can be used to keep grains and other feed dry and rodent-free. For larger quantities of feed, such as square bales of hay or straw, consider building a barn with a large loft or attic to store them in.

Ventilation is one of the most important aspects of any structure that houses living animals. Keeping a dry, clean barn will eliminate and prevent a whole host of future problems, from health issues in your herd to mold and ruined feed.

For livestock such as cattle and hogs, ventilation is especially important. Barn direction and exact placement can have some effect on the natural ventilation of the building, although fans and vents can also be installed and used. 


Read more: Barn ventilation is very important. Here are some tips to keep air moving.


Machine Sheds & Shops

From skid loaders and tractors to lawn mowers and ATVs, a homestead tends to accumulate a variety of equipment over time. To keep things in good, working order, it’s important that machines have proper storage inside a shed.

Machine sheds are typically large to accommodate the largest pieces of equipment needing stored inside. Generally made with a wood or metal frame, it can be challenging to know which materials to use. While wood can be less expensive and easier to put together, a steel-framed outbuilding tends be more solid and have less chance of rotting. 

As when planning for most other structures, look at your long-term plans. Do you anticipate having a much larger quantity of equipment? Will you scale up in the size of the implements? Do your best to plan for these changes so as to get the most use out of the time, money and effort you invest. 

Eventually, that same equipment that you’ve stored away for the winter will need regular maintenance and repair come the working months. A shop can be beneficial if you anticipate having multiple projects or mechanic work that will need to be done inside with tools close at hand.

farm outbuilding outbuildings
HildaWeges/Adobe Stock

Greenhouses

Having a greenhouse on your homestead allows the opportunity to grow fresh produce year-round. When the first frost hits and the outdoor garden dies away, plants can still be kept toasty and fruitful in a warm shelter. From deep, red tomatoes to take inside and slice to fresh zinnias to brighten even the dreariest of winter days, a greenhouse’s contents can make this structure your favorite place on the homestead.

Greenhouses do require a fair amount of work if they’re meant to be used year-round and not just as a basic cold frame that allows plants to grow part-time without supplemental heat. A cold frame won’t offer the warmth that is needed to keep the plants alive during a winter. Greenhouses have a source of heat, allow for plenty of light to pass through the structure and have proper ventilation during the warmer months. 

Standalone, attached lean-to and DIY window greenhouses are all different styles you can choose from to best suit your needs. A standalone greenhouse is its own separate outbuilding and will be set near a garden. An attached lean-to style is a three-sided greenhouse that leans up against a house or existing outbuilding, such as a shed, for the fourth wall.

The DIY window greenhouse utilizes old, unwanted windows to build anything from a small cold frame (with a handful of windows and straw bales) to a full-sized greenhouse with floor-to-ceiling windows. 

Regardless of what style you choose to go with, frame materials will need to be sturdy and solid enough to withstand the weather. Steel, aluminum or pretreated wood is often used for the frame and then everything from old windows to fiberglass, polycarbonate or plastic sheeting can be used for the walls of the structure. 

Proper air circulation is important to keep your greenhouse from overheating. There should be vents or windows that can be opened on either end of the outbuilding as well as fans to help pull the air through if enough of a draft isn’t present. 

Another style of outbuilding that has become quite popular right now on homesteads are hoop buildings. Made from tubing (often metal tubing) that has been formed into arches with a tarp stretched over it, this less expensive option should be considered. While not as sturdy as a framed building, a hoop building can be used for a variety of purposes, from greenhouses to grain storage. 

Quonset huts are a similar type of round-top outbuilding that still pop up on farms occasionally. They can be used for everything from a commercial space to storage on the farm and are considered some of the strongest structures available. 

farm outbuilding outbuildings
nd700/Adobe Stock

Chicken Coops

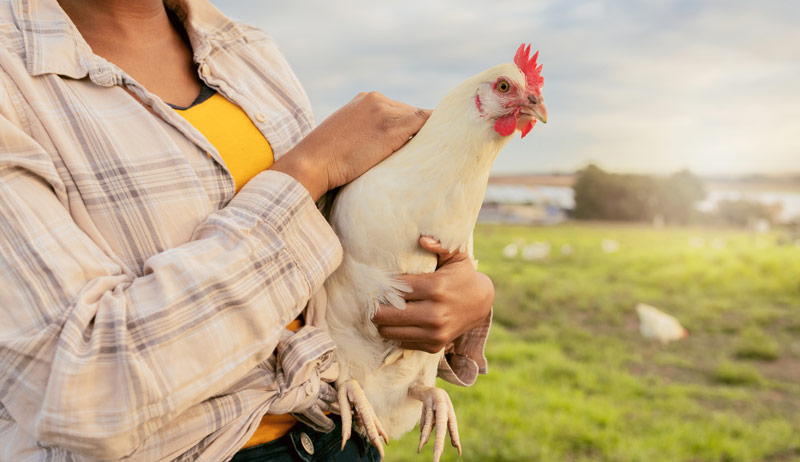
When building a suitable coop for your hens, it’s important to think through your plans so you can create a safe, inviting haven your flock will want to come back to each evening. 

Coops can be built (or bought) in a variety of styles, but some things should be considered in the plans, such as:

  • ventilation
  • predator-proof buildings and runs
  • easy accessibility (for cleaning and bedding removal)
  • adequate space for your flock (both now and in the future, if there’s growth)
  • plenty of roosting space 

Before settling on a space for your coop, watch to see how much morning sun and afternoon shade it receives. After all, you don’t want cooked chickens in the henhouse! 

Drainage is also very important to consider before building. If your coop won’t be elevated off the ground, make sure that any water or rain run-off drains away from the space well before building. 

A movable poultry tractor is also an option if you have a smaller flock that will need access to fresh places to forage and would rather not invest in a large, stationary coop.


Read more: Check out this video, the first in a series on building a garden shed!


Garden Sheds

A garden shed is one of the more simple, easy outbuildings to get in place on your homestead. They can be hardwired with electricity and running water or just left as a simple shed with some battery-operated lights and a lock on the door. A great way to store your tools out of the elements all winter, garden sheds should be stationed somewhere near your summer garden with easy access for the days you’ll be running in and out of it constantly. 

Simple sheds are easy to find and purchase already constructed. But building one from scratch gives you complete control of the design and layout. You’ll also be able to utilize leftover materials from other projects around the homestead. Learning to build with second-hand materials and construct projects on a budget is an asset to almost any homesteader. 

If the idea of building your shed from scratch is unappealing, consider buying a kit with the pieces already precut and ready to assemble. This is a nice option in the middle of the two previous suggestions, as pieces will be cut to the appropriate size, yet the outbuilding can still be constructed on site and without requiring a forklift or other heavy-duty moving equipment. 

A garden shed can be much more than just a drab outbuilding in the background. If done right, it can bring new interest to an outdoor space and add an extra focal point.

A lack of light in any building can be frustrating and make almost any job harder than it needs to be, so at least one or two windows should be present to allow plenty of natural light to filter inside. The shed should have racks and hooks to hang tools along one side of the wall, shelves to organize various pots and planters on, and a table in front of one window to allow for small projects and repairs to be done. 

This article originally appeared in the March/April 2023 issue of Hobby Farms magazine.

Categories
Crops & Gardening Equipment Farm & Garden

Tools You Need for Growing Potted Citrus Trees

Have you ever considered growing citrus fruit trees in pots? Even if you live in an area too cold to support growing citrus trees in the ground, container-grown trees can be kept outdoors in summer and moved indoors for winter, allowing them to thrive and produce fruit in regions far outside their regular comfort zone.

So guess what? I’ve decided to push that approach to the maximum and grow a Clementine tree in Zone 4 of the USDA Plant Hardiness Zone Map.

It might seem risky to try growing a Clementine tree in a region with an average annual minimum temperature of -30 degrees F and a frost-free season that’s frequently shorter than four months. My Clementine tree is supposed to be hardy to around 40 degrees F, and since nighttime temperatures around here are regularly lower than that in the spring and fall, I’ll have to be diligent in keeping an eye on the nightly temperature forecasts.


Read more: These 10 varieties of citrus trees can be grown successfully in pots.


Inside Job

To be on the safe side, I may opt to bring my tree indoors every night, even in the summer.

But that’s okay. I have a couple of suitable south-facing windows where my Clementine tree can still get sunshine. The tree I’ve purchased is a beautiful specimen already more than 4 feet tall, and I’m willing to put in some effort to help the tree thrive no matter what the weather.

To that end, I’ll need suitable tools and equipment. Even with proper pruning, my Clementine tree is supposed to grow 8 feet tall. At the moment it’s planted in a small pot, so I can easily pick up the tree and move it around. But as it grows taller (and heavier), I’ll have to upgrade to larger (and heavier) pots to accommodate its bigger (and heavier) root ball.

Picking up an 8-foot tree in a large pot isn’t a job for the faint of heart.


Read more: Check out our simple guide to yard carts!


Roll with It

One option I’ll consider is attaching casters to the pot so it can be rolled from one location to another without having to pick it up. That’s probably the best long-term solution, though another option (if installing casters on a pot proves difficult) would be to strap the pot to a flatbed yard cart and move the tree in this manner. That might even be easier, since a yard cart offers a broad wheelbase (for better stability) and a long handle for convenient pulling.

I should also invest in a soil moisture tester. I understand that it’s easy to overwater potted citrus trees, but I don’t want to underwater either. With a soil moisture tester, I can determine with confidence when my Clementine tree needs water.

Anyone seeking to follow my example and grow a potted citrus tree should consider picking up some bungee cords as well. In its current small pot, my Clementine tree is decidedly top-heavy. Any meaningful wind would be sufficient to topple it over.

That’s why I’m keeping the tree on my porch at the moment, where I use bungee cords to lightly tie the pot and trunk to the porch railing. The wind won’t topple the tree on my watch!

Growing potted citrus trees comes with challenges, but I’m excited by the possibilities and eager to enjoy the first harvest, which can’t come soon enough.

Categories
Animals Chicken Coops & Housing Farm & Garden Poultry

What To Do (& Not Do) When Building A Chicken Tractor

I’ll begin by stating that I don’t understand the expression “The best laid plans of mice and men.” I fathom completely that the best laid plans of men (myself in particular, and, specific to this article, my attempts to build a chicken tractor) oft go astray. But the mice seem to do alright. 

They plan to eat a hole in the feed sack so the contents will fall out for them to make off with, and that plan goes swimmingly. They plan to avoid any store-bought or homemade traps, and they come off like some cross between Einstein and Houdini. In this article, I’ll share with you my experience planning and building a chicken tractor: what I wanted to do, how I did it and what I learned. 

Plan Parameters

My mobile pen parameters were simple: build a low-cost, high-mobility, low-maintenance chicken tractor that allowed me to use chicken litter and chicken behavior to fertilize my pasture. Rotational grazing livestock followed by chickens makes sense to me. The idea is that chickens spread the livestock manure by their natural scratching and add their own litter to the soil.

So, I wanted to be able to move my chickens around 20 acres of pasture.

My design needed the ability to let the chicken litter from daily activities and roosting to amend my soil under the tractor. Low maintenance dictated a plan where I didn’t have to shovel the tractor out every few days. Low maintenance also meant not having to provide water and food or open and close chicken doors multiple times each day.

Finally, my farm is an absolute hobby farm rather than a quasi- or full-blown commercial operation. Therefore my budget needed to be low enough that egg sales could pretend to offset the cost. 

I started with a condemned car hauler trailer that a friend gave me. This was a flat 16-foot-long trailer with two axles and a wood floor. It had a ball hitch that would permit me to pull it around the fields easily with my actual tractor.

I feared the wood floor would quickly rot out with wet chicken manure all over it. And the floor would clearly not permit manure to drop to the ground where I wanted it. My plan was to replace the wood floor with chain-link fencing.

I expected chain-link to be sturdy enough for chickens to walk on and keep out predators. It would have large enough holes for the litter to fall through without clogging. The cheap solution was to buy scraps from a fence installer. I also made overhanging roosting areas along each side that would allow the litter generated nightly to fall straight to the ground below.

In my area, people are disassembling old, unused chicken houses and selling the various parts of the structures online or through social media. It’s easy to find tin, hanging nest box sections for $25 to $50 that have 20 nests, 10 per side. I sprayed mine down with bleach and pressure washed them.

After a few tweaks with pliers and a couple of replaced screws and rivets, they were ready for hens again.

For the water supply, I installed a piece of guttering on one side of the roof that feeds into a 55-gallon drum inside the chicken tractor. The outlet of the drum is a PVC pipe with several automatic chicken waterers inside the tractor. The pipe elbows down and continues through the floor to a few more waterers underneath the tractor that the chickens can reach from outside.

The low-maintenance feeding solution seemed easy. I bought a plastic chicken-feeder at the farm-supply store and hung it from the tractor beams. For the structure itself, I used wood from a small building a friend asked me to tear down and haul away. This worked great from a cost standpoint. But the trade-off was extra time and labor.

In one example, for the main vertical supports I used knobby cedar posts from the building tear down. They had to be notched and squared to meet up evenly with the flat metal surfaces of the trailer and the dimensional lumber of the rest of the chicken-tractor frame.

I covered the entire exterior of the chicken tractor with repurposed henhouse tin, which is readily available in my area for about half the price of new tin. The used tin also lends a nice nostalgic appearance to match other buildings and features of my farm. I also found an automatic, solar-powered coop door online to let the chickens out in the morning and lock them in at night.

And so, with dozens of eggs in a friend’s large incubator to account for new tenants, I neared completion on construction of this chicken tractor. This is where the planning ended and the learning began.

I’ll share a few of my many failures with their attempted solutions.


Read more: Check out these plans for a DIY chicken tractor!


Problem 1: Mounting 

The first problem was how to attach henhouse parts to the metal trailer frame. I needed to attach round cedar posts to the square metal trailer frame. I used a chainsaw to cut rough flat places on the posts and bolted them to the frame. 

For the flooring, I didn’t want to save money on the fence and then overspend on fence hardware to attach to the frame. I solved this problem by stretching the fencing tight and screwing it to the frame with self-tapping screws and large washers.

Problem 2: Fence Floor

The chain-link fence floor was awkward. It was too flimsy for me to walk on to check on birds or collect eggs. I had to step gingerly on the original metal crossing braces that previously supported the wood floor, spaced every couple of feet.

I added a few narrow strips of wood that run lengthwise and attach to the metal cross braces. I use these as walkways.

Problem 3: Roosting & Floor 

My most catastrophic failure was not anticipating the chickens’ reaction to the fence flooring. The floor seemed high and airy enough to the chickens that felt they were roosting on it, even though they were only 2 feet off the ground. This was also how I learned first-hand the horrible damage a raccoon can do to a flock. 

We lost 10 birds in one night. We learned by the fryer pieces strewn about the yard and research that the raccoons didn’t even kill chickens to eat them. They yanked whatever portion of a bird they could grab through the fencing only to get to the contents of the craw.

They leave the entire carcass uneaten. 

The miserably time-consuming but necessary solution was to enter the tractor every night for the first few weeks we have any new chickens and physically move them from the floor to a higher roost. Eventually, they learned to roost high on their own.

Problem 4: Automatic Door

The automatic door has been a regular source of heartache. My kit included a solar panel, a battery, a battery box, an electronic timer and a relay. The solar panel was too weak to keep the battery charged, which resulted in the door not opening or closing at times. This meant watching every night and morning to ensure the door had operated and doing it manually if it hadn’t. 

For temporary fixes, I recharged the battery with a car battery charger. I hated wrestling around the battery box cover, which had a securing strap that was difficult to remove. 

My current, more permanent solution has been to add a second solar panel on the other end of the tractor so I get the benefit of sun from more angles. I also added charging posts that go through the side of the battery box and connected to the battery terminals, so if I ever do have to recharge, I can leave the cover on and simply clamp my charger to the posts.


Read more: A good automatic door can be a chicken-keeper’s dream.


Problem 5: Water Worries

Winters in Arkansas (where I live) are typically mild. If you hail from farther north, you’ll say I should have seen this next problem coming. I would counter that we just had the two coldest winters in many years.

But my wife would chide me for quibbling and defending myself. 

One day after a cold night, I went out and heard water gushing somewhere around the tractor. The lines from the rain barrel had frozen and burst, and were spewing water. 

My solution after replumbing the lines was to wrap thermostatically controlled 120-volt heat tape and foam insulation around them. Now, I bring my chicken tractor close enough to plug the heat tape in if the night is going to be cold. This solution has worked so far in low temperatures down to single digits.

Problem 6: Chicks

My farm currently has a laissez-faire attitude toward broody hens. All attempts to stop broodiness, move broody hens and their eggs to “better” nests or interfere in other ways have failed miserably. This policy means that occasionally we have a hen raising one to three chicks in the tractor. 

On one hand, I have been amazed at how a young and tiny chick can navigate the steps in and out and the ramps up to roosts and utilize big chicken food and water sources. But they do tend to fall through the gaps in the chain link and do it before they are old enough to have figured out how to get back in. 

My first solution was to add a nursery inside: a box for a broody hen to lay on eggs, with a front porch area of 1-inch grid metal mesh where chicks could stretch their legs and where I could put chick feeders and waterers.

You could hear the chickens laugh at this solution. They destroyed the water and food stations hourly. Nonbroody hens discovered the nest box and kicked the broody hen out to drop their daily egg. Now, I just let the moms do whatever they want. If I have recently hatched littles, I cover the entire floor in cardboard until they’re bigger.

If you’re considering a mobile home for your flock, do lots of research. I hope some of my design goals help you assess your own priorities. By adding together your favorite concepts from several chicken tractors, you’ll have the features you and your birds love. And hopefully, hearing about the shortcomings and failures of my plans will help you avoid some yourself! 

This article originally appeared in the March/April 2023 issue of Hobby Farms magazine.

Categories
Crops & Gardening Equipment Farm & Garden Permaculture

Give Slow Mow May A Try For Pollinator Support

I love a good compromise where everyone wins, especially when Mother Earth is involved. So let’s talk about  “Slow Mow May.” 

We’ve all likely heard that lawns are basically monoculture wastelands unable to sustain native insects or wildlife. But many of us still maintain at least some lawn. Realistically, not all of us plant to transition to bee lawns or other ground covers—and that’s fine.  

For those of us who want to do better with what we have, many have tried “No Mow May.” Some of us did OK with it, some managed disgruntled neighbors, and some of dealt with lawns that never really bounced back.  

Why Not Mow?

In general the idea of not mowing to help the pollinators makes good sense. The early season is sparse picking for many native pollinators, and the taller the grass the deeper the roots. Keeping the soil surface shaded keeps other weeds from germinating along with keeping the soil cooler, which then requires less watering. All this leads to an overall stronger, healthier lawn that will need less inputs (water and fertilizer) later in the season.  

That is, up to a point. Then the scales seem to tip. 

When you do eventually mow, if you cut more than 1/3 of the total grass blade length, you will likely damage the plant’s ability to regrow. Suddenly exposing the soil surface to more sun by mowing shorter than 3 inches high can put roots into shock, germinate weed seeds and scald the plants that are left.

These are hard-to-handle transitions for any plant, especially at a time when the sun is at its most powerful around the summer solstice.  It’s been shown that sunny grass does worse recovering from No Mow May practices than shady grass.  


Read more: Ditch the yard? Here’s why you might consider it and how to start.


Enter the Compromise of Slow Mow May  

Use the month of May to try out a slower mowing routine (maybe half as often) and see how it goes. Using this practice can give you a feeling of freedom and help you stretch your own ideas of what a an attractive lawn should and could look like. This also gives you some time to talk with neighbors who might have concerns.  

Don’t mow grass shorter than 3 inches high to help retain good root structure, crowd out weeds and keep the soil surface shaded, which will help withstand possible droughts later in the season. 

Overseed with bee lawn or ground cover seed to passively add in lower maintenance options. Or go big and install a bee lawn or other ground covers in less used areas. There are many ground cover options like sedges and low mow turf options out there.  

The overall idea of low- or no-mow spaces is to create a better overall environment for pollinators, better soil health and less work (lower carbon footprint) for us as home owners. States like my own (I’m in Minnesota) have started offering cost share programs for folks to install a pollinator habitat called Lawns to Legumes. Programs like these are gaining momentum as we all realize how much of an impact we can have on Mother Nature with whatever spaces we have. 

Categories
Crops & Gardening Equipment Farm & Garden

Two-Wheel Tractor Essentials (Book Excerpt)

Reprinted with permission from The Two-Wheel Tractor: Small-Scale Equipment and Innovative Techniques for Boosting Productivity (New Society Publishers, April 2023) by Zach Loeks.

two-wheel tractor tractors


This tractor goes by many names: “two-wheel,” “single-axle” and “walk-behind,” all of which highlight its small-scale nature. But the word “tractor” defines its multifunctional use and sets it apart from the plethora of lookalike single-purpose power equipment. It has one system (engine, transmission, wheels, PTO) powering multiple interchangeable implements. It can do the work of a shed-full of power equipment, with only a single system to maintain.  

A tractor can be simply defined as a land-management machine that has a universal hitch and PTO so it can operate various implements to perform different jobs—from mowing to tilling and snow blowing to hay baling. A PTO (power take-off) is an efficient mechanical part that carries the energy transferred along the drive train from the engine and applies it to any number of implements that have no power of their own. 

Innovated in the first half of the 20th century, the PTO revolutionized farming by allowing a wide range of implements to be developed, all of which are engaged by the mighty power of an engine rather than relying on being ground-driven or pulled through the soil. Ground-driven implements (such as a plow) have no moving parts, whereas a PTO-powered implement (such as a rototiller that has moving tines) is powered by the PTO connection to a tractor’s engine. Many two-wheel tractors have PTOs, and all have hitches for multiple implements. 

two-wheel tractor tractors

Types of Two-Wheel Tractors

There are a few variations of two-wheel tractors to consider. These can generally be placed into two categories: multifunctional (with PTO) and row crop (primarily for cultivation). Smaller models were popular in the 20th century, and they’re returning for special applications. 

Note: Unless otherwise specified as a four-wheel tractor, all tractors—both multifunctional and row crop—discussed here are the two-wheel type. For the scope of this excerpt, we’ll concentrate on the multifunctional variety. 

Multifunctional with PTO 

Multifunctional two-wheel tractors (referred to here as M2w tractors) are the most popular type of two-wheel tractor, with applications across many industries: farming, landscaping, property maintenance, forestry, orcharding and market gardening. M2w tractors can be used with multiple implements, including PTO-powered types. 

The innovation of rotating handlebars is a key multifunctional trait of M2w tractors because they provide a typical rear-mount mode for pull-type implements, as well as an alternate front-mount mode for push-type implements. Some of these implements are PTO-powered and others are non-PTO implements. 

Note: You should never try to push or pull a tractor. The engine, wheels and proper use of weights do this work for you! 

M2w Tractor Features 
  1. This tractor has many uses for different projects since it is not limited to light-duty jobs, and it has many equipment options. 
  2. Implement-type versatility includes the ability to use both PTO-powered and non-PTO implements. 
  3. Lower clearance is less desirable for cultivation, yet better suited for earthworks and mowing-type jobs because of a lower center of gravity. 
  4. Higher hp engine (usually between 8 and 13 horsepower) provides the necessary power for the diversity of tasks. 
  5. More transmission/clutch options include mechanical or hydro-mechanical, clutches and all-gear, or hydrostatic, transmissions. 
  6. Adjustable and rotating handlebars have antivibration mountings and improve ergonomics; operator height adjustments for operators and the offset handlebars improve operation in unique situations, like raised bed management. 
  7. Rear- and front-mount modes improve equipment options, transport, and general operation. 

Read more: Two-wheel tractors are ideal tools for community gardens!


Two-Wheel Tractor Benefits

Two-wheel tractors are great small-scale equipment, making land management a breeze. They are suitable for many enterprises that need affordable, maneuverable, multi­functional equipment. 

  1. Multifunctional: Two-wheel tractors have only one engine, yet multiple implements can be used—opening up opportunities for many enterprises. 
  2. Easily learned: These tractors have a simple but effective design. They have a short learning curve compared to larger equipment. 
  3. Task-appropriate power: Most two-wheel models have between 4 and 13 horsepower, but some can be found as low at 1 12 horsepower and some upward of 16 horsepower. This is a practical power range for many small-scale jobs that are often done with overkill engines in landscaping and farming. 
  4. Budget-friendly: A grower can pick up a tractor and all needed equipment on a modest start-up budget. Two-wheel tractors start at around $2,500, whereas a compact four-wheel tractor costs between $13,000 and $16,000. Implements cost between $500 to $3,000, compared to $5,000 to $15,000 for four-wheel tractors. 
  5. Seasonal implements: The two-wheel tractor performs (with the correct equipment) spring, summer, fall and winter tasks. 
  6. Equipment options: Equipment comes in different widths to match the scale of your operation and with different accessories that can be customized to your terrain and tasks. Different equipment versions suit different needs and budgets. For example, there are more than three types of plows; each has its own merits. 
  7. Low Impact: Two-wheel tractors cause far less compaction on your soil and use less fuel—while still doing a job right. 
  8. Low maintenance: Two-wheel tractor maintenance is straightforward. Components are easily visible and accessible, and there is no need for specialized tools beyond those found in a typical home garage. 
  9. Maneuverable & easily controlled: These tractors are maneuverable, well-balanced, small and have a tight turn radius. This is ideal for negotiating sloped land, garden headlands and greenhouses. There are two main types of two-wheel tractors, and both are very maneuverable. The first type, the row crop tractor provides excellent cultivation and seeding control with its great hitch design, while the most popular type, the multipurpose tractor, has a drive system that is perfect for maneuvering with loaded carts, mowing, and heavy soil working. 
  10. Easy storage & transport: These machines are easy to store. With foldable handlebars and a compact size, they can be loaded in the back of a pick-up truck or on a small trailer. 
  11. Safe handling: Their scale and features make them safe for operators at all levels of experience (with proper training, of course).

This excerpt originally appeared in the March/April 2023 issue of Hobby Farms magazine.

Categories
Crops & Gardening Farm & Garden Food

Jam, Jelly, Marmalade & More: Defining Preserves 

Do you know the difference between jam, jelly, preserves, conserves, fruit butter and marmalade? I’m sure you’ve heard the names used somewhat interchangeably. Before I started preserving my own food, I didn’t realize there was actually a difference between jam and jelly.  

Presently, I frequently use the word “preserves” as a blanket word for pretty much all of the fruit-based goods I make. So, in case you are unsure of which is what, let me break it down for you. 

Jam

Jam (pictured above) is a fruit-based spread that has pieces of fruit that have been chopped or mashed with sugar. It is a spreadable consistency that will have chunks of the fruit within it. Jam is my favorite to make. 

Jelly

jelly preserves
Madele/Adobe Stock

Jelly uses the strained juice of fruit, cooked with sugar and sometimes a thickening agent such as a commercial pectin. The preserve is clear and spreadable, without any chunks, and usually is see-through. 


Read more: Sweet springtime violet flowers make a delicious jelly!


Preserves

preserves
Edalin/Adobe Stock

Preserves are similar to jams, however the pieces of fruit aren’t mashed or chopped. Rather, they are left in whole form, though they normally break down during the cooking process. The resulting end product is very similar to jam. 

Conserves

conserves preserves
vaclavkrizek/Adobe Stock

Conserves are similar to jams as well, however there is often the addition of nuts, raisins, dried fruits and other spices cooked within. 

Fruit Butter

preserves fruit butter
nata_vkusidey/Adobe Stock

Fruit butter is a smooth and spreadable fruit puree that has been strained of solids. The texture should be thick and silky, without any chunks. It’s generally cooked slowly over many hours to deepen the flavor and thicken the consistency.


Read more: This pear jam brings big fall flavors!


Marmalade

marmalade preserves
MSPhotographic/Adobe Stock

Marmalade is made with various citrus fruits. Citrus peel (with or without pith) is sliced and cooked with sugar, and the end product produces softened pieces of citrus, suspended in an infused, spreadable thickened sugary syrup.  

Now that you know the differences between them, which do you use for what? Generally, these various preserves can be used interchangeably. All go well with the classic buttered toast or spread over a fresh-out-of-the-oven biscuit. And they also taste great mixed into plain yogurt or oatmeal, or used as a topping option for pancakes and waffles.

Preserves also make a great addition to a cheese board, as well as serving well as delicious salad dressings and glazes for grilled or baked proteins.  

Categories
Farm & Garden Video

Video: Building A New Farm Garden Shed (Pt. 4)

In previous videos in this series, we chose a site for my new garden shed, then did some work to level and ready the land for the outbuilding. Then we built the building’s foundation, installing joists and securing a plywood floor.  Next, it’s time to build the frame for the garden shed.

Building a frame is a simple and common practice used by framers across the country. If done right, it’s also a pretty quick part of the building process.

Start at the Top

A wall frame starts with the top plate. This component is just two 2x4s stacked. When I lay them out, I look for how they crown (as we did with the floor joists), making sure I put the boards’ crowning directions opposite one another.

With the boards laying next to each other, I quickly make marks to indicate where the studs will be set. (Check the video to see how I measure and mark these.) I also take special consideration of where the doors and windows will be.

Then, I’m able to simply set the studs and attach them with a nail gun.

A Few Extras

You’ll see in the video that, once the wall frames are built, the building frame goes up pretty easily. One note, though, is that the next step is not to put the rafters up as you may assume. Why? Because putting the square siding sheets on first helps to further plumb the building, ensuring the structure is as square as possible.

In the video, I show you a few extra steps that I took in the framing process, too, which typically don’t show up in framing jobs. This includes attaching small strips of wood, called dead wood, in the corners for ease in attaching the plywood siding. I also checked the structure for square along the way as I installed each wall frame.

I also put some 6-inch lag screws in the base of the walls to secure the frame of my garden shed to the joists. This extra effort will hopefully create a structure that can withstand all but the most catastrophic winds.


Categories
Animals Beginning Farmers Farm & Garden Homesteading Poultry

Ducks Do A Lot At 10 Maple Acre Homestead

“The most rewarding part is making good use of what’s around us and seeing it all work,” says Calum McCaskill, weighing up the benefits of running the 10 Maple Acre homestead in Ontario, Canada. “Sitting on the porch and looking at what we have built in only a short year and looking out over the fields at the wildlife—deer, turkeys and bald eagles lately—is so peaceful and rewarding.”

Having always aspired to be “some kind of farmer for as long as I can remember,” McCaskill originally ended up moving to the country with his wife and renting a small cottage-style abode. After getting outbid on a number of houses, the couple eventually found a place that needed a lot of work but was available for below asking price.

“One of the first things we did after settling in was get chickens and ducks,” says McCaskill. “We’ve been homesteading ever since!”

We spoke to McCaskill about living around ducks and the poultry pecking order. We also got into the wonders of blue eggs.

Sharing Space with Nature

Reflecting on the lifestyle changes that have come with dedicating themselves to 10 Maple Acre, McCaskill says that the biggest difference is being further away from many day-to-day conveniences. “But it’s worth it for the peace and quiet.”

McCaskill adds that the family has also come to grips with sharing space with nature. “We have had mice, crickets, possums and coyotes cause us some trouble,” he says “We have lost two ducks and two chickens to coyotes and possums.”

“One time, I woke up at midnight,” he continues, “hearing coyotes out back at the barn (the old barn that wasn’t closed in as well as the new setup). By the time I got out there, they had disappeared with a duck into the night, which out here is extremely dark. I camped out with my gun the next night, but they never came back.”


Read more: Protect your chicken coop from common predators.


Let’s Hear It for the Ducks

Alongside chickens, ducks also play a key role at 10 Maple Acre.

“We got the ducks because I’ve always liked ducks, and last summer we had an insane amount of crickets on the property and in our basement,” says McCaskill. “The chirping we’d hear in our room while sleeping could drive you nuts. The ducks ate a lot of them…. Just walking across the yard you’d probably see over 200 crickets.”

Pest Control, Entertainment & Security

When it comes to the order of the ducks, McCaskill says that a chap named Andrew (after actor Andy Griffith) is literally “the big duck. He is in charge of the run.”

Detailing some of Andrew’s adventures, he adds: “He has survived a few encounters with coyotes and possums that claimed the lives of his roommates. He is very big so must be good at defending. We trust he will keep the hens and the other duck [Warren] safe in the run should any predators come around.”

“So the ducks are mainly pest control, entertainment and security,” he adds. “I also recently dug about a 2,000 gallon pond for them to enjoy.”


Read more: Chickens? Ducks? These birds of a feather can flock together.


Digging In to the Pecking Order

“There’s a lot of interesting things about keeping the ducks and chickens,” says McCaskill, reflecting on the homestead’s resident poultry. “One that comes to mind is the pecking order. It’s a real thing!”

“We added new chickens to the coop this spring, and it took about two weeks for the original chickens to allow them to come down off the roosts and eat and drink with them,” he explains. “I’d come out to chickens bleeding and hurt. They establish who is in charge down to who’s at the bottom.

“Once that is decided, everyone gets along great. As far as the run enclosure, Andrew the Silver Appleyard duck is in charge.”

Behold the Blue Eggs

“Six of our hens called azure blue chickens lay blue eggs, which is something you don’t see a whole lot of around here,” says McCaskill when asked about the most eye-catching eggs his chickens bless the world with.

“We have 18 chickens: 10 red sexlinks, six azures and two barred Plymouth Rock hens. We named them by breed instead of individuals, as that’s a lot of names. The red ones are Rebas, the white ones are Sheilas and the barred rocks are Thelmas.”

Follow 10 Maple Acre Homestead on Instagram.

Categories
Animals Farm & Garden Flock Talk Poultry

Joining A Poultry Community Provides Plenty Of Benefits

When my husband Jae and I began our poultry farm two decades ago, we didn’t just buy a few (okay … three dozen) starter chicks. We also invested in the best feeders, waterers, toys, hoppers, supplements—you name it—that we could buy. The “best” we determined via online reviews and recommendations from flock-owning friends.

Our new-owner enthusiasm didn’t stop there, however. We joined the American Poultry Association, the American Bantam Association, the American Livestock Breeds Conservancy, our state’s grassroots poultry association, about a half-dozen Facebook poultry groups, and several online poultry-chat sites. We also joined the national breed club for every breed of chicken we were raising. I even co-founded my town’s chicken-owners association.  

Fast-forward 20-odd years to find us active in just two groups, not two dozen: the renamed Livestock Conservancy and our local chicken-owners association. Over the years, as we revised the breeds we raise and our chicken-rearing goals redefined themselves, what we needed from poultry organizations also changed. We found ourselves wishing to support efforts to conserve and promote vanishing breeds … and as the founder of our local grassroots group, I couldn’t just quit.

What’s right for us as flock owners, however, isn’t necessarily right for you. You may not even wish to join a poultry community, and that’s perfectly acceptable. My grandmother never belonged to one, and she raised her hens just fine.

For those curious about what poultry associations there are and whether one or more match your fowl-raising philosophy, here’s a rundown of the six most popular types. 

Livestock  

The American Poultry Association (APA) and the American Bantam Association (ABA) are the country’s key poultry organizations.

Founded in 1873, the APA encourages the breeding and exhibiting of purebred poultry. It publishes the American Standards of Perfection, the metrics by which all purebred birds are judged. The APA supports sanctioned poultry exhibitions throughout North America, licenses judges who officiate at these poultry shows, and presents educational programs to help develop youth into tomorrow’s purebred flock keepers.

Similarly, the ABA sets the standards for all bantam poultry in North America, sponsoring meets across the continent to increase awareness of purebred bantams and to create a more cohesive, cooperative community of bantam breeders. Both associations are strictly administered by directors and district representatives who serve specific terms in office. Membership fees cover the cost of the annual yearbook and quarterly newsletter and support the revision and publication of the Standards (APA) and Bantam Standards (ABA). 


Read more: Join a farming organization to grow your experience and influence.


Conservation  

Like the APA and the ABA, the Livestock Conservancy focuses on purebreds. However, instead of encouraging their rearing and exhibition, the Livestock Conservancy’s emphasis is on heritage breeds that are on the brink of extinction in North America.

Every year, the organization publishes its Conservation Priority List, which details the breeds that are critically endangered, threatened, or bear watching and studying. Membership fees help fund the organization’s many conservation, research and educational programs, including microgrants for heritage breeders working to restore biodiversity in their communities and regions. 

Education 

In the 21st-century technological society, there seems to be little interest in fostering future agriculturalists. Fortunately, two organizations ensure that today’s youths become tomorrow’s farmers and agricultural scientists. The Future Farmers of America  and 4-H both strive to empower children and provide them with the skills, education and training to succeed in the agrarian fields.

While these groups focus on young people, adults are very much welcome and needed to serve as volunteers, advisors and mentors. 

Breed 

Most heritage poultry breeds have a national organization that promotes the breeding and rearing of their bird of choice. Each organization functions differently, its purpose determined by the group’s founders and directors.

Some are more of a club where people who raise the same breed can share experiences, offer advice, and enjoy friendship and community. Others strictly focus on the betterment of their breed and adhering to the Standards of Perfection. Still others focus on the promotion of their breed, with regional or state representatives hosting mini-meets at local poultry exhibitions to spread the word about their group and their chicken breed.

There are even associations whose mission is to have more varieties of their breed recognized by the APA. Locate your breed’s national organization by conducting an Internet search for your poultry breed’s name and “national club” or “national organization.” Then spend some time exploring their web site to determine if the association matches what you’re looking for in a breeders’ group. 


Read more: Which chicken breeds meet your poultry purpose?


Online 

Internet poultry groups number in the thousands, each slightly different from the other, including:

  • Bulletin-board web-page groups, where members post a question and other members chime in with advice
  • Buy-sell-trade groups, where members post photos of birds they want to sell or purchase
  • “Chicken train” groups, whose members help transport purchased birds from one geographical location to another
  • Mutual-admiration societies, where members share photos of their adorable chicks and beautiful chickens
  • Chat groups, where members freely discuss any aspect of flock keeping they so wish

One positive about online chicken groups is that they are free to join. You simply click join and are either approved on the spot or after a moderator reviews your request. Another positive about online chicken groups is that you can leave whenever you wish.  

Local 

Many communities have their own poultry-owners association, a place where backyard and hobby-farm flock owners can chat, support each other, and promote chicken ownership.

Some municipalities require permitted flock owners to join the local poultry group as part of their requirements for flock ownership. Others are completely organized and operated by the poultry owners themselves.

A huge bonus to a local poultry community is that any hatching eggs, chicks or birds offered for sale are just minutes away versus in another state. Local clubs can also guide members towards the best deals in town for feed and equipment … and inform them of what stores to avoid. Another positive is that, because membership is within the community, real-life friendships can develop between flock owners and local events, like a tour de coop or a poultry swap, can be organized and offered.  

Categories
Crops & Gardening Farm & Garden Foraging

Forage Wild Strawberries For A Springtime Treat!

I really love foraging … in theory. The notion of searching out sustenance in the forest, gleaning nutrients from little more than that which Mother Nature gifts the denizens of this wild and strange planet just really speaks to the person I wish I was.

The person I actually am, though, is seized with anxiety over the thought of popping the wrong mushroom into my overeager mouth. I don’t have a great eye for details off the written page, so specific species traits of an herb’s leaf or other subtle indicators of “enjoyably edible” versus “avoid at all costs” don’t exactly leap out at me.

I am, generally speaking, cool with putting found fruit into my mouth, though, and wild strawberries are one of the few foraged foods I have history with. Growing up in suburban Kentucky, I was acquainted with a minuscule patch of tiny wild strawberries that emerged along the side of our poured-foundation home every spring. My dad loved to point them out when doing lawn work, carefully avoiding the crimson dots as he maneuvered the mower around the little patch.

I only remember eating one or two of these little berries in my youth. But getting the green light on enjoying a wild berry surely led me to comfortably foraging our farm’s forest edges for blackberries, raspberries and the occasional strawberry in my adult years.

The Pretender

The most important question when foraging is, of course, are there lookalike plants that could, you know … hurt me? The answer in the case of wild strawberries is yes and no.

Suitably called “mock strawberry,” Potentilla indica has differences in its tooth-like leaves and yellow blooms but puts out a very strawberry-looking fruit. The good news, however, is that Potentilla indica won’t hurt anything more than your feelings as it greets your mouth with a deflating total lack of flavor.

While you’d be forgiven for popping a mock strawberry into your mouth, you don’t need an eagle eye to spot the imposter. While real wild strawberries feature seeds set nearly flush with the flesh, mock strawberries have a notably bumpy texture very unlike the real thing.

Also, note how the plant grows. Mock strawberries grow upward, with the fruit perched atop a rigid stem, above the leaves. Wild strawberries grow downward, drooping toward the ground. So if you spy a bumpy “strawberry” sitting pretty, begging to be picked … keep looking.

Wild strawberries (L, Sanja/Adobe Stock) versus mock strawberries (R, SERGIYVOLODYMYROVYCH/Adobe Stock)

Harvest Time!

There are a few different varieties of wild strawberries you may stumble across, though Virginia strawberry is the most common. Wild strawberries start to ripen in late May around my parts and can be found through October, depending on where you live. Here’s a fun tip: If you spy an ox eye daisy in bloom, you can go looking for wild strawberries, which ripen in the exact same seasonal window.

To harvest this tasty foraging find, pull back the leaves to look for drooping clusters underneath. (Remember: Real wild strawberries grow downward, close to the ground.) Then, go nuts—put as many into your bowl or basket as possible. Go ahead and eat what you want then and there, as wild strawberries don’t store well and have the best flavor—floral and sweet and kind of tangy—at time of picking.


Read more: Foraging directs the brews at Scratch Brewing Company.


Using Wild Strawberries

It’s highly unlikely you’ll gather enough wild strawberries to worry about longterm storage, but if you’re so lucky as to collect an abundance, you can (and should, as they spoil quickly left out) pop the extras in the freezer whole for use later. You could also whip up some preserves or a batch of strawberry dessert to enjoy the berries’ concentrated flavor. Or, if you’re feeling decadent, wild strawberries taste great in a cocktail.

You can also make a tea from wild strawberry leaves. Pick green, healthy leaves (spring leaves are the best), which you can either dry for later use or steep for about 10 minutes now for a tasty, healthy infusion. The tea is packed with vitamins and nutrients, with tannins for a green tea-like mouthfeel.

The most obvious benefit, though, is the taste, which is mildly fruity and perfect for a spring day.