

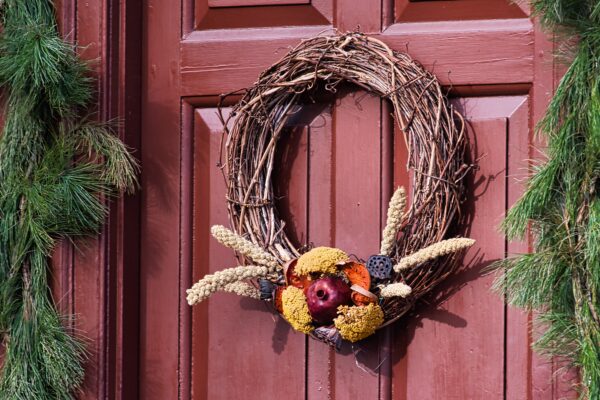
There’s something magical about turning materials from nature into a beautiful decoration for your home. In this guide, you’ll learn how to make a grapevine wreath using vines you can forage from your backyard or local forest.
Why Grapevines Are Perfect for Crafting
Living close to nature gives you access to materials that can inspire creativity—and grapevines are a perfect example. While wild grapes are native in many regions, they can sometimes overwhelm young trees. Cutting them back can help your trees thrive, and the vines themselves become an ideal craft material.
Grapevine wreaths are versatile: they can become door decorations, dreamcatcher bases, or even DIY chandeliers. You can make them small or large, simple or elaborate—the shape and size are limited only by the vines you collect and your imagination.
Step 1: Prepare Your Grapevines
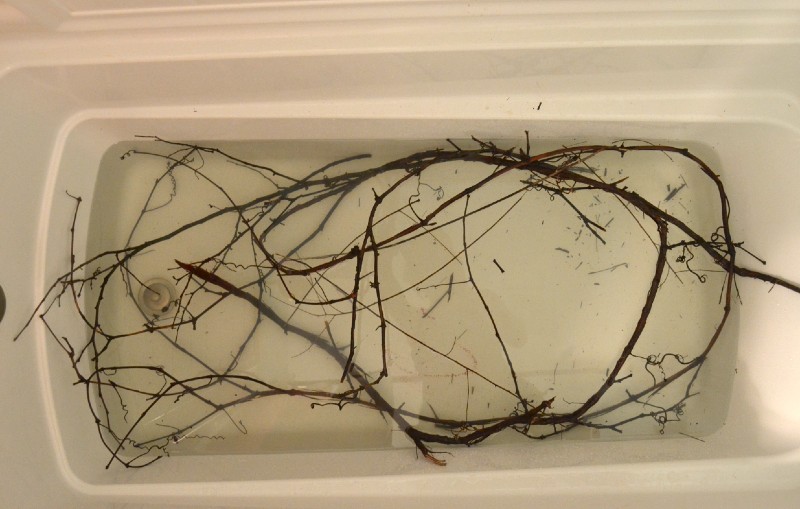
If your grapevines are brittle, soaking them in warm water for an hour or more will make them pliable. If the season has been rainy, vines may be soft enough to work with straight from the forest. Use a bathtub, bucket, or trough—whatever fits your vine collection.
Step 2: Form the Wreath Foundation


Pick a vine length suitable for the size of the wreath you want. A 3-foot vine is ideal for beginners and small wreaths. Hold it with both hands to identify its natural curve. Cross the ends like tying a shoelace and wrap any extra around the hoop you’ve formed—this is the base of your wreath.
Step 3: Build Up Your Wreath

For a fuller wreath, wrap additional grapevine lengths around the base. Tuck ends into the wreath, or secure them with floral wire if needed. This step lets you create a thicker, more textured look.

Step 4: Trim for Style

Trim any protruding vines if you prefer a neat look, or leave curls intact for a wild, rustic aesthetic. The beauty of a grapevine wreath is that imperfections add character.
Step 5: Dry the Wreath

Hang your wreath in a well-ventilated spot for several days to a week until it’s completely dry. This helps it hold its shape and ensures longevity.
Step 6: Add Decorative Touches

Now comes the fun part! Attach adornments using thin vines, floral wire, or ribbon. Pinecones, feathers, evergreen sprigs, and even small bird nests can make your wreath truly one-of-a-kind. Let nature inspire your design.
Beyond the Basic Wreath
Once you’ve mastered the basic wreath, let your imagination soar. Grapevines can form hearts, stars, baskets, or even three-dimensional decorations. Large grapevines can be used indoors as rustic plant hangers or wall art. The possibilities are endless when working with this versatile natural material.
FAQ: How to Make a Grapevine Wreath
Q: Do I need special tools to make a grapevine wreath?
A: No, basic items like floral wire, scissors, and a bucket for soaking vines are enough. Optional decorations can be added with ribbon or hot glue.
Q: How long should I soak the vines?
A: Soak brittle vines in warm water for at least one hour to make them flexible. Rain-softened vines may not need soaking.
Q: Can I make different shapes besides a circle?
A: Yes! Grapevines are versatile—you can create hearts, stars, baskets, or even three-dimensional designs once you’re comfortable with the basics.
Q: How do I make my wreath last longer?
A: Hang it in a dry, well-ventilated space until fully dried, and avoid direct sunlight or moisture to maintain its shape.
Q: Can I use artificial decorations?
A: Absolutely! Dried flowers, faux berries, and ribbons all work well with grapevine wreaths.
This article about how to make a grapevine wreath was written for Hobby Farms magazine. Click here to subscribe.
