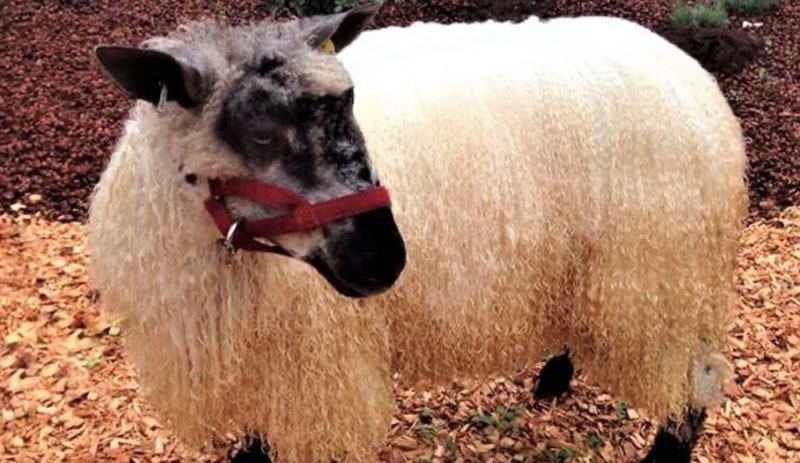
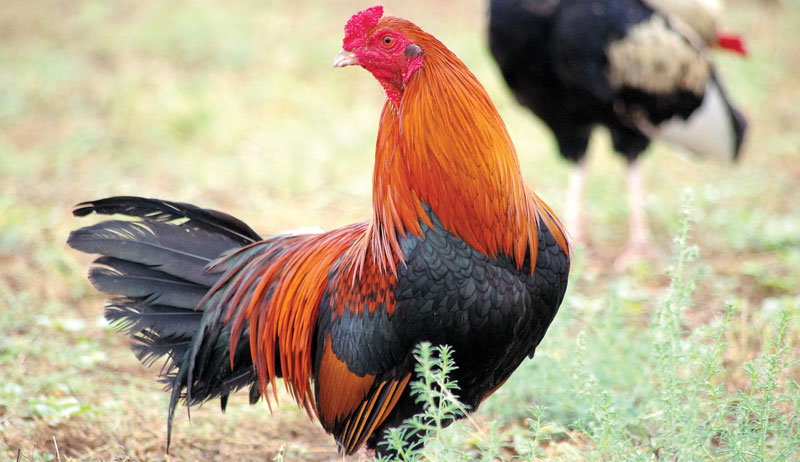
If you keep sheep, how did you chose the breed you wanted to raise? Was it hair vs wool sheep? Wool for spinning? Were you looking for a 4-H project? A good meat-producing sheep?
There are all kinds of reasons people choose the breed of sheep they have (or want to have). But one additional thing to consider? Stopping some breeds of sheep from going extinct!
Why is that important? Well first of all, consider the fact that 75 percent of the world’s food supply comes from just 12 crops and five livestock species, according to The Livestock Conservancy. That’s a pretty startling statistic.
In the US., some of the most common breeds of meat sheep are the Cheviot, Dorset, Hampshire, Shropshire, Southdown and Suffolk. Many folks get crosses from these and other breeds as well in an effort to create sheep that are fast-growing and produce more meat.
But many years ago, farms across the country had sheep breeds that suited their particular environment and solved a particular problem for each farmer. Farmers that lived in the Deep South, for example, would look for different characteristics than ranchers in North Dakota.
What that meant was that different breeds of sheep were more resilient to specific types of weather and forage. According to The Livestock Conservancy, those sheep were bred for robust health, better mothering instincts, better foraging and the ability to thrive in a changing climate.
Today, if a disease were to attack a commercial breed of sheep, for example, it could wipe out a huge portion of the nation’s food supply. That same scenario is true with cattle, poultry and other types of livestock.
What Is a “Heritage” Breed?
So what exactly is a “heritage” breed? The best way to look at it is to think of the breeds of sheep that your great-grandparents may have had in their barnyard.
The Livestock Conservancy lists endangered breeds by five different categories:
Critical (the most endangered breeds with less than 200 sheep in the US)
Threatened (or less than 1,000 of the breed in the US)
Watch (which is less than 2500 of a single breed in the US)
Recovery
Study
So, if you are interested in spinning, you might consider the Navajo-Churro (which are in the most endangered group, Critical) or the Black Welsh Mountain Sheep (which are currently labeled as Threatened).
The Florida Cracker or the Gulf Coast native breeds are considered good meat sheep, and they do well in hot and humid conditions. Yet both are in the Critical category with very low numbers.
This excellent sheep reference guide from The Livestock Conservancy gives you comparisons in an easy-to-read chart. For example, I am looking for what breed would suit my needs (herding for dogs, meat production and wool for selling as garden mulch) in the Midwest. I could choose the Teeswater, which is on the Critical list and is alert, spirited and suited to a temperate climate. Or there is the dual-purpose (meat and wool) Clun Forest, which is docile yet an excellent forager.
It might take a bit of effort to find the heritage breed of sheep that you want. But I personally feel the effort is worth it. Although I currently have North Country Cheviot crosses, I may add a new breed to my flock when I find the right breed and the right breeder!
If you decide you want to look into a specific heritage breed, I want to hear about it! In addition, you can look online for a breed club or find a list here.
Good luck with finding the right breed of sheep for your own farm operation. And remember, if you can, consider a heritage breed to keep the vital biodiversity needed in our farm livestock!
Potted plants are great any time of year. They add color and vibrancy inside or outside of a house. But when you bring home new plants from the nursery, you typically need to repot them in a more permanent container than the ones they’re sold in. And you need to follow a few important steps when doing this.
First, you need to ensure that the pot you’re moving your new plant into is correctly sized. These permanent containers need to be bigger than the pot your plants came in. In the video above, you’ll see I’m recycling some metal containers for use as planter boxes.`
After you’ve chosen and readied your planters, you need to put some gravel in the bottom. This gravel layer simply allows excess water to drain away from the plant’s roots in the container.
Next, you want to put potting soil into the container. Don’t fill the container to the brim, though. Rather, you just want to put in enough soil so that, once the plant is put in there, it sits at the desired level in relation to the container’s top edge.
Your potted plant comes in a thin plastic container from the nursery, and you want to massage this container a bit before removing the plant. This simply breaks up the soil and frees the roots.
Slide the plant from the container, noting how the soil and roots are compacted to the shape of the container. Rough up the surface of the soil with your thumbs to loosen the roots, sending them in the right direction to receive nutrients from the potting soil you’re about to add.
Once the plant is removed from the container and readied for transplanting, you can place it into the container. Then add potting soil around and on top of the plant, not packing it tight but rather firming it up so the plant is secure.
Congrats! Your new plant is now permanently potted. Move the container to wherever you want it and give it a good water. check the moisture every day, and provide more water if the soil feels dry.
My great-great-grandma Selma passed away nearly 30 years ago. She was 93 years old when she died, and I was 10. Though our time together was short, she left a lasting (loving) impression on me.
She didn’t cook much by the time I was born, though from what I’ve been told, she was quite the chef back in her prime. My grandma shared stories about all the cooking Selma would do and how she’d have a big pantry filled with boxes of various types of cookies she’d prep for the holidays.
When my great-great-grandma passed away, my uncle and his family inherited her cookbooks. Her cookbooks consisted of mostly handwritten recipes or recipes she’d clipped out of publications and glued into a notebook. When my uncle came to town earlier this year, he hand delivered me these cherished cookbooks.
It’s an honor to now call them mine, as these recipes are 100 years old.
In one of the books is my grandma Selma’s hand-written sugar cookie recipe. We’ve made this recipe annually each December since my daughter was born. The cookies can be frosted and decorated, eaten plain or rolled out and cut into shapes and baked.
1-2 tablespoons milk (as needed to create a smooth consistency)
Food dye, colors of choice
Frosting Instructions
Beat butter and vanilla using a hand mixer until creamy and smooth. Slowly add powdered sugar, mixing until combined well. Add milk and continue to mix.
Once frosting is made, divide up the frosting into small bowls, and add food coloring until the desired color is reached.
Notes
If you intend to cut the dough into shapes and bake, allow it to cool in the refrigerator for two hours before rolling out.
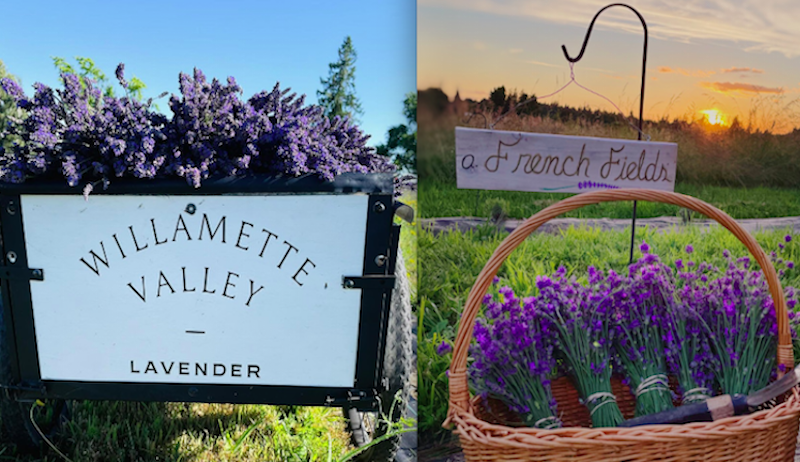
After visiting a nearby lavender farm for their 20th wedding anniversary, Mike Mitchell and Sandra Solano-Mitchell were inspired to turn their own 10.5 acres of land into a similar venture. They named it Willamette Valley Lavender.
“It was then, surrounded by solitude, lavender and bees that we decided to jump in with both feet and take on this new adventure,” the couple recalls. “In October 2020, we planted our test garden with 200 plants and 11 cultivars. This allowed us to see what would grow well in our micro climate.
“Since then, the farm has expanded to over 3,000 plants and more than 30 cultivars.”
We spoke to Sandra and Mike about the therapeutic nature of faming and the differences between French, Spanish and English lavenders. We also got into the best ways to incorporate lavender into your cooking routine.
“For many years we brainstormed ideas about what to do or grow at the farm. But everything we came up with required huge amounts of time year-round, and we needed to be mindful that our teaching jobs already demanded most of our time,” explains the couple. (They think of themselves as public school teachers by day and hobby farmers on the weekends.)
“We found lavender to be more of a teacher-friendly crop,” they continue. “Harvest times and plant care align well with our school schedules, as we harvest early in our summer break.
“Although there is still a lot of work to do year-round. We really enjoy the process and everything lavender has to offer. The lavender work is stimulating and reenergizing, which makes for an excellent disconnect from our daily jobs.”
When it comes growing lavender, Sandra and Mike are advocates for organic methods. “We do not need to add fertilizers or pesticides to nature,” they explain.
“Preparing the land, we may add amendments to reach the proper pH level for the soil. But once the soil is ready the only additive we have for the plants is a little bone meal to help them establish. So this fits with our using the resources already on hand.”
There are over 450 varieties of lavender available. But Sandra and Mike like to categorize them into three main categories in the United States:
English lavender
French lavender
Spanish lavender
They describe the English variety as being an “excellent choice for culinary purposes” due to its sweet and delicate floral aroma.
On the other hand, French lavender possesses an “invigorating fragrance” that makes it great for aromatherapy. Spanish lavender is a must for garden and landscape use.
Moving into the kitchen, Sandra and Mike are fans of using lavender in drinks.
“Lemonades, lattes, mocktails and cocktails can be easily achieved with fresh or dry bud or by making simple homemade lavender syrups,” they say. “We also enjoy baking recipes, fruit salads or desserts. When cooking with lavender, a little bit goes a long way.”
“Farming is rewarding because it gives us a healthy, creative and productive outlet to our busy and often stressful teaching jobs,” say Sandra and Mike when asked about the positive impact that Willamette Valley Lavender has had on their lives.
“It also gives us the opportunity to share our lavender products with our community during farm visits and farmers markets,” they continue.
“That is extremely fulfilling because we—like many people—love the fact that lavender brings us pleasant memories, joy and comfort.”
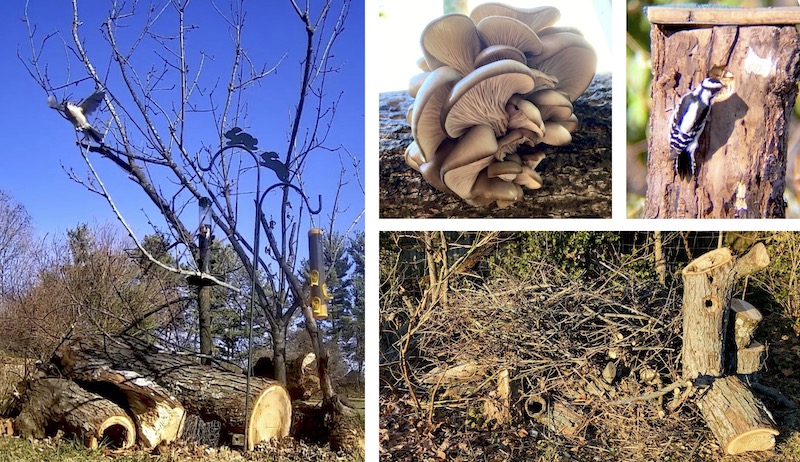
I knew the silver maple tree in my backyard was in pretty rotten shape, but hearing the decades-old tree fall was still a shock. (As it happens, one of my nature cams captured the whole sad spectacle on video.) A combination of water-logged soil and stiff, straight-line winds finally resulted in a fallen tree.
When I told friends what happened, they immediately jumped to the same conclusion: that I would be cutting the tree up for firewood. But I don’t have a fireplace or a wood-burning stove. And now I have even less habitat for the creatures that used to depend on that old tree for shelter.
As a result, I’ve been doing everything but stacking new firewood. What follows are 10 ways I’ve been using my old tree to help feed myself and support area wildlife, too.
And who knows? Maybe the next time you’re faced with a newly fallen tree, you’ll give some of these a try.
Bird Rest Stops
I used to love sitting near the old maple and watching the birds take shelter within its hollows and along its branches. Determined to restore some of what’s been lost, I’ve created a few bird rest stops.
First, I selected some large, sturdy limbs which still had several branches attached. Then I gathered several intact and hollow log sections. To keep grass and weeds from encroaching, I removed a small section of turf and covered the area with a thick layer of cardboard and fallen leaves.
Next, I arranged the logs so that they could sandwich and support some of the tree limbs. I positioned these limbs so they would stretch upward—like younger, smaller trees might. To keep the logs and limbs in place, I filled nooks and crannies with loose soil, watered it in well, and packed the soil down.
I planted sedum atop areas with exposed soil and sowed some perennials around the logs as well.
Finally, I added a bird feeder pole, along with black oil sunflower seed and thistle seed feeders. My mini rest stops have been well-trafficked ever since.
Forts & Blinds
If you collect enough similarly-sized sticks, you (or the kids!) can use them to create a lovely natural fort or even a photography blind. Once inside your hiding spot, you can more easily snap close-ups of birds and other animals.
Got Burls?
Stressed-out trees are much more likely to produce burls—rare growths prized by some woodworkers. If you have them, you may be able to sell your tree’s burls for top dollar. Or you can make something beautiful from them yourself.
Suet Log Feeders
I drilled a series of staggered holes in some of my longer, wider logs and then filled the holes with softened suet. Whether you hang or stack these suet-filled logs, woodpeckers, Northern flickers and other birds will flock to them.
Mushroom Magic
Depending on what kind of fallen tree you have, you just might be able to inoculate some thicker limb sections with mushroom spawn plugs. You can also inoculate large (green/live) logs using the totem method.
Susan Brackney
When selecting logs to inoculate, be sure to get them up off the ground as soon as possible. Store them on a clean tarp or large piece of cardboard to prevent other fungi from moving in before you have a chance to introduce your fungus of choice.
Although mushroom logs take some work and maintenance up front, they’ll pay dividends for many years.
Large Wildlife Habitat
My tree already had some large dead sections. So, once it fell, I was left with a number of hollow or partially hollow logs.
I arranged some of these to create shelter for larger animals like rabbits, possums and raccoons. To begin, I cleared away turf and weeds, laid down cardboard and topped with fallen leaves. Next, I added a large pallet and surrounded this with logs—some standing on end and others on their sides.
Finally, I filled in the remaining space with large limbs and smaller twigs and sticks. Eventually, critters will rearrange this habitat as needed. (See photo.)
Hügelkultur
You can use up many of your leftover logs by stacking them inside a trench or at ground level to create a hügelkultur planting bed.
If you have at least one hollow log section that’s just over a foot long, you might have what you need to make a nice downy woodpecker house. (See photo and details here.)
Compost or Mulch
Whether you own, borrow or rent a chipper/shredder, you can use it to make fast work of smaller limbs and branches. Then, use the chipped wood from your fallen tree to mulch landscaping plants or periodically add it to compost piles in need of carbon-rich material.
Mill It
New lumber isn’t cheap, and your fallen tree could supply you with enough boards for your next few projects. Seek out someone near you with a portable sawmill and you’re in business.
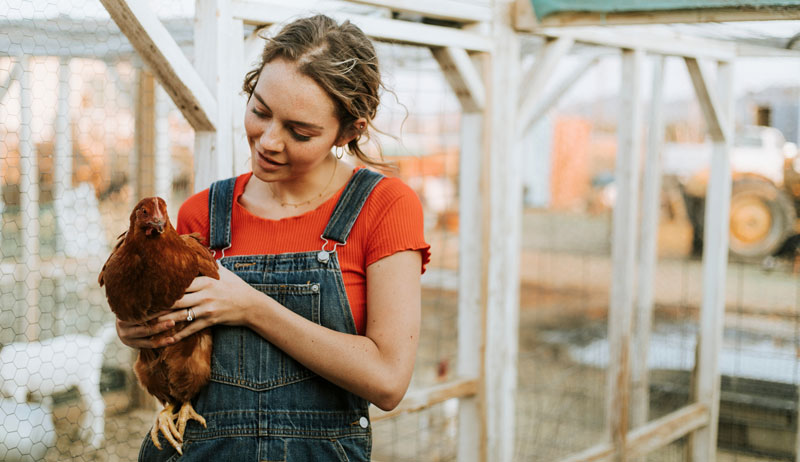
So you’re finally taking the plunge and joining the ranks of chicken owners across America. Congratulations! Keeping a microflock of chickens will bring a great deal of enjoyment, amusement and satisfaction to your life, in addition to those delicious fresh eggs.
Keeping chickens is not without its negatives, however. And new poultry owners occasionally find themselves blindsided by ramifications they were unaware they would encounter. Make sure you enter the world of flock ownership with eyes wide open by giving these four points your full consideration.
Can You Handle the Inconveniences to Your Schedule?
Owning a backyard flock involves a major restructuring of your—and your family’s—schedule. Forget sleeping in or spending a leisurely morning in bed, checking the news or reading your notifications. Your morning priority must be releasing your chickens from their coop.
They don’t need to be let out at daybreak—especially since predators are still skulking around at that hour. But your birds should be released before mid morning to provide them with the daylight exposure necessary for egg production and to prevent the stress and negative behaviors that come from being enclosed with limited space.
It doesn’t matter if it’s pouring rain, if it’s blizzarding or if it’s 0 degrees F out. You still need to open up the coop and let the chickens decide if they want to come out or not.
Closing up at night can be more disruptive to your schedule than the morning release, since the length of day changes throughout the seasons. It’s not so bad during the summer, when sunset occurs around 9 p.m. You’ll just have to cut short outings to evening ball games and concerts and opt for the late showings at movie theaters.
As the days grow shorter, however, time management becomes much more challenging. This is especially true if you work a 9-to-5 job outside the home, as it will already be dark when you leave work.
If your children have afternoon or evening activities, you’ll need to find a way to lock your birds up before attending their games or school plays. And yes, you’ll need to let your friends and family know that no, 6 p.m. is not a good time to meet for dinner because that’s around when you have to lock up the flock.
Just this past Thanksgiving, I had to explain that a 4 p.m. dinner time wouldn’t work for us because sunset was just past 5 p.m. and we’d have to leave dinner in order to lock up our chickens.
You can press your luck and return home to lock up your chickens after nightfall. But I’ll guarantee you’ll make that mistake only once. There are simply too many climbing, digging, leaping and swooping predators around—even in the suburbs—to risk your flock’s slaughter.
Even if you work from home, you cannot allow yourself to get too caught up in a task or activity that you miss lock-up times. I made this mistake once. I was fully in writer mode, working on an article—and went outside just as the sun was setting … and just as a Cooper’s Hawk swooped down on my beloved Silkie hen, Natalya.
My scream scared away the hawk, but Natalya was mortally injured and died in my arms. Nothing—not work, household projects, phone calls, a good book—comes before lock-up.
And then there’s vacation. Unlike dogs or cats, you can’t bring your flock to a kennel. You’ll either have to hire an animal sitter or train a trusted friend or relative to care for your chickens while you’re away… and you’ll have to impress upon them the importance of release and lock-up times.
My family has not gone on a vacation together in almost a decade because one of the six of us always has to stay behind and take care of our animals. We just don’t feel it’s right to impose on our friends for the length of time a vacation lasts.
In short, when you own chickens, your chickens dictate your schedule. If you find this difficult to accept, you may wish to reconsider keeping a flock.
It’s not enough to let your birds out in the morning and lock them up at night. Raising chickens involves keeping them healthy and watching out for their safety and well-being.
This can involve trudging out to your coop several times a day in sub-freezing weather, hauling 5-gallon buckets of warm water to thaw out and refill frozen waterers. It can mean setting up misting hoses in 100-degree F temperatures to relieve your panting hens. It can mean running in a torrential thunderstorm, trying to round up birds who didn’t have enough sense to seek shelter inside their coop.
It most definitely means stumbling around with a flashlight in total darkness, hoping to locate that one adventurous chicken who didn’t make it back in before sunset.
Keeping your birds healthy also involves regularly cleaning out their coop, routinely providing them with fresh bedding, and thoroughly scrubbing the waterers and feeders, which can get rather nasty if left unsanitized for too long.
You’ll also need to be willing to dispose of entire sacks of feed if they’ve gone musty or if the sack shows signs of rodent contamination or insect infestation. It may seem like a waste of money and may involve dashing out to your nearest feed store for more. But offering your flock spoiled or soiled feed can have grave consequences for your birds.
If any of these undertakings seems extreme, you may not be ready to take on keeping a chicken flock.
Can You Manage the Emotional Aspect of Flock Ownership?
Chicken owners often share funny photos or amusing stories about their chickens on social media. It’s often these heartwarming posts that make us long for a flock of our own.
What rarely gets mentioned, however, are the negative emotions we experience as poultry keepers.
Resentment is common. Having to modify our lives, our routines and our schedules in order to be up early for release and at home for lock up can be very frustrating and can quickly sour the entire chicken-keeping experience.
Stress is also frequently experienced. I know of several backyard flock owners who rehomed their hens because the stress of dashing home from work every evening, hoping to find their chickens alive, was just too much for them to handle.
Many of us become very emotionally attached to our chickens. They’re not just egg layers. They’re our pets and companions.
The grief of losing one of our cherished birds—to predators, injury, accident or other reason—can be overwhelming. If you are not at a good place with your own mental and emotional well-being, now may not be the time to introduce chickens to your life.
Can You Tackle the Foul Side of Fowl Keeping?
It goes without saying that rearing chickens is far from being a squeaky-clean hobby. Dealing with our flock’s feces is pretty much a daily occurrence … and that’s the easy stuff. A good number of poultry keepers also have to deal with worms (both in those droppings and in the birds themselves), poultry lice, mites and other parasites.
If any of our birds’ bottoms are coated with diarrhea, especially that caused by coccidiosis, we have to carefully bathe them to remove the stuck-on excrement. There’s also the regular removal and disposal of soiled coop litter, which can be dusty, soggy, ammoniated2 and in various stages of decomposition.
For me, the most unpleasant part of chicken keeping is without a doubt dealing with the remains of what were our feathered friends after a predatory attack. This can be very gruesome, depending on the predator.
Raccoon killings are the worst, since those carnivores rip open the throat and torso to feast, leaving the chicken’s shredded corpse behind once they’ve eaten their fill. If the kill occurred inside the coop, there’s a good possibility you’ll also need to scrub blood and gore off the floor and walls.
If handling blood and poop (and worse) makes you squeamish or queasy, you might want to consider a different aspect of hobby farming, such as container gardening, rather than subject yourself to daily bouts of woozy nausea while caring for your backyard flock.
Master Composter Reingard Rieger, Ph.D., breaks down composting, urban gardening and Seattle Public Utilities’ Master Composter Sustainability Program managed by Tilth Alliance in this episode of Hobby Farms Presents: Growing Good.
Learn about Seattle Public Utilities’ Master Composter Sustainability Program (managed by Tilth Alliance), which trains 30 to 35 volunteers each year to go into the community and educate others about composting, soil health, recycling, stormwater management and more. From mandatory food-waste composting to mandatory recycling, Seattle’s sustainability programs have had a big payoff: From 2004-2019, the tonnage of compostable material going to the landfill was reduced by 40 percent, even while the city’s population grew by 30 percent.
Get Reingard’s professional advice to start or improve your own composting or, as she says, “farming the microbes.” Hear about vermiculture (worm composting) basics, worms’ preferred vegan diet and the science behind how we get worm castings. And learn about food-digester worm bins, which are easy to build and use in your own garden.
Reingard shares her experience in building a 10,000-square-foot backyard garden and a front-yard rain garden in Seattle and talks about her family’s farming background in Austria, too.
Heritage breeds have fascinating histories and are also superior to many newer breeds when it comes to hardiness and versatility. The Cubalaya, a heritage breed that developed in Cuba, has all these qualities and more. Stunning to look at and easy to handle, it is both rare and unique.
“Cubalayas are truly majestic-looking birds, and seem to know it, carrying themselves proudly,” says breeder Ronald Seagrave. He is the owner of Seagrave Williams Farm, located in Dinwiddie, Virginia, and dedicated to the preservation of endangered and heritage breed poultry.
History
In the 16th century, when the Spanish started colonizing the island of Cuba, they had already taken over the Philippines. When colonists began arriving in Cuba, they brought Southeast Asian game fowl with them, introducing the ancestors of today’s Cubalaya to the island. Centuries later, in the mid-1800s, more Asiatic fowl were brought to Cuba from the Philippines. These birds were crossed with other European breeds, eventually creating the Cubalaya.
When Cuban chicken-keepers began breeding these birds for certain characteristics, they focused on a fierce expression, a curved beak, a stretched out tail and little to no spurs. As with most breeds of the time, those who kept chickens also wanted a bird that was good for the table and excellent at egg production.
Cockfighting was a popular sport at the time, and these birds were used for this activity as well. Breeding for no spurs helped ensure the birds wouldn’t be permanently damaged during competitions.
In 1939, the Cuban National Poultry Association accepted the Cubalaya into its registry. The breed was first shown at the International Poultry Exhibition in San Francisco, California. This was the first opportunity American chicken-keepers had to see the Cubalaya.
The American Poultry Association quickly accepted the breed into its Standard of Perfection, including the Bantam category.
The Cubalaya is known for several unique features, and its stunning appearance is the most obvious. Considered an elegant, handsome bird, Cubalaya roosters have a stunning “lobster tail,” which resembles a lobster claw, drapes down at an angle and is rich with lavish feathering. This unusual tail sets Cubalayas apart from other chicken breeds because they are the only birds with this characteristic.
“The cocks have long, flowing lobster tails, carried slightly upright, and long neck feathers. And the hens are beautiful cinnamon color,” Seagrave says.
Cubalaya roosters also have pea combs with bright-red earlobes and wattles and flowing feathers throughout their bodies. They’re still bred to have little to no spurs to prevent males from injuring each other severely during struggles for dominance.
Three color varieties in Cubalayas are recognized by the APA: Black, Black-Breasted Red and White. The Black variety has shanks that are slate in color. The Black-Breasted Red has a standard black breast with red plumage. The White variety has standard white plumage. Both the Black-Breasted and White have pinkish-white shanks.
The hens of this breed also have tails that drape down similar to the rooster’s lobster tail but are considerably smaller. They
are often a wheaten color with a darker cinnamon-colored head and neck or are solid black. Some are a blue-red wheaten, which is referred to as “ashen.”
Cubalayas come in standard (full size) and bantam varieties. The standard Cubalaya rooster weighs about 6 pounds; a standard hen, about 4. A bantam variety rooster only weighs about 26 ounces, with a bantam hen weighing about 22.
It’s a slow-maturing breed, and individuals can take three years to reach their full adult size.
As with many heritage breeds, Cubalayas are valued for their versatile uses. Cubalayas are excellent layers, with hens reliably producing small- to medium-sized, cream-colored eggs. They also make good meat birds and are used often for this purpose in their native Cuba.
Kruppert/CC BY-SA 3.0
Personality
Despite their sharp beaks and fierce eyes, Cubalayas are surprisingly friendly birds—at least with humans. While Cubalayas can be aggressive with other birds, they’re known for developing relationships with their human caretakers and make great pets.
“Cubalayas are proud birds, but very curious and friendly,” Seagrave says. “They have wonderful temperaments. Even as chicks, they are curious and not skittish.”
Happiest when they are free-ranging, these active birds enjoy hot, humid weather and make great foragers. Some keepers say Cubalayas don’t like being confined and can get rather noisy when they’re feeling cooped up.
As with many heritage breeds, Cubalayas are hardy and a good choice for beginning chicken owners.
“Cubalayas are easy to keep due to their good nature, and they tend to be extremely healthy birds,” Seagrave says. “Due to their friendly, curious nature, they lend themselves to being a good breed for young or novice keepers.”
If you want to breed chickens, Cubalayas are a good choice because the hens tend to be broody. So no assistance is needed in raising Cubalaya offspring. The chicks are usually fearless and must learn caution against predators from other birds in the flock.
“The hens are good layers, with good mothering instincts,” Seagrave says.
Preservation
The Cubalaya is a rare breed that has been ranked on The Livestock Conservancy Conservation Priority List as “Critical.” This means the breed has fewer than 500 birds in the U.S., with five or fewer primary breeding flocks (50 birds or more) and an estimated global population less than 1,000.
The Livestock Conservancy exists to help save heritage breeds such as the Cubalaya, which are losing numbers as a result of modern agriculture. A few specialized types of poultry make up the majority of chickens used in agriculture, and traditional breeds have fallen out of favor. Small family farms where these breeds once thrived are disappearing at an alarming rate, and with them, historic breeds are disappearing as well.
Even in the breed’s native Cuba, the Cubalaya is becoming scarcer. American breeders seem to be the breed’s greatest hope to avoid extinction.
“After educating ourselves on these birds and seeing them in person—they are simply majestic-looking birds—they were an easy choice to add to our program,” says Seagrave, whose farm is a nonprofit that helps protects endangered livestock and poultry breeds from extinction.
In 1873, when the APA first began registering standard chicken breeds, these chickens were well adapted to outdoor production in various climates. They were hearty and long-lived and reproduced easily, providing an important source of protein to the growing population of the U.S. well into the mid-20th century.
When chicken breeding for egg and meat production became industrialized, rapidly growing hybrids were preferred. Breeds such as the Cubalaya were sidelined. Today, the Cubalaya is one of three dozen breeds of chickens in danger of extinction.
The Cubalaya is beautiful and exotic, with many positive qualities that make it a great choice for chicken keepers. Consider adding this special breed to your flock. You’ll help to preserve a piece of history.
This article originally appeared in the November/December 2022 issue of Chickens magazine.
Chickens are omnivores with strong instincts to forage for vitamins, minerals, proteins and oils found in the living grasses and insects they eat, to sustain life and to produce healthy eggs for would-be offspring. But, despite the wonder of winter, the season lacks fresh, living foods for chickens to enjoy.
While grain-based feed is balanced for optimal nutrition as a main food source, feeding only commercial feed denies chickens some of their natural behaviors. Chickens can become bored during the winter months. When they have nothing to peck but feed, they can start pecking each other instead.
Encourage natural behaviors during winter and decrease seasonal stress by offering your chickens sprouts and fodder grown in your kitchen. The fresh tastes of spring will boost winter activity levels for chickens. This can keep them warm and occupied during the coldest months.
In the warmer months, forage can be sown directly in the run for in-coop enrichment all year round.
In Poughkeepsie, New York, Tina Gabel breeds, shows and sells Silkies and Nankins, in addition to keeping a few large layers. Her interest in healthful and holistic foods led her to try sprouting for her flock.
“The satisfaction of growing sprouts and fodder doesn’t end after the first jar,” Gabel says. “It becomes a nice hobby of sorts.”
She prefers sprouting soft, white wheat through fall, winter and early spring, and recommends the simple jar method of sprouting. “It’s so easy and fast, and the supplies are available at local stores.”
To sprout seeds in a jar, add 1⁄2 cup clover seeds, alfalfa seeds, wheat berries or even lentils into a quart-sized canning jar. Secure a double layer of cheesecloth over the jar’s mouth with the band. Soak the seeds overnight, then rinse through the cheesecloth at least twice a day for two to four days, draining upside down between rinsing.
Gabel drains hers slightly tipped in a dish drainer. But if you’re short on space, place the jar upside down in a small dish. Slow the growth process by storing finished sprouts in the refrigerator until you’re ready to use them, continuing to rinse occasionally.
Sprouting seeds packaged for human consumption are usually labeled Certified Organic, while conventional seeds might be treated with chemicals that make their sprouts inedible. Even if you don’t feed your chickens organic feed, sprouting organic seeds ensures they are appropriate for human consumption and safe for your flock.
Charlotte Lake/Shutterstock
Growing Fodder
To grow fodder, simply grow your sprouts longer. After three or four days of sprouting, transfer the sprouts to another container, such as a colander or a bowl. Continue gently rinsing the fodder at least twice a day, and drain well.
Within a few more days, the roots will intertwine to form a thick mat topped with lush greens resembling sod. Once the mat forms, flip it onto your hand to rinse the bottom, let it drain and return the fodder to its container. To serve to chickens, tear off a small section at a time, trim greens from the top or present the entire mat for the flock to peck at their leisure.
“We harvest fodder for the bantams by cutting 1⁄2-inch pieces for them so they don’t get impacted crops,” Gabel says. “The large fowl are given chunks of fodder, which they love to grab and carry around.”
Benefits of Fresh Forage
Foraging for living foods in the winter keeps chickens happy and ensures that the eggs laid during the off-season are as healthy as possible.
“By supplementing the diet with soft wheat sprouts, hard wheat fodder and fresh vegetables and fruit, along with some seeds and supplements, we can help fill any possible nutritional gaps,” Gabel says.
While she grows her sprouts and fodder, daughter Lindsey makes a supplement “pizza” for the flock year-round, with layered poultry conditioner, black oil sunflower seeds and a sprinkle of probiotics to help keep the show birds in tip-top shape.
Once she discovered the ease of growing treats hydroponically, without a greenhouse and soil, growing sprouts and fodder became a hobby that Gabel shares with other chicken owners.
For chicken keepers raising their broods in cities or areas where flocks are more vulnerable to predators, free-ranging for forage can be inadvisable or impossible. For these chickens, the lack of living foods isn’t only a problem in winter. Rather, it plagues the coop environment the entire year.
Sherry Fischer can’t let her flock of Silkies forage in her yard in Fort Bragg, California. So she decided to bring the yard into the run.
“I became interested in enrichment in the coop and run when I found myself envious of people who were able to free-range their chickens,” she says. “I expressed concerns with a friend about the flock’s mental and physical well-being while kept in a pen.”
Fischer began hanging pots of edible nasturtiums inside the run and planting strawberries out alongside the run where her Silkies can help themselves to the forage that grows within a beak’s reach.
She even grows forage right inside the run. Her grazing frame, a shallow raised bed topped with framed chicken wire, allows her lightweight Silkies to munch on the clover and mixed grasses growing through. For large layers, a grazing frame requires hardware cloth to support their weight over the forage.
Through her diverse social media network, Fischer encourages other chicken keepers to grow supplemental foods and forage inside their coops and runs, or to grow it elsewhere and serve it in a natural way. One of Fischer’s foraging tricks is stuffing freeze-dried mealworms into cracks in logs and around rocks for the chickens to find.
She assures that providing enrichment in any coop is easy and beneficial.
“It’s not hard to be kind and caring, and to provide a stimulating environment for chickens,” she says. “It can be easy.”
During the winter months, Fischer sometimes even bakes for her chickens. “Veggie-filled corn muffins topped with mealworms—yum!”
Sidorov_Ruslan/Shutterstock
Nutritious Supplements & Compassionate Living
High-quality nutrition and a pleasant coop environment are important to many modern chicken-keepers. As Gabel treats her chickens to sprouts and fodder while they wait for spring, and Fischer’s flock enjoys foraging inside the run, each chicken keeper creates a superior quality of life for her livestock.
What it takes, Fischer says, is “just seeing to it that they have the opportunity to find and work for some of their own food, access fresh greenery and function as a flock within a combined area.”
Offering living foods such as sprouts, fodder and purposeful forage is a simple gesture to increase a flock’s quality of life. The once-offbeat hobby of chicken keeping continues to evolve against the grain.
More Information
Be Scrappy
Supplementing the winter diet with living foods isn’t limited to sprouting and fodder. You can safely offer many kitchen scraps to your flock’s diet from produce you eat in your kitchen every day.
From kale to watermelon rinds, many foods that are nutritious for you are nutritious for your chickens, too.
Foods to Feed
Bread: It’s great in moderation, just make sure it isn’t moldy.
Cooked Meat: Be sure to cut up into small pieces.
Corn: Feed it raw, cooked or dried.
Kale: Plant a row just for your fowl.
Other Scraps to Feed: cabbage, carrots, cucumbers, grains,
lettuce, oatmeal, peas, pumpkins, spinach and watermelon
Martin Helgemeir/Shutterstock
Foods to Avoid
Avocados: According to The Merck Veterinary Manual, research shows that birds fed 8 grams of mashed avocado developed myocardial necrosis (heart tissue death) and died within 48 hours.
Raw Beans: Shell beans such as black, fava, kidney, lima and pinto, contain lectins, proteins that exist in in plants as protective agents.
Peaches/Apricots/Apples: The pits and seeds of these fruits contain cyanogenic glycosides, more commonly referred to as cyanide.
Potatoes: Raw potatoes contain high levels of solanine in their skin, and ingestion can result in racing heart rate, digestive distress, tremors and coma.
Rhubarb: This cousin of the potato also contains solanine.
Other Foods to Avoid: chocolate, coffee or coffee grounds, greasy foods, processed foods, raw meat, salt, soft drinks or spoiled or rotten foods
This article originally appeared in the November/December 2022 issue of Chickens magazine.
A tractor-mounted snow blower can be a great tool for clearing snow. Up here in northern Wisconsin, where annual snowfall is measured in feet, a tractor-mounted snow blower can simplify and speed up the process of digging out after a winter storm.
But operating a snow blower attachment isn’t as easy as it looks. To maximize safety, avoid pitfalls, and achieve optimum snow-clearing performance, here are four tips to keep in mind.
You might assume a wide snow blower (say, 7 feet wide) is better than a narrow one (2 feet or 4 feet). Certainly a 7-foot snow blower can clear a lot more snow with each pass.
But there are downsides to operating such a wide snow blower. When operating on uneven ground, a wide snow blower may struggle to clear away all the snow. As one end bottoms out on high ground, the other end floats above low ground, unable to drop any lower.
A narrow snow blower is better at negotiating these dips and rises, as a result clearing more snow and leaving behind a cleaner path.
2. Avoid backing into snowbanks.
So you’re out snow blowing and you’ve cleared a path all the way to the barn doors. Great! Now it’s time to turn around and head for home.
Depending on the depth of the snow, that may be easier said than done. It’s tempting to execute a three-point turn. In doing so, though, you’re bound to back into an area of undisturbed snow. And this can be a recipe for getting stuck.
Instead, try backing up along your cleared path until you have room to resume forward progress in a different direction. This allows the snow blower to clear a suitable path for turning around.
3. Frequent height adjustments may be needed.
On my tractor, the snow blower attachment sits a good distance ahead of the front wheels. This means the snow blower reacts belatedly to changes in ground elevation.
If there’s a dip in the ground, the snow blower doesn’t dip down to follow until the front wheels enter the dip. If there’s a rise in the ground, the snow blower will strike it head-on because the wheels haven’t climbed the rise yet.
If you’re trying to clear uneven or undulating ground, you’ll need to pay close attention to the height of the snow blower. My snow blower attachment can be raised and lowered by the tractor’s hydraulics. I drive slowly and keep one hand on the hydraulic controls so I can raise and lower the blower as needed to compensate for elevation changes.
In my experience, a self-powered snow blower with a single axle rides pretty smoothly over the ground. The auger section pivots up and down nicely thanks to the single axle. And when clearing snow from my gravel driveway, it’s not overly inclined to scoop up rocks.
That’s not the case with my tractor-mounted snow blower. Since the snow blower sits in front of the tractor, it’s free to raise and lower independently of the four load-bearing tractor wheels. And it’s possible to lower the blower aggressively so it scrapes the ground and throws small rocks out of the discharge chute.
This is dangerous (and potentially damaging to the blower), so when clearing gravel or rocky ground, it’s important to raise the snow blower high enough that it clears the snow without scooping rocks from the ground underneath.
By keeping these four tips in mind, you’ll be well on your way to clearing snow safely and effectively with your tractor-mounted snow blower.