Categories
Crops & Gardening

Organic Fertilizer: Grow Your Own

Organic fertilizer, high in nitrogen, organic matter and any number of things soils love can be grown at home and then used in your garden.

When we hear the word “fertilizer,” we may picture animals, compost or maybe even just chemicals. What doesn’t always come to mind are plants. Most of these nutrient-rich plants can be grown at home on a small scale to provide a little extra kick to your garden, your compost or wherever you may need some added fertility.

Plants That Are Organic Fertilizer

Comfrey

Comfrey is a prolific and useful perennial plant that is also one of the top organic fertilizers. It grows fast, spreads fast and has leaves that are highly nitrogenous—not to mention it’s medicinal benefits for bone and muscle repair. Comfrey roots reach up to 10 feet down to mine minerals, so the plant can be used to enrich the soil or break up compaction. Many people, however, grow it strictly for the leaves, which are often applied to compost piles to activate them, brewed into a compost tea, or simply laid on the surface of beds for added nitrogen and organic matter.

Nettles

A favorite crop among many organic and biodynamic gardeners, nettle has highly desirable properties. Much like comfrey, it heats up fast as it decomposes, making it a great addition to kickstart a cold or below temperature compost pile. It can also be fermented along with comfrey leaves in water for a few days and applied to heavy feeding crops—this is called a compost tea. To make a compost tea, pack the nettles (greens only, no roots) into a small barrel or bucket, fill it with water, then stir once or twice a day for a few days. It will smell like manure. Before application, combine one part of the resulting liquid with 10 parts water to dilute it, and then apply directly to the base of plants. This high-nitrogen liquid will provide a nice snack to hungrier crops.

Leguminous Cover Crops That Are Great Organic Fertilizer

You hear the words “nitrogen fixing” thrown around a lot, but it’s a fairly unique and useful attribute for a crop to have. Nitrogen fixation is when a plant takes nitrogen from the atmosphere—where the vast majority of it resides—and turns it into something plants can use, like ammonia. This action is where legumes excel. By sowing leguminous cover crops, then working them into the soil prior to growing season, not only are you getting that nitrogen fixation but also biomass, which is good for creating humus and retaining nutrients.

Red, White and Crimson Clover

A highly productive biennial legume, red clover produces a lot of mass over time and excels at accumulating nitrogen and phosphorous. Sow it spring or fall, especially around perennials, like asparagus, as weed control and green manure.

Sown in the spring or late-summer, white cover crop makes for an excellent living mulch and can be planted into or sown around other crops. It’s a perennial, so expect it to come back year after year. Like red clover, it pairs nicely with other perennials.

Crimson clover is an excellent annual legume that creates nice ground cover and provides a dense rooting system to hold soil in place and help break up compaction. It produces a high amount of organic matter, and is generally sown in fall.

Vetch

A winter-hardy annual legume, vetch can be sowed in the fall as a cover crop and then turned into the soil in the spring. It excels at capturing nitrogen and provides added benefit when used in conjunction with rye.

Peas

Sown in the spring or fall in milder areas, peas collect nitrogen and produce a fair amount of biomass. In a crop rotation plan, it’s a great crop to proceed tomatoes, onions, cucurbits, celery and most anything that is not another legume.

Non-Leguminous Cover Crops That Make Great Organic Fertilizer

Fertility, of course, is not just about fixing nitrogen. A lot of times, it’s about blocking out weeds and keeping what nitrogen, soil and minerals you have in place. Plus, If you only used leguminous cover crops in your garden, you run the risk of incubating legume-loving pests and disease so it’s good to mix it up a little from time to time.

Oats

This cover crop establishes itself quickly, creating a nearly impenetrable mat for weeds. Many people will sow it in the fall over their garlic, so it will kill weeds and provide a mulch and feed for the garlic. Oats do not fix nitrogen, but they create biomass, which can then be turned into the soil.

Cereal Rye

Cereal rye is a fast-growing, winter-hardy cover crop that is proficient at holding soil and recycling nutrients. It has allelopathic effect on weeds and other grasses, so do not plant it where you will be growing corn. Cereal rye grows best in drier areas.

Sudangrass

Sudangrass is an excellent cover crop because it’s fast-growing and produces ample organic matter for the soil. For best results, sow it in combination with or before legumes.
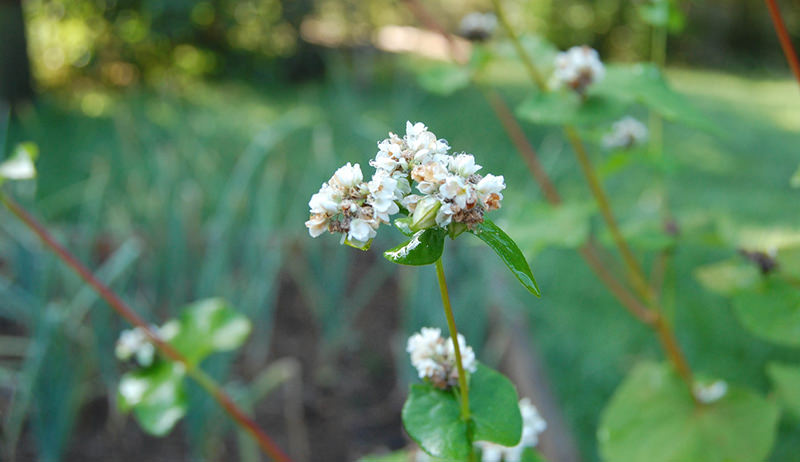
11. Buckwheat

Buckwheat is extremely fast-growing and can outrun almost any summer weed, but it does not produce a lot of biomass. However, if left to flower, it will attract beneficial insects to pollinate your garden and increase its fertility.

Alfalfa and Grass Hay as Organic Fertilizer

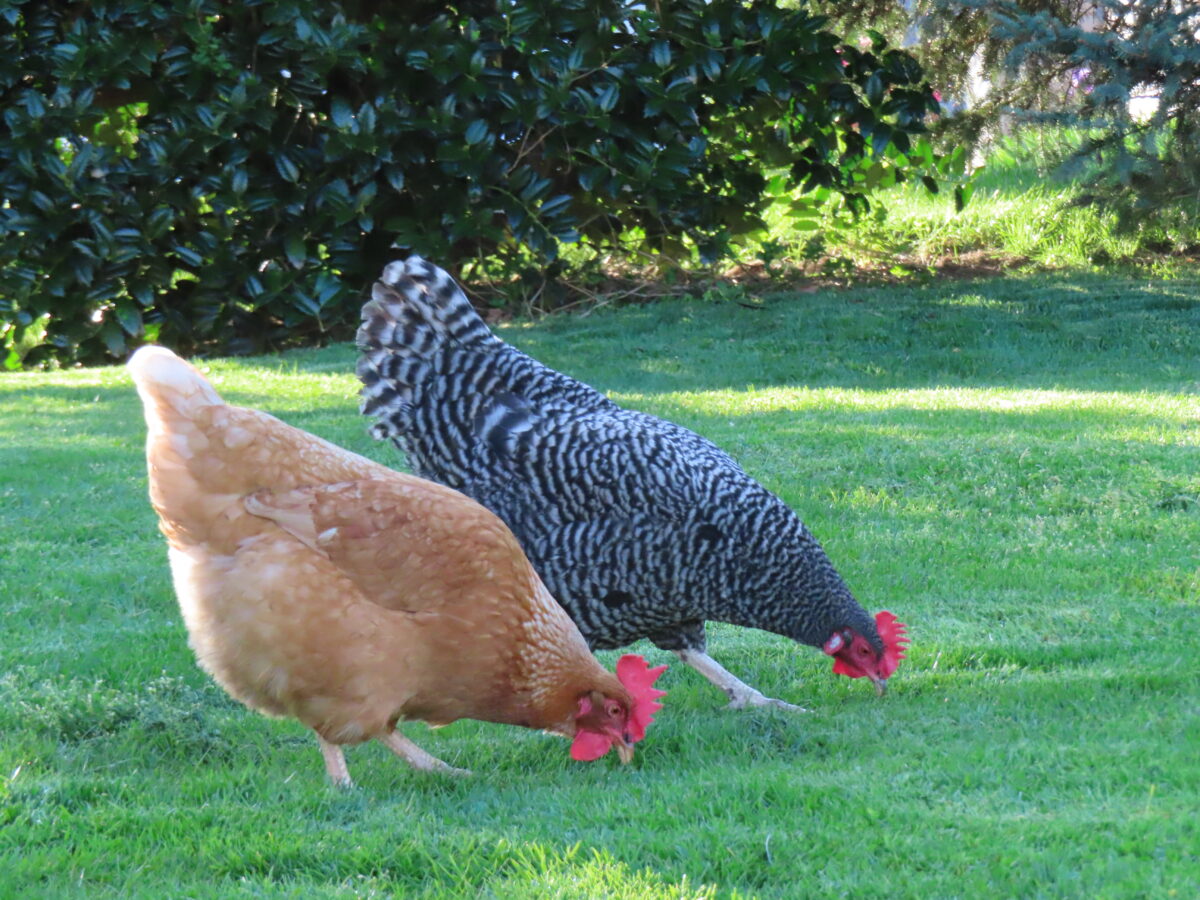
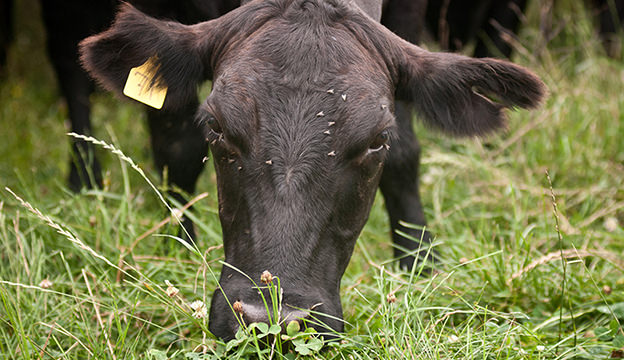
Alfalfa is a legume typically thought of as a high-protein feed for livestock, but can also be a high-protein organic fertilizer for the garden. Mulching with alfalfa hay—or any good hay, for that matter—can be an excellent source of fertility. The grass can be cut and added to compost or dried and spread across the garden to be eaten by the soil microbes on their own time. To keep these fields productive, rotate animals through regularly—chickens can do a lot for keeping a hay or alfalfa field productive.

This article about organic fertilizer was written for Hobby Farms magazine. Click here to subscribe.

Categories
Poultry

Herbal Tea for Chickens

Herbal tea for chickens is a good way to help your hens recover from the long, cold winter and rebound to lay an abundance of healthy eggs in the spring. These five herbal teas are the perfect spring tonics for boosting health and vitality for backyard flocks. 

2 Reasons Why Herbal Tea for Chickens Can Be Better Than Fresh Plants

It may sound strange to brew a cup of tea for your chickens instead of throwing a handful of fresh or dried herbs in the coop or run, but brewing herbal tea for chickens is gaining popularity for two reasons.

 #1 Some herbs do not grow in all planting zones and are not available in the winter or spring when you need them most. Many backyard flock owners have solved this problem by purchasing dried beneficial weeds and herbs from online sources to make into herbal tea for chickens.

#2 Another plus to serving tea versus the plants is that all flock members should receive at least some of the benefits, versus the top hens in the flock eating up all the fresh chickweed you threw into the run while lower ranking flock members get nothing.

How to Brew Herbal Tea for Chickens

Herbal tea for chickens is easy to make, doesn’t require a ton of time to prepare and can be stored in the refrigerator for up to a week.

Start by boiling one and a half cups of water. Add one teaspoon dried herb or a handful of fresh herbs (unless directed otherwise). Steep for ten minutes. Strain the herbs from the water. Cool to room temperature before diluting into a gallon of water.

Replace tea water with clean drinking water after twelve hours.

Spring Tonic Tea

This spring tonic is one of my favorite go-to spring herbal teas. Unlike some of the other herbal teas for chickens featured in this article, this spring tonic is a tea blend that I put together for my flock and requires four ingredients.

This herbal tea blend also requires slightly different instructions than the previous ones for brewing tea. Here’s what you need.

1 teaspoon dried dandelion leaves

1/2 teaspoon dried dandelion root

1 teaspoon dried chickweed

1 teaspoon dried nettles

Boil two and a half cups of water before adding the herbal blend. Steep for fifteen minutes. Strain plants from water. Cool to room temperature and dilute in one gallon of water before serving.

What Does Herbal Tea for Chickens Do?

The spring tonic tea works as a cleanser to rid the chicken’s body of harmful toxins that may have built up over time. While at the same time replacing necessary vitamins and minerals the hen may have lost while being confined to the coop for most of the winter.

The herbs in this tea blend work as diuretics, optimizing kidney function and health by flushing toxins out of the body and increasing urine. Even though chickens do not produce urine, they do excrete a solid white substance called uric acid that mixes with their poop to flush the toxins out and keep their bodies healthy for the upcoming laying season.

The spring herbal tea for chickens is also high in vitamins A, B, C, and D and minerals, including zinc, iron and calcium. These beneficial plants are also great immune boosters.

speckled sussex chicken on roost bar in coop
Erin Snyder

Parsley Tea

Another beneficial herbal tea for chickens, parsley tea is one of the best springtime herbs to boost your flock’s health for the upcoming laying season.

Parsley is high in vitamin K and calcium that work together to keep bones strong. Since a hen’s body draws calcium from her bones to produce an egg shell, keeping her bones strength up is vital for her health and continued egg production.

Studies suggest that parsley contains anticancer properties and may inhibit the growth and spreading of cancer cells. This is especially critical for high-production breeds that are more prone to developing ovarian tumors and cancer.

Raspberry Leaf Tea

Raspberry leaf tea supports a healthy reproductive tract to keep a hen’s reproductive system healthy, and this tea has many other health benefits, too.

Raspberry leaves are a good source of calcium, magnesium, and potassium and are full of antioxidants. These antioxidants help to protect the hen’s body of free radical damage and help to guard against certain diseases, such as cancer.

Research suggests that these leaves also work to keep the immune system strong.

Raspberry Leaf Warning

Raspberry leaves can be challenging to dry and quickly become toxic if not dried properly. Always use fresh leaves from raspberry plants untreated with herbicides or pesticides.

Herbal Hint: While it is an extremely beneficial herbal tea for chickens, raspberry leaves are not my flock’s favorite tea. However, I have learned that my chickens will drink it when I brew a peppermint tea bag with the raspberry leaves.

Peppermint Tea

This herbal tea for chickens is usually thought of as a summer herb, but peppermint helps to increase egg production, create larger eggs with thicker shells, and help repel winter external pests such as lice and mites.

Peppermint aids in respiratory health, keeping your flock’s nasal passages and respiratory systems clean. Filled with antioxidants, this sweet-smelling herb also supports a healthy immune system and digestive tract.

Peppermint tea is a chicken favorite and pairs nicely with raspberry leaves to support a healthy reproductive system.

Herbal tea for chickens is beneficial for your flock’s overall health all year round. But it is especially critical in the spring when a chicken’s body is recovering from the winter and making the transition into the egg-laying season.

This article about herbal tea for chickens was written for Chickens and Hobby Farms magazines. Click here to subscribe.

Categories
Farm Management

Farming Oysters: Everything You Need To Know

Farming oysters is something that most farmers probably don’t consider. With oysters, you don’t need much land or have to feed your crop.

Out of Season?

Eating oysters on the half shell out with friends, I’ve noticed a few changes over the years. And not just in my friends. It seems that oyster shells have gotten deeper and the oysters, fatter and tastier.

Most curious is that oyster bars now offer oysters in summer. To me, oysters are out of season and not as tasty then. Most people know the rule that oysters are best in months that have an “r” in them, meaning that one avoids oysters in the spring and summer months of May, June, July and August. But that doesn’t seem to be the case these days. What’s going on?

Farming oysters—that’s what’s going on. Wild-caught oysters generally grow in clumps of long, thin, flat shells. They reproduce in summer, spitting out gametes (reproductive cells) that deplete their heft and tastiness. Wild oysters in summer often taste thin or muddy.

But the depletion of oyster beds from overharvesting and disease, as well as pollution from cities, industries and intensive livestock operations, has created an incentive for farming these sea creatures. The research and extension services of many states’ agricultural universities have risen to the challenge.


Watch Video: Foraging, Drying & Storing Oyster Mushrooms


Researchers have bred oysters that are sterile and resist disease. Because they don’t reproduce, oysters are still fat and tasty in the summer months, which extends the season for farmers. Without spending energy on producing the next generation—extension oyster hatcheries take care of that—these oysters come to maturity in two years rather than the three it takes wild oysters to reach harvest size of 3 inches long. That accelerates profitability for farmers.

If you have access to clean salt water that has historically supported Atlantic oysters (Crassostrea virginica) or West Coast oysters (Ostrea sp.), you can probably get a lease for harvest rights below the low tide line and a permit for farming oysters. Check with your local ag extension office or wildlife agency. Just an acre or less of shallow water is enough to start an oyster farm. Because oysters filter the water for their food, you’re helping the environment while spending nothing on feed. Contrast this with the 5 pounds of fish that it takes to raise 1 pound of farmed salmon.

Oyster Schools

Many coastal ag extension offices offer one-day workshops on farming oysters. Ag agents also visit sites for specific technical feedback on what you need to succeed. They can often help you with a business plan, too. In some states, you can’t sell directly to the public, so learn about local wholesalers and restaurants and ask them what they want in terms of quantity, quality, seasonality and price.

If you have access to a dock, you can start increasing your aquatic mollusk knowledge inexpensively by working with your local ag extension and doing what’s called oyster gardening. Many extension oyster hatcheries give away button-size baby oysters to people who commit to growing them for a year so they can repopulate depleted oyster beds with juvenile oysters. Some hatcheries want all their oysters back, so you might not get to eat them (darn!), but you do get a low-cost education in oyster management before taking the next step.

Another option: Look into a sustainable franchise model called GreenWave. It trains and assists farmers in implementing a mixed farming model that adds seaweed, sea vegetables, mussels and other marine crops to an oyster operation to better deal with fluctuations in the market and the weather.

Tools for Farming Oysters

A pickup truck, a small work boat and a dock will get your farm started. Oysters can eat only while they are under the water, but that’s also the time when their shells and containers can get fouled by algae, seaweed, mussels, barnacles and predators. A setup allowing the oysters to be above water so they can dry out kills these fouling organisms and makes for a cleaner and more profitable shell at harvest time.

Many oyster farmers grow their oysters with what’s called an off-bottom system. In it, oysters are suspended near the surface of the water in baskets, bags, trays or cages called oyster condos, racks, Taylor floats or adjustable long-line systems. These devices let the oyster be held above the water part of the time.

Some of these containers have floats allowing the racks to be flipped over, while others are suspended from piers like soggy sheets on a clothesline. When the tide goes out, the suspended bags of oysters can dry out. Floating cages can be flipped weekly so they can dry out and kill the fouling organisms. Flipping also makes for a deeper shell and a fatter oyster.

How Much to Get Started Farming Oysters?

The cost estimates of most extension websites are based on starting with an acre or more of oysters and a couple of thousand or more bags or cages. That could cost from $60,000 to $200,000 depending on a number of variables.

The University of Maine Cooperative Extension recommends starting small with just 25 oyster bags or cages. Counting equipment, baby oysters and permitting, you could get started for less than $5,000 if you already have a truck, boat and dock. Add another round of bags or cages and oysters each year, and you could be making a profit in three years. At that scale, you might manage without a helper, but generally oyster farm employees make $15 to $25 an hour depending on experience.

Beginner Bait

If you want more information, surf—er, fish—the web:

Oyster Taste

If you’re familiar with the notion of terroir, in which soils and climate determine the taste of vegetables and fruits, then you’ll understand the notion of merroir, in which the character of seas determines the flavors of oysters. Generally, the saltier the sea, the saltier the oyster. Oysters grown near large freshwater rivers are less salty.

The more time an oyster spends out of the water, the sweeter it tastes. The best tasting oysters—for sweetness and saltiness—are from my home region of the South Carolina Low Country. Tides there run 6 feet, so oysters spend a lot of time out of the water. The Sea Islands that were my youthful stomping grounds are far from the smallish rivers that feed the salt marshes there, so their salinity is high. In northern beds, oysters spend more time underwater. Being above water in winter they would die in the harsh cold weather.

Other things also modify their flavors while the oysters clean the water. As filter feeders, a single oyster processes about 50 gallons of water in a day. Oysters eat their preferred algae from the water but they also extract carbon to make the calcium carbonate for their shells and nitrogen to create the protein for their flesh.

Farming oysters can be a profitable farming opportunity, and it’s also a way to fight climate disruption and water pollution. Consider as well all the ice-cold dishes of shucked oysters to enjoy, regardless of how any month is spelled.

This article about farming oysters was written for Hobby Farms magazine. Click here to subscribe.

Categories
Equipment

3-Point Hitch Categories: From 0 to 4

The 3-point hitch is widely considered to be one of the greatest innovations in the history of tractors. This safe and simple means to attach implements to tractors forever changed the face of farming.

The design of the 3-point hitch is simple but effective. Three points of attachment, arranged in a triangular fashion, provide a rigid connection between the tractor and the implement. A pair of lower links at the ends of hydraulic arms (which you can raise or lower to adjust the attached equipment) complement a single upper link.

But three-point hitches are not all created equal. And they vary greatly in size, matched to the strength of the tractor on which they’re installed.

We divide three-point hitches into five categories, labeled 0 through 4. The key to distinguishing the categories is to measure the diameters of the link pins used to attach implements to the hitch.

Of course, pin diameters aren’t the only variable parts of the equation. The spacing between the two lift arms is another important consideration.

The latter measurement can vary slightly (we’ve included approximate measurements below). But the pin diameters are standardized and are the defining measurements separating the five categories.


Read more: Farmers should give thanks for the advantages offered by the three-point hitch.


When shopping for implements, you need at least a basic understanding of the categories in order to ensure you purchase the right equipment. You’re pretty much out of luck if you want to use a Category 2 implement on a Category 1 tractor, though with adapters, the reverse is often possible.

With these disclaimers in place, let’s explore the five categories of three-point hitches, outlining their pin diameters and other general specifications.

3-Point Hitch: Category 0

We define the smallest 3-point hitch category by upper and lower link pins measuring 5/8 inches in diameter. The spacing between the two lift arms is approximately 20 inches.

You find category 0 hitches on light-duty garden tractors with 20 horsepower or less.


Read more: Consider these 4 tractor types for farm use!


3-Point Hitch: Category 1

At one time or another, most hobby farmers have probably used a tractor with a Category 1 hitch. You’ll widely find these on tractors offering between 20 and 50 horsepower.

The top link pin measures 3/4 inch in diameter, while the two lift arm pins are slightly thicker at 7/8 inch. The spacing between the lift arms is approximately 26 inches.

You may also find references to “limited” Category 1 hitches. These hitches share the same dimensions as regular Category 1 hitches. However, they may be incapable of lifting all Category 1 implements as high as necessary for suitable performance.

3-Point Hitch: Category 2

Category 2 hitches are also common, albeit on slightly more high-powered tractors with horsepower ranging from 40 to 125. A Category 2 hitch increases the top link pin diameter to 1 inch and the lift arm pins to 1 1/8 inch. The spacing between the arms increases to approximately 32 inches.

3-Point Hitch: Category 3

The Category 3 hitch significantly increases the diameters of the link pins to 1 1/4 inch (top link pin) and 1 7/16 inch (lift arm pins). This provides the added strength necessary for heavy-duty implements powered by tractors in the 80 to 225 horsepower range.

The distance between the lift arms is variable. A straight Category 3 hitch features a spacing of approximately 38 inches, while the smaller Category 3N hitch shrinks the width to approximately 32 inches.

3-Point Hitch: Category 4

The most durable three-point hitch category adds another 1/2 inch or more to the link pin diameters. They come in at 1 3/4 inches (top link pin) and 2 inches (lift arm pins).

When installed on tractors offering between 180 and 400 horsepower, it’s hard to conceive of a task that a Category 4 hitch can’t handle.

As with Category 3 hitches, the spacing between the lift arms of a Category 4 hitch is variable. The spacing on a regular Category 4 hitch is approximately 46 inches, while a Category 4N hitch spans approximately 36 inches.

Now that we have all the dimensions in mind, I think it’s time to start shopping for new equipment!

This article about the 3-point hitch categories was written for Hobby Farms magazine. Click here to subscribe.

Categories
Large Animals

Can Pigs and Goats Live Together?

Can pigs and goats live together? Yes. But, generally speaking, most farming today is based on systems of monoculture. That is to say, the farmer focuses on one thing and grows a lot, whether it’s meat chickens or broccoli, dairy cows or apples.

Subsidies are set up to support large-scale operations that focus on just one thing at a time.

But monoculture farming is, by very definition, unnatural (nature is the ultimate polyculture). And it could be argued that these unnatural methods have fed the epidemic disconnection from food that leaves us unfazed by cage-raised hens and fields of corn that stretch for miles.

But that’s why we hobby farm, right? We’re not beholden to systems that reward overpacked cattle yards or maximized crop yields.

We like growing our own food, and we like farming whatever we want. So, maybe without even meaning to, small farms are often the antithesis of large-scale monoculture farms. That they often deliberately include a wide variety of animals and plants.

This is certainly the way things have gone on our farm, which we populated with gardens, chickens, pigs and cows within our first few months on site.

But while scrolling through Instagram recently, I saw a photo that left me wondering whether we’d missed an opportunity with our chicken yards, cattle fields and pig pastures. The poster had a sheep in the pig yard which is, like, next-level polyculture to me, considering that I farm according to the old Offspring lyric: “You gotta keep ‘em separated.”

And it got me wondering: can pigs and goats live together? As we consider bringing so

me goats onto our farm in the near future, what’s the rule for running pigs with other animals? Should we try co-pasturing animals?

Pigs With Chickens

Let’s start with the obvious. If you free-range chickens, they’ll get in with your pigs because they go wherever they want. You’ll be co-pasturing animals, and that’s a good thing.

When a pig roots the soil, it uses its snout as a dish, shoving it into the ground then flipping it over, soil side up. This allows them to access delicious roots, bugs and other subterranean goodies.

Chickens love bugs even more than pigs do. And they’re way better at getting to them.

When a pig flips a piece of dirt, chickens are all over it, breaking apart clods, pulling out bugs and spreading the soil around. They also go through feces when pigs drop them, too. This thins it out for quicker decomposition and exposes potential parasites to sunlight.

The downside, though, is that a hungry pig will, on occasion, make a meal out of a yard bird. I’ve seen it happen once, which puts pigs way behind all our predators. But it’s worth noting that it can happen.

Can Pigs and Goats Live Together With Sheep?

There are plenty of farmer stories about sheep, goats, pigs and even horses living together as one big, happy family. And it’s true that, on a large piece of land, you probably don’t have to worry about pigs being aggressive to the point of endangering other large livestock. (Baby animals are another thing, though, so don’t allow births around pigs.)

But it’s not a good idea to house everything together in pens, just based on the fact that pigs will destroy all the forage in a confined space. This will leave your other animals hungry.

Feedings present a challenge, too. Each animal has distinct dietary requirements, and one species getting into another’s feed can deprive the animal of necessary nutrients. It can also overexpose the animal to elements that can cause problems.

So, if you’re co-pasturing animals, create individual feeding stations and observe individual feeding times. On-demand feeders don’t work.

Finally, because these animals can carry a lot of common parasites, co-pastured animals need to be on a strict parasite program so that an infection in one species doesn’t spread to all animals sharing the space.

Pigs With Cows

A lot of the previous section applies to cows, but some farmers have found that cattle present a specific benefit to a porcine population—their manure.

Some farmers are in the practice of feeding their pigs cow manure, inspiring a study that found no significant effects, good or bad, save the production of a leaner carcass. Based on the teachings of Joel Salatin, it has become common to have pigs clean out cattle barns after moving cows to pasture.

I don’t plan to put my pigs on a cattle manure diet. But I am interested in the implications the practice presents for the whole co-pasturing thing.

While you’d need to be especially careful of pigs’ tendency to destroy pastures, wreck soil structure and starve your cows, the idea that pigs can benefit from cow waste is, at the very least, intriguing.

My Plans Are …

In the end, I don’t see myself intentionally co-pasturing animals of mixed species. Raising livestock presents enough challenges, and I suspect I don’t have the time or energy to co-pasture animals the right way.

But for a farmer who already pastures animals separately and is looking for a new challenge, well, there are plenty of people out there who run everything together, so it might be worth trying.

This article about can pigs and goats live together was written for Hobby Farms magazine. Click here to subscribe.

Categories
Animals

Raising Cattle: The Beginning Farmer’s Guide

Raising cattle is a way that many people choose to feed their family wholesome food that is raised according to their ethical and health standards. Raising a couple of cattle can feed your family and then some for the year. You don’t even need a lot of land to do it—as a rule of thumb, you can keep one cow-calf pair per every 2 acres of pasture for 12 months. Here’s how from start to finish.

Prepare Fencing Before Cows Arrive

Barbed wire fencing is a good option for fencing in cattle pastures.
Melissa K. Norris

One of the most important things you’ll need in place before raising cattle, no matter the size of the herd, is good fencing. If there’s a hole in your fence, a cow will find it. There are three main fencing options for cattle:

1. Barbed Wire Fencing

Barbed wire is best if you’re fencing acreage. You’ll want to have at least three strands, though four is best. The bottom strand needs to be low to the ground, as cattle can do a mean belly crawl, and the top strand needs to be close to 4 feet tall, as cattle are surprisingly agile and can jump quite high when they want. Another excellent item is for your fencing are metal wire stays. These keep your cows from pushing their way through the fence. Remember, they’re like a mouse; if they can get their head through it, their body will follow.

2. Electric Fencing

Electric fencing is another good option for raising cattle, but this will require electricity, whether obtained from the grid or solar panels. When using electric fencing, you need to have good ground, and in dry areas or during droughts, this can be more difficult. Be aware that as brush and vegetation grow, they may fall on or push the wire, causing it to short out. Electric fencing is often better suited for smaller pens or pasture areas.

3. Wooden Fencing

I have to confess, there is little else more charming than a weathered wooden fence. However, if you’re fencing acreage or large paddocks, wood becomes expensive fast. Here in the Pacific Northwest, wood also rots rather quickly, though cedar is often a good wood of choice because it holds up longer.

Fence Posts

Your choice of fence posts will range from metal T-posts to wooden ones. We use railroad ties or cedar posts for all of our corner posts, gates and as middle section during long stretches of fencing. Remember, unless you’re in free-range country, if you’re cattle get out, you’re responsible for any damage they incur, so good fencing is important.

Choosing Your Cattle

Your breed choice can determine the size of the cattle, but typically what they're fed affects the flavor of the meat.
Melissa K. Norris

Cattle are herd animals and find safety in numbers. If at all possible, you’ll have better luck raising cattle with a pair than a single cow, and you can keep one of the cows as your breeding stock.

You’ll hear a lot of opinions about which cattle breed produces the best-tasting meat. While some breeds produce larger steaks or grow more quickly than others, in our experience, we’ve found the flavor of your beef comes from what you feed your cow and how it’s handled during and after butchering.

We’ve raised Black Angus, Red Angus and Hereford. We prefer a Black Angus and Hereford cross, as the Angus tend to be larger than our Herefords and produce a slightly larger finished animal.

You can purchase cattle at auction, but we prefer buying from local breeders so we can see the cattle’s condition, observe the rest of the herd and ask the breeder questions.

Water For Your Cattle

Grassfed cattle need access to a water source, whether is a pond, a creed or a trough.
Lynda Bullock/Flickr

Your cattle will need access to clean water. This is even more important than feed when raising cattle. If you don’t have a natural water source, like a pond or creek, on your property, you’ll want to use a large water trough. Instead of purchasing a conventional trough, we use an old cast-iron bathtub. Keep an eye out for people doing a remodel, and you can get an older tub for free.

Locate your waterer close to your water source. Miles of hose isn’t fun and can be tough to manage during the freezing temperatures of winter.

Cattle Feed Options

Extend the pasturing season by growing a mixture of cold- and heat-hardy grass varieties.
Melissa K. Norris

Ideally, your land will produce enough grass to feed your cattle for the majority of the year, but most people will have to feed hay during the winter months when grass goes dormant. Seed your pasture with different varieties of grass to help stretch your pasture further into the year. We’ve been looking into Triticaline, a cold-weather grass originating from Russia.

If you only have one or two cows, you’ll most likely feed square hay bales during the colder months. Purchasing from an independent farmer or baling straight from the field will be cheaper than purchasing from a feed store—you’ll usually pay more for the second cutting. Cover the stored hay to protect it from rain, wet hay will grow mold and be of poor quality for your cattle.

If you have more than two cows, however, look into haylage—the large round bales that look like marshmallows. This is grass hay is rolled when it reaches 60- to 65-percent moisture content, as opposed to 18 percent of regular baled hay. Haylage is an excellent feed source and what we use for our herd. It’s higher in protein count and more cost-effective per ton. When we switched to using all haylage, our yearly feed bill was cut in half.

To avoid having your cattle waste the hay, you’ll find most people feed in a large, round feeder so the cows can’t make it into bedding. After they’ve laid in or soiled the hay, they won’t eat it. We will also unwind the hay from the main round bale and feed it by hand, making sure to cover the bale back up with a large tarp.

We don’t use any pesticides on our pasture, controlling brush and weeds with mowing and chopping off blossoms before they go to seed. Our haylage is purchased from local farmers who don’t use spray either.

Butchering Time

Communicate with your butcher on the types of meat cuts you want.
Carrie Cizauskas/Flickr

Many people butcher beef in the fall for two reasons:

  • When farmers perform their own butchering, the fall is cool enough to allow the beef to age outdoors.
  • Fall is usually when cattle are at their largest, having gained weight from a long summer of feeding on pasture.

When it’s time for butchering, you want your animal to still be gaining weight, not losing it. Once the weather turns to cold, more of their energy goes to keeping warm instead of growing. Also try to keep to your routines as much as possible on butchering day, so your animals stay calm. Ask your butcher to hang and age the meet for a full 14 days, provided there is enough of a fat layer to protect the meat. This aging process will produce a much better flavor and a more tender finished product.

It’s possible to raise beef on a small scale, though some thought and planning does go into the process. We love knowing exactly what goes into our beef, and the finished product is not only one we can be proud of, but is nourishing to our family. If you’re considering bringing a couple of cows to your farm to feed your family, use this information as your jumping-off point. We know you won’t be disappointed with the results.

This article about raising cattle was written for Hobby Farms magazine. Click here to subscribe.

Categories
Poultry

What Bugs Do Chickens Eat?

What bugs do chickens eat? Beasties, specks, creepy crawlies—whatever you call them, bugs can be found in any yard or garden, especially if you keep chickens. Not a problem, you say? What could be more natural than a happy hen scampering after a hopping cricket or scratching up a tasty beetle? You may have even started your flock with the express purpose of insect control. Not all insects make for tasty snacks, however, and some can be downright dangerous to your birds. As a poultry keeper, you’ll need to differentiate between the good, the bad and the ugly.

The Birds & The Bugs

Raising chickens has long been known as an excellent way to curtail the local insect population—“insect” being a colloquial catch-all term that covers noninsect arthropods such as spiders, worms and centipedes. If it creeps, crawls or flies, your birds will obligingly hunt it down and eat it.

Chickens’ omnivorous diet, ravenous appetite and natural curiosity will keep them cheerfully foraging in their run and, if you allow it, on your lawn or in your garden. When asking yourself the question “what bugs do chickens eat,” consider that free-ranging your chickens will not only keep your flock content but will also significantly diminish the number of insects on your property.

Chickens will gladly gobble up grasshoppers, hookworms, potato beetles, termites, ticks, slugs, centipedes, spiders and scorpions. They’ll happily devour the larvae of ants, moths and termites, with a distinct partiality to beetle larvae—lawn grubs and mealworms, aka darkling beetle larvae. (The latter are sold by various companies, if you’d like to buy a treat for your birds.)

There are, of course, instances where you’ll find yourself upset at asking yourself “what bugs do chickens eat?” as you’ll see your birds’ propensity for inhaling all insects, such as when they chase after butterflies and fireflies, or greedily gulp down your garden’s earthworms. Likewise, there will be times you’ll scratch your head and wonder why your flock is completely ignoring certain insects you want gone, such as box-elder bugs and multicolored Asian ladybeetles. (Both emit a noxious odor and therefore have few natural predators.)

Chickens will also avoid ingesting bees—and who can blame them?—but they will chow down on hive beetles, which has encouraged many beekeepers to keep honeybee hives alongside their flocks.

With these natural exterminators at work in your yard and vegetable patch, there is no need for the use of pesticides. Using chemicals can in fact be harmful or even fatal to your poultry flock and to your pets and even wild animals, too, especially if they ingest affected insects or plants that have been sprayed with these poisons.

In situations where relying on chickens for insect elimination is impractical—a backyard barbecue or a late-night soiree, for example—use a bug zapper, then offer the electrocuted pests to your poultry as crunchy treats.

What Bugs Do Chickens Eat? Flies, For One.

When it comes to chickens, flies are a double-edged sword. On the positive side, chickens love to eat flies and absolutely adore fly larvae. A growing number of chicken keepers are even starting to raise black soldier fly larvae to feed their flocks and improve the decomposition processes in their compost bins.

On the negative side, houseflies are known to transmit the chicken tapeworm Choanotaenia infundibulum, a parasite which deprives its avian host of the nutrients it needs to thrive and survive, while green bottlefly larvae have been known to cause botulism, aka limberneck disease, in chickens.

Even worse, house flies, green bottleflies and black blowflies—known as filth flies, which are flies that typically breed on animal feces—can also cause a horrifying condition called myiasis, aka flystrike. While flystrike is far more common on such livestock as sheep, horses, cattle and even rabbits, it occasionally does affect chickens with devastating effects.

In flystrike, adult female flies lay their eggs in a moist, odiferous area of a chicken’s body, often an open wound or a dirty vent. Within 24 hours, maggots hatch and begin to feast on dead cells, secretions and other bodily debris.

These maggots don’t eat live tissue, but they do tunnel through it, causing irritation and injury to the chicken. The pungent smell of the infestation then attracts more flies, repeating and exacerbating the infestation.

Afflicted chickens may recover if brought to veterinary attention during the condition’s early stages; unfortunately, the shock, pain and decay caused by flystrike often results in bird mortality.

Fly Combat Operations

To keep your flock healthy, the best course of action is to repel and keep flies out of the coop. Some methods, including hanging vanilla-scented air fresheners or clear baggies of water with pennies in them, seem like old wives’ tales yet have avid pro-ponents who swear to their effectiveness. More practical antifly tactics include:

  • Provide proper ventilation to reduce the moisture inside the coop.
  • Cover ventilation openings with fine-wire mesh to prevent flies from entering.
  • Keep the coop interior clean, regularly removing droppings and replacing soiled litter with fresh bedding.
  • Mix food-grade diatomaceous earth in with fresh litter; the microscopic, razor-sharp edges of the diatoms cut into flies, causing them to desiccate and die.
  • Change nest-box pads or litter frequently.
  • Hang fly tape or fly traps in the upper area of your coop, away from where feathers can become enmeshed in their adhesive surfaces; replace frequently.
  • Clean up food and water spills quickly and remove damp litter.
  • Dispose of manure and soiled shavings well away from the coop.
  • Ensure there is no standing water in the chicken run.

When it comes to flies, you might switch from asking yourself “what bugs do chickens eat” to “what bugs should chickens not eat.” If fly infestation continues to be a problem, consider a proactive approach: fly predators. These gnat-sized, nonstinging wasps lay their eggs inside fly pupae; the newly hatched parasites consume the pupae, preventing them from reaching adulthood. Fly predators are harmless to humans, plants and other animals; the one drawback to their use is that chickens find them delicious, so several releases throughout the fly season may be necessary.

As with your lawn and garden, you’ll want to stay away from chemical methods of eliminating pests from your coop. Using insecticides in such a small, enclosed area can seriously harm your birds, introducing toxins into their bodies no matter how well-ventilated your henhouse may be.

Keep your hens healthy and they’ll repay you in kind by eagerly partaking of your yard’s bountiful bug buffet—and entertaining you with their antics while they do so.

This article about what bugs do chickens eat was written for Hobby Farms and Chickens magazines. Click here to subscribe.

Categories
Equipment

Barn Door Seals: How to Prevent Leaky Barn Doors

A leaky barn door seal can be a big problem. Barns keep hay and livestock dry but are little more than windbreaks in the winter unless you take precautions to seal them correctly. Sealing up those big sliding doors can go a long way toward making a barn more comfortable for you and your livestock. A good barn door seal, along with lights and a heat source, make it possible to work on equipment all winter long—and maybe even have office space on the coldest of days.

Why Barn Door Seals Are Important

Sliding barn doors, by their very nature, are difficult to seal tightly. Originally, they were meant to keep most of the wind and rain out of barns that are otherwise so drafty that a little wind through or around the door was no problem. In fact, the movement of air through the barn provided ventilation for the animals and helped finish drying the hay. However, there are many reasons to seal up the barn, including the doors, the No. 1 advantage being to make it harder for rodents and birds to get in. If part of the barn is heated, a tight barn will also help keep down the fuel cost.

Step-by-Step Project for Barn Door Seals

Sealing up the barn door requires two kinds of seals: compression seals on the ends and sliding seals along the top and bottom. Compression seals are the easiest to install and can be rubber or foam strips. The rubber strips, used for garage doors, are more durable but more expensive. Foam strips will need to be replaced every few years. The important thing is for the door to have a good, straight surface that mates tightly with the surface on the barn. Seals along the top and bottom must allow the door to slide easily.

1. Install a Top Rain Guard

If the barn door seal is not protected by the roof overhang, install aluminum flashing or inverted gutter to keep off moisture that can freeze on the track. Few things are more aggravating than trying to open an iced-over barn door. When installing the top shield, use good quality silicone calk to seal the area between the flashing and the barn so moisture doesn’t get in and rot the wood.

2. Install the Seal on the Barn Door’s Edge

barn door seal latch
Dave Boyt

Close the barn door and notice how tightness and uniformity of the gap. If it’s more than 1/4 inch or greater at the top or bottom, cut and attach a wood shim to close up the gap. Use a rot-resistant wood—either treated lumber or cedar—so that you won’t have to replace it later, and then install a rubber gasket. Garage-door gaskets are available at lumberyards and hardware stores, but some people use automotive heater hose for the gasket. Either way, you should be able to compress the gasket down its entire length when the barn door is closed.

3. Install the Top and Bottom Brushes

seal sliding barn doors
Dave Boyt

Barn door seals along the top and bottom are a little more complicated because they have to allow the door to slide easily. A simple brush-type seal attached to the top and bottom of the barn door may be all the seal you need for many applications. If you need a better seal, install a backing strip with a compression seal along the floor. An option for the bottom is an inverted “U” channel that engages the bottom of the door, keeps the door from blowing in or out when partially open, and acts as an air trap. Combined with the brush, it provides a good airtight seal.

Brush seals come in various sizes, so you’ll need to determine the appropriate length of bristles. With the door closed, measure the gap between the floor and the bottom of the door. Purchase twice the length of brush as the width of the door so that you can attach the brushes top and bottom. Screw the metal flange of the brush to the bottom of the door so that the brush deflects about 1/8 inch at the point of the greatest gap. Then do the same for the top of the door. The door should still slide open and closed easily with the brushes installed.

If you’re not worried about aesthetics and are on a tight budget, use strips of old carpeting instead of the brushes. Cut the strip about 2 inches wider than the widest gap between the door and the floor. Use a wood backing strip to attach the carpet to the door, and let the carpet bend where it meets the floor to form the seal.

4. Install Latches

barn door seal latch
Dave Boyt

You will need a good set of latches to pull the barn door tight against the seals. A toggle latch on both sides of the door will do the trick. If you have easy walk-in access, install the latches inside the barn. This will keep them from icing up and make the barn less accessible to anyone who might stop by and “borrow” a piece of equipment.

Close the door and place the latch so that it tightens just as the barn door seals come together. When you close the latch all the way, it should compress the seals to make an airtight connection. If the latch is adjustable, make sure it is set to the widest opening when you install it, then tighten it to seal the door when latched.

Other Ideas for Barn Door Seals

barn door seals on a sliding barn door
Dave Boyt
  • Sandbag Draft Guards: Most of the air coming in through a sliding door is usually from the bottom. If you don’t use the door often, consider piling sandbags against the bottom of the door to keep out the wind.
  • Door Insulation: If the door itself is drafty, such as the case with a board-and-batten door, staple a tarp or roofing felt to it on the inside. If the rest of the barn is insulated, you may even want to attach a layer of foam to the inside door and put a plywood cover over that. Closed-cell foam (e.g. “blueboard”) is best for this purpose.

  • Window Seals: The quick and easy fix for a drafty window is clear plastic held in place with cardboard strips stapled to the window frame. These are available at lumberyards and hardware stores. Of course, you’ll need to take them down in the spring when you want the windows open for ventilation.
  • Walk-Through Door: If you’re frequently moving smaller items, install a walk-through door and save the sliding door for when you need to move large equipment, supplies or crops. The smaller door should be well-sealed and easy to lock, but in the long-run will help prevent the inflow of cold air.

Problem Solving Drafts

If you still notice wind coming through your sliding barn door seals, relax—you just have a little more work to do. If there is even a slight gap between the edge of the door and the side of the barn, tighten the latch. You may even need to install a second latch above or below the first one to get a good seal along the length of the door. If you feel air coming through a corner, use some leftover brush material or carpeting. Fill small gaps on non-sliding surfaces with silicone caulk and larger areas with foam insulation, such as “Great Stuff.

This article about barn door seals was written for Hobby Farms magazine. Click here to subscribe.

Categories
Poultry

5 Benefits of Keeping Roosters in a Backyard Flock

Are there benefits of keeping roosters? You bet—but not everyone thinks of these automatically. If fresh eggs are your only goal in raising chickens—and that’s usually the case on small farms—you obviously don’t need a rooster. Because of this, some people don’t pursue the topic any further because roosters have a few disadvantages. Neighbors often dislike rooster noise, plus roosters can be territorial. In some urban or neighborhood settings, keeping a rooster may be against city ordinances, even if keeping a flock of hens is allowed.

But roosters do have their benefits—actually quite a few! So, if you’re already comfortable caring for a flock of hens, you just might be interested in upping your game and bringing a rooster into the mix. Here’s why:

1. Roosters Guard the Flock

Roosters naturally want to protect the hens and the chicks. It’s a deep instinct for them, and they take the job very seriously. A rooster is constantly on the lookout for predators or other threats, and he will vocally warn the hens of real or perceived dangers. He might also attempt to direct the flock toward safety, like a protective sheepdog. A rooster can also help by alerting you to unusual happenings or dangers around your rural property that you need to check out. Sometimes, the hens may seem more confident or relaxed with the protective presence of a rooster nearby.

2. Roosters Equal Live Chicks

Without a rooster, your hens lay unfertilized eggs. These eggs are great for cooking. But they’re not helpful if you’re actually interested in raising chicks “from scratch” and increasing the size of your flock with your own birds. Keeping a rooster with quality genetics that you value can be a fantastic way to naturally add chicks to your flock with little work on your end.

3. Roosters Can Be Umpires

Life in the flock tends to be calmer and more natural with a rooster around. Roosters have a knack for interrupting and stopping hen “squabbles” that might otherwise lead to pecking or bullying. Many chicken owners note that placing a rooster in the flock adds back in a missing component of the hierarchy that simply makes flock life better and more natural.

4. Watching Roosters Can Be Enjoyable

There is more to farming than strictly production, especially at the hobby level. Roosters are simply a joy and entertaining to watch, with their fun strutting and dancing behaviors, vivid plumage coloring (that you may not get with the hens), and impressive combs and wattles. They even bring small gifts to their hens. If you enjoy watching birds—and you probably do if you have chickens—you may enjoy having a rooster even more.

5. Roosters Bring a Sound of the Farm

Finally, crowing at dawn is not some pastoral cliché—a rooster will call with the sunrise. While some may find this annoying, it all depends on your point of view. The sound of a rooster as the first light of day hits your property can be a nice reminder that you’re living the rural life, with all of its tradition, charm, and satisfaction.

This article about the five benefits of keeping roosters in a backyard flock was written for Chickens and Hobby Farms magazines. Click here to subscribe.

Categories
Poultry

20 Facts About Ducks You May Not Know

Facts about ducks: Ducks love the water, make endearing pets, and produce nutritious eggs and meat, but there are still so many things we don’t know about them. Here are twenty facts about ducks that duck owners may not know.

Duck Egg Records

Some of the most fascinating facts about ducks include egg world records. So let’s learn about some famous world record holders.

#1 Khaki Campbell females are the most popular duck kept for egg production, with each female laying an average of three hundred eggs annually. A Khaki Campbell duck and a Black Australorp hen hold the record for the most eggs laid in a year. With each layer producing three hundred and sixty-four eggs in three hundred and sixty-five days.

khaki campbell duck
Erin Snyder

#2 The largest duck egg on record was laid by a Pekin duck in Ireland, named Queen Maeve. The egg was not double-yolked, but an egg inside an egg, and measured over eight inches in diameter and weighed half a pound.

Duck Egg Nutrion

Facts about duck eggs often include that ducks are prolific egg layers. But did you know that duck eggs contain a lot of nutrients?

#3 Duck eggs contain more vitamins A, B6, B12, E, selenium, folate, and protein than chicken eggs. However, they also contain more fat and three times the amount of cholesterol as a chicken egg.

Unique Breed

Our facts about ducks would not be complete without this truly unique breed with characteristics like no other domestic duck breed: the Muscovy duck.

#4 Muscovy ducks perch like chickens. Although there are other perching ducks, such as wood ducks, Muscovies are the only truly domestic ducks to exhibit this behavior.  This unique breed is also the only domestic duck not descended from the Mallard.

#5 Did you know that Muscovy ducks do not quack? Instead of quacking, Muscovies make a variety of noises, from hissing and puffing and croaking sounds to cooing to their eggs.

Strange, but True

While duck owners love their ducks, we can all agree that they have some unusual habits. These facts about ducks might be a little strange, and you probably don’t want to try them out at home!

#6 Did you ever wonder why the Nova Scotia Duck Tolling Retrievers were bred to be red? The reason is that ducks are attracted to the color of a fox, so the dogs were bred to resemble foxes. The trick worked as both domestic and wild ducks continue to be fascinated by foxes. These retrievers easily lure them out of the water to be caught by hunting and retrieving canines.

#7 Some ducks have actually been trained to pick pockets and steal from women’s purses.

Drake Fun Facts

No facts about ducks list would be complete without some fun facts about drakes. While they may not produce eggs, these special boys deserve a little recognition, too.

#8 Drakes make excellent pet ducks and get along well in all drake flocks called bachelor pads without the presence of female ducks.

#9 Drakes work hard to impress the ladies by performing courtship displays to win the hearts of the female ducks. From tucking their heads and necks in and dropping their wing feathers to reveal their wing speculums (the blue patch on the wings visible in Mallards and other gray ducks), to spraying water with their bills and letting out a whistle, a drake’s performance is quite impressive.

True Love

 #10 One of the most unknown facts about ducks is that some domestic duck pairs will mate for life. Even though they may breed with other members of the flock, the bonded pair will remain a couple for life.

Water Myth Busters

As a member of the waterfowl family, there are some misinformed facts about ducks and water.

#11 Did you know ducklings can drown even though they can swim and float? That’s right. Ducks have an oil gland at the base of their tails that produces the oil that makes them waterproof. When preening, adult ducks spread the oil over all their feathers to keep themselves dry and able to float. However, until they are fully feathered and their oil gland begins to work, ducklings can only stay afloat for small periods of time. To protect ducklings from drowning, only allow them to swim for several minutes at a time.

#12 If given the option of choosing between a pond or a kiddie pool, many domestic ducks will choose the kiddie pool, where they can safely see and feel the bottom with their webbed feet.

Pekin Facts

#13 The King of Ducks is well known and is the most popular duck in the world, with tens of millions of Pekins in the U.S. alone. This hardy breed is kept for eggs and meat and is the most popular breed kept as pets.

#14 Pekins were named after Peking, China (what is now known as Beiing), where their breed originated.

Old Duck

#15 The oldest living duck on record is Desi, a Mallard female in Britain. She was reported to be twenty years old when she died.

Just Being Ducky

Behaviors are some of the most interesting and informative facts about ducks. From their cute waddles and happy quacks, we can learn a lot about these amazing creatures just by watching their behaviors.

#16 Ducks often sleep with one eye open and one eye shut. This behavior allows the duck to rest half of its brain while the other half of its brain is awake and on the lookout for danger.

#17 As summer fades to autumn, many domestic ducks will begin to engage in the destructive behavior of ripping out grass and tunneling into the ground with their bills. If there is a water source nearby, the entire yard can quickly become a muddy mess. However, ducks aren’t just having fun; they are looking for tasty morsels under the ground surface, such as grubs and other bugs to eat.

More Myths Busted

Want to learn more about common duck myths? One of these facts about ducks was even tested on the popular TV show Mythbusters.

#18 Even though duck bills are thought to be gentle and not inflict damage, the truth is they can cause serious damage to each other and bite hard enough to leave a small bruise on your wrist or arm. Surprisingly, while they may be thought of as gentle, fighting drakes can even punch in the opposing drake’s eye.

#19 Domestic ducks can’t fly or migrate like their wild cousins.

#20 Female ducks quack so loudly that they actually echo. While it may be hard to hear, if you listen closely on a clear day, a female duck cutting loose will echo back.

Facts about ducks are both a fun and informative way to learn more about these delightful waterfowl. From behaviors to breed characteristics and delicious eggs, ducks continue to capture our hearts as we learn more about them.

This article about 20 facts about ducks was written for Chickens and Hobby Farms magazines. Click here to subscribe.