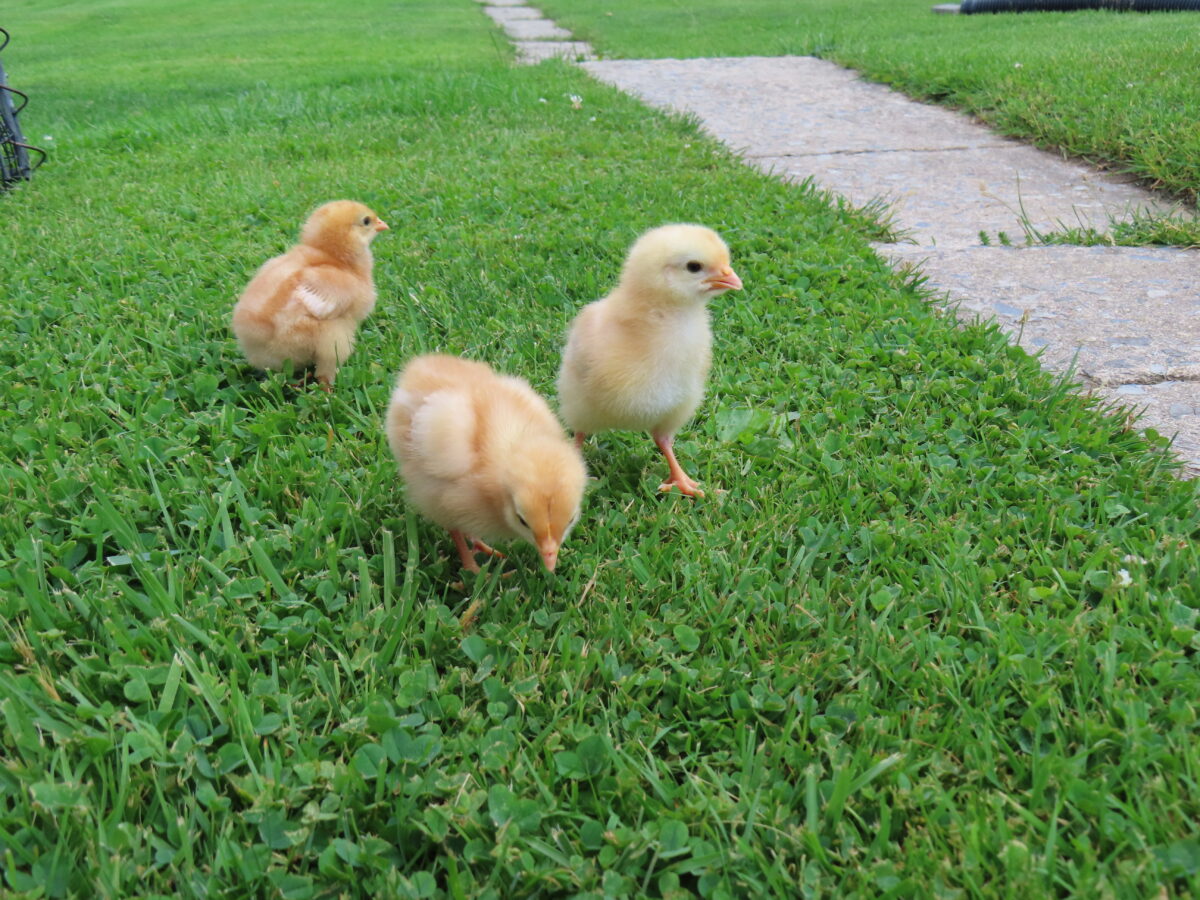
Herbs for baby chicks help promote strong immune systems and provide the necessary nutrition chicks need to grow up healthy and robust. While many herbs are beneficial for chickens, these eight featured plants are some of the best herbs for baby chicks.
Why Feed Herbs?
There are several benefits to introducing herbs to baby chicks. Chicks that are fed herbs early on in life are more likely to eat them throughout their entire life than chickens who were introduced to herbs as adults. These herbs will benefit your flock throughout their lives, and, in some cases, can help slow down certain diseases, including cancer and arthritis.
1. Fennel
Even though it’s not as commonly known as oregano, fennel is one of my go-tos when choosing herbs for baby chicks. Whether you are raising layers, meat birds, or family pets, fennel works to help promote a healthy digestive tract, prevent against heat stroke, and reduce E. coli levels in chickens.
Studies suggest that fennel seed is also anticoccidial (a common condition in young chickens caused by coccidosis).
Fennel Feeding Directions:
Due to their larger size, fennel seeds are hard for baby chicks to ingest. Never feed fennel seed free choice to baby chicks or other young poultry.
Instead, place one teaspoon dried fennel seeds in a cup of boiling water. Steep for ten minutes. Cool to room temperature before diluting into a gallon of water. Refresh tea water every twelve hours.
2. Oregano
When it comes to herbs for baby chicks, oregano can’t be beat. Take a look, and you’ll see for yourself why oregano is the number one herb backyard poultry owners and factory farms reach for.
This powerful immune enhancer is antiviral and believed to guard against avian influenza. Oregano also works to guard against coccidosis, aflatoxins (such as Aspergillus), and mycotoxins and is also a natural antibiotic.
Researchers have also seen lower numbers of deaths in broilers caused by Ascites syndrome when fed oregano versus those raised without this powerful herb.
Feed oregano to baby chicks fresh, dried, or steeped in tea. When feeding fresh or dried herbs to baby chicks, be sure to offer free-choice chick grit to prevent digestive problems.
3. Yarrow
Many people consider yarrow to be a weed or a flowering plant versus an herb, but whatever you want to consider it as, yarrow is one of the best herbs for baby chicks.
Yarrow helps to promote a healthy reproductive system in the brooder, working to clear the sinuses and airways. You may even notice baby chicks sneezing after consuming yarrow as it works to clear up their nasal passages.
Chicks seem to enjoy the taste of both the flowers and the leaves of yarrow and will happily peck at them, free choice.
4. Cilantro
Chicks grow quickly, so it’s important to provide them with the proper nutrition to prevent health problems later in life. If you’re looking for growth-promoting herbs for baby chicks, cilantro is the best option.
Cilantro helps promote bone growth and chick growth and is high in vitamin A to promote strong vision.
Offer cilantro free choice for chicks to peck at. Unlike some humans, most chickens do not mind the taste of cilantro.
Erin Snyder
5. Dill
There is nothing like the smell of fresh dill harvested from the garden, so it’s no wonder that when selecting herbs for baby chicks that they would enjoy it as much as we do. But this delightful aromatic plant doesn’t just smell and taste good; it also has benefits for raising healthy chicks.
Dill works to improve the digestive tract and prevent gastrointestinal (also known as GI) upsets in chickens. This is good news for chicken owners, as seventy percent of a chicken’s immune system is located in the GI tract. So, when you feed dill to chicks and adult chickens, you aren’t just supporting their digestive tract, but also their immune system.
Promoting a healthy immune system in baby chicks will not only help prevent them from succumbing to disease early in life, but it will also help keep them healthier as they age.
Feed dill free choice or steeped in a tea.
6. Tarragon
Tarragon is full of antioxidants and is one of my chicks’ favorite herbs. These antioxidants help to destroy free radicals that could otherwise cause damage to the body, such as cancer.
Cancer is very prevalent in chicken flocks, especially layers, so providing antioxidants to chicks at an early age and throughout their entire lives is one of the best things you can do to keep your future egg layers cancer-free.
Tarragon can be fed free choice.
7. Comfrey
Another herb for chicks that promotes bone growth, comfrey is high in protein and vitamin B12 and also helps to develop healthy muscle and cartilage growth in chicks.
Use caution while feeding comfrey, as it is a very strong herb and should only be offered several times a week in small amounts. Feed comfrey free choice. Do not steep into a tea.
8. Parsley
A popular herb for chickens, it only makes sense that this vitamin-rich herb is also one of the best herbs for baby chicks.
Parsley aids in blood vessel development and is one of the most nutritious herbs you can feed your growing chicks. High in vitamins A, B, and C, this herb helps to promote a healthy immune system.
Parsley is also high in important minerals, including calcium and iron.
Feed parsley free choice or steep it into a nutrient-rich tea.
Herbs for baby chicks are one of the best ways to boost your future flock’s immune systems and produce healthy eggs and meat without breaking the budget. While all these herbs may not be available to you, including even one or two will help keep your chicks healthier for years to come.
This article about herbs for baby chicks was written for Hobby Farms and Chickens magazines. Click here to subscribe.
Save your grass when raising chickens with the tips in this article. You don’t have to have a dying lawn while also free-ranging your girls.
When we were expecting baby chicks, we received plenty of discouraging criticism. One was a warning that chickens would ruin our yard, second to the myth that chickens are dirty. The comments came most often from well-meaning people who still bemoan their mid-century farm chores, when chicken keeping was still part of basic rural survival—far different than what raising chickens can be today.
We are no doubt raising a little rural charm in our backyards, but the mode is different—our chickens are pets, often named, and they’re expected to live for many years. We also provide better healthcare and personal attention. Most importantly, we don’t keep too many of them.
Nonetheless, chickens can do a number on your yard if you’re not careful. Here are some tips for keeping your yard in tact while still enjoying your backyard flock.
1. Avoid Pollution
A small flock of backyard chickens love to eat grass, but it’s impossible for them to eat an entire yard of it. What destroys grass is the high nitrogen content in fresh chicken poop. In the small confines of a chicken run, the swift layering buildup of chicken poop smothers and chemically burns the grass, obliterating anything growing in a new run within a week.
Alternatively, a small amount of chicken poop is an effective fertilizer. Free-ranging a flock evenly distributes chicken poop throughout the yard, making it the cleanest chicken keeping method of all, with no toxic buildup anywhere. Of course, you still need to clean the coop regularly. The solution to pollution is dilution: Consider diluting your chickens with an abundance of space to avoid toxic buildup of waste. Large waste can be picked up and composted, or diluted and washed away with a spray of the hose if you prefer. Small waste deposits can be left alone.
2. Respect The Limits Of Your Space
Free-ranging to avoid chicken waste buildup and toxic spaces doesn’t give us permission to fill our yards with even more chickens. Raising too many chickens in a backyard actually will destroy your yard, just like well-meaning former farm kids will tell you of their own larger-scale farming experiences. Raise too many chickens for your space, and your yard will transform into a predictable farm-shade of brown; but raise just the right amount of chickens for your space, and you’ll still be seeing green.
Chicken ordinances in cities and towns usually allow for raising a specific number of chickens within a certain area of space. Many ordinances require that chickens must be raised in confinement for hygienic purposes. Unfortunately, even in a spacious coop and run, the chicken waste is concentrated in their small living area. If this space is not kept tidy, it can become a toxic and dangerous place for the chickens to live. A toxic, filthy coop breeds disease within a flock, and the coop will become a stinky nuisance for neighbors. While well meaning, ordinances can promote the very problems they’re trying to protect your neighbors from. Chicken spaces do have an odor, but it’s not decidedly bad. However, chicken spaces and yard areas should never stink simply because chickens are living there.
When choosing the number of chickens you will raise, be conservative until you know how a handful of adult hens will affect your coop, your yard and your neighbors. Starting small will give you a sense of how well you can keep up with cleaning their spaces, too. In the long run, this will save your grass.
Save Your Grass by Letting It Grow
Keeping the lawn a little longer will help protect it from the high nitrogen content in chicken waste. Short grass, on the other hand, is already prone to drying out, making it even more vulnerable to chicken destruction.
When you do mow the lawn, consider mulching instead of picking up the clippings. When grass is picked up, chickens will munch on the tasty trimmed grass, scratching at the roots as they do. Because chickens prefer easier work when it’s available, mulched clippings offers instant gratification, and they will kick clippings around as they snack, instead of scratching directly at the ground.
This article about how to Save Your Grass When Raising Chickens was written for Hobby Farms magazine. Click here to subscribe.
DIY planter ideas are something you should consider when starting your spring garden, especially if you live in an urban area.
We have a massive poplar tree in our backyard, and for years, I struggled to get anything to grow beneath it. I tried hydrangeas, hosta, Solomon’s seal, and many other shade-loving perennials and shrubs, but their roots just couldn’t compete with the tree’s.
I decided that if I wanted a garden under the poplar, I was going to have to do it in containers, but purchasing big, decorative pots was way too expensive. So as soon as the weather warmed this spring, I set about making six unique, repurposed planters to line the fence around the tulip poplar. I made them out of old filing cabinets.
DIY Planter Ideas First Step: Source a Filing Cabinet
Jessica Walliser
If you don’t have an unused, metal filing cabinet sitting around at home or the office, ask friends and family if they happen to have one. DIY planter ideas can also be found at:
swap meets
construction recycling centers
flea markets
used office-supply stores
junk yards, scrap yards
Freecycle.org
Craigslist
I found all six of mine at a yard sale for $5 each. Look for cabinets that are free from rust, dents and dings, and be sure the bottom is enclosed.
Steps to Success
Step 1: Remove The Drawers & Drill Drainage Holes
Jessica Walliser
Pull out the drawers and metal liners. If you don’t want to send them to the landfill, the drawers and liners can be sold for scrap. Once the drawers are out, use an electric drill to make six to 10 1/2-inch drainage holes in the back of the filing cabinet. This will be the base of the DIY planter.
Step 2: Paint The Cabinet
Jessica Walliser
Apply two coats of a rust-fighting spray paint to the outside of the cabinet, making sure to cover all edges and corners thoroughly. I chose light green for my planters, but you can make them any color you’d like. Let the kids have at it if you’re looking for something creative. Paint the entire inside of the cabinet with two coats of black, heavy-duty, anti-rust spray paint.
Step 3: Site Your New DIY Planter
If you’re using the planter on a patio or deck, there’s no need to elevate it, but if it will be placed on grass or soil, raise the planter on bricks or rocks to help prevent rust. Try to keep it level, if possible. In my situation, I had to choose between leveling my planters with the fence line or keeping them true-level. I chose true-level.
Step 4: Fill The DIY Planter With Soil
Jessica Walliser
Use a 50/50 blend of compost and high-quality potting soil to fill your new filing cabinet planter. This is by far the most expensive part of making this planter, but you can reduce the cost by purchasing the potting soil in a compressed bale rather than in bags. Toss in a few cups of organic granular fertilizer as you fill the planter. This DIY planter idea is coming along!
Step 5: Plant!
Jessica Walliser
I chose to use a combination of shade-loving annuals and perennials in my planters, but you can fill your new filing cabinet planter with herbs, vegetables, ornamental grasses or whatever you’d like.
Step 6: Maintain Your DIY Planter
Jessica Walliser
The metal will eventually begin to rust, so you’ll need to add a new coat of anti-rust paint to the exterior whenever necessary. As the plants grow, the nutrients in the soil mix will be depleted, so you’ll need to top the planters off with a few inches of fresh compost every year. There’s no need to replace the soil mix if you also mix in 2 to 3 cups of organic granular fertilizer before replanting them every spring.
This article about DIY planter ideas was written for Hobby Farms magazine. Click here to subscribe.
Proper tree planting equipment is important whether you’re placing a few stately shade trees or investing in an orchard full of fruit and nut trees. Planting trees requires a lot of tools to get the job done. Arming yourself with the right equipment will ensure the project goes smoothly to give your trees a healthy start.
Whether you’re planting first thing in the spring or waiting until autumn to capitalize on milder weather, this handy checklist of 10 tree planting equipment tools you need for planting trees will help ensure you don’t overlook an important component of the job:
1. Wagon
Trees are heavy, particularly those grown in large pots. You don’t want to carry them far, so having a wagon (either a hand-pulled cart or a larger tractor-pulled trailer) as part of your tree planting equipment will help you bring the trees right to their holes without breaking your back.
Tractor-pulled trailers are also useful for hauling the rest of your tree-planting tools.
When coupled with a tape measure (see below) and graph paper, a GPS receiver can help you plan the most ideal location for every tree, allowing you to envision your orchard at maturity even when the trees are still young.
3. Shovel and Spade
These tools, a shovel for scooping dirt and a spade for breaking the sod and cutting through the soil, will help you quickly and efficiently dig the wide, deep holes needed for tree plantings.
There’s a chance you’ll encounter large rocks while digging the holes. And if you’re like me, once you’ve chosen the perfect location for a tree, you’re bound and determined to dig that hole no matter what obstacles you might encounter.
A digging bar will help you pry heavy boulders out of the ground.
5. Bucket
If you’re shoveling loose soil onto the sod surrounding your holes, it will be difficult to pick it all back up after the fact.
Instead, shovel the soil into a large bucket, which will keep things tidier and save you time when you backfill the hole. A separate bucket can be used to hold rocks.
6. Tape Measure
Rather than eyeballing the depth of your holes and hoping they’re correct, measure the height and width of the rootballs you’ll be planting to make sure your holes are an ideal match. Dig the holes a few inches deeper than necessary, then backfill the bottom with loose soil until the tree sits at the correct height.
This will provide softer soil for the roots to penetrate early on.
7. Utility Knife
It can be difficult to remove large trees from their containers. While I love saving plastic pots for future use, I’ve found the best solution is to slice multiple sides of the pot with a utility knife and remove the tree this way.
The utility knife can also be used to cut through overly crowded roots growing on the outside of the rootball to encourage outward growth.
If your trees are spindly and/or a bit crooked in their growth, staking them with a T-post will support them against the wind, helping them to grow straight until they’re large enough to fend for themselves.
You can also install T-posts around each tree to support a welded wire fence for protection against hungry deer.
9. Fence Post Driver
T-posts aren’t very helpful without a way to install them. A manual or gas-powered fence post driver will quickly drive them into place.
10. Water Jugs or Tanks
Freshly-planted trees need plenty of water, so bring along a supply to give them a long drink after planting.
If you’re within reach of a garden hose, perfect. If not, water jugs or tanks can be hauled by wagon to more remote locations. I use a 35-gallon leg tank to water trees in my orchard, and I’ve been happy with the results.
This article about tree planting equipment was written for Hobby Farms magazine. Click here to subscribe.
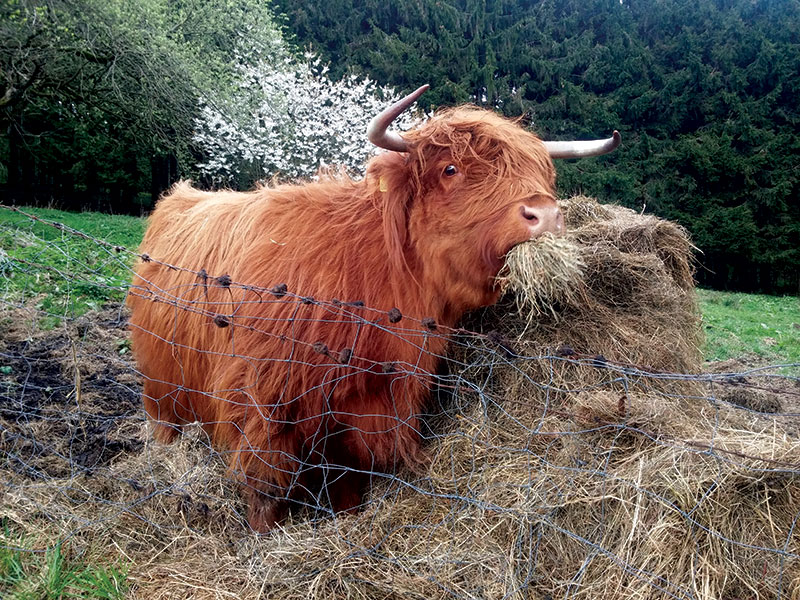
Pet cows are actually a thing. Not many people think of having a cow as a pet, but it’s fairly easy—and enjoyable.
I love my Highland steer. His name is Frazer, named for Scottish-Canadian explorer, Simon Frazer. He’s an ox-in-training and my best bovine pal. Will we one day eat him? No way!
While farm folk traditionally equate cattle with animated hamburger, increasing legions of rural dwellers view livestock in a brand new light. House rabbits, Pygmy goats, pot-bellied pigs and now cattle: They’re pets, not supper.
“What’ll you do with him?” ask visitors when I say he isn’t abattoir bound. Good questions. What does one do with a pet cow? There are so many avenues to pursue.
Bovine Careers
Consider driving. Frazer’s job is learning to pull a cart. Draft oxen are traditionally hitched in tandem, linked to one another and to the implement they’re hauling by means of a sturdy wooden neck yoke. But an ox (a mature draft steer) can wear a modified horse harness or a sleek single yoke. And a cow can pull a cart or wagon too. The advantages? Trained cattle are less reactive than many horses; it’s generally safe to loop the reins, hunker back and enjoy their leisurely pace. Tough bovine hooves rarely demand expensive shoeing, and an ox-drawn conveyance really turns heads.
Have you ever thought of riding pet cows? While the undisputed king of saddle cattle is the Texas Longhorn steer, any sensible, sizable, sturdily built cow or steer can be trained to ride. According to the International Texas Longhorn Association (ITLA), there are 400-plus saddle-trained Longhorn steers in the United States. Saddle and pulling steer events held at ITLA national and regional shows include an intricate trail event in which steers slop through water, weave through pylons, step over an assortment of obstacles and retain their composure while riders navigate a gate, don a crinkly slicker and unlatch and close a rural mailbox. Impressive? Yes!
A petite Jersey, a Dexter, or a gentle miniature dairy cow can provide your family with better dairy products than money can buy, and unlike a plastic milk jug, Bossy makes a great pet, too.
The soft, woolly undercoat curried from molting Galloway and Highland cattle is a fiber artist’s joy. Spin it and knit the ultimate cushy, warm mittens. A 2,000-pound ox yields a heap of premium hair.
A pet cow can be artificially inseminated, so you needn’t ever own (or visit) a bull. Her calves will be readily salable as pets or breeding stock if her bloodlines are good. Help preserve an old breed or establish a new one—and experience the joys of raising cattle without shipping calves to slaughter.
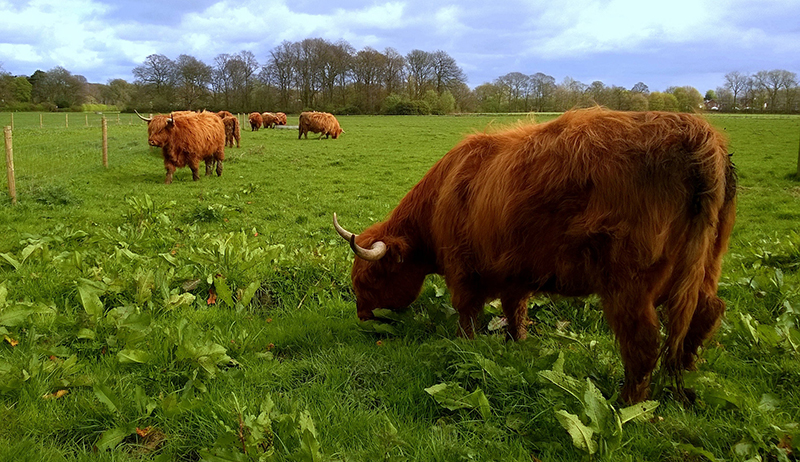
Pet cows can mow your yard. Some, such as Scottish Highland cattle (one of which is pictured below), also browse—they’ll brush wood lots and grub tree sprouts for you too.
Shutterstock
Training Pet Cows
Cattle are intelligent creatures and they readily perform for food. Traditional reward-based training regimens work well with bovines but clicker training, the method used to teach marine animals at attractions such as Sea World, is their forte. Methods designed for clicker training dogs, horses and llamas are easily modified for cattle. You can even teach your bovine to do tricks!
Bovine Byproducts
Call it cowpie, cow pat, cow flop or plain old cow manure, bovines make a load of fertilizer. Fresh cow flop is 5 percent nitrogen, .2 percent phosphoric acid, and 5 percent potash by weight; dried manure has even higher percentages. And it’s said to be mildly antiseptic. Old-timers soaked athlete’s foot in fresh cowpie, smeared it on their heads to inhibit baldness and caked it on injuries as a drawing poultice. In India, where cows are sacred, dried cow pats provide cooking fuel and are smoldered to repel mosquitoes.
Finding a Mentor
Tame bovines make charming and unusual pets, but they’re not for everyone. Before buying a cow, calf or steer, find a mentor to advise you. County extension agents, veterinarians, experienced oxen drovers, veteran dairymen and beef cattle breeders are excellent choices. Investigate breeds via online search engines. Cattle-oriented mailing lists put new owners in daily touch with helpful cattle keepers from around the globe.
The average pet cow or steer can live 18 years, some live 25 years or more. Adding a bovine beast to your family is a huge commitment. Be sure you really want a cow or steer before you buy one. Here are the barest basics to consider.
Pet Cows 101
Housing for a cow or steer can be as fancy as a box stall in your horse barn or a simple field shelter. You’ll probably need a safe, enclosed area in which to train your animal, either indoors or fenced tall and stout, so it can’t leap out. New owners often assume cows can’t jump, but frightened or irked cattle can vault a standard pipe gate with ease.
Working enclosures should be solidly built of planks, poles or brawny wire cattle panels at least five- or six-feet tall. Equine round-pen panels work well. If your animal is a miniature, a wee youngster or already tame when you get him, standard fencing will suffice. There is a lot to be said for starting with a trained pet bovine or a calf.
Pastures should be perimeter fenced using stout, permanent fence posts supporting cattle panels, tightly stretched wire mesh, five or more strands of barbed wire, or four to six strands of high tensile electric fence. Smooth wire won’t work unless it’s electrified; cattle will squeeze right through. Cross fencing needn’t be as elaborate unless you’re fencing cattle away from something they mustn’t eat. Cattle can pasture with other species; each will dine on plants the other leaves. The exception: some horses harry cattle. If your horse and pet cow can’t get along, separate pastures are probably a must.
Cattle require a lot of drinking water. An adult cow will down around 30 gallons a day, more if it’s hot or she’s lactating. She won’t drink as much as she needs from a soiled or scummy water source and probably won’t break ice in a waterer that’s frozen over. Clean water served lukewarm when the mercury plummets and cool when it soars will encourage her to imbibe all she needs. Cattle appreciate pond access in the summertime. They’ll wile away sultry days up to their chins in cool water and drink from the pond as well.
A 2,200 pound Minnesota-based riding steer, a Hoosier farmer’s miniature Zebu pasture ornament and a Georgia family’s milking Jersey all require radically different diets, vaccinations and deworming schedules.
While book and online resources can spell out the basics of cattlekeeping, always discuss important points with your county agricultural extension agent and a cattle-savvy local veterinarian before bringing Bossy home.
Pet Cow Care
Cattle are ruminants. Their four-compartment stomachs allow them to eat their food then hunker down, bring it back up as a cud and rechew it at leisure. Unless you (or a calf) milk your cow, it’ll probably do best on a predominately hay and pasture diet. No matter which local forage you choose for your cow or steer, it should be high quality, dust-free, and fed from a hayrack or a clean, dry spot on the ground. Cattle and moldy feed spell disaster; never feed moldy hay or musty, sour grain to your cow or steer.
Shutterstock
Cattle attract flies. The worst are horn and face flies, but deer flies, horse flies, gnats and black flies are attracted to cattle too. Droves of biting flies cause cattle to rub, race and fret, so control is a must. Insecticide-laced ear tags, oral larvicides, pour-ons, sprays and dust bags or back scrubbers are all viable options; but because pesky horn flies develop resistance to the chemicals used in these controls, it’s important to rotate organophosphate and pyrethroid products every few years. Face flies spread pinkeye, a highly contagious bacterial infection that can lead to blindness unless aggressively treated. Fortunately, most horn fly control products also repel face flies and other bloodsucking pests.
Well-nourished pet cows kept in dry, tidy surroundings don’t require a lot of coat care but you’ll need a cattle comb to groom your shedding beast and chase caked-on mud and muck when it accumulates. Most cattle appreciate being hosed with cool water on hot, steamy summer days. Expect to hand pick burrs, tiny sticks and other debris from long-coated breeds and from forelocks and tail swishes.
Hooves need trimming every few months. Hire a professional who will load your animal in a mobile chute and use power tools to shape his hooves, or teach your pet to pick up his feet and do the job with simple hand tools yourself. Visit Purdue University’s “Trimming Hooves” page online to see how it’s properly done.
Continually sloppy footing in barns, cow lots or pastures leads to foot rot, a nasty bacterial malady that thrives in mucky manure and invades via scratched or abraded feet. Untreated foot rot can cause permanent disability, and is extremely painful to the animal. Keep your cow or steer out of mud.
Shutterstock
All cattle are strong, and unhandled ones are reactive. It takes a certain amount of strength and agility to tame and train a bovine. Horned cattle can be especially dangerous; beginners shouldn’t buy a wild, snorty cow or steer with horns. Older cattle can be dehorned but it’s a grisly, agonizing process. Choose a calf or a tame adult member of horned breeds, or opt for a dehorned or naturally polled cow or steer.
Buy a Better Bovine
Many first-time buyers choose a calf, and this is a logical choice. However, because calves are more susceptible to certain diseases and stresses than older cattle, buying a baby is a process fraught with danger. Discuss calf-rearing issues with your county extension agent or veterinarian before buying a tiny baby—you must be fully prepared and in the know before you do.
Any calf should be purchased from a reliable source. “Don’t buy a calf from a sale barn,” says dairy farmer Lori Armstrong of Thayer, Mo. “Cattle at a sale might look perfectly healthy but you can bring home a lot of disease that way. For a pet I’d buy a bucket calf (bottle baby) from a dairy farm; it will look to you as mama. It’s not long before a calf is big enough to start dragging you around, but a bucket calf is smaller so it’s easy to train. I’d recommend a Jersey. Jerseys are naturally social; they make really good family cows.”
Another option: Buy a trained or partially trained weanling calf or older heifer, cow or steer from a reputable beef breeder. Nick and Anneke Self of Bent Creek Farm near Greenville, Tenn., bred our boy Frazer. A husky 10-month-old calf when he joined us, Frazer was already gentled and he led and stood tied like a pro. “We take our cattle to exhibitions,” explains Anneke, “so we work with our calves, we teach them basic things, the sort of things Frazer knows. Quite a few Highland breeders do that. It wouldn’t be hard to find a handled Highland, even an adult, if [you] check around.”
Before choosing a breed, consider what you plan to do with your pet. Ornamental organic lawnmower? Any breed that intrigues you will do.
But if you have your heart set on a riding steer, a Longhorn or Highland makes more sense than a Jersey or Zebu. An Angus family milk cow? Get a Guernsey instead! Any steer makes a fine ox, but for massive pulling power try a Chianina. And for compact cuteness, opt for a Dexter or a miniature Longhorn. If you want to win ribbons, choose a breed that’s popular in your locale.
Availability of pet cows may be an issue. Most miniature breeds and some heritage and imported breeds are in demand, as well as breeds listed on the American Livestock Breeds Conservancy’s endangered list.
Evaluate your climate and facilities. While they’ll adapt, Highlands in Florida and Brahmans in northern Minnesota are definitely out of their element. Small acreage? Think Dexters, Jerseys, Guernseys and miniatures when space is at a premium.
Which sex? Cows and steers make fine pets; for the casual cattle keeper, bulls do not. Working cattle are traditionally castrated males, but cows can pull carts and pack riders too.
Finally, do you recognize cattle ailments, afflictions and conformation anomalies when you see them? Do you know what to ask about vaccinations, breeding stock bloodlines, and other nuances of cattle selling? If not, ask someone who does to help evaluate potential purchases. Don’t choose unwisely because you’re unaware.
So go ahead, have pet cows—or a heifer, steer, ox or calf—and enjoy the ultimate hobby-farm pet.
This article about Keeping Pet Cows on a Hobby Farm was written for Hobby Farms magazine. Click here to subscribe.
Sugar snap pea trellis ideas aren’t difficult to come by. In this article, I share five of my favorite trellis ideas. All are easy to set up. Plus, each provides ample support for the growing vines.
Sugar snap peas are among my favorite garden crops. Their sweet crunch is hard to resist. But, the vines of many sugar snap pea varieties can reach five to six feet in height, making a sturdy support structure an absolute necessity. Today I share five of my favorite trellis ideas. All are easy to set up, and each provides ample support for the growing vines.
Sugar Snap Pea Trellis Options
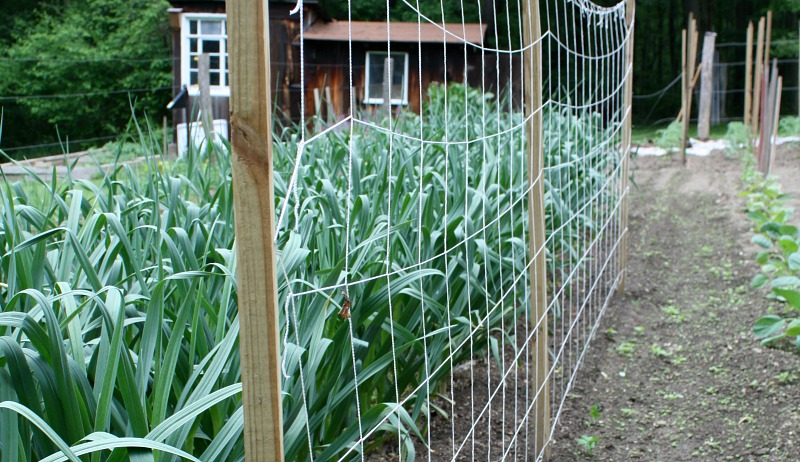
Nylon Netting Row Trellis
This simple structure is among the most inexpensive sugar snap pea trellis ideas. Nylon garden netting is often sold at local nurseries and found at various online garden supply companies. The netting’s openings are five- to six-inch squares, and it comes in lengths of 25 or more feet and is most commonly 5 feet tall. Hammer 1-by-1 hardwood stakes down the length of the row of your sugar snap peas, spacing the stakes about 8 to 10 feet apart. Then, stretch the nylon garden netting down the length of the row and use a staple gun or zip ties to attach the netting to the wooden stakes. You can plant a row of pea seeds down each side of this trellis to maximize growing space.
Box-Wire or Chicken-Wire Row Trellis
If you don’t want to purchase the nylon netting described above, use chicken wire or box wire to build your sugar snap pea trellis instead. Space the hardwood stakes as described above, but use the fencing instead of the nylon netting. It’s less flexible and slightly more visually obtrusive, but it works like a charm. The biggest downside to this sugar snap pea trellis technique? The small openings of the fencing make it impossible to reach through and harvest pods from the other side of the row. If you use this method, be sure that the trellis is fully accessible from both sides, or harvesting the pods will be challenging.
Natural Branch Trellis
Another fun (and visually attractive) way to trellis sugar snap peas is to use tree branches as support for the vines. Collect straight branches that are forked multiple times to give the vines plenty of places to cling to. Bury the base of a line of branches into the ground down the length of the garden row. Space them close enough so that their forked branches cross over each other. If you can’t bury the base in the ground, you can tie the base of the branches with twine or plastic zip ties to pieces of 3-foot rebar that are hammered into the ground for stability. Choose branches that are tall enough to support the growing vines to their mature height.
Gabion Stack Pea Trellis
Gabions are empty cubes or cylinders made from welded wire that are filled with rocks and earth. They were once used as military fortifications, but these days you often see gabions used for erosion control and to create unique fences, walls and other outdoor structures. Empty gabions also make great trellis structures. To make a trellis from gabions, stack several empty gabions on top of each other and fasten them together with zip ties. Place the stack in the garden and secure it to the ground with four wooden or metal stakes. Plant your sugar snap pea seeds around the stack, and you have yourself a distinct trellis. You can buy gabions from construction and landscape supply centers as well as various online sources.
Recycled Ideas
There are many different repurposed household items that work great as a sugar snap pea trellis, too. You can use a mattress spring, an old closet organizer or tireless bike rims—the possibilities are endless.
With a little bit of creativity, you’ll have a great sugar snap pea trellis for this growing season and many more.
This article about sugar snap pea trellis ideas was written for Hobby Farms magazine.Click here to subscribe.
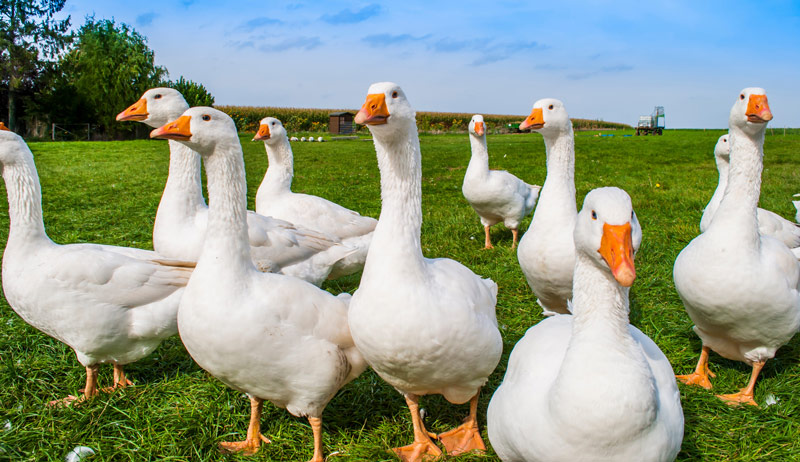
What do geese eat? It’s a question every potential geese-keeper needs to ask themselves before getting any gooslings.
Hobby-farm and small-flock owners are increasingly recognizing the benefits that come with keeping geese. Beyond being dual-purpose birds, geese are fabulous poultry-flock guardians, facing off against weasels, skunks and smaller carnivores, and raising an ear-splitting alarm for other kinds of predators. Geese also make wonderful weeders, easily eradicating unwanted greenery growing in gardens, orchards and crop fields. Those interested in rearing geese quickly learn that these waterfowl are self-sufficient breeders, with both parents attentively raising their goslings.
With so many positive reasons to raise geese, it’s only natural to wonder what these birds eat. This is especially true for flock owners who also keep chickens, ducks, turkeys or gamebirds. Can geese eat the same rations as the others?
While formulated feed for geese does exist, it is very difficult to find at farm-supply stores. It can be specially ordered, but the cost would be prohibitive, especially if a hobby-farm flock features only one guardian goose.
Fortunately, most farmers already have plenty of what geese eat on hand: pasture! Primarily herbivores, geese are fabulous foragers. Their digestive systems are designed to efficiently process fiber and, as a result, they can survive on grasses and greens such as bluegrass, brome grass, chicory, white clover, dandelions, orchard grass and Timothy.
Just one acre of fresh pasture can support between 20 to 40 geese.
As with other domestic fowl, geese need grit to aid with digestion. A hopper of poultry grit should be offered near the goose house, but chances are that geese will take in all the grit they need naturally in the form of tiny pebbles as they forage. It’s essential that pasture-fed geese have access to a young, fresh pasture with tender grass and greens. Mature, dried-out pasture does not provide the quality of fodder necessary for goose nutrition.
What do Goslings Eat?
Baby geese—goslings—have different nutritional needs than their adult counterparts. So instead of asking what do geese eat, in this case, you need to ask: What do baby geese eat? They grow much faster than chicks or ducklings, and their diets will vary with their age.
Start newly hatched goslings out on unmedicated chick starter crumbles. At two to three weeks, switch them to unmedicated chick grower topped with sprinkles of chick grit and chopped-up white clover and fresh grass. Slowly increase the amount of greens and decrease the amount of grower so that, by five to six weeks, the goslings can be successfully switched to pasture (supplemental chick starter can be offered until the goslings are fully feathered).
Mother Goose
Broody geese focus solely on one task: incubating their eggs. A goose setting eggs will rarely leave her nest. Given it can take anywhere from four to five weeks to hatch eggs, Mama Goose may starve since she cannot forage. So what do geese eat while brooding?
It’s therefore vital to offer a broody supplemental food—and fresh water—in bowls she can reach without leaving her nest. Broody geese can eat crumbled layer rations sprinkled with chick grit. This food can be made more enticing by topping them with chopped white clover and grass.
What Do Geese Eat During Winter?
Despite being cold hardy, geese cannot forage successfully if their pasture is covered by snow. During these chilly months, a diet of Timothy hay, shredded green cabbage and kale, and chopped beet and carrot greens will see them through the winter.
What do geese eat when it comes to special treats? Try cracked corn, wheat and oats from time to time—always in moderation. On snow-free days, allow your birds to forage whatever they can but continue to offer them their winter diet until the new spring pasture growth is well established once again.
This article asking what do geese eat was written for Hobby Farms magazine. Click here to subscribe.
Tractor horsepower is one of those myths when it comes to machinery; people tend to believe bigger is always better and more is best. I doubt there’s a hobby farmer anywhere who doesn’t appreciate the abilities of a powerful utility tractor with engine strength measured in tens or even hundreds of horsepower, and it’s not difficult to envision yourself behind the wheel of such a tractor, easily accomplishing all of your farming tasks.
Of course, the biggest tractors also come with the biggest price tags, and not everyone can afford a top-of-the-line tractor with features and accessories and tractor horsepower to spare. But not everyone needs that level of power. In fact, for hobby farmers, smaller tractors with less tractor horsepower can offer significantly greater versatility and return on investment than giant tractors aimed at commercial farmers.
This raises an interesting question: Just how much tractor horsepower do you need for common farming tasks? If you’re shopping for a tractor, here are some guidelines to help you identify how much power you need.
Tractor Horsepower & Working Acreage
The first question to ask is: “How much land do I intend to cultivate?” Do you have 10 acres that you’d like to prepare for planting? Do you have 20 acres of hay to cut for small square bales? Or are you mainly looking for a tractor with a front-end loader or a backhoe for more down-and-dirty farming tasks, with less emphasis on working in a field?
These are important to consider because there aren’t hard numbers to identify the amount of horsepower you need for any given task; it’s a variable equation driven by the size of the implements you want to use, the speed at which you intend to use them, the type of soil you’re working with and many other factors. It’s not as simple as: “Task Y requires X horsepower.”
Basically, it comes down to this: If saving time is a priority, or if you plan to use your tractor to cultivate large fields, a stronger tractor will let you use wider implements at a quicker pace. However, if you plan to minimize challenging field tasks have the patience to work your land at a slow speed, a tractor with less horsepower and smaller implements might be enough.
That said, let’s break down tractor horsepower ratings into a few categories and analyze the tasks that can be accomplished with each.
Tractor Horsepower Defined
If you’re curious about the origin of terms or phrases, you’ve probably wondered about the term “horsepower” and whether it has anything to do with the power of a horse. In short, the answer is yes, though the comparison between the power of horse and machine is fraught with caveats, exceptions and generalizations.
Consider first that tractor horsepower was meant to be a practical comparison of work accomplished over a long period of time, not a comparison of peak strength. You might wonder: “My little 17-horsepower lawn tractor is struggling to pull a heavy wagon up this incline. Does that mean I’d need 17 horses to do this same job?” The answer, of course, is no. A single horse at peak exertion is significantly stronger than a single-horsepower engine. But obviously, a horse can’t sustain its peak level of power for hours on end. In contrast, a lawn tractor can deliver that level of power for as long as you keep it supplied with gas.
In terms of modern standards, one horsepower is equal to about 746 watts of power, though there are also variations, such as the metric horsepower, which is about 10 watts less. It’s also worth noting that the horsepower rating of a given tractor usually refers to the “engine horsepower,” which is separate from the horsepower offered by the power take-off, a number that is smaller than the rating for the engine. If you need to know the PTO horsepower rating of a given tractor, you’ll have to dig into the specifications from the manufacturer, though for general comparisons of tractor strength, engine horsepower is a suitable measurement.
15 to 20 Horsepower
Horsepower in the 15 to 20 range (sometimes slightly more) is the amount offered by a basic lawn or garden tractor. This is more than sufficient for typical lawn tasks such as mowing your yard, pulling carts or small trailers full of debris or supplies, and even plowing light snow (with appropriate tires, tire chains and weights, of course). However, field cultivation tasks are out of reach.
25 to 35 Horsepower
Stepping up from lawn and garden tractors, 25 to 35 horsepower enters the range of subcompact tractors and low-end compact utility tractors. Their extra power provides options for using a front-end loader and a backhoe attachment. And—with the right implements—small-scale field cultivation is within reach. Unlike lawn and garden tractors, compact utility tractors typically have a power take-off, or PTO, for powering implements. This spinning drive shaft allows implements, such as a mower, loader or backhoe to pull energy from the engine to run. Most tractors come with a standard rear-mounted PTO, but midpoint PTOs are also available on some models.
40 to 50 Horsepower
The range of 40 to 50 horsepower begins to blur the line between compact utility tractors and regular utility tractors, significantly expanding the number of farming projects you can tackle.
Tasks such as plowing fields and baling small square hay bales are achievable with this level of horsepower, although you might find that challenging conditions, such as working in clay soil or pulling a wagon behind your hay baler, will push tractors of this strength to their limit. However, if you do these tasks in small amounts and are willing to work at a slow pace, tractors in this range can be an excellent choice for a hobby farmer; some even include removable mower decks, making them remarkably versatile.
60 to 90 Horsepower
A utility tractor in this horsepower range (especially the high end) will probably handle everything a hobby farmer can realistically ask it to do. The added strength makes the tractor more stable on challenging jobs such as baling hay—even round bales are feasible—and let you use larger and wider implements at a faster pace.
100 to 150 Horsepower
Talk about serious power! Tractors offering 100 to 150 horsepower can handle all but the most extreme farming tasks without hesitation and are suitable for farming at a commercial level, although this power and ability comes with a big price tag. The only question is whether you can put a tractor of this level to good use. The typical hobby farmer probably won’t have enough large-scale farming tasks to warrant the cost of a tractor in this range.
So for hobby farmers, where is the sweet spot of power versus price? For mowing your yard and doing some work with a front-end loader, a tractor with 25 to 35 horsepower might be all you need. If you envision doing a little of everything and want a versatile “jack of all trades” tractor, something in the 40- to 50-horsepower range will probably be sufficient while remaining maneuverable and relatively affordable. But if you need more tractor horsepower for serious field cultivation tasks, a large tractor with 75 horsepower or more could be worth the added expense.
In essence, you don’t necessarily need the biggest tractor in the lineup. Depending on your needs, you might be happier with something smaller.
This story about tractor horsepower originally appeared in Hobby Farms magazine. Click here to subscribe.
Make fence posts, instead of buying them. Use the trees from your lot to create your own wooden ones.
What are they exactly? That’s easy—it’s a post made out of metal or wood and installed in the ground to support the boards, wires, etc. that comprise a fence. Whether you’re marking a property line, keeping livestock in place, or blocking out wildlife, fences are common critical infrastructure on farms.
So that’s the broad definition. But let’s talk about the nitty-gritty definition—that “post made out of metal or wood” part. The livestock pastures on my farm are constructed with wooden fence posts purchased specifically for the project. The front side of the deer fence that surrounds my orchard is also built with wooden posts—4x4s, to be precise.
There’s nothing magical about wooden ones. Sure, some are treated so they resist rot and last longer. But at their heart they’re simply long sections of wood measuring several inches in diameter.
So the next time you’re working on a fencing project and shopping for a bunch of posts, and you’re questioning whether the cost is worthwhile … why not consider harvesting your own from the trees on your farm?
If you have the time and tools, you can create beautiful fence posts that will last for years. Maybe your farm is dotted with trees like Black locust or cedar that produce durable, rot-resistant wood. Maybe you’re a skilled lumberjack with the equipment to safely fell trees of all sizes.
And maybe your farm has a sawmill so you can produce uniform fence posts of specific sizes from all the black locust trees you felled yourself.
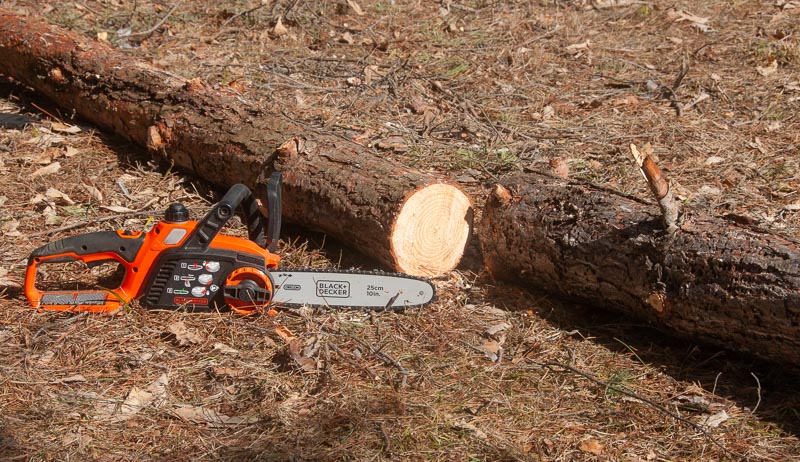
That’s the perfect-world example. But making your own posts doesn’t have to be so complicated or fancy. A couple winters ago, a massive storm blew down many trees and branches across my farm, including a few small pines trees and part of a cedar trunk that were just the right length and diameter to turn into fence posts.
As part of the cleanup, I trimmed off all the smaller branches with pruning loppers, then used an electric chainsaw to cut the logs to suitable fence post lengths. I left the bark in place and wound up using my simple posts to construct a grape trellis in my orchard.
I know untreated pine wood won’t last very long in the ground, but that’s okay. The post was free, it cleaned up a mess, and it will be easy enough to replace the post down the road.
So there you have it: two examples of making your own fence posts from the trees on your farm. Whether you’re cutting up logs on a sawmill to make tidy fence posts, using windblown pine trees to make rough-hewn posts, or taking an intermediate approach, you’ll be harvesting a valuable product from your farm and saving the cost of purchasing fence posts.
Wicking tub? Many gardeners believe there is nothing new under the sun (literally) for gardening techniques, just new takes on old tricks. However, Leon Sloan from Kingston, Oklahoma, has a unique container gardening method debunking most gardening beliefs.
Sloan shares his 13-year-old concept of wicking water up through a pipe to get healthier plants that maintain moisture 24/7.
Waste Not, Want Not
Meeting Leon you quickly learn he conserves everything he can to make the most out of what he uses. He believes in protecting the oceans and environment through recycling and upcycling. And he always aims to save the most money possible.
At his greenhouse store, he sells fertilizers and plant supplements in ziplocks and recycled pop bottles. This responsible and intentional mentality is part of his wicking tub method. The concept of the tub is simple and reflects his way of living—waste not want not.
Wicking Tubs are made of recycled 25-gallon feed tubs, one PVC pipe and 8-gallon milk jugs. These are all simple supplies most people can access.
On larger scales the milk jugs can be supplemented for French Drain Pipes when making multiple wicking tubs without needing so many jugs. You can also substitute the feed tubs for 5-gallon buckets, your favorite decorated containers or raised garden beds.
Sloan’s universal rule is to cover 80 to 85 percent of the bottom surface of your container with the supply holding the oxygen (i.e. french drain pipes or empty gallon jugs). This, he refers to as a “false floor.”
Soil will take up the remaining 15 to 20 percent of the bottom of the container to wick the moisture up to the roots of the plant.
A Different Approach
Common Container Garden practices encourage using old soil or organic matter “fillers” in the bottom 25 to 50 percent of the containers, and to drill holes at the bottom of the container.
Sloan’s wicking tub method teaches that the oxygen at the bottom is pertinent to wick the water up. And holes only allow water to pass through and out of the container leading to dry soil. The wicking tubs make even drip irrigation seem wasteful.
“Without a way to hold water in and keep soil continuously and evenly moist, you are just running water through the soil and out the bottom,” Sloan explains. Sloan does drill a hole 4 inches from the bottom on the side and as an indicator of when you have watered the plant enough.
“Just pour your water down the PVC pipe until it comes out of the side hole,” he explains.
To assemble the 25-gallon tub with gallon jugs, follow these steps.
Pre-drill 3/16-inch holes around the top and bottom of the gallon jugs.
Drill one hole in the side of the tub 4 inches from the bottom.
Pack the jugs in as tight as you can, covering 80 to 85 percent of bottom.
Open one of the jug lids and insert the PVC pipe. The pipe must be cut at an angle for the part going inside of the jug. And it must be long enough to stick out of the container.
Add potting mix and supplements, ensuring 15 to 20 percent of the soil reaches the bottom of the container.
Plant either seedlings or seeds.
Water through the PVC pipe until it trickles out of the hole in the side of the tub.
Leon shares these wicking tub tips and more on his YouTube Channel, Gardening with Leon. In the video above, he demonstrates his method by assembling a fig tree using the French drain pipe.