Raised garden bed measurements are essential to laying out a raised garden bed. It’s not difficult to get the correct measurements.
Isn’t it just a matter of measuring out the sizes, squaring the corners, and going from there? Well, yes … and no. You want to arrange the beds in a logical manner that won’t challenge your productivity (and patience) for years to come. So you really need to put some time and thought into the measuring step.
After all, once raised garden beds are prepared, they’re not easy to move. It’s better to get them right the first time around and avoid regretting their layout at a later date. Keep the following considerations foremost in your mind when laying out raised garden beds.
What Raised Bed Garden Measurements Will Be Best for Each Bed?
In theory, raised garden bed measurements can be any size large enough to support the plant(s) you aim to grow. But some sizes are more suitable than others.
The width is the most important consideration. Three to 4 feet wide is considered optimal for the short side. Any wider, and you’ll find it difficult to reach the middle of the bed without climbing inside and compacting the soil.
And if any of your raised garden beds will be installed along a fence or building, you might want to make the width even more narrow. That way you can easily reach across the whole bed from the one accessible side.
You can also factor in required spacing of plants you intend to grow when figuring out your raised bed garden measurements.
Say you’re growing pumpkins on raised mounds spaced 8 feet apart. A bed measuring 8 feet long won’t provide enough space for more than one mound. But you might be able to squeeze two mounds into a 12-foot bed, if you don’t mind some vines creeping over the edges of the bed.
How Far Apart Should the Beds Be Spaced?
The amount of space between each bed is just as important to consider. An 18-inch walkway between each bed might seem like plenty when you’re laying out empty beds. But plants have a habit of encroaching on these narrow walkways until they’re impassible.
For example, I once planted tomatoes in adjacent beds separated by 18 inches or so. The tomatoes grew so vigorously that by the end of summer, the two beds had practically become one. It was hard to tell where one tomato plant ended and another began!
The path between the beds was nothing more than a hazy memory, If it had ever existed at all (maybe it was just a myth?), it was long gone by the peak of tomato season. I wish I would have considered the bed in my original raised garden bed measurements.
You should also consider whether you’ll need to bring machinery between the raised garden beds.
A walk-behind string trimmer mower is convenient for keeping the pathways between beds tidy. But it can’t serve its purpose if there isn’t enough room between beds to maneuver around.
Similarly, if you want to drive a garden tractor and wagon through your garden with loads of compost, you’ll need much wider spacing between at least some of the beds.
If you’re not concerned about tractors and want your beds spaced closer together, that’s fine too. But in this case, I do recommend that you install the beds one at a time.
Start at the back so you can pull trailer loads of compost right up alongside each bed, filling as you go. Then slowly work your way outward until all the beds are in place. That way, you won’t have to haul compost by the shovelful or wheelbarrow load, past dozens of beds, to fill the most inaccessible beds in the back.
Laying out garden beds for maximum satisfaction and productivity takes a bit of time and planning. But the troubles you’ll avoid in the long run make it all worthwhile.
This article about Raised Bed Garden Measurements was written for Hobby Farms magazine. Click here to subscribe.
Rakes seem straightforward but not all are created equal. Rakes on the farm include garden, bow, landscape, level head, lawn types and more. Knowing which one to use takes a bit of knowledge.
Walking into a hardware store, it’s easy to be overwhelmed by the array of rake availability, and each is designed for a specific range of tasks. Knowing how to select the correct rakes for your needs will save time and make your physical labor more efficient.
Garden Rakes
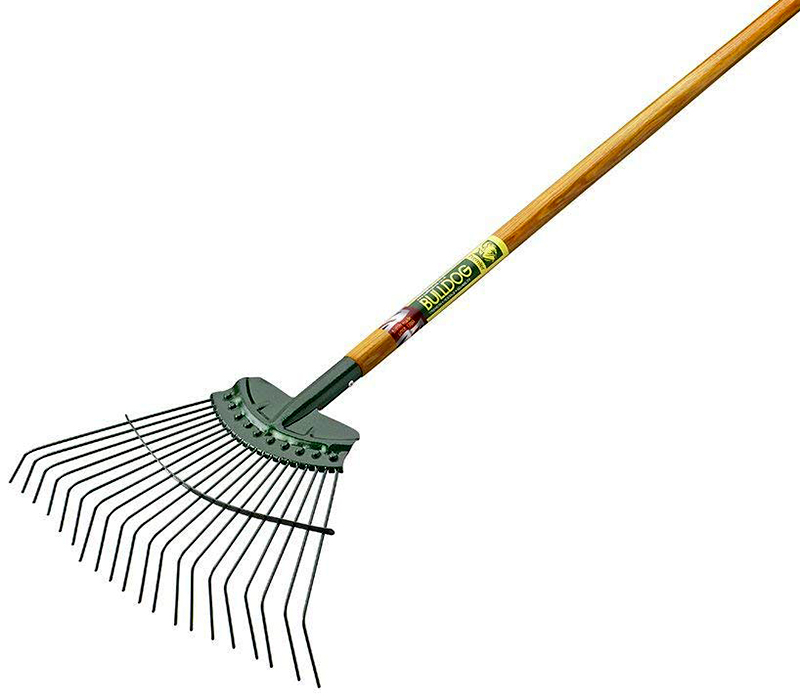
The catch-all category of “garden rakes” or “steel rakes” (pictured above) encompasses a number of rake designs that rely on short sturdy tines for a wide range of cultivation and clearing tasks. There are three broad styles of garden rakes.
Bow
The bow rake is a common workhorse that features 14 to 16 vertical or curved tiånes arranged in a straight alignment that is offset from a long handle by a pair of curved bows extending from both sides of the head. Used for a number of garden tasks, the bow rake is especially good for spreading mulch, weed removal, tamping soil, breaking up compacted soil clods, and removing roots and rocks from cultivated beds. The bow design gives the rake efficient spring action.
Landscape
The landscape rake is a general term for a larger level head-type rake. These broad rake heads range in width from 20 to 36 inches, and because of their size, the heads and handles are often composed of lighter materials, such as aluminum. Rakes of this size are intended to be used to level wide areas of cultivated soil and to easily spread large volumes of sand or earth.
Level Head
Similar in appearance and function to the bow rake, level head (aka flathead) rakes feature a head with a row of straight or curved tines connected directly to the handle. Level head rakes can be used for similar tasks as the bow rake but are especially good at breaking up spaded soil and eliminating debris. After the soil is turned and cleared, the rake head can be flipped upside down and used to smooth or level earth. Unlike the relatively standardized bow rake, level head rakes can be found in different head sizes with various spacing and length of the rake teeth for different cultivation and bed preparation needs. For example, level head rakes with closely spaced teeth are designed for fine preplanting soil cultivation compared to rakes with wider spacing between their teeth which are used for rough initial clearing and large debris removal. Some ingenious manufactures have also designed rubber covers to be slipped on several rake teeth in order create deeper planting furrows at a set spacing.
Lawn Rakes
Amazon
Lawn rakes are crucial tools for collecting organic litter from open space. While primarily used in manicured formal landscapes, lawn rakes are also essential for gathering leaves and grass to be used for homemade compost or mulches. There are two main styles of lawn rakes:
fan-shaped: made of plastic or bamboo
spring-type: made of flexible steel tines with a tension bar
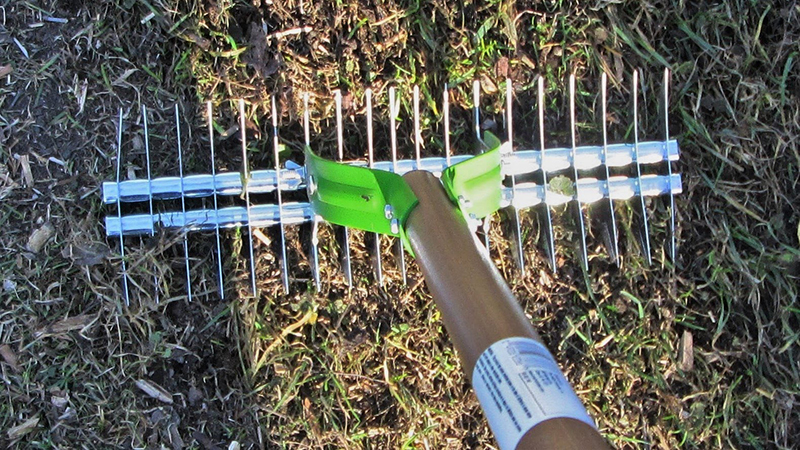
Of the two, spring-type leaf rakes are the most durable and versatile, making them a good choice for most light cleanup work. If you have concerns about damage to underlying tender plants, bamboo or plastic rakes may be a better choice. There are also unique lawn rakes available with adjustable heads that can be narrowed for raking in tight spaces or scooping heads that can be used to pick up raked materials.
Lawn rakes are lightweight and feature a multitude of fine teeth which makes them ideal for quickly gathering large quantities of light organic debris. This task is unsuited for their garden-rake cousins due to the inefficiency and clogging issues of the heavy tines.
Specialty Rakes
A number of very specialized single-task rakes are also available on the market, including thatch or scarifying rakes, rubber rakes and rock rakes.
Thatch
YouTube
Thatch varieties look unusual and feature a series of closely spaced large curved tines on an adjustable head. They are used to remove excess dead grass and other organics near the surface of the soil, known as thatch, which allows more air and moisture flow for healthier lawns.
Rubber
Manufactum
With a head full of soft flexible tines, rubber versions are designed to safely remove leaves and debris from brick or stone surfaces that might be scratched or damaged by traditional lawn rakes.
Rock
Amazon
Finally, specialized rock tools are used to collect stones from rocky soils that have already been tilled. While designs for rock rakes vary, most have a curved U-shaped design that allows you to rake cultivated soils for rocks and then flip the head to winnow out any remaining soil before relocating the stones out of the garden.
Purchasing Advice
The quality of the tools sold in big-box hardware stores and even local hardware shops tends to be poor, consisting primarily of mass-produced tools made of low-grade materials. While these are often initially serviceable, they tend to last only a season or two before starting to break or fall apart. Take the time to find higher quality rakes and hand tools that feature sturdy materials and thoughtful ergonomic designs.
For traditional bow or level head rakes, look for forged steel heads rather than rake heads made of stamped, hardened or cast steel. Forging is the strongest and most labor-intensive of the steel-manufacturing processes and produces a denser end product, which holds a better edge. It also has slight flexibility that adds to the durability of the tools by helping prevent breakage.
Beyond the heads of the tools, consider the type of handle. Good hardwood handles (traditionally ash or hickory) are my preferred choice, though some may prefer fiberglass handles, as they’re lighter and require less cleaning and care. Whichever handle type you choose, be sure that it’s firmly connected to the head. Finally, be sure to select a tool with a long handle so it can be used by people of any height without back strain.
Expect to pay three or four times more for a well-crafted rake than you would for a low-grade hardware store rake. The upside to the high costs is that, when well-cared for, these tools truly are lasting and can even be passed down to the next generation of farmers and gardeners.
Fast-growing shade trees are a must when you want to add some summer relief to your farm animals, be it horses or livestock.
No matter what kind of animals hang out in your pastures, they’ll appreciate a nice shady place to escape from the heat of the sun. While you could build a shade shelter for this purpose, why not plant a tree that can also add beauty to your property, too? Here are eight fast-growing shade trees that can give that shade in short order.
7 Fast-Growing Shade Trees
1. Hackberry (Celtis occidentalis)
Also referred to as a sugarberry, this relative of the elm tree makes for a hardy shade tree with its cylindrical, drooping branches. Native Americans used hackberry to treat sore throats. The leaves are a showy gold in the fall.
Zone: 2-9 Height: 60 feet Width: 40-60 feet Growth per year: 2-3 feet Culture: With its deep root system, it can handle droughty uplands, but will grow faster and taller in moist bottomlands that receive part shade to full sun. Spacing: 20-30 feet apart, especially if your soil stays moist Lifespan: 150-200 years
When your talking about fast-growing shade trees, you must not forget the Tulip Popular. Also known as yellow poplar or Tulip Tree, this North American native is nicknamed for its yellow, tulip-like blooms. Related to magnolias, its lobed leaves are green in summer and turn gold in the fall. Some specimens in the upper mountainous areas of the Appalachians reach to 190 feet tall. Flowers might not appear for the first few years.
Zone: 5-9A Height: 80-100 feet Width: 30-50 feet, maintaining a fairly narrow, oval-shaped crown even at extreme heights Growth per year: 3 feet Culture: Tulip poplars enjoy full sun and deep, moist, slightly acidic soil. Their shallower root systems don’t cope well with dry, hot locations. Spacing: 15-25 feet apart Lifespan: 300 years
3. Weeping Willow (Salix babylonica: Salix x blanda and Salix x pendulina)
The Babylon weeping willow and the Wisconsin weeping willow are fast-growing shade trees that are so similar in habit and form that they’re usually treated interchangeably. Their drooping branches, thin twigs, small, linear leaves, and classic sweeping foliage make them great pasture trees for stock to browse beneath. They’re one of the first trees to leap out in the spring and turn gold in the fall. Be aware that their invasive roots wreak havoc with pipes and foundations, however.
Zone: 2-9A Height: 50-70 feet Width: 50-70 feet Growth per year: 3-8 feet Culture: Can handle drought or extensive flooding; partial to full sun; will grow in most soil types Spacing: 30-50 feet Lifespan: 50-70 years
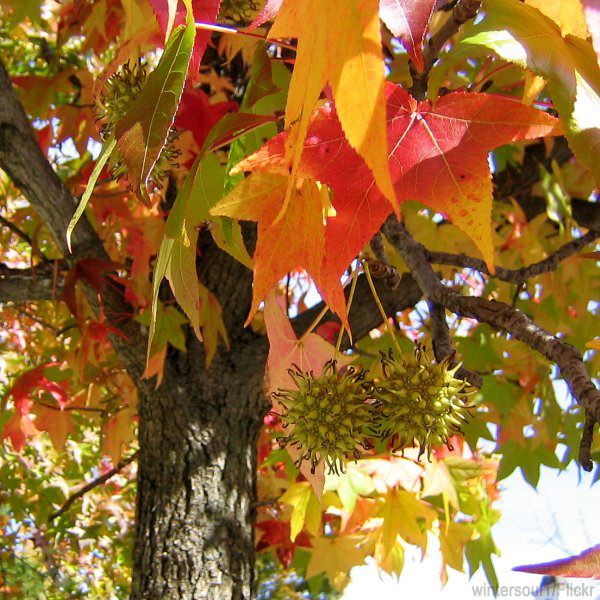
4. Sweet Gum (Liquidambar styraciflua)
This North American native, medium- to fast-growing shade tree has glossy, star-shaped green leaves in summer and sports brilliant colors in the fall, ranging from orange and purple to red to yellow. As with willows, its root systems are formidable, so things like pipes and structural foundations will likely lose any battles. The seed pods/fruits of the sweet gum can be messy, but remain clinging to bare branches well into the winter, looking a bit like tiny sputniks and attracting birds to feed on the seeds. If you wish to avoid the mess altogether, look for the Rotundiloba cultivar, which is fruitless.
Zone: 5A-10B Height: 75 feet Width: Narrow pyramid to 50 feet Growth per year: 1-5 feet for the first decade; slower after that Culture: Part shade to full sun; tolerates wet and dry conditions if rooted in deep soil Spacing: 15-25 feet Lifespan: 200-300 years
5. Green Ash (Fraxinus pennsyvanica): A Fast-Growing Shade Tree In Iowa
One of the most adaptable fast-growing shade trees is native to Iowa: The green ash has been planted extensively for windbreaks, riparian zones and pastures. Its fine-grained hard wood is strong and suitable for furniture, sports equipment and more. The subspecies, Arizona or velvet ash (Fraxinus velutina) grows well in the southwestern United States, though some areas of intense sun necessitate a stand of trees to protect them from sunscald. The green ash’s 2- to 4-inch leaves are a showy gold in the fall, and it has large surface roots.
Zone: 2-9 Height: 50-80 feet Width: 50-70 feet Growth per year: 2½-3 feet; in warmer moist zones, trees may grow 6-10 feet per season when young. Culture: Prefer full sun and moist, well-drained soils, but tolerate a wide range of soil conditions. Spacing: 25-35 feet apart Lifespan: 120-175 years
6. White Pine (Pinus strobus)
One of the faster growing pines, this favorite has soft bluish-green needles, and are, of course, evergreen. Several white pines planted together can give shade and provide a windbreak along a fence line or in a pasture. White pines don’t tolerate air pollution well and are susceptible to the bark disease, white pine blister rust and the White Pine weevil.
Zone: 4-9 Height: 50-80 feet, though specimens have grown to 150-plus feet Width: pyramidal, 20-40 feet Growth per year: 1½-2 feet Culture: Fertile, moist, well-drained soil and full sun Spacing: 10-20 feet apart Lifespan: 200-400 years; one specimen in New York is dated 458 years old
7. Magnolia (Magnolia grandiflora): A Fast-Growing Shade Tree for the South
tamu/stock.adobe.com
There are eight magnolias native to the eastern U.S. M. grandiflora, also known as the southern magnolia, big bay, big laurel or large-flower magnolia, has creamy lemon-citronella scented blooms and grows throughout the South. These fast-growing shade trees are lovely evergreen deciduous trees, and they make wonderful stand-alone specimens. These trees sport blooms up to 12 inches across and have been known to grow to 120 feet. Their formidable root systems can be twice the width of their canopies, so don’t plant them too close together. Two of the fastest growing varieties are Margaret Davis and Smith Fogle.
Zone: 4-9 depending on the variety Height: 60-80 Width: 30-50 feet Growth per year: 2-plus feet Culture: Moist, neutral to slightly acidic soil, sun to partial shade Spacing: 25-35 feet apart Lifespan: 80-120 years
This article about Fast-Growing Shade Trees was written for Hobby Farms magazine. Click here to subscribe.
Feed your flock by learning how to grow worms for chickens and build a worm bin. This addition to a flock’s diet can add a naturally-grown nutritional food source and add variety.
My in-ground worm bin’s squeaky lid conjures the sound of a creepy crypt’s opening door. It reminds me of that spooky children’s rhyme, “The Hearse Song:” “The worms crawl in; the worms crawl out; the worms play pinochle on your snout.” The worm bin is in fact a crypt for things once living that are now dead: leaves from the garden, chaff from roasted coffee beans, cotton from my worn-out blue jeans. And the worms — specifically red worms (Eisenia fetida) — do crawl in and out. However, there aren’t any signs of snouts just yet.
You might be more familiar with smaller worm bins that people keep in their kitchens. Some keep in-house worm bins going for many years, but those require a bit more maintenance than their promoters let on. I’ve curated an in-house worm bin a couple of times, keeping the worms in a 10-gallon plastic tote and feeding them kitchen scraps supplemented by shredded newspaper. Then, I’ve moved on to other projects when the bin became a bad houseguest and generated too much stinky moisture or flies and maggots, which hatch from fly eggs laid on produce peels in the kitchen or grocery store.
However, when I saw an outdoor worm bin built with concrete block sides and a plywood lid, I knew I would create one myself. The advantages over an in-house bin were obvious.
Excess moisture would drain into the ground rather than pooling in a stinky kitchen container.
Any maggots that turned into flies would simply escape to the wild rather than buzzing and banging into my kitchen window.
Consider the volume of compost!
Also, because I was considering ways to generate some free food for my flock, I realized I could use organic waste too coarse for my regular compost bins to grow red worms for chickens that they could eat come winter.
A little research revealed red worms’ ideal conditions: temperatures between 59 and 77 degrees Fahrenheit; a moisture level of 80 percent (like a damp sponge); pH between 5 and 9; minimal ammonia or salt; and no light. Also, worms are cold-blooded and breathe through their moist skin.
I knew that even in my mild zone seven in North Carolina, an aboveground worm bin meant the worms would spend winter too cold to be active. And if the bin dried out in summer, compost production — and worm reproduction — would suffer. Few things motivate me like a design problem.
So I buried this problem; an in-ground worm bin was the way to go. The surrounding soil would keep it warmer in winter and cooler and damper in summer. But I’d need to figure out how to keep it from flooding when it rained; how to keep it moist during droughts; what organic waste would go into it; and schedules for feeding the chickens from it and harvesting the compost. Of course, I also wanted to keep the cost as low as possible.
I poked around the inventory behind my house. (Note: The plantings in front of my house are “cottage/garden style” for the sake of my wife and the neighbors, but the area behind the house is what I call “barnyard style” for me.) Behind the garage, I found a scrap pile of pressure-treated posts and pickets from past fence projects, a tattered screen door, a used soaker hose and some wire-fencing scraps. The wheels in my brain were turning.
Identify the Location
To begin growing worms for chickens, I chose a well-drained spot on high ground that wouldn’t flood in a rain. It was also accessible for a wheelbarrow, so I could shovel out prime compost once a year. Additionally, it was just a few feet from a 275-gallon rain barrel.
Measure and Dig the Hole
An area measuring roughly 3-by-6 to 4-by-8 feet and about 1 foot deep makes a worm bin that can swallow lots of organic waste and grow thousands of red worms for chickens. I recommend using an old screen door for a lid, so you can:
Create a bin that matches the dimensions of the door.
Modify the bin to meet the dimensions of the door.
Or custom build a screen door that matches the dimensions of your bin.
Build the Bin
After you’ve dug the hole, line the inside with a solid frame to keep the dirt walls from caving in and support the lid. Concrete blocks (commonly called cinder blocks) are 16 inches long, 8 inches wide and 8 inches tall, so one course of blocks will give you enough depth. Sixteen blocks will line a 4-by-8-foot bin. You can also use pressure-treated planks or rot-resistant planks of the heartwood of red cedar, white cedar, cypress or redwood, if they are available locally. Untreated wood that isn’t rot-resistant, such as pine or oak, will last three to eight years and then need to be rebuilt.
Regardless of wood type, three 8-foot planks of 2-by-12 inches will suffice for a 4-by-8-foot bin. Cut one plank in half to 4 feet, then nail or screw (with 3-inch screws) the four pieces together to create the 4-by-8 frame, as if you were making a raised bed. Drop it in your hole.
My pile of 6-by-6-inch scraps cut from the tops of pressure-treated fence posts gained new life as a free lining for my bin. I stacked two courses of these scraps and joined them together with 3-inch exterior grade screws so they would stay in place. I used an old screen door for a lid. I could have dug a bin that matched the door’s dimensions, but I instead framed the top of the bin with pieces of scrap 1-by-6-inch pickets to fill the gap between the door and the 6-by-6’s.
Add the Lid
Once the bin was dug and the frame was installed, add the old screen door. Use the old hinges to secure one side of the door. Add one or two handles on the other side to make it easy to open. Then, lay the soaker hose on the door, and sandwich the hose to the door with a section of fence wire and fence staples. Use a scrap piece of a 2-by-4 to prop the lid open when you’re adding organic waste, letting the chickens feed or harvesting compost.
Cover the door with heavy-duty landscape fabric or a double layer of shade cloth, so that light won’t bother the worms but some rain can get in. Finally, have a tarp, a piece of plywood or some metal roofing handy to cover the bin if heavy rains set in, so it won’t fill up like a tub of water and drown the worms.
Slowly Add Water
Connect the soaker hose to the rain barrel with a garden hose and spigot. You’ll add materials that are dry, so the steady drip of the soaker hose over the entire bin will sustain a roughly 80 percent moisture level. The spigot lets you turn off the water if there has been enough rain.
Add Worms and Waste
Resources such as Rhonda Sherman’s Vermiculture Technology (2010) and Mary Appelhof’s Worms Eat My Garbage (2016, 2nd edition) recommend starting with one pound of red worms per one square foot of worm bin. But that’s for optimal composting. At about $25 per pound via mail order (you can find many vendors online) and with 32 square feet of bin, that was too expensive for me.
My goals were less about using a lot of worms to eliminate waste and more about using some waste to generate a lot of worms for chickens. For that reason, I started my worm bin in the spring with a couple of pounds of worms. They live only in the airy top couple of inches. I cover them with an inch of waste every week or so and they multiply.
Schedule
Of course, being a lazy chicken-keeper, I didn’t want to spend time or energy harvesting the worms for chickens. So come winter, when the supply of bugs has diminished, I open the lid on the worm bin once every week or so and let the chickens scratch and feast on worms, other bugs and any seeds they find. I wait to open the bin an hour before they are ready to roost. That way, they exit the bin on their own and return to the coop without any effort on my part.
By spring, the chickens are banished from the bin, but I open it in the morning so the sunlight will force the remaining worms to go deeper. I can then harvest the top few inches of mostly worm-free compost into a wheelbarrow. I use either a shovel, pitchfork or seed fork depending on the texture and wetness of the compost.
I let the worms go deeper again for a few more hours and repeat the process four or five times until there’s just a few inches of compost and writhing worms at the bottom of the bin. Then I restart the process of adding organic waste to generate more worms for chickens for next year’s winter buffet.
Worm Food
I put tender kitchen scraps and chicken poop from the coop into my regular compost bins. However, items that are too coarse for a compost bin need help to decompose in less than a year. The worm bin essentially helps me turn this costly trash, especially if you’re paying for garbage pickup, into free protein by growing worms for chickens. The annual supply of high-quality compost is a bonus.
According to Crystal Stevens in Worms at Work: Harnessing the awesome power of worms with vermiculture and vermicomposting (2017), “A rule of thumb among well-known vermiculturists is that worms can eat their weight in one day. For example, 1 pound of worms will go through 1 pound of food scraps daily.”
To “feed” your worms for chickens, consider the following:
Coarse Plant Material (herbicide-free)
Seedy Plants and Rotten Tomatoes Include plants that you don’t want to add to the compost bin; the seeds will survive, and in the worm bin, the chickens will scratch up and eat those seeds º mostly.
Cotton Clothes Include clothes that are too ragged to donate, mostly T-shirts and jeans. Polyester clothes won’t get eaten, and stretchy fabrics such as old socks and underwear will leave too many strands of inedible fabric.
Coffee Chaff Use the chaff from organic coffee roasters (and the compostable bags it comes in) as well as coffee grounds. Check with your local coffeehouse whether it offers waste chaff for free.
Pine Shavings These can come right from the coop.
Cardboard, Newspaper & So On Shredding speeds up decomposition.
Shredded Tree Leaves
Kitchen Scraps Don’t include food items that are very salty such as potato chips or acidic such as citrus peels. Also, avoid meat products, dairy products and nut butters that can attract rodents and create smells.
This story about growing worms for chickens originally appeared in Chickens magazine. Click here to subscribe.
Using spent brewers’ grain for chickens and livestock feed is a great way to economize on your feed costs while keeping your animals productive and healthy. Whether planting forage crops in unused space or tossing kitchen scraps out to the livestock, you’ve probably already got some systems in place to recycle “waste” back into production. Here’s another source you may want to consider, one that is not only often available free but also provides excellent nutrition: brewer’s waste.
Brewer’s waste, also known as spent brewers’ grain for chickens, is a byproduct of the brewing process. Beer begins with a mash of barley (and sometimes other grains) and hot water, which after an hour or so of enzymatic activity, converts the grain’s starch into sugar and is then drained and rinsed to extract that sugar. That’s what the brewer wants: sugar, which is the starting place for fermentation. Left behind are the starchy endosperm, residual protein and whatever residual sugars the brewer couldn’t rinse away. These protein- and fiber-rich leftovers are excellent feed for everything from cows to chickens.
Calculating a Ration For Feeding Spent Brewers’ Grain for Chickens
Optimum use of brewer’s waste in a feed ration varies by animal, lifecycle phase and even by purpose. Ruminants love the fiber content, and the low-degradability protein is excellent for dairy cattle in production. Pigs, goats, sheep, rabbits and poultry all benefit from a moderate quantity in their diet.
If you’re considering using spent brewers’ grain for chickens as a regular, substantial percentage of your animal’s feed (between 20 to 40 percent), you’ll want to consider the nutritional aspects carefully. A good internationally accepted overview is provided by Feedipedia. But for the typical homesteader or small-scale farmer, regardless of the animal, intermittently supplementing a regular mixed feed ration with a few buckets from your own brews or a local brewery is going to be a great nutritional supplement and a joy to your animals.
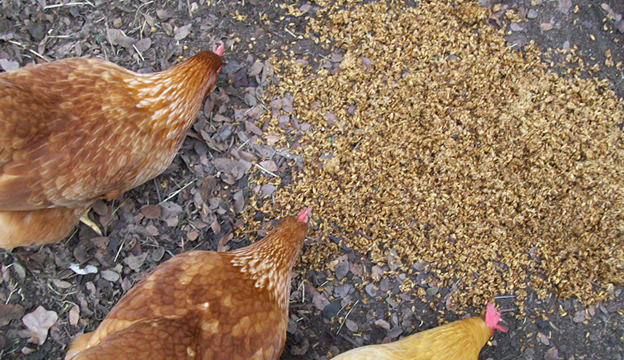
Using the spent brewer’s grain from my homebrew sessions is a treat for my flock. Scratching and pecking and gobbling away, they delight in the pile of warm grains that ends up dumped in their run. Consequently, their enthusiasm shows me how well my brewing has gone. The more excited the animals are, the more sugar was left on the grains and the weaker my beer is going to turn out to be. So let’s just say I like to see them a little happy, but not too delighted.
Accessing Spent Brewers’ Grain for Chickens
If you homebrew, getting spent brewers grain for chickens is easy, but in many cases, local breweries or homebrew clubs may supply spent grains at no charge. One brewery in my hometown is happy to supply grains on a bring-your-own-bucket basis if you show up at the end of a brew day when they’ve got a load of grain to dispose of. Call around and see what sort of arrangements you can make—with the growing popularity of craft beer, microbreweries and now nano-breweries are springing up all over. Many larger-scale breweries probably already have arrangements with local farmers or feed suppliers, but because even a small brewery can produce waste grain by the ton, there’s always plenty to go around.
A Word of Caution When Using Spent Brewers’ Grain for Chickens
No matter where you get it, make sure you’re getting fresh brewer’s waste and using it quickly. Guidelines typically recommend using wet waste within three days, but my personal experience is that after even 36 hours, I can smell the aroma of wild fermentation beginning. Certainly don’t let the grains sit around any longer than two or three days.
I’ll usually dump my brewer’s waste the morning after a brew session—long enough that the 170-degree-F grains have had time to cool to a safe temperature but well before any fermentation or spoilage has taken place. In the winter, I might accelerate that process and dump the grains right onto the floor of the coop just a couple hours after I finish to help our birds stay warm overnight.
Additional Uses
If you’re producing silage, brewer’s waste can be an excellent component, where it’ll last six months or more. Be sure the grains have cooled well before ensiling, and for best results, mix them with a dry component, such as dried forage, other dry wastes or unmashed grains. Beyond animal feed, brewer’s waste makes an excellent nitrogen-rich component in any sort of composting system. With our modified deep-litter chicken coop, whatever the birds don’t eat ends up mulching down and ending up on our garden beds within a few months.
Brewer’s waste is a great resource for any small agricultural enterprise that has animals. With the rising popularity of both homebrewing and small-scale commercial brewing, it is a plentiful, affordable source of high-quality feed. And if you aren’t already brewing yourself, give it a try: it’s a fun, productive hobby and a great component to any homestead!
This article about using spent brewers’ grain for chickens was written for Hobby Farms and Chickens magazines. Click here to subscribe.
Bend sheet metal with common tools. This comes in handy when you have lots of farm projects that require sheet metal.
On our farm, we’ve got an old outbuilding and a dream to build a party barn. Progress is coming along nicely. We’re looking forward to having a gathering space on the farm that spares or house the added foot traffic.
As part of the project, I’m installing a homemade vent hood. I really wanted to use material found during property cleanup, so I pieced it together using found parts. And that includes scrap metal I came across on the farm.
But this involves bending barn tin metal pieces into shape for the hood, which reminded me of a common question: How do you bend sheet metal without a bending brake?
I have an easy way to bend sheet metal pieces (thin-gauge) and get the job done.
First, place a piece of angle iron against the sawhorse. This will be the bottom part of your “sandwich.”
Next, lay your piece of scrap tin on the angle iron where you want the bend. Place the second piece of angle iron on top of this, then clamp everything down. Make sure your long edge is out when you do this so you can use the weight from the longer edge to your mechanical advantage. (It’s easier to bend a longer length.)
With everything clamped in place, use the screwdriver blade to score the scrap metal along the edge of the angle iron. Run the blade along this track a few times to make a visible line. (You can watch me do this in the video above.)
Once you’ve scored the metal, you can simply bend the metal up along the scored line to make your bend. So long as you have the pieces clamped good, the bend should be pretty easy. If you need a tight edge, you can use a hammer to create that.
Remove the clamps and top angle edge. You can then complete the bend by hand for a clean edge.
Watch the video above to see how I bent found scrap metal for my homemade vent hood.
This article about how to bend sheet metal with common tools was written for Hobby Farms magazine. Click here to subscribe.
City farm animals don’t have to just include chickens and goats: Rabbits, ducks, quail and even cattle can fit on some lots.
Perhaps nothing makes a farm feel more like a farm than animals. They set the pace of the day, and they provide rhythm, activity, manure and (hopefully) income. Animals, one could say, are the life. Of course, as an urban farmer, your animal options may be limited. Space is a factor, and in many areas, there are restrictions on what kinds and how many animals you can have. Here are six animals suited for city life: Maybe you’ll find one that could provide you a little extra income, fertility and, let’s be honest, entertainment.
No. 1 City Farm Animal: Chickens, of Course!
Garrett Heath/Flickr
Chickens are the most obvious and most popular choice for the urban farmer. Relatively quiet animals (the hens are, at least), they produce highly sought-after products—eggs, meat and more chickens—and are becoming increasingly legal in many cities. To boot, chickens also create a nitrogen-heavy manure, which can make an excellent natural fertilizer when mixed into compost or soil. The Cornish Cross, the Red Ranger and the Freedom Ranger are the best backyard meat breeds, whereas there are countless excellent laying breeds: Black Australorp, Easter Egger, Barred Rock, Rhode Island Red, Buff Orpington … the list goes on.
To make a profit from your backyard flock, you can raise them for meat or eggs, but also consider raising them for the chicks. Four- to 6-month-old pullets––that is, hens that are not yet laying––can often go for $10 to $20 each. An urban farmer could make a decent living just selling these young birds to other urban farmers.
2. Rabbits
The Bunny Maker/Flickr
Why more urban farmers don’t consider rabbits city farm animals is a bit of a mystery to me. Although they can be used for fiber or breeding, their most profitable product is often meat and many people may feel intimidated by—or simply not interested in—raising such a cute creature then hauling it off to slaughter. That being said, a young rabbit can get to butcher weight in just 12 weeks, which rivals chickens in terms of speediness.
Raising rabbits takes good organization, but their upkeep is relatively simple, and the upfront investment can be much more reasonable than larger animals: less fencing, smaller pens, less feed, cheaper breeding stocks. Moreover, many rabbits can be produced in a very small area—hundreds of rabbits a year in your average backyard if planned accordingly.
For meat breeds, consider raising Champagne d’Argent, New Zealand, California, Creme d’Argent or a combination. For pet breeding, the Lops, Dutch and Miniatures are very productive and very adorable. Then, of course, if meat and pet rabbits are not your thing, there are angora rabbits, whose hair can be harvested regularly and mixed with other fibers or sold in bulk for blending.
3. Ducks
Kelly Weatherly/Flickr
Depending on your market, free-range duck eggs sell for upwards of $1 a piece right now. In Nashville, Tenn., in 2015, they were spotted for $1.50 each or $18 a dozen. Now, ducks don’t always produce quite as many eggs in a year as your average chicken, but their yields come close. In fact, some people argue that Indian Runner ducks can out-perform chickens in egg-laying.
Ducks also make better garden companions than their poultry cousins, and even the laying varieties produce decent meat and duck fat. Some good, small-scale breeds include the aforementioned Indian Runners, Rouens, Khaki Campbells and Blue Swedish. The classic White Pekin is also an excellent dual-purpose breed. Purchase some decent feed along with a kiddie pool, and you’ll raise happy ducks.
4. Quail
Rachael Brugger
Quail are rather underrated city farm animals. The most common breed, the Bobwhite, can mature in 16 weeks and start laying after 24. Quail can also live in a fairly small area, as long as it’s covered and kept clean. “A 2’ x 2’ x 8’ pen could comfortably house 20 to 25 quail,” Carla Emery notes in her classic book, The Encyclopedia of Country Living (Sasquatch Books, 40th anniversary edition, 2012). Quail will not likely brood their own chicks in captivity, however, so it’s a good idea to have an incubator if you plan to earn a profit from your endeavor. Some quail breeds, such as the Coturnix, can produce four to six eggs a week, which can sell for up to 50 cents an egg, suddenly making quail a profitable fowl for small spaces.
Pygmy goats aren’t just cute, though they are definitely that: They can also make great dairy or meat animals. As city farm animals go, it might be hard to keep the larger dairy and meat breeds due to lack of space, but a pygmy goat requires less of everything, as they are generally 1/2 to 3/4 the size of your average dairy or meat goat.
But that doesn’t mean they are poor milk producers. Nigerian Dwarfs are said to produce anywhere from 1 pint to 2 quarts of milk a day, depending on feed quality and the goat. And although they are small, pygmy goats have been used as meat animals around the world and especially in Africa for many years. In the case of meat production, a castrated male, aka wether, of any dwarf variety would work well. You also have the option of raising dwarf fiber goats, like the Pygora or Nigora, which produce a nice angora wool. Of course, no one is going to begrudge you for just keeping some pygmy goats as fine manure-producing pets either.
City Farm Animals Most Unlikely Candidate:
Dexter Cattle
Atle Grimsby/Flickr
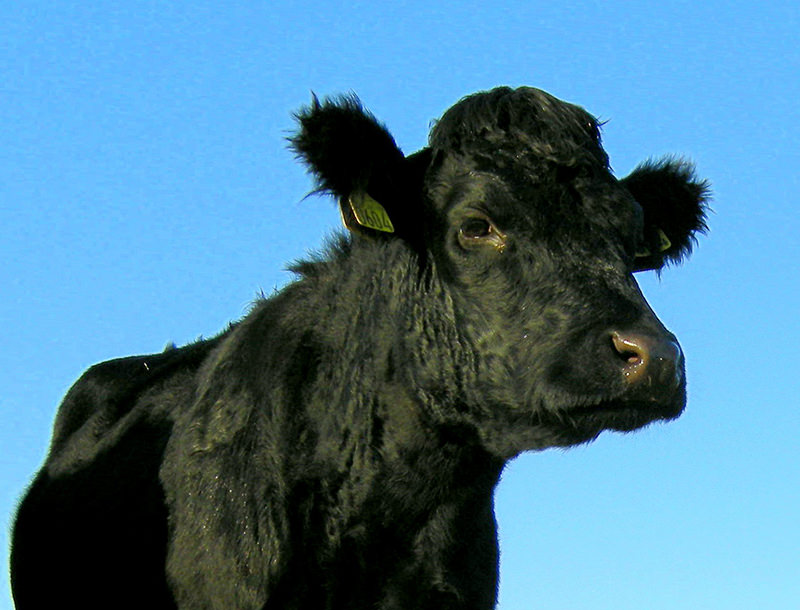
If your property isn’t big enough for cattle, that doesn’t mean it’s not big enough for Dexter cattle. These are naturally small, squat animals that have an excellent feed conversion rate and can double as milk producers. Dexters require about 1/2 an acre of good green grass per animal or 12 to 15 pounds of hay and a little grain each day, so while you might not find Dexter in the city center, they could be good city farm animals for outlying suburbs.
According to Hobby Farms writer Sue Weaver, a grass-fed Dexter steer will grow to finishing weight in 18 to 24 months. Dexter can give 1½ to 3 gallons of 4 percent butterfat milk daily, can produce nearly 500 pounds of meat. Those are pretty attractive numbers for city farm animals.
This article about City Farm Animals was written for Hobby Farms magazine. Click here to subscribe.
Backyard chicken keeping isn’t just a trend—it’s a lifestyle. Whether you’re raising hens for fresh eggs, sustainability, or just the simple joy of watching chickens peck around your yard, every setup tells a unique story. From sun-drenched desert runs in Arizona to cozy, rain-ready coops in the Pacific Northwest, there’s no one-size-fits-all when it comes to building the perfect space for your flock.
At Roost & Root, we’ve had the privilege of connecting with chicken keepers from every corner of the U.S.—and we’re constantly inspired by the creative, thoughtful ways people turn their backyards into functional, beautiful spaces for their birds. In this article, we’re taking you on a virtual tour of real-life coop setups from across the country. You’ll find practical tips, region-specific advice, and plenty of backyard chicken inspiration to help you design your own oasis—wherever you call home.
Southern: Beating the Heat with Shade & Airflow
Founder Dyan Twining has been a passionate chicken keeper for over 15 years. Her love for chickens sparked the creation of Roost & Root, with the goal of designing coops that make keeping chickens easy and enjoyable – no matter where they live.
Dyan keeps a variety of breeds, which is why the Heritage Chicken Coop | Model 30 is her go-to. Its spacious design allows her to care for multiple breeds with ease. The coop features an Updraft ventilated monitor-style roof, ensuring optimal airflow—especially important in the scorching Central Texas heat. Plus, the roof is crafted from SunTuf Polycarbonate, which blocks 65% of light, protecting her flock from the harsh Texas sun while still letting in just enough light to keep things bright and airy inside.
West Coast: Fresh Eggs, Ocean Air, and Backyard Flair
The Golden State is a golden place to keep chickens, too. In urban areas where backyard space might be limited, it’s important to choose a coop that makes the most of every square foot—while still adding style to your outdoor space. We love how this customer cleverly nestled their Round-Top Stand-Up Coop beside a lemon tree. Not only does it look amazing, but the tree also provides natural shade—perfect for keeping the flock cool during those sunny West Coast summers.
Midwest: Four Seasons & Snow Scenes
Ah, the Midwest—where you get a little bit of everything, from warm summer mornings to snow-covered winter wonderlands. Imagine whipping up a farm-fresh omelet with local produce and eggs from your own backyard hens, or adding those eggs to a classic Midwest casserole. However you use them, your coop needs to be as tough as the weather.
That’s why we love how this customer embraced the season by dressing up their Round-Top Walk-In Coop with a festive evergreen wreath. It’s proof that functionality and charm can go hand-in-hand.
In a region that sees all four seasons—and sometimes all in one week—our cold-weather accessories are a must-have. And with integrated waterers and feeders built into Roost & Root coops, you can keep your flock fed and hydrated for days without having to bundle up and brave the snow every morning. Now that’s cozy.
Northwest: Rainy, Lush, and Full of Life
Chicken keeping in the Northwest means leaning into misty mornings, towering evergreens, and rich, rain-soaked soil. Your hens will love scratching through the damp earth, and you’ll love the peaceful rhythm of caring for them beneath foggy skies.
With the region’s cool, wet climate, ventilation and moisture control are essential—and Roost & Root coops are built to thrive in exactly these conditions. Made from 100% Western Red Cedar, our coops are naturally rot-resistant and rich in protective oils that guard against moisture and decay—all while staying non-toxic for your flock.
This customer outfitted their Backyard XL Chicken Coop Model 2 with our optional Storm Panels, creating a cozy, weather-ready setup. Want even more protection? You can add a roof panel to the extension area for full coverage. And when the clouds part and the sun finally peeks through, those panels are easily removable—just pop them off to give your birds some sunshine and help dry out the ground.
Ready to Create Your Own Chicken Oasis? No matter where you live, Roost & Root has a coop built for your climate—and your style. From cozy backyard setups to spacious walk-in designs, these are just a few of the models we offer. Explore our full collection onlineto find the perfect fit for your flock. We are already in 10,000+ Backyards Across the U.S. Join thousands of happy chicken keepers who trust Roost & Root to make backyard chicken keeping simple, stylish, and fun. We’ve thought of everything, so you don’t have to. Let us help you choose the right coop to make chicken keeping easy, beautiful, and totally you.
Homemade treats for chickens have so many benefits. It keeps your ladies from being bored, and a variation in their diet will boost your birds’ overall health and happiness.
Chickens are omnivorous, meaning that they eat plants and meat. Here, are 14 homemade treats for chickens for your flock that encompass their natural diets. Please remember to always feed these in moderation. Feeding too many treats can have a negative impact on your chickens’ health.
#1 Snack Piñata
The easy-to-make piñata is a great way to give a snack and combat boredom at the same time. Take corn, watermelon or really any vegetable and fruit that you can hang from a rope and hang it up in the coop! Your birds will be entertained all day by these chicken treats, and you’ll get a funny show watching them peck at whatever you have hanging.
In my coop, I normally use a mix of different gourds and sometimes I’ll even hang a head of broccoli. They always have a fun time with it!
#2 Herb Garland
An herb garland can look beautiful in your coop, make it smell better and serve as an impromptu snack bar for your flock! I always have leftover lavender, oregano, chives, mint, parsley and thyme.
I sometimes hang it high above their roosts or low other times to give them a sense of change. I take simple twine, bunch up my herbs and tie them into the twine. I then hang it side to side in their coop.
If I’m going to be gone for a few days, I’ll incorporate some kale and spinach bunches into this as well.
#3 Chicken Cake
I have only made this next treat twice in my entire time of chicken tending. I don’t bake very often, but if you are a baker, this treat will work out well for you and your flock!
A chicken cake can contain all sorts of goodies, and decorating can be a load of fun also! The recipe is as follows.
Ingredients
1⁄2 cup flour
1⁄2 cup applesauce
1⁄2 cup peanut butter
1⁄4 cup oregano
1⁄2 cup chopped apple
1⁄4 cup parsley
1⁄2 cup chopped strawberry
1 teaspoon baking powder
Preparation
Mix your flour, baking powder, peanut butter and applesauce together. After they’re mixed, add the rest of the ingredients. Put it into a cupcake tray with a disposable cupcake tray for easy removal.
Bake at 350 degrees F for 20 minutes, and viola!—a chicken cake!
You can top your chicken treats cake with a multitude of different things. The first time that I made this recipe for my flock, I cooked the entire cake in a cake pan and topped the whole thing with corn and herb leaves. I used carrots to make a face (because what’s a cake without some decoration) and my flock loved it!
Everyone can make these easy chicken treats! You only need peanut butter, raw oats and any other treats you would like to throw in. They’re also great to freeze during the summer to help your birds cool off!
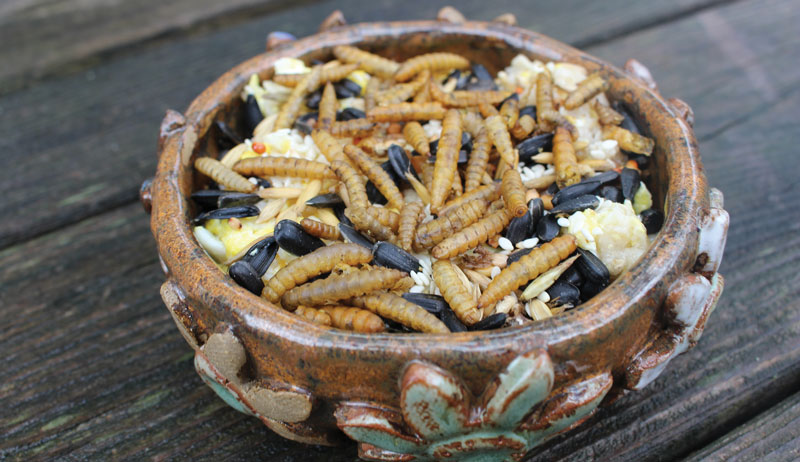
Mix 1⁄2 cup of peanut butter to 1⁄2 cup of oatmeal, and roll into balls. That’s it! I recently have started incorporating mealworms and black sunflower seeds into mine, but any treat can be added.
#5 Chicken Salad
This “salad” will be very different from the salad you’re used to making. For this treat, you need peas, blackberries, blueberries, chopped grapes, spinach, oregano, chopped strawberries, iceberg lettuce and sunflower seeds.
Mix it all in a big bowl and you have a chicken salad for your flock! During summer, I’ll mix in ice cubes also to keep it cool.
#6 Cool-Down Block
The frozen cool-down block is a good treat during summer. Fill any container up with water and add whatever treats your flock likes.
After you have added the chicken treats, freeze it. Giving them this treat during the summer will help them cool down on those very hot summer days while also keeping them entertained. My flock will work on one of these for hours even after it has melted.
#7 Apple Wreath
For this next homemade treat for chickens, you will need to purchase a wire wreath frame. I normally get mine at the Dollar Store. Once you have your wire wreath frame, peel some apples.
Add the apples to the wreath form, and hang in the coop within your birds’ reach. You can also add herbs to the frame with the apples or larger treats. This is a simple, easy and quick treat.
#8 Parfaits
Another quick and easy treat for chickens is a parfait. For my flock, I get a large container of yogurt and add fruit to it. Blackberries and strawberries tend to be my flock’s favorites.
The live bacteria found in yogurt is great for a chicken’s stomach health. But too much of a good thing can cause diarrhea, so feed yogurt in moderation.
#9 Pasta Please
When you’re in a cooking mood with no one to cook for, cook your flock some pasta! During winter, pasta can offer a warm little pick-me-up for a cooped-up flock.
I cook spaghetti or angel hair. Once it’s cooled, I put it in a large bowl and add mealworms, black fly larvae and a mixture of herbs. I serve this only once during winter. Pasta contains a lot of carbohydrates so this is another treat that is best served in moderation.
#10 Molting Fuel
The “molt meatloaf” is perfect for molting season. Many variations are available, but this is the one that I have used (routinely adding ingredients over the years).
Stephanie Thurow
Ingredients
3 eggs
3⁄4 cup milk
2 teaspoons molasses
2⁄3 cup old-fashioned oats
2⁄3 cup layer crumble
1⁄4 cup wheat germ
1⁄4 cup powdered milk
3 cloves garlic, chopped
1⁄4 cup oregano
1⁄4cup cinnamon
1⁄4 cup cayenne pepper
1⁄4 cup dill
1⁄4 cup fresh or dried parsley
1 teaspoon fresh or dried sage
1 1⁄2 pounds ground beef
Preparation
Combine your eggs, milk and molasses first. Add everything but your ground beef, and mix well. Once blended, add your meat. Pat this mixture into a meatloaf pan, and bake at 350 degrees F for 1 hour. Once cooked and cooled completely, serve to your flock!
Banana pancakes are also great homemade treats for chickens. This treat only uses two things: eggs and bananas! You can always add in herbs and mealworms, though, if desired.I love this treat because it freezes well, it’s nutritious and you can warm them up for a winter morning treat.
You’ll need two eggs to one large ripe banana. Blend the eggs and banana together until the texture is smooth. Into an oiled skillet, pour “batter” and cook like you would a regular pancake! You can make a single giant one or several silver-dollar ones to feed sporadically throughout winter.
#12 Nesting Box Herbs
I use a blend of herbs in my nesting boxes and in my litter, but I also use them as homemade treats for chickens on occasion. This blend consists of multiple herbs that are good for chickens, and while I sell it in my store, I’m going to give you the recipe here.
I don’t really use a measuring set. It’s just an even blend of all of these herbs: basil, bee balm, calendula, chamomile, cilantro, comfrey, dill, echinacea, garlic, lavender, marigold, mint, nasturtium, oregano, parsley, rosemary, sage, tarragon, thyme and yarrow.
I collect and dry all of these herbs myself, but you can easily purchase them already dried.
#13 Cookies for Chooks
Santa doesn’t have to be the only person that gets cookies! Your flock will love these homemade treats for chickens and they are so easy to make! All you’ll need is 1 cup of peanut butter, 1 cup of flour and 1 egg!
Mix these ingredients together, and make dough balls. Apply to a cookie sheet and bake in the oven at 350 degrees F for 6 to 8 minutes. Let them cool fully before you feed to your flock!
#14 Sprout Some Seeds
This next treat requires wheat seeds. You can do this one many different ways. I have seen some chicken keepers sprout them in jars and do a daily wash of water, while others cover a flat planting tray with seeds and sprout them that way.
I normally plant mine because some of them will be transferred to my garden. The sprouts that I don’t use are fed back to my flock and will keep them entertained for hours. The extra dirt gives them something new to scratch in and, with the sprouts mixed in, gives them a treat to look for!
Homemade treats for chickens in moderation are a best practice for any flock. These treats will hopefully help you spoil and help with your flock’s nutritional intake!
This article about homemade treats for chickens originally appeared in the September/October 2022 issue of Chickens magazine. Click here to subscribe.
Rooster spur injury and other wounds can happen when working with a chicken flock. Chickens might not have the teeth that other domestic animals do, but they can still cause quite a bit of damage, intentionally and unintentionally. As chicken owners, be prepared to handle any of the following injuries.
Shutterstock
Abrasions & Lacerations
Scratches and scrapes are the most common injuries suffered by poultry keepers and can be from a rooster spur injury. Lifting a hen off a nest, moving a bird from or onto a perch, or doing any kind of coop-cleaning or maintenance are instances where your skin can come in contact with your chicken’s talons. Because of the nature of their purpose, for digging and defense, talons are naturally sharp, meaning they can just as easily break human skin as they can the surface of the ground. Given that talons encounter dirt, droppings and other unsanitary surfaces, you should consider a scratch from this source contaminated and treat it accordingly.
While preventing scratches might prove difficult, you can minimize your exposure by wearing long pants, sleeves and gloves while interacting with your flock. You can also reduce the damage your birds’ talons might inflict by inspecting them regularly to check for jagged edges that might trap more grime; these can be trimmed using a pet file or clipper.
Bruises
Although chickens are relatively small animals, larger breeds such as Jersey Giants, Brahmas and Australorps can deliver significant force. The pectoralis and supracoracoideus muscles that control a bird’s flight are extremely strong. One smack from an agitated chicken’s flapping wings can blacken an eye or cheek—or anything—quite easily.
To prevent getting battered, pick up your hen or rooster in a manner that keeps both wings pinned tightly against the bird’s body. Avoid holding your bird anywhere near your face; if you need to examine an injured or sick bird, enlist someone to securely grip your chicken while you examine it.
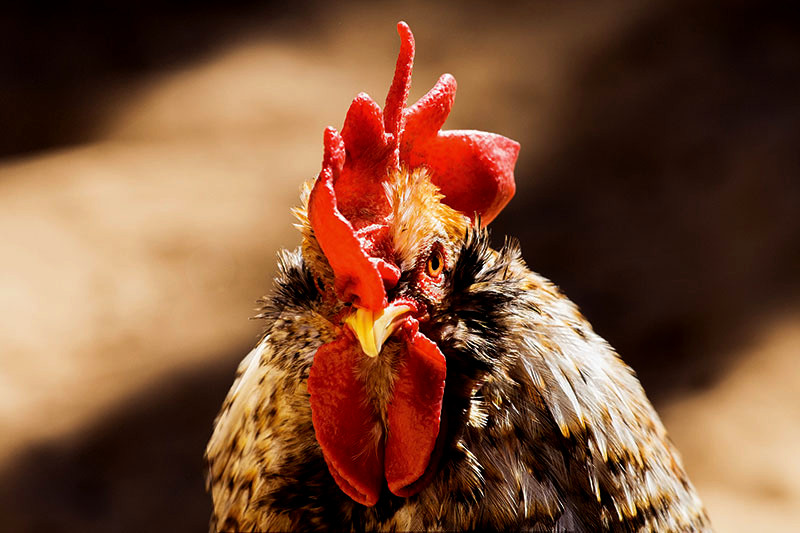
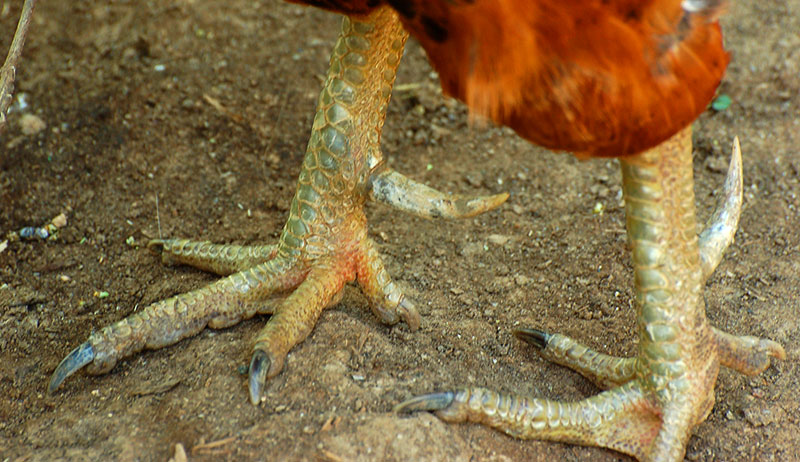
Descended from the red jungle fowl (Gallus gallus), the domestic chicken comes equipped with two natural weapons that helped it survive in the wild: its spurs. Hens grow only little buds on their feet, but roosters can grow spurs that are extremely long, sharp and dangerous. Spurs are what roosters use against rivals as well as other threats to themselves and their hens. Should one of your boys perceive you as a threat, he will not hesitate to use his spurs against you and this can cause a rooster spur injury.
Ana Hotaling
Because spurs consist of bone covered with a hard keratin sheath, they cannot be cut off without injuring the rooster. You can, however, reduce their size and minimize the potential damage to your flock and to yourself.
Many poultry owners keep an avian first-aid kit handy, stocked with antiseptic, ophthalmologic ointment, veterinary bandages, electrolytes and other items needed to treat an ailing bird. In addition to these items, keep rubbing alcohol, antibacterial ointment, gauze or cotton balls, and bandages on hand for yourself in case you are the one who suffers the barnyard injury. Most importantly, do not hesitate to seek professional medical assistance when your wound is severe, as I did after Davey sank his spurs into me.
This article about rooster spur injury and chicken wounds was written for Hobby Farms and Chickens magazines. Click here to subscribe.


")