Categories
News

Our Predictions for 2015’s Top Food and Farming Trends

Our Predictions for 2015's Top Food and Farming Trends - Photo by iStock/Thinkstock (HobbyFarms.com)

An exciting year lies ahead on the farming front. Long gone are the days when growing food was reserved for folks living in the country, managing acreages that reached in the triple digits. Nowadays, it seems that every person who meanders through a farmers’ market has an opinion on how you—our nation’s farmers—do your jobs. With ongoing buzz about backyard chickens, GMO labeling, saving the bees and sustainable land use, the food and farming world is certainly evolving into a new kind of beast.

To kick off 2015, we asked our farming experts their predictions on the biggest agricultural trends lying ahead of us this year. Here’s what they had to say:

Melissa Griffiths

Melissa Griffiths
Farmer and Blogger at Bless This Mess

“Gourmet popcorn! I’ve been growing organic heirloom popcorn that my late grandfather cultivated over 50 years ago. People can’t get enough of it, and it makes the best gifts. I’m pretty sure good popcorn is where it’s at this year. People can’t believe how many different varieties there are.”

Grace Hensley

Grace Hensley
Horticultural Entrepreneur and Blogger at eTilth

“Now that the economy is improving, we will move beyond the ‘Grow Your Own’ and ‘Local/Slow Food’ movements to nourish our soul with Slow Flowers. Cutting gardens, especially those in the front yard, will sprout up and brighten our neighborhoods.We will celebrate American Grown Flowers with delicate and fragrant blooms.”

John Ivanko and Lisa Kivirist

John Ivanko and Lisa Kivirst
Owners of Inn Serendipity Farm and Bed-and-Breakfast; Co-Authors of Homemade for Sale 

“2015 will be all about a return to home-based food businesses, as more fledgling food entrepreneurs launch directly from their home kitchens thanks to expanding cottage food laws across the country. Finally, ‘homemade’ and ‘fresh from the oven’ on the package will mean exactly what it says.”

Cherie Langlois

Cherie Langlois
Farmer and Freelance Writer/Photographer

“I think—and hope!—we’ll continue to see increasing consumer demand for organic and/or locally grown food lead to the proliferation and prominent display of these products on mainstream supermarket shelves, as well as grow more organic/local farms and farmers to meet this demand. I’m looking forward to the day when I don’t have to hunt through the store with a GPS and magnifying glass to find organic and local offerings!”
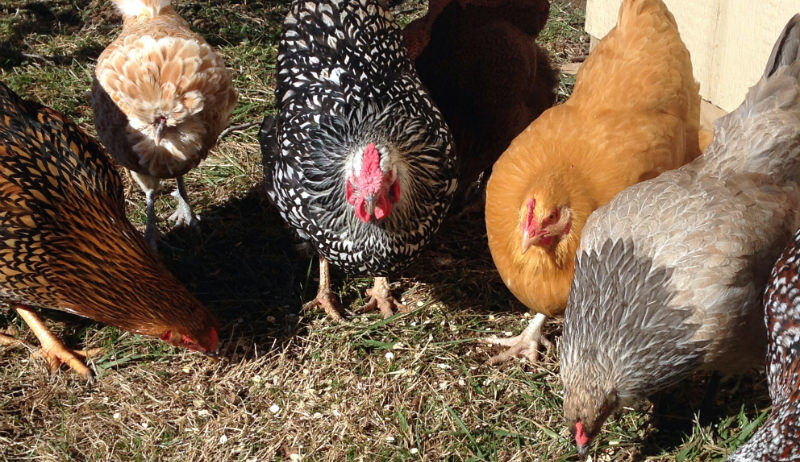
Kathy Shea Mormino

Kathy Shea Mormino
Blogger at The Chicken Chick

“There will be a chicken on every plot of land! With the ability to supply families with a fresh, homegrown source of nutritious food with very little space required, backyard chickens are the new family dog—but don’t call them a fad. While fresh eggs may be the draw, their quirky personalities quickly endear them to their urban, suburban and rural-dwelling humans by providing endless entertainment, companionship and stress relief that rivals the most zen yoga class.”

Lisa Munniksma

Lisa Munniksma
Freelance Writer and Farmer

“2015 will be a year of continued polarization throughout the food and farm community. As more people become educated about, passionate about and empowered by their particular stance on food and farm issues, the farther apart different sides of each issue will become. Just a few hot-button issues I think we’ll hear a lot about are energy production—in the forms of fracking and alternative sources, in particular; genetically modified food labeling; animal-welfare initiatives; and pollinator protection, especially in the form of neonicotinoid pesticide regulations. While all aspects of the agricultural community should be coming together to provide truthful, unbiased education to the public about food production and its effects on the world, I think the divide between those identifying as conventional farmers and those identifying as sustainable farmers will get larger before it gets smaller.”

Audrey Pavia

Audrey Pavia
Author of Horses for Dummies
“This year will see an even greater awareness in humane farming. As more people learn about the practices of big agribusiness, they will demand more humane treatment of farm animals.”

James and Eileen Ray

James and Eileen Ray
Owners of Little Seed Farm 

“It’s the year of the goat, and goats are currently all the rage, so I’d say raising goats for fun, for meat and for dairy will be the biggest farm trend of 2015.”

Lisa Steele

Lisa Steele
Author and Founder of Fresh Eggs Daily

“I predict that in 2015 backyard ducks will be the new ‘it’ hobby-farm animal, as people realize they are hardier than chickens and out-produce them, laying larger, more delicious eggs year-round.”

Erica Strauss

Erica Strauss
Head Weeder at Northwest Edible Life

“With more widespread acceptance of high-saturated fat foods, people will be looking for local and sustainable options for beef, pork, poultry, butter and other animal products. The local and slow food movements’ natural next stop is in heirloom breed meats, and we’ll see more restaurants advertising heritage meats that are higher-fat and higher-flavor.”

Kristina Mercedes Urquhart

Kristina Mercedes Urquhart
Freelance Writer, Author and Founder of The Humble Honey Bee Facebook Page

“It is my hope that 2015 will be the year the U.S. bans neonicotinoids, the deadly class of pesticides that pose a threat to wildlife and has put our pollinators in peril. I see a trend moving towards more small-scale organic farming and individuals choosing to eat locally grown, pesticide-free food; as a result, the demand for crops grown without the use of these deadly pesticides will continue to grow.”

Cory Hershberger

Cory Hershberger
Associate Editor of Hobby Farms Magazine

“I think a major 2015 food trend will (hopefully) be embracing less-than-perfect produce. Supermarkets in France are already on board, and with continued nationwide emphasis on avoiding food waste and root-to-tip cooking, 2015 might just be the year American consumers stop judging the apple by its skin, to mangle a metaphor.”

Rachael Bruger

Rachael Brugger
Managing Web Editor, HobbyFarms.com

“This year everyone’s going to be talking about their soil and all the microbes that live (or at least should live) inside it. Farmers will give more attention to how they cultivate and amend their land, embracing soil practices that encourage the production of nutritionally healthier and more flavorful fruits and vegetables, as well as native plants that can be foraged for food. I predict that it won’t be long before biodynamic agriculture and other systems of chemical-free farming will soon eclipse even organic methods.”

« More The News Hog »

Categories
Beginning Farmers

A Resolution to Keep On Gardening—Only Better This Time

A Resolution to Keep On Gardening—Only Better This Time - Photo by Cyndi Cady (HobbyFarms.com)

After years of battling clay, gophers, and deer carrying tin snips and jet packs, I finally built a friggin’ fortress: New fence, eight 3-by-6-foot raised beds clad in 1/2-inch hardware cloth, and a combination of compost from the local horse ranch and some pricey organic hand-stirred soil from cows raised on boutique-grown grass. You can get a glimpse of it in the photo above.

I planned a 12-month planting cycle (here in my corner of Northern California, we can grow some stuff year-round), and gathered seeds and seedlings from friends and nearby nurseries. Many of the seed packets contained instructions in tiny little print, and my friends warned me about annoying details like planting times, distances and other stuff that I was certain would not apply to me. After all, I was gopher-free, deer-proof and armed with the super soil of the century. My garden would be invincible! I would be neck-deep in delicious produce. I would share with friends, donate to the food bank, host charming farm-to-table dinners … perhaps even give lectures to share my wisdom!

OK, it didn’t quite turn out like that.

My first foray in gardening had some successes and some epic failures, and as a result, here are a few things I’ll be working on this year:

1. Plant one—and only one—bare-root plant in each spot.

The bare-root strawberries I bought last year came in clumps of three or four, and by the time I realized it, my garden bed was a mass of interwoven runners and roots as dense as a doormat. I had planted onions in the strawberry bed, as well, and those few that struggled through the strawberry force field were thin and sad, like onion versions of Munch’s “The Scream.”

2. Plant three times as much kale and stevia.

A Resolution to Keep On Gardening—Only Better This Time - Photo by Cyndi Cady (HobbyFarms.com)

Kale was an awesome crop. Harvesting by cutting leaves instead of whole plants meant the seeds I planted last April are still producing in January. Delicious! I roast it; crush it up raw with garlic, olive oil, lemon and Parmesan for salad; make kale chips … but we had to curtail our kale intake to avoid wiping out the whole crop. Stevia was a great surprise: We used it to sweeten tea and as a party trick for farm visitors (“Here! Taste this!”). In 2015, I’ll plant loads more and dry it.

3. Scatter plant only when appropriate.

Scattering seeds is great for crops like kale, chard, arugula and lettuce. The thinnings make great salad. I plant ’em thick, and thin the leaves as they grow, eventually shaping the crops into neater rows. Winner! Beets, radishes and other root veggies, on the other hand: not so much. Next time, I’ll get my glasses out and read the tiny print on the seed packs.

4. If friends give you seeds, be prepared for surprises.

A Resolution to Keep On Gardening—Only Better This Time - Photo by Cyndi Cady (HobbyFarms.com)

This is not a sugar pumpkin, and I’ll tell you why …

My pal Martha gave me a bunch of sugar pumpkin seeds, along with a ton of peppermint seedlings. I love sugar pumpkins: My mind immediately leapt to visions of pumpkin soup, pumpkin pie and adorable pumpkin bowls!

However, my dreams were crushed.

The pumpkins I got were big, white and lumpy, with a few weird oblong orange blobs thrown in for good measure. Clearly, the sugar pumpkin seeds Martha started with were hybrids, and the seeds she saved produced unpredictable pumpkin madness. Next year, I’m buying sugar pumpkin seeds to make sure all my pumpkin dreams come true. Thanks anyway, Martha. The mint worked out just fine … in fact, it may be taking over the world any day now.

« More Greenhorn Acres »


Categories
Poultry Urban Farming

How To Keep Chickens Warm On Frigid Nights


Ever since my husband put the walls, door and windows onto the new shed he built, I’ve been joking about how it would make the perfect new home for more chickens.

This morning, he mentioned temporarily housing our eight chickens inside the new shed overnight, when the temperature dips down near 0 degrees F. In many places north of here, it’s going to get even colder than that this winter. While my husband’s idea is a compassionate one—and selfless, considering how much he loves his new 96-square-foot man space—housing the flock in the shed might not be the right answer for dealing with bitter cold nights.

Temperature Differences

If you’ve considered keeping your chickens in a seemingly warmer place temporarily, consider that in a larger building, like our empty shed, the flock cannot heat the entire space. In fact, they might feel much colder in a larger space than they would if they were to be cooped up in their normal, ventilated space where they are already accustomed to heating it themselves. Upstairs in their small mobile coop, my chickens huddle together in a small area where they keep each other warm.

Moving a flock to a space that is actually colder for them can tempt one to supplement heat. However, sudden temperature changes can be deadly—i.e., we could risk burning down the new shed.

Most of the time, chickens don’t need supplemental heat, just protection from the cold. Consider that extreme temperatures are relative, and as a human, you’re not a good judge of living outdoors with feathers. If you’re raising cold-hardy breeds, the chickens will be fine most of the time as long as you provide enough feed, liquid water and a cozy, clean, ventilated space.

In general, if your chickens leave the coop to hang out in the run or to free range, they’re warm enough. They might even enjoy some time in the sun. If they’re too cold, they’ll be reluctant to leave the coop, even to eat. That’s when I like to serve warm breakfasts.

Danger of Extreme Cold

For a flock that’s adapted to cold temperatures through the natural changes of the seasons, the biggest threat to them is frostbite. Ornamental breeds with less body mass can also be in more danger in cold weather. Much of a flock’s frostbite risk happens right inside the coop, where moisture accumulates simply from respiration and poop buildup in the bedding.

If you find signs of frostbite on your chickens—pale white or black areas on combs and wattles—look immediately to the ventilation in your coop, and make sure to keep bedding clean and dry.

Have an Extreme Temperature Plan

Remember, chickens don’t experience cold temperatures the way you and I do. Your flock’s idea of a warm coop won’t feel warm to you.

Before the cold air comes, I move the coop parallel and next to the privacy fence to block direct winds. The positioning will help the chickens keep their body heat inside the coop. I generally keep the ladder down so the chickens can walk down for breakfast in the morning when they’re ready, but when the cold falls into the single digits, I button up the coop a little tighter, pulling the ladder up and locking the hens upstairs. However, the ladder doesn’t fit tightly; if it did, we’d lose some ventilation.


Categories
Beginning Farmers

The Book That Answers Your Burning Rabbit Questions

The Book That Answers Your Burning Rabbit Questions (HobbyFarms.com)

At A Glance 

Title: The Rabbit-Raising Problem Solver
Author: Karen Patry
Publisher: Storey Publishing
Release Date: April 2014
Cover Price: $19.95
Target Audience: Pet rabbit owners and livestock farmers with rabbit husbandry questions; anyone interested in owning rabbits for meat, fur, fancy or fun

Let’s not mince words: Rabbit-keeping is on the rise. Karen Patry, longtime Rex rabbit breeder and author of The Rabbit-Raising Problem Solver, notes that rabbits are becoming more popular as pets and livestock animals worldwide, but particularly in the U.S.

“In the United States, the locavore movement, combined with a shaky economy and a desire to know where one’s meat comes from, is spawning a rising tide of micro-homesteaders and survivalists who choose to raise their own meat,” Patry says. “Rabbits are a logical choice as they are easy to keep in smaller spaces.”

This sudden boom of rabbit interest has led to many brand-new keepers with a lot of husbandry questions, and while there’s certainly no shortage of information available online, in books and from fellow rabbit aficionados, it can difficult to find the answer quickly to a specific question. Patry has capitalized on this with The Rabbit-Raising Problem Solver, putting concise, easy-to-find answers to a variety of rabbit-raising questions into readers’ hands.

Designed as a troubleshooting guide and featuring hundreds of questions organized by topic, including housing, feeding, behavior, breeding and kindling, Patry’s book is the one you’ll find yourself turning to when husbandry questions of all types arise. Instead of poring over chapters of books on rabbit kindling and sifting through endless Google searches in an attempt to find a reputable source explaining why your pregnant doe is running around her cage with a mouthful of hay, the question is succinctly and helpfully answered in the chapter on pregnant rabbits. (This rabbit is just building a nest box for herself, and she’ll likely give birth to kits in a few days.)

Patry runs Raising-Rabbits.com, where she’s the guru on all things rabbit husbandry. This authoritative spills over into her book, lending all her answers an air of hard-won expertise—when she writes about losing rabbits to toxic treats or kindling “glitches,” you know her information is coming from legitimate past experience.

The Rabbit-Raising Problem Solver doesn’t just focus on one type of rabbit, either: Patry includes information on rabbits raised for meat, fur, show and even just as pets. As she writes in the preface, “This book contains answers for owners and raisers of all types of rabbits. Meat or fiber rabbits need the same basic care as family pets, because a rabbit is a rabbit no matter what the purpose.” She doesn’t just stick to surface questions, either: Her book covers material helpful to prospective rabbit owners and long-time breeders alike. She dives deep into breeding and kindling, discussing the mechanics of mating, how to encourage your rabbits to breed and what to do if your rabbit gives birth to a large litter. Diagrams and illustrations help solidify readers’ understanding—which is particularly helpful in the section on sexing young bunnies less than 12 weeks of age, as rabbit genders don’t begin to differ in appearance until then.

If you’re considering rabbits or have already made the leap into bunny husbandry, let Karen Patry be your guide to these versatile animals. She’ll either reinforce the practices you already have in place or teach you how to handle any situation your rabbits bring to the table.

The Final Word: If you’re new to keeping rabbits, it’s highly recommended to pick up a copy of The Rabbit-Raising Problem Solver; it’ll be dog-eared and worn before you know it.

For more information on raising rabbits, check out:

« More Plowing Through »


Categories
Crops & Gardening

Plan It: Your 2015 Garden Strategy

Write Your Garden Plan for 2015 - Photo by Jessica Walliser (HobbyFarms.com)

The New Year is a time for renewal. A time to reflect on personal successes and failures, to look to the future, set goals and map out plans for the coming seasons. Blah, blah, blah … I guess I’m not that deep.

For me, the New Year simply introduces an opportunity to try again. And as a gardener, the prospect of another chance to create my “perfect” garden is both exciting and intimidating.

Thankfully, the seasonal cycle offers many gardeners a time of physical rest, ideal for salivating over glossy seed catalogs and deciding what plants will hit the compost pile come spring and which ones will be divvied up and shared with friends. Most importantly, it presents us with an occasion to think about how well crops did (or didn’t do) and to prepare for the next growing season.

I’ve found that every year I spend as a gardener results in a whole pile of lessons learned and another pile of things to try next year, which I then have to reconfigure into some sort of garden plan. Below is my own blow-by-blow mini garden guide for the 2015 growing season. I live in USDA hardiness zone 6, but gardeners from zones 4 thru 8 will be able to glean both timely and useful information from it. Consider using it as a gardening compass to help guide you to your own “perfect” garden. I’ll try my best not to steer you wrong.

January

  • Start designing this year’s garden (yep, already). Choose vegetable varieties by reviewing notes from last year and focusing on the details of those dog-eared catalog pages. Plan on trying a few different varieties every year—you never know when you’ll find a hit.
  • For the perennial bed, make a list of what gets divided come spring, and start collecting magazine images with new plants you’d like to try.

February

  • Set up your seed-starting paraphernalia. Order your seeds from a reputable company, and start seeds of early cool-season crops, like broccoli, cauliflower and cabbage, according to package directions.

March

  • Toward the end of this month, when the spring soil no longer sticks to your shovel, add some compost to the vegetable garden and turn over the soil. Sow seeds of radish, lettuce, peas, beets and spinach directly into the soil.
  • Indoors, focus on starting seeds of warm-season crops, like tomatoes, peppers, eggplants and flowering annuals.
  • Clean remaining leaves out of shrub beds and perennial borders, and cut back any perennials still on their feet.
  • Clear away winter mulch mounded over roses and cut ornamental grasses back to 8 inches.

April

  • Begin acclimating indoor plant starts to outdoor conditions by gradually exposing them to the outside environment. Increase the time they spend outdoors everyday until they are out 24/7. (You’ll want to make sure they are indoors on frosty nights).
  • Now is a fine time to divide summer blooming perennials and to stake varieties prone to flopping or splitting.
  • Set transplants of cool-season vegetables into the garden, covering them with plastic cloches or floating row cover for extra protection.

May

  • Plant bare-root roses and perennials early this month.
  • Start designing container plantings by positioning the pots and filling them with a blend of potting soil and compost. Hold off on planting them, though, until the danger of frost has passed.
  • No matter how tempting the weather may seem, refrain from planting annuals and summer vegetables until the danger of frost has passed.
  • In late May, sow seeds of warm-season veggies, like zucchini, winter squash, corn and beans. And it’s now safe to nestle in those tomatoes and peppers.

June
For me, early June is about mulching.

  • Spread 1 to 2 inches of compost, mushroom manure, grass clippings, straw or hay between plants in the vegetable garden and perennial border. Don’t allow the mulch to contact the plant’s stem and be sure to adequately cover the soil surface.
  • Shrub beds and tree “islands” can be mulched with shredded bark. For added weed suppression, lay newspaper 10 sheets thick on the soil surface then spread the mulch on top.

July

  • Ideally, most plants should receive about 1 inch of water per week either from Mother Nature or your hose. If you did your job and mulched effectively, you can get away with much less (I’ve gone whole seasons without watering even once when I’ve used the newspaper under straw trick).
  • For summer flowers, deadheading is a must. Simply cut off any spent blooms to trigger the production of more flowers; and do it continually.
  • Enjoy the summer’s first tomatoes this month.
  • Yank out the now-bitter lettuce.

August

  • Can, pickle, freeze and process summer’s bounty.
  • Put zucchini on the neighbor’s porch, ring the bell, and run.
  • Weed religiously—anything left to go to seed will make a million where there once was one.
  • In mid-August, sow seeds of late-season vegetables, like turnips (in my opinion the most under-appreciated veggie on the planet), lettuce and radish.

September

  • Start searching your local nursery or your favorite catalog for spring-blooming bulbs. Tulips, daffodils, snowdrops and the like can be planted anytime from late-September until Christmas (though the earlier, the better).
  • Now is also an ideal time to plant shrubs.
  • Continue to harvest from the veggie patch and divide spring and summer blooming perennials. Enjoy summer’s last show.

October

  • Plant garlic.
  • Deconstruct your container plantings, empty the contents into the compost pile and/or take cuttings of favorite varieties to grow indoors.
  • Pull out frosted annuals and spent vegetable plants. It’s your call on whether or not to cut back your perennials. Some like the winter interest they add to the garden, while others prefer a “clean” winter landscape.
  • Protect late-season crops with a heavyweight floating row cover to extend their harvest well into the autumn.

November

  • Rake fallen leaves out of all garden beds and off the lawn. Chop them up and add them to the compost pile, or use the shredded leaves as winter mulch for perennial and vegetable beds—just keep them off any remaining plants. If you can’t chop them, compost them whole or give them to a gardening neighbor—do not send them to the landfill.
  • Sit down and take lots of notes about the season’s garden happenings before you forget them. These notes will prove an invaluable tool over the coming years. Record everything you can.

December

  • Watch the mailbox for catalogs and start dreaming about next year’s “perfect” garden.
Get more garden-planning help from HobbyFarms.com:

« More Dirt on Gardening »


Categories
Crops & Gardening

My 4 New Year’s Herbal Resolutions

My 4 New Year’s Herbal Resolutions - Photo by Annouk/Flickr (HobbyFarms.com)

Happy New Year! It’s time again for the year’s resolutions. This time of year is thick with tradition and superstition. There’s a lot of magic in the air.

Around the world, the start of a new calendar year has been a time to push out the old and invite in the new. Of course, the start of the calendar year was not always Jan. 1. In many cultures, the start of the year was as the earth was waking up in the spring—the start of the growing season. Now, it seems a bit odd to start the year in the middle of the winter, but good luck and wealth are welcomed nonetheless. Bad decisions and bad luck are ushered out.

What are your resolutions this year? I really like this practice, but see it more as a setting of intention. Each year my family sits quietly (a feat in itself with two kids) and talk through the things that we are grateful to have experienced in the old year. We also speak our intentions for what we would like to bring into our lives in the new year. These aren’t empty promises that are written down in secret. They’re shared so we keep one another accountable.

My new year’s resolutions usually cover finances, health and education. I thought I would share some of my herbal-themed resolutions this year. Perhaps they’ll inspire some of your own!

1. I will study one new plant found in my back yard or neighborhood each month.
This will include reading, trying it in culinary recipes, making teas and tinctures, and crafting with it if possible. By learning the plants in our own backyards we keep medicine local. This increases the effectiveness and lowers the need for pollution caused by shipping our medicine from farther away.

2. I will make a plan for one new garden space.
We are changing one of our old barns into classroom space and the pasture into teaching gardens. This resolution is really more for my husband, as he does the landscape design around here, but I’ll have to voice my intention to tell him what plants need to be included.

3. I will make my seed and plant order by the middle of January.
Last year, we waited too long to place our seed orders and some of our picks were sold out. If you’re looking for some of the more popular vegetable or herb varieties, you’ll want to order early.

4. I will plant more flowers!
Over the years I’ve been too practical with our space. I’ve tried to limit what we planted to only useful and edible options. This year, we will plant things just for beauty so we’re sure to spend time doing nothing but sitting in a garden and drinking it all in.

Get help for your herb garden in 2015 from HobbyFarms.com:

« More of the Prescription Gardener »

Categories
Recipes

3 Tips For Improving The Art Of Home Cooking

If you’re like us, you often find yourself in a recipe rut. Cooking grows to be more of a chore when you fall into robot mode, blindly following recipe instructions. It’s times like these when you need to take a renewed look at your kitchen, viewing it more as an art studio than a food-prep workspace. When you do, your daily meals become palettes on which to create and express yourself. Your ingredients turn into trusty implements, helping you to explore new textures, colors, scents and flavors. Cooking can be as creative as your imagination allows.

For inspiration and practical tips on blending the artful and practical sides of food preparation, we turn to our friend, Brett Olson, creative director and co-founder of Renewing the Countryside, a nonprofit that champions positive stories of rural revitalization and local food.

Olson is adept at merging the worlds of art and edibles, and he practices it in his home kitchen everyday. He treated Lisa to some of his chili when she stopped by for a visit recently, and she asked him his top tips for channeling culinary inspiration.

1. Study the Masters

“When I was in art school, a common practice was to study paintings by master artists and model their technique,” Olson says. “This isn’t copying, but rather experiencing different perspectives to better understand and identify your own voice.”

The same principle holds true in cooking: Take any opportunity to observe and learn from others. This could be watching a chef on a cooking TV show or hanging out in the kitchens of well-seasoned home cooks, like Olson. Take the insights you gather during those experiences, and try them out in your own home.

2. Substitute Ingredients

“Trading in a few ingredients on a recipe for some of your own can be an easy way to warm up to cooking out of the box and off the recipe card,” Olson says. Try substituting a different herb in the same general family, like trading basil for tarragon. Or add in more of one of your favorite ingredients, such as a full teaspoon paprika instead of a half teaspoon.

And if your attempt fails, don’t loose heart. “Plenty of paintings end up being scraped off the canvas and into the trash,” Olson says. “If your culinary chili experiment goes ‘bad,’ scrape it off and chalk it up to experience!”

3. Taste and Tweak

As you cook, sample and adapt along the way.

“Unless you’re into paint-by-numbers, any artist will always be playing around with adding and subtracting color until it’s just right from his or her eyes,” Olson says. “Sometimes you might add too much of something, but you can balance that with throwing in something else. Same concept with cooking. The end result is you’ll identify your secret ingredient that makes your culinary creation uniquely your own, memorable and tasty.”

Play with Chili

While, of course, Olson’s chili doesn’t have an exact recipe, Lisa did cajole him to break down the preparation into five steps. If you need a general guide to follow as you wean yourself off of recipes, his instructions are good to follow.

  1. In a cast-iron Dutch oven over medium-high heat, brown your meat in a few tablespoons oil. Your meat of choice can be ground beef, bison, venison or turkey—there’s no wrong answer.
  2. Sprinkle in your seasonings. Add a couple tablespoons of chili seasoning, or fake it with your own mixture of cumin seeds, dried chili, garlic powder, salt and oregano. Stir until fragrant. Add a large diced onion with a few cloves minced garlic. If the meat is dry, add in a bit more olive oil, rendered bacon fat, canola oil or butter.
  3. Add in a couple handfuls of cooked beans, such as black, kidney, garbanzo or great northern, along with a few cans of stewed tomatoes. Play around, adding anything else you desire that would add flavor and texture: celery, carrots, bell peppers, butternut squash or frozen corn.
  4. Cook until ingredients are tender and the chili thickens. If it gets too thick, add some stock, beer or water, and cook some more. Continually taste as the chili stews and experiment with different seasonings until it tastes just how you want it.
  5. When serving, garnish the chili with chopped green onions, shredded cheese and a dollop of Greek yogurt for added tang and protein. Try eating the chili by scooping it with hearty chips instead of a spoon, and serve it with a beer on the side.
Get more chili recipes from HobbyFarms.com:
Categories
Urban Farming

Black-Eyed Pea Soup

Black-Eyed Pea Soup - Photo by Judith Hausman (UrbanFarmOnline.com)

Although the solstice has passed and the sun is slowly creeping its way back into our lives, we still have a lot of winter left. A hearty bean soup is one way keep your energy and stay warm until temperatures rise.

My favorite take on this bean soup is Creole-style. For those who prefer it, small red beans make a good substitution. A few handfuls of winter greens, such as mustard or Savoy cabbage, are good additions to this meal, too. You don’t need to be very precise with the amounts of ingredients you use—just keep the balance of flavors to your taste.

Of course, you can slow down this recipe by cooking the beans from scratch first. To prepare dried beans for a soup, soak them for 6 to12 hours, drain and rinse. Cover the soaked beans with fresh water, and cook until tender (about 1 to 3 hours).

It’s easy to keep the soup vegetarian, but if you’re using ham bones, you might want to chill the soup after the first stage of cooking to easily remove any fat before adding in the rice and beans. Doing so will stretch the cooking process even more.

Cooking the rice before adding it is not optional, however. The rice will absorb all the other liquid if it’s cooked in the soup itself.

Serve this soup with cornbread or crusty whole grain rolls. You can also pair it with a piece of well-flavored cheese and a lightly acidic green salad with fennel and oranges. Don’t forget to get the fire going in the wood stove, too!

Yield: 4 servings

Ingredients

  • 2 carrots, chopped
  • 1 green bell pepper, chopped
  • 2 stalks celery, chopped
  • 1 large clove garlic, chopped
  • 1 medium onion, chopped
  • 2 cup chicken or vegetable broth
  • a ham hock, ham bone or 1 c. leftover cooked ham (optional)
  • 1½ cup cooked or canned black-eyed peas
  • 1 cup cooked rice, white or brown
  • 1 cup tomato purée or diced tomatoes
  • 6 large mushrooms, chopped
  • 1 tsp. thyme
  • dash Worcestershire sauce
  • sprinkle of cayenne (optional)
  • salt and pepper to taste

Preparation

In large soup pot, gently sauté all chopped vegetables besides mushrooms. When softened, add broth and hock or ham bone. (If only using bits of leftover ham, wait to add that.) Cook for about 1 hour over low heat. Then remove from heat, take out the hock or bone, cut away any meat and reserve it.

Put the soup back over low heat. Add the thyme, tomatoes, mushrooms, black-eyed peas and rice. Heat thoroughly, seasoning as desired. Add up to 1 cup additional broth or water if soup seems thick. Five minutes before serving, add Worcestershire sauce, cayenne and any reserved ham.

Read more of The Hungry Locavore »


Categories
Animals Beginning Farmers Farm Management

9 Responsible Uses for Your Meat By-Products

9 Responsible Uses for Your Meat Byproducts - Photo by Ton Schultan/Flickr

If you’re among the thousands of people who home-process animals for meat, you may find yourself quickly overwhelmed by the remains—innards, feathers, hides, et cetera—and find yourself asking, “What do I do with all this stuff?”

Many byproducts of butchering don’t have to go to waste. Even parts that aren’t included in common meat cuts can often be consumed or composted, and when they can’t, there are proper means of disposal that are safe for you and the environment. When preparing to process your animals, try not to think of these byproducts as waste or an inconvenience, but as food, compost and fertility.

1. Eat Offal

Depending on who you talk to, many people will tell you that no part of an animal is inedible. The most commonly consumed—and often healthiest—animal parts are the liver, heart, tongue, gizzards, brain, kidneys (for beef, lamb and pork), tripe and sweetbreads. Research recipes for the innards, aka offal, of the animals you’re butchering. Even if you don’t think you have a taste for organ meat, you might be surprised.

2. Feed Your Animals

Farm dogs will be more than happy to help you dispose of some of your butchering remains—just make sure you don’t allow extra innards to lie around the yard. Consider freezing some and feeding them to the dogs regularly. Pigs and chickens also appreciate being fed the byproducts. Avoid feeding the remains of the same animal, however—no pig guts to pigs, in other words.

3. Make Bone Broth

If you have any remaining bones not packaged up with meat cuts, use them to make bone broth that can be frozen or canned. Bone broth is high in gelatin, collagen and easily absorbable minerals, such as calcium and magnesium—plus, it adds great flavor to soups and recipes that call for stock. Simply add the bones to a pot or slow cooker filled with water, add an acid like vinegar and allow to boil. You can continue making the broth until the entire bone has disintegrated. Flavor the broth with herbs and spices as desired, or leave it as-is for greater versatility.

4. Market Feathers and Hides

You can often find a market for inedible portions of the animal, like feathers and hide, especially if they’re kept in good condition during raising and processing. People use the feathers of poultry like guineas or roosters for jewelry, crafts, decorating and fishing flies. If you don’t already know someone looking for feathers, try selling on sites like eBay or Craigslist.

The hides of cattle, buffalo and other animals can be tanned and marketed to businesses making leather products. The natural tanning process involves cleaning, washing, stretching, drying, softening and then smoking the hide. Tanning takes some work and you might need to read up on the process before getting started, but there are a number of online tutorials available and it can make a fun project.

5. Farm Maggots

The thought of maggot farming probably doesn’t conjure the most appetizing images, but maggots are an incredible source of protein for chickens, turkeys, ducks and other fowl.

To farm maggots, drill large holes into the bottom and sides of a large bucket. Hang the bucket on a sturdy tripod system, tree branch or the rafters of an old barn or outbuilding so it’s several feet off the ground and out of reach of curious predators. Pack the remains into the bucket in layers covered with a little hay to help with smell and decomposition. Flies will find it, and maggots will begin to fall from the holes onto the ground where your chickens can eat them.

While the maggots are a great source of protein, the decomposing organs may smell and attract unwanted predatory animals, so keep that in mind when choosing a place for your bucket.

6. Compost

With a little bit of care and a hot compost pile, it is possible to compost animal remains. Burying the remains in wood chips works best, but you can also bury smaller amounts in your normal compost pile, especially if it’s very hot.

The key word here is “bury”: You don’t want to simply set the remains on top of the pile for predators to pick through. The remains need to be at least 1 to 3 feet below the surface of the pile. Consider separating each layer of remains with something carbonaceous, such as hay or sawdust.

Feathers also make great compost, though they’re high in nitrogen and break down slowly. Consider burying them with the rest of the remains either in wood chips or directly into the compost.

7. Bury

One viable option for safely getting rid of unwanted organ meat is burying them in a deep hole in the ground. Start by digging a hole 1 to 3 feet deep a day or two before slaughter. Collect all of your unwanted remains into a bucket, and carefully dump it into the hole, avoiding spilling any blood around the sides, which will attract scavengers. Pour a little lime on top to help camouflage the smell. Cover the hole with dirt, and place a large object, such as a grate, over the mound to keep animals from digging.

If you get your water from a well, bury the extras as far from the well as possible, especially if you have sandy soil. Also, consider burying the remains in a place you may want to plant a tree: Once they break down, that land will be very fertile.

8. Burn

Burning the remains can be another viable disposal method. Get a very hot fire going outside well before butchering, and place the remains on the embers, with more wood on top to keep it burning. Feathers can smell as they burn, so consider another disposal method for them. Animals will still likely dig through the ashes, so fence them out of the burn pile or you can expect a mess.

9. Sell What You Can’t Use

One person’s trash is another person’s treasure, right? Talk with other farmer friends, or place an ad on Craigslist or a community board a few days before processing day to advertise the scraps. Surely someone will be able to find a use for them.

Get more help with on-farm processing from HobbyFarms.com:


Categories
News

California Farmers Scrambling Over Egg Law

California Farmers Scrambling Over Egg Law - Photo by Robert S. Donovan/Flickr (HobbyFarms.com)

If you purchased eggs from a grocery store in California in the past week, you might have noticed a higher price tag. On Jan. 1, 2015, the state now requires farmers to provide each laying hen at least 116 square inches of space, which is up from the industry standard of 67 square inches. Since this law (AB 1437) passed in Nov. 2008, there’s been a massive uproar. States have sued California to stop the law, the United Egg Producers launched a campaign propagandizing the American way of producing eggs, and producers have scrambled (scrambled eggs—get it?) to reconfigure their farms to meet the new standards.

California’s conventional egg producers are upset about this, obviously—they’ve had to do a whole lot of work in the past few years to put in larger crates and build additional barns to house the same number of chickens—but so are egg producers from other states.

California is the fifth-largest egg-producing state. It has more than 16 million egg-laying hens, but that’s not enough to feed its 38-million-plus residents. (Iowa is No. 1 in egg production with more than 53 million hens.) California imports a lot of eggs—9.2 million cases, or the bounty of 11.7 million hens, plus the equivalent of 3 million cases of liquid and dry eggs. Iowa, Minnesota, Missouri and Ohio are responsible for 70 percent of these imports.

Researching all of this, I found statistics for the commercial U.S. egg industry as a whole. You might be interested to know:

  • 8.09 billion eggs were laid in commercial egg production in September 2014 alone.
  • There were 301 million hens in commercial egg production as of Sept. 1, 2014.
  • 63 egg-producing companies with 1 million-plus hens are responsible for 87 percent of egg production.
  • The 172 companies with 75,000 hens or more represent about 99 percent of all the hens in this country.

This is a big-scale business being forced into changes mandated by just one state, which many people are saying is against fair commerce laws. I’m curious to see if this bill will mean fewer egg producers will be willing to sell to California, if more egg producers will move out of California, or if home-scale egg production will increase in the state as grocery-store egg prices rise.

California’s egg law was largely promoted by the Humane Society of the United States and PETA. They cite not only animal-welfare concerns but food-safety issues, too. They say hens stressed by poor living conditions are more likely to have higher levels of pathogens in their intestines, increasing our risk of getting sick.

Opponents to the bill say it’s poorly worded (I read this complaint about almost every piece of legislature I research!), it will be too costly for farmers to implement, it will cause an increase in already-climbing food prices, and passage of this bill invites too much government oversight into food-production practices.

But Wait, There’s More
Jan. 1, 2015, wasn’t just a day for the chickens. AB 1437 also mandates calves for veal and pregnant pigs be allowed to lie down, stand up, fully extend their limbs and turn around freely, eliminating gestation crates and some calf huts. When animals are being transported, exhibited, tended to by a veterinarian and used for research, this rule doesn’t apply.

Fines up to $1,000 and imprisonment up to 180 days are the penalties for noncompliance.

On Your Plate
If you have your own hens but don’t sell eggs and don’t buy eggs, this law doesn’t affect you—unless you’re against the government encroaching on what “humane” farming practices mean, in which case, yes, this affects everyone.

If you are an egg producer who sells eggs in California, you already know this affects you and have either stopped selling to California or have already made your management adjustments.

If you would or would not like to see a law like this in your state, let your representatives know! And put your money where your mouth is—you either support higher-welfare animal products with your grocery dollars/farming budget or you don’t.

« More The News Hog »