Categories
Animals Poultry

5 Questions To Ask When Buying Rabbits

When adding a rabbit enterprise to your farm, you’re not simply after cute bunnies with soft fur and floppy ears. It’s important to select rabbits carefully and ask the appropriate questions before buying, no matter if you’re raising rabbits for meat, fur or fancy. A great way to maximize your investment is to start a breeding program with a pair of rabbits that encompasses the traits and qualities you desire in future generations of rabbits. These questions will guide you through your buying experience and help get your new farm venture started on the right track.

1. Is the Rabbit Healthy?

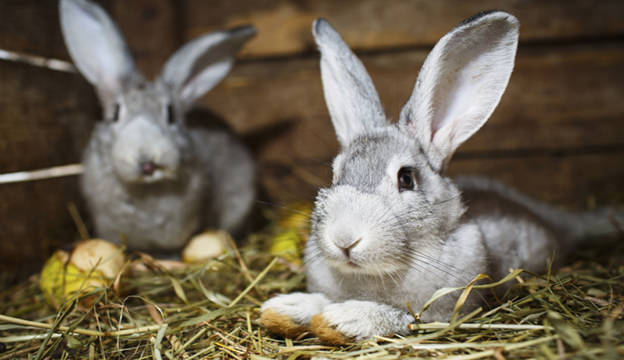
It goes without saying: The rabbits you buy must be in good health. In addition to avoiding rabbits with contagious diseases (such as pasteurella, aka snuffles), ask if the rabbit has ever suffered from GI stasis, sore hocks or mastitis. Check that the rabbit is free of congenital defects, such as malocclusion of the teeth or splay leg. If you’re planning to raise and breed rabbits, you’ll want your foundation rabbits to be as perfect as possible, particularly in regard to the Standard of Perfection for their breed.

2. How Old is the Rabbit?

The age of a rabbit is more important than you might think. There are advantages and disadvantages to buying both junior rabbits (under 6 months old) and senior rabbits (over 6 months old). Young rabbits, even if you start off with 10-week-olds, will mature quickly and still have all their reproductive years ahead of them, though much guesswork will be involved in determining their offspring. An older rabbit that has already produced or sired a litter lets you confirm it’s giving birth to the size, type and quality of rabbits that you’re after. Of course, an older rabbit will also have less time left to produce offspring for your breeding program.

3. Does the Rabbit Have a Pedigree?

If you’re coming to rabbits with knowledge of other types of livestock, you might assume that you’ll want to purchase registered rabbits, but in most cases, you’ll want to look for pedigreed rabbits. Registered rabbits are wonderful, but they’re not always easy to find, as a rabbit has to be evaluated by a licensed registrar and meet all breed criteria, including ideal weight, before being registered.

Pedigreed rabbits, on the other hand, are easy to find and possess a detailed history of their ancestry, giving insight into the weights, colors, accomplishments and bloodlines of their ancestors. You’ll often see people selling rabbits that are supposedly purebred but don’t have pedigrees; however, without a pedigree, it’s impossible to determine whether the rabbit truly is purebred.

4. Is the Doe a Good Mother?

If you’re looking for a senior brood doe that will raise healthy litters, inquire about her background. Find out how many kits she’s produced in each litter and if she cared for them all properly. Did she build a good nest and kindle—aka give birth—in her nest box? Some female rabbits fail to use a nest box and scatter their kits all about the hutch, which prevents the kits from staying warm and can be disastrous if you don’t find them immediately.

5. What’s the Price?

Unless you have an unlimited budget for establishing your rabbitry, the price being asked for a given rabbit is a factor to consider. You might find an ideal rabbit of the appropriate age and with all of the qualities you desire for $50 and a similar rabbit for $20, but with some compromising qualities. Determine ahead of time whether you want to invest in a more expensive rabbit to obtain all the characteristics you want or compromise in order to save money. Remember, the purchase price is often the least expensive part of owning a rabbit. Once rabbits are in your care, you’ll need to be able to pay for food, litter, housing and veterinary expenses.

Get more help keeping rabbits on HobbyFarms.com:

  • 13 Baby Bunnies to Help Celebrate Spring
  • Outdoor Rabbit Housing Options
  • Using Rabbit Manure
  • 5 Rabbit Illnesses to Know
  • How to Make Money Selling Rabbit at the Farmers’ Market
Categories
Urban Farming

2015 Resolution: Install Rain Barrels

2015 Resolution: Install Rain Barrels - Photo by Kevin Fogle (UrbanFarmOnline.com)

My family and I rang in the New Year at the Outer Banks of North Carolina this year. It was a nice reprieve from the monotonous urban landscape that characterizes winter around here. The Carolina beaches certainly are not tropical this time of year, but they make for a great escape, perfect for star-watching, long walks on the empty coast, looking for beach glass and the traditional beach bonfire on a cool evening.

While sitting around the bonfire this year I started to mull over some of my 2015 garden resolutions. In years past, I typically came up with big resolutions that never quite seemed to get done. So this year, I went with a few simple goals that should make my gardening slightly easier and a little more environmentally friendly.

I Resolve to Save Water

My primary goal this year is to improve water conservation in the front yard garden. This will involve the installation of the best Christmas gift that I received this year: two large rain barrels made of 100-percent recycled plastic. Rain barrels are a great choice for an eco-friendly gardener: They save water for your garden, help prevent excess water runoff into the sewer and drainage systems, prevent erosion, keep moisture levels down around your home’s foundation, and can save you a few dollars on the monthly water bill as an added bonus.

The barrels I received are perfect for my needs. They have a series of spigots (one near the base for attaching hoses and a higher one for filling watering cans), an overflow hose that can be used to link two or more barrels and a cover with mosquito screening. The screening prevents mosquitos from laying eggs in the barrel which is essential for folks living in South Carolina when three out of four seasons have plenty of these noisome insects.

Siting the Barrels

When siting your own rain barrel, try to place it out of the direct sunlight to prevent algae build-up and find a spot somewhere near the area you’ll likely be watering. The exact site may be limited by downspout locations. If your house doesn’t have gutters, find a spot along the roofline that seems to catch more rainwater and place the barrel there.

Because I fall in the no-gutter category, I will need to wait for the next rainstorm to scout out the perfect site before officially placing my rain barrel. Before installing yours, think about raising it off the ground on some sort of leveled platform, like landscaping pavers, to give you better gravity feed when attaching hoses.

I am excited to use the newly collected rainwater to hydrate my ornamental and edible container plantings. Happy New Year from my garden to yours!

Read more of Garden In Front »


Categories
Crops & Gardening

How Do Roots Pull Nutrition Out of the Soil?

I hefted two identical bunches of carrots at the grocery store the other day, both firm and bright orange with a tousled top of vibrant green leaves; however, one was labeled organic and the other conventionally grown. Scientists can’t seem to agree about the nutritional value of these two different types of carrots. Some claim organically grown produce is more nutritious than conventionally grown produce, while others insist there is no difference. I grow my own carrots in soil heavily amended with decomposed chicken manure, but how do I really know what’s inside my food, and how did it get there?

The first place to start when trying to answer this question is to perform a soil test on your garden; balanced soil yields healthy crops. Fall is the best time to take soil samples and send them to your county’s Conservation District Soil Testing Laboratory. Follow their recommendations to improve your soil so that plants can make the most of the nutrients you add.

Two Types of Roots

You probably remember from high-school biology class how plants breathe in carbon dioxide from the air through tiny holes in their leaves called stomata, and then convert the air into sugars using the energy from the sun. Plants draw water and dissolved nutrients up from the soil through their roots, and control where they go throughout the plant by opening and closing those tiny stomata. The sticky nature of water molecules moves nutrients throughout the plant, but plants cannot live on air and water alone. They need a balanced diet of elements drawn up from the soil through their roots.

Some root systems, like the carrot, have a single thick taproot, while others, like grasses and sunflowers, have a fibrous network. When you dig into the soil, you can easily see the side roots on the carrot, but you’ll need an electron microscope to see the tiny root hairs, only one cell thick, branching off and increasing the surface area of the roots. The root hairs, living only a couple of days up to a few weeks, use calcium like ankle weights to help them grow down!

Roots can grow shallow or deep, depending on the soil type and amount of water available while the plant is growing. I’m always reminding my kids to stay on the garden paths; compacted soils from heavy tractors or careless feet will restrict those roots from reaching deeply into the soil, and I’ll have to water more frequently. The same goes if I over-feed my plants—there would be no need for those roots to grow deep to search for the next meal, and I’d just be wasting money as fertilizers wash downstream.

As the growing tips of the root move through the soil, the cells are elongating and dividing. The carbohydrates shed from the root tips attract fungi in the soil forming a mycorrhizal partnership. Tiny root hairs reach out into the soil and intertwine with the fungi that are capable of dissolving minerals from rocks and decaying plants. The thread-like fungal mycelia are much smaller and absorb nutrients better than the root hairs and can reach out further in the soil to draw dissolved minerals closer to the plant’s roots. These fungi only work in specific pH ranges that are favorable for biological activity. This is another reason why checking your soil test report and balancing your soil pH is so important.

From Soil to Root

Most of that carrot you’re eating—nearly 96 percent of its weight—consists of the basic elements, hydrogen, oxygen and carbon, which the plant gets from carbon dioxide dissolved in water and taken up through the roots. But the remaining part, a mere 4 percent, consists of essential macronutrients (N, P, K, Ca, Mg and S) and micronutrients (B, Cl, Cu, Fe, Mn, Zn, Mo, and Ni) which are essential to plant growth and nutrition. These macronutrients and micronutrients are also essential to our own health.

Nitrogen

Nitrogen is the structural component of amino acids in enzymes, which do everything in the cell, and is an essential component of chlorophyll; without it photosynthesis won’t occur. If plant leaves turn yellow, suspect nitrogen deficiency. Fortunately, bacteria in the soil are great at breaking down ammonium and nitrate, providing nitrogen for the plant. The nitrogen-fixing nodules on the roots of your beans and peas are full of rhizobia bacteria, making the nitrogen bioavailable, which can then easily pass into a plant’s roots.

Phosphorus

Phosphorus is required for plant energy—think of it like a power-smoothie. Without it, our carrot growth is stunted and will either not grow tall or fail to bloom and set seed. The best source of phosphorus is from decaying organic matter and manures, but it binds tightly to soils and is hard for plants to utilize it. Fortunately, the mycorrhizal fungi produce acids and enzymes to dissolve it, providing plants with the necessary phosphorus.

Potassium

Potassium is an element that helps regulate water balance in leaves. Potassium binds to clay soils, but easily dissolves in water and is taken up through the roots. Plants low in potassium tend to wilt and form dead spots on the leaves.

Because a plant accumulates nutrients and has a higher concentration in its roots than in the soil, simple diffusion of these molecules from the soil into the cells of the plant may not be sufficient. Special active-transport proteins use energy to move phosphorus, as well as nitrogen, sulfur and other trace minerals into plant cells. You can easily diagnose a sulfur deficiency, typical in plants grown in sandy soils, when new and young leaves turn yellow.

This fall my soil test came back with a whopping 17 percent organic matter from all of that great composted chicken manure. With a balanced pH and plenty of raw material in my soil, the fungi and bacteria are working together to break down the nutrients and bring them to the roots of all of my crops. I’m looking forward to a productive growing season next spring!

Categories
Farm Management

20 Tips To Cut Costs Around The Farm

20 Tips to Cut Costs Around the Farm - Photo by Cindy Cornett Seigle/Flickr (HobbyFarms.com)

Growing up, my family didn’t always have much money. My parents had decided my mother should stay at home with my brother and me, and so our family of four learned to live on one income. The desire to save money has stayed with me as an adult, and whenever I can save money, I do.

In the last few years, my family has become more self-sufficient in our groceries: We grow a garden; hunt; raise and butcher our own chickens; and forage for food. I can and dry our harvests. We have become so passionate about this lifestyle that I try to encourage others to do the same, at least in part. However, many scoff that we aren’t saving any money, and spend even more on things like seed and fertilizer than they do on groceries.

Certainly, aspects of homesteading can be expensive, and there are plenty of opportunities to spend as much money as your piggy bank holds, but it doesn’t have to be that way. There are many ways to save around the old homestead, making those organic veggies and homegrown foods even more cost-effective. Here are some of my favorites.

Sowing and Growing
Planting and fertilizing the garden doesn’t have to cost a lot of green. With a little extra planning and effort, you can grow nutritious meals that save you money compared to grocery store prices.

  • Spend a little more your first year of gardening on seeds, and make sure the seeds you grow are heirloom varieties. This means they are open pollinated, and the seeds from last year will produce this year. When you harvest the food, save the seeds. Keep them in a cool, dry place, and they will be ready for next year. You will only have to buy seeds once, and can save the seed each year as long as you garden.
  • At the end of summer, go buy seeds on clearance. When stored properly, seeds will easily last another year, but they will be marked down to a fraction of the price.
  • Fertilizer can be expensive, but if you already have animals, you have your own fertilizer production company. It’s best if you let the manure sit and compost a bit, especially if you have chicken or rabbit manure, which is nitrogen-rich. They’re considered “hot” and can burn plants if used fresh.

Don’t Scrap the Scraps
On a farm, leftovers have all sorts of uses. Rarely do we let a piece of food go to waste—we either repurpose kitchen scraps into value-added items, feed our animals or compost.

  • When chopping vegetables, save the ends of potatoes, carrots, celery, et cetera. Keep the scraps in a plastic bag in the freezer until the bag is full, and use it to make vegetable stock, or add it to chicken stock for more flavor.
  • When cooking a chicken, ham or beef roast, save the bones, neck and extra pieces. You can use the carcasses to make stock, turning trash into a delicious pantry staple. To make the stock, fill a large pot with water, add the meat and bones to the water, and boil for several hours. Remove the pieces, and then can or freeze the stock. Stock makes delicious soups and other meals, and can be expensive to buy.
  • If you choose to compost for another good soil enhancer, add food scraps to the compost pile.
  • Chickens can eat most food scraps. They love vegetables. When we harvested our broccoli, we gave the chickens the broccoli leaves. They chattered happily, and we didn’t waste the leaves.
  • Working with fruit? You can make vinegar with apple scraps, jelly from corncobs, and peach jelly from the skins and pits of the peaches.

Cut Down on the Feed Bill
We feed our farm critters without breaking the bank by growing our own feed and repurposing edible kitchen scraps.

  • No matter how quickly we harvest our vegetables, there always seems to be vegetables that have been chewed by bugs, have bad spots or are overripe. Don’t toss these! Give them to the chickens. It will cut down on waste, and the chickens will be very happy. We also had a hound dog who loved tomatoes.
  • If you have a few acres, grow your own hay. It is much cheaper to get someone to cut your hay, than to pay for someone else’s. Your horses and cows will eat all winter at a big saving.
  • When possible and safe, let the animals out to forage for themselves part of the day. Chickens love to hunt for bugs and grass, and this will also cut down on the amount of feed you have to purchase.

Wheeling and Dealing
No one person can grow everything, but when you grow something, you have the leverage to acquire the things that you cannot grow or raise. If you look hard enough, you’ll find what you need without paying full price.

  • Trade and barter for other seeds, equipment, vegetables or other animals you do not have.
  • Check out thrift stores, yard sales, auctions and estate sales. Many of these places will have farm equipment or tools that still have a lot of life in them for a fraction of the cost.
  • Plan ahead for the next year, and buy equipment at the end of the season. A new garden hose for next summer will cost much less in October.
  • If you do buy produce from farmers’ markets or orchards, ask for seconds. These are items have blemishes or imperfections, and cost much less. Apple seconds make delicious apple butter, and cost half what the pretty apples cost.

Making Money
It’s true, farm life isn’t cheap, but thankfully many of your farm enterprises can pay for themselves if you adopt an entrepreneurial spirit.

  • Have surplus produce? Load up the truck and go to the farmers’ market. You can use the money you make to buy necessities around the farm, or to purchase produce that you do not grow.
  • If you have extra eggs, sell these at the farmers’ market or to neighbors, friends and family. Productive hens can generate enough income to pay for their feed.
  • Canned goods make excellent homemade Christmas gifts, saving you money during the holidays.
  • If you are an avid canner, check your state’s cottage industry laws. You may be able to sell your homemade jams, jellies and pickles without using a commercial kitchen. Specialty pickles, such as asparagus pickles, are often considered gourmet foods and can boast a higher price tag.
  • Contact your local extension office for any grants available for small farmers. For example, as of this writing, government grants are available in Virginia for those who raise bees. The grant will cover the costs incurred in setting up the hives.

There are often many opportunities to save a little money and get a deal, especially if one is willing to put in a little work. Tearing down a building may result in being gifted the lumber. Helping someone move could mean you get that old box of mason jars that were in the attic. Keep your eyes open for opportunities to save money and stretch a dollar.

One thing to remember is that the food grown and raised on the farm has an additional money-saving benefit: less sodium, fewer chemicals and fewer preservatives. The food we eat is healthier, and this can prevent health problems and possibly even expensive doctor visits later on.Those of us who live on a farm know this way of life is worth every penny.

About the Author: Traci Wilmoth and her family live on a 13-acre farm where they raise and butcher their own chickens, hunt for meat, garden and forage for food. She holds a graduate degree in English from Virginia Tech and teaches college writing courses. 


Categories
Crops & Gardening

2 Intriguing Plants for the New Year

2 Intriguing Plants for the New Year - Photo by Jessica Walliser (HobbyFarms.com)

Happy New Year! It’s hard to believe that 2014 has come and gone so quickly, but despite its warp speed, 2014 was certainly a successful year for the garden.

A Year In Review
Here in western Pennsylvania, we managed to elude the late blight that plagued other parts of the country, and we saw only a few instances of impatiens downy mildew. It was a crazy year for fungal diseases as a whole because we had consistent rainfall throughout the entire growing season. Typically in years with this much rainfall, we see a rise in many different fungal pathogens, but these two issues thankfully seemed to stay away. However, that wasn’t the case for basil downy mildew, powdery mildew and black spot, all of which raged through many gardens this season.

On the flip side, the regular presence of rainfall meant that the 2014 gardening season required very little supplemental irrigation. I didn’t even have to water my containers but maybe a dozen or so times all summer long. The vegetable garden got watered only once in late August. Even the birdbaths seldom needed refilled.

All that rain, with a little help from my mulching prowess, made for a spectacular year in the veggie patch and perennial gardens. I had the best tomato harvest I’ve had in years, and the pole beans continued producing until November! I’m still uprooting the occasional carrot and beet, enjoying them roasted in the oven with a bit of sea salt and olive oil.

Next Year’s Garden
While a gardener never has control of the weather, he or she does have control over what’s planted in the garden and how it’s cared for. Like many gardeners, I often spend the month of January taking stock of the previous year’s garden and planning for the coming season. I relish the seed catalogs, with their colorful images and playful descriptions. Somehow I end up with more dog-eared pages than not. The 2015 seed catalogs hold so much promise for the coming year, filling my head with ideas and inspiration.

I’d like to briefly introduce you to two plants I’m excited to grow in the coming season. One is a returning favorite and the other is going to be an exciting, new experiment.

Digiplexis
One plant I grew for the first time in 2014 that will make a definite comeback in 2015 is Digiplexis (pictured above). A cross between our native foxglove and a cousin from the Canary Islands, this plant truly took my breath away. Tall spikes of raspberry red and orange flowers bloomed non-stop all summer long. Although it’s hardy south of USDA zone 8, here in my zone 6 garden it’s treated as an annual. There are a couple of varieties of Digiplexis on the market and all of them are pretty stunning. I can’t wait to grow it again this year. I’m going to try it in my front garden to test for both deer and drought resistance. I’ll let you know how it goes.

Ketchup n’ Fries TomTato
Another plant I’m looking forward to trying, this one for the very first time, is the Ketchup n’ Fries TomTato from Territorial Seed Company. It’s the first commercially available grafted tomato-potato variety that’s actually considered to be successful. They’ve been on the market before, but they proved more of a novelty than a productive crop. To make the plant, the shoot system of a cherry tomato is grafted to the root system of a potato. Because the two are closely related, a union forms and the two grow as a single plant. Each plant produces tomatoes above ground and potatoes below.Two crops from a single plant is pretty exciting stuff. I can’t wait to give it a try!

Here’s wishing you a successful and happy 2015—in the garden and in life!


Categories
Poultry Urban Farming

The Pullets are Laying Eggs

The Pullets are Laying - Photo by Rachel Hurd Anger (UrbanFarmOnline.com)

I’ve been buying eggs for 2 months. My family doesn’t eat very much meat, so we technically fall under the flexitarian, or semi-vegetarian category, making eggs very important to my family. When the girls aren’t laying, our choice is to eat more meat or buy eggs.

It’s embarrassing to buy eggs and chicken feed, but when the hens get old and it’s winter, ’tis the season. The biggest caveat to raising urban chickens is that our flock sizes are so limited and our layers are also pets. Culling to make room for younger layers just isn’t what we do.

The weather hasn’t been as cold as it should be this time of year, so the chickens have been out ranging, they’ve been active, and when it’s warm, they don’t have to convert as much of their food energy to stay warm. The days are slowly getting longer now, but the days aren’t long enough to see eggs from the elderly hens until the end of February.

My husband went out to button up the coop for me after sunset on Christmas Eve while I was busy in the kitchen baking bread for our French toast the next morning—the French toast for which I had to buy eggs—and he delivered me an egg!

I didn’t expect an egg for a couple more weeks yet, but once all the pullets get started, I shouldn’t have to buy any more eggs through the winter. That’ll be a relief!

We didn’t get another until Dec. 26, and it’s a slightly different shade than the first, so it appears half the pullets are laying. The third egg was laid Dec. 28. It’s the exact same shade as the first, so I expect the same layer, but it’s larger. It could very well be a double yolk, as double yolks are quite common in young layers.

Without isolating the chickens individually, I won’t likely know which pullet the eggs belong to, but the different shades give me clues.

When an entire flock is laying, it’s easy to match eggs by color and shape. The shades and shapes become so familiar that when one type is suddenly missing, it’s obvious that someone has stopped laying.The easiest for me is when my only white layer stops laying. It’s always exciting when she resumes laying to find a blazing white egg in the nest. Likewise, if my Easter Egger lays blue or green I’ll know her eggs on sight, but if she ends up laying a shade of brown, her eggs will blend with the others. However, I’ll still be able to line up eggs and identify four different types, one type for each pullet.

For now, it looks like I can expect an egg every 48 hours, but that schedule won’t last long. Soon I’ll be stockpiling dozens of eggs in all the egg cartons I’ve collected in the last eight weeks.

I have enough store-bought eggs to get us through the rest of this week, so I haven’t cracked open the freshest eggs. They feel too special. Twenty weeks of feed investment makes those first eggs mighty valuable!

What are you expecting from your flock in the new year? Do you have questions about winter laying habits? Let me know in the comments below.

Read more of Chicken Quarters »


Categories
Crops & Gardening

3 Natural Ways to Boost Your Energy

’Tis the season to stay out late and spend time with friends and family. If you’re a parent, or have just been burning your candle at both ends all year, the long afternoons filled with family gatherings can even be too much. Do you find yourself drifting in and out of the conversation or longing for a post-dinner nap? I envy the men of my family—somehow it is an accepted convention that they spend a large part of each get-together asleep in front of some game or another.

For the rest of house, making lackluster conversation and struggling to remain upright while working puzzles or playing board games after dinner, this is the point at which they reach for the coffee. I’ve never liked coffee, but now that I know how bad it is for already strained adrenals, I’m not going to pick up the habit out of desperation either.

The tradition of sipping a coffee after a large meal is so hard on the body. The caffeine in the cup tells our adrenal glands that we are in grave danger, setting off our fight or flight mechanism. There is a surge of adrenaline, yes, but you pay mightily for that energy. In order to muster more brain power and blood flow to the extremities, the body has to shut down non-essential processes. That large dinner filled with fat and protein that you just ate? Digestion is shut down, so it is no longer being processed. You now have a big rock sitting in your stomach that must be pushed through the system by way of gravity and luck. If you’ve done this often, the inevitable burping and feelings of indigestion come next.

If you’d like to avoid the coffee this year, here are a few natural supplements that you might try.

1. Ginkgo (Ginkgo biloba)

3 Natural Ways to Boost Your Energy - Photo by Dan Iggers/Flickr (HobbyFarms.com)

This common street tree is the last remaining member of the oldest plant family still living on Earth. The leaves, when used in a tea, tincture or capsule have been found to support brain health and increase energy by providing greater oxygen flow to brain cells. The tree can be grown in just about any kind of soil in full sun. It’s a slow grower, so it can take a few years before a harvest of leaves is available.

2. Cinnamon (Cinnamomum spp.)


3 Natural Ways to Boost Your Energy - Photo by Carmen Eisbar/Flickr (HobbyFarms.com)

Hard to grow unless you live in the topics, this natural stimulant is one of my favorite energy sources. C. verum is helpful with arthritis and inflammation and C. cassia is helpful in managing blood sugar levels. It also provides another much-needed bonus of increased energy.


3. Ginseng (Panax quinquefolius)

3 Natural Ways to Boost Your Energy - Photo by Kerry Wixted/Flickr (HobbyFarms.com)

This woodland plant is endangered, but you can manage a small patch on your property to harvest a continual supply of roots. Ginseng root is an adaptogen that supports the whole body in fending off stressors. It’s invigorating and encourages a healthy metabolism. Used over time, it can enliven all the systems of the body. Be sure to buy from sustainable sources only.

Whether you grow your own or simply buy it, choose a natural pick-me-up to save your health this holiday season.

Get more help growing and using herbs from HobbyFarms.com:

« More of the Prescription Gardener »

Categories
Recipes

5 Kitchen Tools We Loved This Year

It’s out with the old and in with the new this time of year, right? As we ring in the New Year, we celebrate our favorite winter kitchen ritual: clearing out and using up everything in the pantry and freezer. We’re actually pretty dedicated to this tradition, as we save both money and space by using up the food we’ve stockpiled. The same clearing principle goes toward all the gear in our kitchen cabinets: If we haven’t used it in the past year, it obviously isn’t essential for us and either gets packed away in the attic or donated.

This approach gives us some breathing space for the new kitchen gear we love to try out. Our kitchen discoveries from this past year proved themselves worthy of their dedicated storage space. That said, all of these items are actually quite small and compact, so that space and storage really aren’t even factors. What was your favorite new kitchen tool this past year?

1. Bowl Covers

5 Kitchen Tools We Loved This Year - Photo by Oh Sew Green (HobbyFarms.com)

We met Racheal McCormack of Oh Sew Green on a trip out West and were drawn to the cheery, colorful fabric she uses to sew up her reusable items, from sandwich bags to bowl covers. These items save green in two ways: no need to keep buying plastic bags, wrap or foil and nothing ends up in the landfill. We regularly use her bowl covers, which fit snuggly on an open bowl and have a food-grade plastic coating on the inside that is easy to wipe down or pop in the washing machine.

2. Quality Knife

5 Kitchen Tools We Loved This Year - Photo by John H/Flickr (HobbyFarms.com)

This one is a bit embarrassing to admit, but for two people who spend a lot of time in the kitchen, our knife collection consisted of an odd mixture of hand-me downs and dull odds and ends. Operating under the “less is more” premise, we upgraded to one all-purpose, 6-inch chef’s knife from Victorinox, the folks who also make the classic Swiss Army knife. It’s a little shorter than the traditional 8-inch chef’s knife, so it’s nimble enough to easily slice and dice fruits and vegetables but with enough heft to cut through heavier items, like a pumpkin or meat. Our only problem now is we keep squabbling over who gets to use this knife when we’re both in the kitchen. Maybe a second one is calling our name in the New Year?

3. Digital Thermometer

5 Kitchen Tools We Loved This Year - Photo by Thermoworks (HobbyFarms.com)

Nerdy farmstead chefs unite! We’re amazed at how often we use our digital themometer, a Thermapen by Thermoworks. We first picked it up as a bread-baking tool so we could tell exactly when the inside of our loaves reached the perfect internal temperature of 190 degrees when baking in our outdoor wood oven. The bread would get nicely brown on the outside, but we found it might not be fully baked on the inside. What we didn’t realize is how we’d use this thermometer to check when water or any liquid came to a full boil. Turns out, there were lots of times we “thought” something was boiling and it wasn’t there yet. No more soupy puddings for us!

4. Anti-Fatigue Mat

5 Kitchen Tools We Loved This Year - Photo by Imprint (HobbyFarms.com)

This one took us by surprise, as we honestly didn’t believe a gel floor mat under out feet would make that much of a difference in how our legs felt, but now we’re converts. Standing on a hard floor, a wood floor in our case, for hours causes joints and legs to fatigue. These mats alleviate pressure on your heels, back and shoulders by providing support and cushion. You can even find mats with green technology: Imprint Comfort Mats are manufactured without the use of toxic, heavy metals.

5. Speaker

We’re the type of people who would much rather invest in seed packets than the latest technology, but that said, cooking is much more fun when we have music or talk radio going. This year we got a small, portable speaker that runs on a rechargeable battery and runs on Bluetooth so it can pick up anything from our iPad. Our kitchen regularly turned into a dance floor. With anything from National Public Radio podcasts to Lisa’s lively Cuban Pandora station, kitchen prep time flies by.

For more of our favorite gear of 2014, check out this recap from the National Restaurant Show.

Categories
News

A Man, A Goat and the Open Road

“He may be brown, but really, he’s made of gold,” Steve Wescott says about LeeRoy Brown, his Alpine/Boer goat and walking companion. Steve and I talked on the phone a couple of weeks ago about his project Needle2Square, a 2,800-mile cross-country journey on foot.

On May 2, 2012—the 20th anniversary of Steve’s father’s death—Steve and LeeRoy hit the road to raise awareness and funds for Uzima Outreach and Intervention, Steve’s best friend’s ministry in Kenya for substance-addicted adults and neglected and orphaned children. The plan was to walk 10 miles per day and be finished in a year. This is a reasonable calculation for an individual walking across the country, but add a charming goat into the mix, and suddenly you find it hard to walk 10 feet without someone stopping you for photos and a chat. “Every day, all day, it’s just a sea of camera phones,” Steve says. This has turned out to be great because he’s had a chance to talk with so many more people about his mission.

In 2012, the pair made it from Seattle to just past Salt Lake City before snow hit and they had to take a break for the winter. In the spring of 2013, they started again where they left off and made it to Kansas City, Mo., by Thanksgiving. This year, Steve and LeeRoy only made it as far as Saint Louis before getting sidelined by an injury caused by a dog attack. They encounter a lot of dogs, many of which are unsure about having a goat around or just plain upset about it.

In this particular angry-dog encounter, neither Scott or LeeRoy were attacked by the dog, rather LeeRoy got tangled in his leash when the dog came after them and he tried to get away. Steve said it’s difficult to find a veterinarian who really understands how to treat the equivalent of a performance goat. This is just like a performance horse, in my mind, and after seeing a few doctors, the University of Missouri at Columbia were able to get LeeRoy on the mend and on the road again.

They stopped walking earlier this year in Effingham, Ill., as a result of back and hip issues Steve has developed from three years of being on the road. This isn’t the end for them, though.

Steve’s Giant Education
“Goats are so underrated,” Steve says. “I had no prior experience with the animals. I was a city kid. I’d never camped, really, before this.”

A Man, A Goat and the Open Road - Photo by Needle2Square (HobbyFarms.com)

I asked about his training regime, and Steve told me, “I ate a lot of Jimmy John’s sandwiches, and I watched a lot of YouTube videos on how to camp.” I laughed, and he said he was totally serious. He was trying to gain weight before the trip, thinking all of this walking would make him drop weight. Instead, the opposite is happening. “I blame the goat,” he says, because he has to go at LeeRoy’s pace.

The preparation was mental as much as anything, and the mental portion of the trip really kicked in after he go through Seattle, Portland and Boise, where he had a lot of friends and a lot of support from people he knew. After that, it was largely just him, the goat and the road.

Steve caught a lot of flack from goat lovers about this trip. Everyone wanted to offer their advice—and criticism—about the way he fed and cared for LeeRoy. Knowing nothing about goats before taking off, Steve relied—and still relies—on LeeRoy to tell him what’s happening in his goat world: “I have learned to trust him, and even though his personality is subtle, I know him.”

Now, LeeRoy knows how to ride in a car and subtly moves closer to his pack when it’s time to load up and get moving.

From Green Pastures to the Red Carpet
Next up for Steve and LeeRoy are a documentary and a reality television show. Neither of these are things Steve asked for, having expected this experience to last only one year. All the better, as the whole point behind Needle2Square, after all, is to spread the word about his friend’s ministry far and wide. This additional publicity will take them farther than their six feet can go on their own.

Categories
Urban Farming

Squash Leek Gratin

Recipe: Squash Leek Gratin - Photo by Rachael Brugger (UrbanFarmOnline.com)

The shortest day has come and gone, and I’m dipping into my long-keeping winter stock of local products. My pig share is nearly done, but my lamb share just showed up to replace the pork in my freezer, with visions of spicy kebabs and cozy braised shanks. The pumpkins and winter squash are holding up well, so I sliced one up and layered the lovely orange flesh with mellow, pale-green leeks for a rich side dish. It would make a warming vegetarian main dish, as well.

I used half-and-half to give the dish a creamy texture, but part heavy or light cream will be fine, too. It’s cream that elevates these simple winter vegetables to another level, so much so that you can even do without the traditional cheese on top. The layered vegetables look sumptuous and beautiful, bathed in glossy cream.

Another possibility is to just add the butternut squash and leek slices to potatoes and onions, topped with Gruyere instead of Parmesan, to make a more traditional gratin. The herbs can vary: tuck a bay leaf in one edge (where you can grab it out before serving), rub garlic around the dish with the butter or slice some shallots into the layers, sprinkle fresh, chopped, Nordic-style dill or some fennel or celery seed.

Yield: 2-3 servings

Ingredients

  • 1 small winter squash, peeled, seeded and thinly sliced
  • 2 leeks, cleaned and sliced
  • 1/2-1 cup half-and-half
  • butter to grease the baking dish
  • thyme, salt and pepper to taste
  • 1/2 cup grated Parmesan (optional)

Preparation

Preheat the oven to 350 degrees F.

Butter an 8-inch square or round baking dish or use a traditional oval gratin dish. Alternate shallow piles of squash and leek slices. Pour cream to about halfway up the vegetables. Season and cover.

Bake for 30 minutes. Uncover, sprinkle on cheese if using and bake for 12 to 18 more minutes, until cream is bubbly, cheese is lightly browned and vegetables are soft.

Read more of The Hungry Locavore »