Categories
Urban Farming

3 Ways Gardening Benefits the Heart

3 Ways Gardening Benefits the Heart - Photo by Kevin Fogle (UrbanFarmOnline.com) #hearthealthy #garden #gardening

Valentine’s Day has now safely passed until 2016. Like everyone else, I was busy on Saturday consuming sinful dark chocolates, too many colorful sugary confections and a decadent meal—all of which are amazing but not terribly heart-healthy. Still stuck in the Valentine’s Day mindset, I’ve been musing about how gardening is, on the flipside, good for the heart in many ways. Here are a few ways I’ve found gardening to be an amazing hobby, not only for the health of your heart but for your entire body.

1. Aerobic Exercise

Planting and maintaining a garden by hand requires daily dose of aerobic exercise, from cultivating the soil, hauling hoses, watering, weeding and chasing away unwanted garden visitors, like that obnoxious family of squirrels that resides in the old live oak tree on my lot.

2. Healthier Food

Not only is the regular activity associated with gardening healthy, the hard-earned vegetable and fruit harvest has some great benefits, too. Having fresh fruits and vegetables in your garden means you’ll incorporate more into your daily diet—and I think we all can afford to replace sweets with produce. When growing your own crops, you can choose to follow organic conventions over conventional gardening methods that often utilize noxious pesticides. As an added bonus, when your vegetables and fruit are picked at the peak of ripeness, they often have higher nutritional value than the same produce purchased in your local grocery store.

3. Source of Joy

So the physical act of gardening is good for your body, but what about your emotional well-being? When I celebrate life and love, I like to think about making a difference in the lives of those individuals around me. For me, gardening is a great outlet.

As a hobby, gardening allows us a chance to spend time outdoors with our spouses, children, parents, friends and neighbors. Growing my front yard garden has allowed me to meet many of my neighbors who stop by on their daily walks to chat and see how the garden in growing. It creates a focal point for a neighborhood conversation. Gardening also offers an amazing teaching opportunity for children away from blackboards, books and digital screens of all kinds. There are so many wonderful lessons waiting in the garden for kids of all ages from watching seeds sprout to learning about the complex predator-prey relationships amongst the insects found on our plants. In this sense gardening can help build a bond that will last a lifetime, one built on learning, companionship and a love of the natural world.

Read more of Garden In Front »


Categories
News

GMOs Bite—Literally

GMOs Bite—Literally (HobbyFarms.com)

Dengue fever and chikungunya are two terrible diseases with no treatment and no vaccines available. If you contract one of these diseases carried by the Aedes aegypti mosquito—a species not native to the U.S. but sometimes found in the more tropical regions of the country—you just have to ride it out. With this in mind, the Florida Keys Mosquito Control District thinks it has a solution: Release genetically modified mosquitoes to kill off Aedes aegypti, starting with a neighborhood of Key West.

I’m in the Florida Keys right now, volunteering at a nonprofit urban farm, so I’m super interested in what’s going on here. I’ve gotten to speak with people on both sides of the GM-mosquito issue, as well as residents who don’t know what to think, which has only propelled me farther down this rabbit hole of interest. Here’s what I’ve found out.

What’s a GM Mosquito?

Oxitec, a British company, has been working on these GM mosquitoes for years. The idea is that only male GM Aedes aegypti mosquitoes will be released to mate with female non-GM Aedes aegypti mosquitoes. Male mosquitoes don’t bite, so humans are, in theory, safe from being bitten and having the GM DNA enter our bloodstream. Oxitec’s mosquitoes are modified with a DNA cocktail of E. coli bacteria, the herpes simplex virus, coral and cabbage. It’s projected that 0.03 percent of mosquitoes released will be female—so, a very small margin of error here—and a bite from a GM mosquito will cause the same reaction as the bite from a non-GM mosquito.

The offspring from the GM males and natural females die before reaching maturity, knocking down the population. I’m curious to know what will happen when the GM males mate with those few GM females—the same result, I hope, or we’re populating the world with GM mosquitoes.

Why the Florida Keys?

While these diseases are terrible and rampant in some parts of the world, they aren’t prevalent here in the U.S. Key West saw an outbreak of dengue fever in 2009 and 2010 with 88 people contracting the disease locally. It hasn’t been seen here since November 2010, though. Chikungunya, on the other hand, has never been acquired in the U.S..

Even with these relatively few cases to be concerned with in the Florida Keys, the FKMCD insists the release of GM mosquitoes are for the public’s safety. A warming climate and always-expanding global travel are spreading tropical diseases farther afield, and Key West, being the southernmost U.S. city, may experience these issues sooner rather than later. I’m always questioning what other impacts are around the bend, though.

Pollinator Problems

Just like we’re seeing in other fields of pest-control, the Aedes aegypti are becoming pesticide resistant to four of the six chemicals currently used. At first glance, I understood that the GM mosquitoes would reduce pesticides being used to control the mosquito population. As you know, when you go around spraying pesticides to control a bug, other bugs around it are affected, too, so hearing about an alternative to pesticides made me perk up my ears. If a GM mosquito could markedly reduce pesticide use, maybe this isn’t the worst idea ever.

After talking with Michael Welber, active with the Florida Keys Environmental Coalition, I came to understand that the Aedes aegypti mosquitoes are only one of 45 species of these annoying buggers in the Keys. The GM mosquitoes will control the Aedes aegypti, but pesticide spraying will continue to carry on for the rest.

Some residents and visitors are happy about the pesticide use because it does control the mosquito population, which is a nuisance, to say the least. If these GM mosquitoes are released, we’ll not only have GM mosquitoes, but we’ll still have dangerous chemical pesticides. There will be a break in pesticide spraying, though, because the mosquito control district won’t be able to spray after the GM mosquitoes have been released, otherwise they’ll kill the GM mosquitoes before they’re able to carry out their breeding duties. This will give other mosquitoes a chance to ramp up their populations.

More Mosquitoes

Reducing the population of just this one mosquito species feels a little futile considering there are so many other species out there. And getting rid of one can open the door for another to move in, like the Asian tiger mosquito, which also carries chikungunya and dengue. If that happens, I guess a GM version of this mosquito will have to be released, too. Subhead: Superbugs Creating Superbugs

Last week, I wrote about antibiotic-resistant bacteria being released from concentrated animal-feeding operations. These antibiotic-resistant bacteria are a real concern in the creation of GM mosquitoes, too. Tetracycline is used in the creation of the GM mosquitoes, which can lead to the development of antibiotic resistant bacteria in the GM insects’ guts, which can be passed into the environment, other insects, and potentially animals and humans.

GM Success?

Oxitec has already released 70 million of them in Brazil and the Caribbean and have not received any reports of reactions from mosquito bites or the synthetic DNA. Oxitec claims that in Brazil and the Cayman Islands, more than 90 percent of the target mosquitoes have been controlled by the GM mosquitoes, though other reports say Oxitec had no baseline population number to go by in making this claim.

The FDA (and You) in Control

The Food and Drug Administration Center for Veterinary Medicine is working with the Centers for Disease Control and Prevention and the Environmental Protection Agency to decide whether the GM mosquitoes are bound for the Keys.

Whether or not you live near the Florida Keys, you should be doing your part to keep mosquitoes under control on your own property. Any ways that you help reduce this pest population can help keep the chemicals and GM bugs out of your neighborhood.

« More The News Hog »

Categories
Homesteading

5 Perennial Vegetables for a Children’s Garden

5 Perennial Vegetables for a Children's Garden - Photo by Tessa Zundel (HobbyFarms.com) #garden #vegetables

Gardening with children is a lot like cooking with children: a worthwhile investment in the future and an experiment in patience. The secret is to keep it simple, keep it organized and do one thing at a time.

As you teach a garden principle, practice it. For example, after you explain how deep the trench for the asparagus should be, go dig it. Give everyone a job so that they can all contribute to the planting. Even a toddler can dig holes off to the side while you teach older kids to feather out the roots of the asparagus without breaking them.

If you want to grow crops like peas, lettuce and beans, you’ll be working with annual vegetables. Annuals are planted, grown and harvested over the course of one year. Perennials, on the other hand, are only planted once and continue growing for many years after. There’s a place for both in the children’s garden.

An advantage of annuals is that they’re flashy and fast: The rewards are easy to see and you’ll be eating from them in no time. Perennials are more subtle. They’re like a secret that we gardeners tell ourselves every spring. My children have so much fun planting and eating peas (an annual), but discovering the first rhubarb shoots (a perennial) is something they can anticipate every year—it’s like searching for treasure.

If you want to incorporate perennial vegetables into your children’s garden, here are some of my kids’ favorites you can try.

1. Asparagus (Asparagus officinalis)

5 Perennial Vegetables for a Children's Garden - Photo by Rob Ireton/Flickr (HobbyFarms.com) #garden #vegetables

This is probably everyone’s favorite perennial veggie. The thing our family likes about asparagus is that it comes up out of the ground one at a time, as if someone came along and stuck asparagus spears in the garden. The way asparagus grows makes it simple to instruct children how to harvest. Simply say, “Please go out and cut 20 spears of asparagus right at the ground.” The spears are best picked when they’re short—once they get tall, they get tough. This makes asparagus a good tool for teaching commitment in the garden; you have to check on it every day to make sure nothing goes to waste.

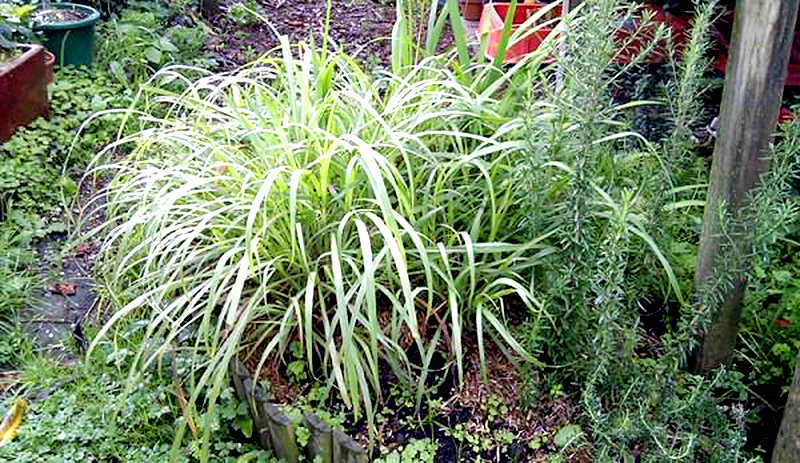
2. Walking Onions (Allium proliferum)

5 Perennial Vegetables for a Children's Garden - Photo by Tony Alter/Flickr (HobbyFarms.com) #garden #vegetables

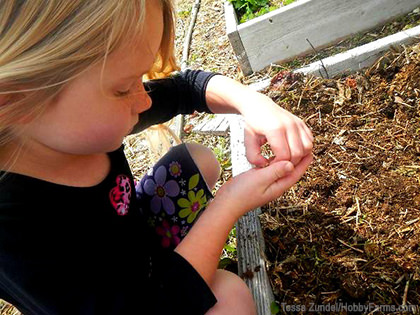
Onions aren’t necessarily a kid’s first vegetable choice, but my children love them because they literally walk across your yard year after year. (And I love them because I can sneak them into my kids’ favorite dishes.) After you plant the onion bulb, it sends up shoots during the year and forms a baby bulb at the top, called a bulblet. The bulb increases in size as it ages and drops to the ground, rooting about 1 foot from the mother plant. Then, it does it all over again, moving forward and to the sides each time. Want to convince your kids that there’s magic in the garden? Introduce them to walking onions.

3. Scarlet Runner Beans (Phaseolus coccineus)

5 Perennial Vegetables for a Children's Garden - Photo by Tessa Zundel (HobbyFarms.com) #garden #vegetables

While scarlet runner beans are technically a tender perennial, in some zones they act more like an annual, dying back in the winter and re-growing in the spring from seeds dropped to the ground. These beans are beautiful! The seeds are purple or pinkish with black spots, and the flowers are bright red. There are several varieties of runner beans and they all vary a bit in flower and seed color.

The vines are strong and vigorous, so they’re perfect for growing up playhouse walls or tepee trellises. They’ll cover a small structure in a season, providing hours of shaded enjoyment in the children’s garden. The beans are completely edible picked fresh, but are really yummy dried. They put one in mind of a certain boy name Jack and his magical beanstalk.

4. Jerusalem Artichoke (Helianthus tuberosus)

5 Perennial Vegetables for a Children's Garden - Photo by Tessa Zundel (HobbyFarms.com) #garden #vegetables

Jerusalem artichokes (aka sunchokes) are a tuber, similar to an iris tuber. The tops will die back every winter but will pop right back up in late spring. Be careful with these because the tubers proliferate easily and abundantly. This can be a great thing for an edible garden because you can, indeed, eat them.

They taste like a cross between a potato and an artichoke when cooked, which is probably how they got their name, as they’re in no way related to artichokes. When raw, they taste a lot like a water chestnut. The tubers can be knobby, which gets annoying when you’re trying to clean them and prepare them for eating; try the Fuseau variety for fewer knobs.

Jerusalem artichokes produce 5- to 7-foot stalks with small, sunflower-type flowers and provide a great privacy screen for any low-lying fort or fairy house. Once the stalks have died back, they make excellent play swords for backyard imaginings and great kindling for the fire.

5. Lamb’s Quarters (Chenopodium album)

5 Perennial Vegetables for a Children's Garden - Photo by Tessa Zundel (HobbyFarms.com) #garden #vegetables

This is also known as Fat Hen, which indicates you can use it to feed your poultry. While lamb’s quarters is actually a reseeding annual, believe me, it’s not afraid of winter and will be back in spring. This weed is one of the very first things to start popping up in the garden, and we love it. It reseeds very easily and prolifically, so some people battle with it, but I know several wild foragers who deliberately planted the seed in their yard so they can harvest it.

The baby shoots are wonderful in salad or added to stir-fry. My kids think it’s groovy when we cook the weeds from the garden. Once the leaves of lamb’s quarter get a bit bigger, we use them in place of spinach, which needs a bit more time in our climate to be safe from the frosts. In fact, it tastes a lot like spinach, only better—kind of nutty and full of spring.

So, there you have it! Did I neglect one of your favorite perennials? Set me straight in the comments below.

Visit my blog if you want some ideas on annual vegetables and fruits for a children’s garden.

« More Farm Sprouts »


Categories
Animals Poultry

5 Common Brooder House Mistakes

Raising chicks is tricky business, especially if you’re new to it. Your new, tiny, feathered charges are susceptible to all kinds of dangers early on, and the health that they establish now will follow them throughout their lives. From getting the right temperature—not too hot, not too cold—to maintaining quality standards indoors and protecting chicks from predators, there’s plenty to know about the inner workings of a brooder house.

By taking care to avoid five common errors in managing a brooder-house environment, you can help raise a healthy clutch from chicks to adulthood.

1. Too Hot

The ideal temperature inside the brooder house is 95 degrees F for layer breeds and 90 degrees F for meat breeds. The temperature discrepancy is because meat breeds are larger chicks that grow faster and create their own heat.

“As a rule, the temperature should be lowered 5 degrees F per week during brooding until you reach the daily temperatures that the chicks are living in,” says Phillip Clauer, Penn State University senior instructor and extension specialist. “Also, you need to remember that it sometimes gets much colder at night in spring, and the chicks may need supplemental heat at night.”

Often this supplemental heat comes in the form of a heat lamp. An easy way to control the temperature is to continue to raise the heat lamp each week, suggests Wayne Martin, extension educator in alternative livestock systems at the University of Minnesota Extension Service. Keep a thermometer at ground level to be sure the brooder house stays at the right temperature. Apart from using a thermometer, you can tell right away that the temperature is too hot when chicks are staying far away from their heat source and are panting to regulate body temperature.

Overheated chicks can dehydrate, will grow slower because they’re eating less and become stressed, making them more likely to get sick.

2. Too Cold

To get the brooder house to the correct temperature it’s important to heat the area—including bedding, feeders and waterers—at least 24 hours before the chicks arrive.

“People tend to not preheat the brooding area long enough or properly,” Clauer says. “It takes longer for the floor and litter to warm up than people think.”

If chicks are too cool, they’ll huddle together close to the heat source. As discussed above, a thermometer is important to regulate the brooder-house temperature. Chilled chicks will grow slower and gain less weight and are more likely to contract diseases. They have to eat more to keep warm, so they’ll be more expensive to keep, too.

3. Unclean

Coccidia, parasites and bacteria are lurking around the farm, waiting to infect young chicks. To protect them, provide bedding in their brooder house to absorb waste and provide footing. Wood shavings, chopped straw and rice hulls make good bedding choices. Martin cautions against using paper because paper gets slick when wet, and the chicks can fall on it and become injured. Fresh litter should be added as needed, when bedding becomes wet and soiled.

If using a deep-litter bedding system, be vigilant about adding several inches of bedding in between each batch of chicks so that new chicks won’t come in contact with pathogens left by older chicks. If not using a deep-litter system, entirely clean out all of the litter from the batch before and sanitize the space several days before adding the new bedding and chicks.

Waterers and feeders need to be low enough for chicks to reach them, but not so low that the chicks will poop in them or scratch waste and bedding into them. Keep them at the birds’ back-height, and clean them out twice per day. In between groups of chicks, sanitize feeders and waterers.

4. No Rodent-Proofing

Chicks are susceptible to attacks from rodents. Rats, especially, love little-chick snacks. This is a sad reality of raising chicks. Predator-proof the brooder house by ensuring there are no holes that even the smallest predator can enter. Seal up any gaps in walls and doors, and put 1/2-inch wire mesh over window openings. Entering the brooder house after a predator attack is not an experience that any farmer should have, so take precautions ahead of time to ensure the space to raise your chicks is safe.

5. No Ventilation

While you don’t want a draft blowing on your chicks, you do want good air exchange. A poorly ventilated brooder house will harbor ammonia and humidity, promoting respiratory issues and disease. Vents above the chicks should allow brooder-house air to escape and allow fresh air to come in; however, cracks in doorways and windows or poorly sealed openings at chick-level will cause drafts, which are not good for chicks’ temperature regulation.

Whether this is your first run of chicks or your 10th, remaining vigilant about brooder-house maintenance will help you to raise a healthy flock every time.

Categories
Crops & Gardening

How to Grow and Use Lemongrass

Lemongrass is a versatile herb, prized in the kitchen and known for its medicinal properties. This plant gets its name and unique flavor from citral, the same chemical compound that gives lemon peels their invigorating scent. Sometimes mistakenly called citronella grass, Cymbopogon citratuslends its flavor to ethnic dishes, teas and more.

The Master Gardener Program at the University of Wisconsin Cooperative Extension says that of the 55 species in the genus Cymbopogon, West Indian lemongrass (C. citratus) is what’s typically used for cooking. This variety can help repel insects, yet is also used to attract honey bees by mimicking the bees’ own pheromones. Other known uses for lemongrass include:

  • antifungal
  • natural diuretic
  • anti-parasitical
  • anti-diarrheal
  • anti-microbial
  • anti-bacterial
  • calm the stomach
  • break down fats
  • stimulate perspiration
  • treats colds
  • balance the nervous system
  • help with stress and exhaustion,
  • soothe headaches and muscle pain
  • increase circulation
  • help with respiratory conditions, sore throats and high cholesterol
lemongrass
Julian Melville

Grow Lemongrass

Lemongrass performs as a perennial in USDA zones 8 and warmer, loves full sun, and can handle intense heat as long as you don’t let its roots dry out. If given well-drained, rich soil, one clump of lemongrass can easily grow into a mound 3-plus feet tall and 6 feet wide, so choose your location well. I planted my 4-inch pot in a spot up by our pool, thinking it would look tropical and lend fragrance to sunbathing. It did, but by the end of summer, that little plant dominated the whole end of the garden bed!

Overwinter lemongrass in zones 1 to 7 by digging a clump of roots, trimming stalks to a few inches tall, and planting in pots. Lemongrass will fill the container you put it in, and root expansion can break a pot that’s too small pot, so start with one at least 12 inches diameter. Set the pot in a sunny spot indoors and keep barely moist, or store in a cool, dark place, watering just enough to keep the roots alive. Once night-time temperatures reach 40 degrees or above, transplant outdoors. Pests are virtually nil, though spider mites might invade when lemongrass is overwintered indoors.

Propagation is easy—if the lemongrass you buy from your grocery produce section contains the entire base, take a few sections before you’ve peeled them, place in a glass of water, and set it in a sunny location.Before too long, you’ll see little roots begin to sprout. When they’ve reached an inch or more in length, transplant into a pot or the sunny garden spot, water regularly and enjoy.

Use Lemongrass

The first time I cooked with lemongrass, I neglected to research exactly what part to harvest. I just grabbed my kitchen shears, chopped off a nice handful of the arching leaves, washed them, cut to 1-inch lengths and threw them in my Tom Kha Gai soup. The flavor was incredible. However, the grass didn’t wilt into nice little edible shoots as I expected: It was tougher than celery strings and sharp on the edges.

Since then, I’ve learned that while the stems and leaves are great for infusing flavor into teas and broths, you’ll want to bundle them together so you can take them out later. It is the scallion-like base you’re after if you’re going to be eating lemongrass. When stem bases are at least 1/2 inch thick, you can pull or cut them off the main clump. Peel the outer layer to reveal the white inside part. Slicing is easier if you crush the base with the flat of your knife.

This inner stalk lends an Asian flavor to your stir-fry, and pizazz to salads and sauces, as well. Freeze leftovers in zipper-sealed bags, pre-sliced, or slice when partially thawed. Alternately, purée and use by the teaspoonful, freezing leftovers.

If you’re unable to use all the fresh leaves during the growing season, harvest a bunch to bundle, hang to dry, then store in tightly sealed containers. Dried lemongrass will remain potent for up to a year if not exposed to light. The dried leaves are great many of the same purposes you’d use the fresh leaves. Alternately, scatter grass stems around your patio, porch or pool to help ward off insects. Other uses for lemongrass include but are not limited to:

  • adding interest and fragrance in flower arrangements
  • new starts in pretty pots make fun housewarming gifts
  • tinctures and balms for topical use
  • inclusion in potpourri mixture or favorite teas
  • feed for chickens
  • compost

All in all, whether you eat it, drink it, apply it, smell it, or more, you’ll be hard put to find a plant as versatile and tasty. Maybe there’s a corner of your yard or garden waiting to host its own burst of lemongrass!

Get more growing tips from HobbyFarms.com:

Categories
Beginning Farmers

Poop Is Awesome—Except When It’s Not

Poop Is Awesome—Except When It’s Not - Photo by Cyn Cady (HobbyFarms.com) #manure #garden #compost

The scoop on dirt is simple: Good dirt needs good poop. Chicken poop, cow poop, duck poop, horse poop. Bat poop, even! With the local horse ranch a scant mile away, my Girls producing mounds of soil nutrient right there in their composting chicken house every week, and my trusty wormies processing household garbage into gold, I am up to my ears in awesome poop. While I secretly lust for bat guano (mainly so I can brag that I use bat guano), I am in good shape, poop-wise.

Except for Pudding.

Pudding (don’t tell the other two) is my favorite of our three cats. The other two, Fats and Marble, are charming as heck, but Pudding has a special way about her. Our friend Mike refers to her as “The Superior Cat.” I think he is correct.

I believe Pudding returns my high regard; she follows me everywhere I go, trailing me through the house and into the garden, and that’s where the Pudding Problem arose.

Now, perhaps she noticed the joy I had in mulching with horse manure or saw the gleam of delight in my eyes as I raked another batch of composted chicken poop out of the henhouse and wanted to contribute to the greater good of the Fortress Garden, or maybe she just had to go and didn’t want to leave my side, but one day, as I was in the garden picking a big ol’ bunch of kale for dinner, she hopped up into a planter box newly sown with turnip seeds and, well, pooped.

Not only did Pudding’s Pooping Process (which involved a lot of digging and turning around and digging again, to find just the right spot) destroy my neatly-sown turnip bed, but it introduced what I’ve learned is Uncool Poop (a technical farming term) into my carefully developed super soil. According to the interwebs (and as always, I checked three or four sources), cat poop (and dog poop for that matter) in the garden is a big no-no. Not only can it introduce icky parasites like Toxoplasma gondii, roundworms, hookworms and tapeworms, it really, really stinks.

I actually love the smell of manure, especially if it’s been composted a bit. But the comparison of lovely, crumbly manure to a tiny log of kitty dung is like comparing a delicious ribeye steak to, well … kitty dung.

Poop Is Awesome—Except When It’s Not - Photo by Cyn Cady (HobbyFarms.com) #manure #garden #compost

So I put on gloves, and, sacrificing the turnip seeds I’d already planted, dug through the box until I had removed all of the offending poops. Apparently, it wasn’t Pudding’s first rodeo; I was determined, however, that it would be her last. I added a hefty layer of new soil, and reseeded. This time, I covered the box with bird netting. Pudding watched the whole operation, looking on with an inscrutable expression.

Was she hurt that I rejected her offering? I will never know for sure. But I think she has forgiven me. The other day she brought me a lovely dead lizard, and I believe I was successful in summoning a credible display of delight. I’m pretty sure lizards make decent compost, so I think we’re good.

Can’t get enough about poop? Read more on HobbyFarms.com:

« More Greenhorn Acres »


Categories
Poultry Urban Farming

How to Store Backyard Eggs

The United States is one of only a handful of countries in the world that scrubs its eggs for market. Most European counties do not.

Fear of illness from legitimate salmonella outbreaks has certainly influenced the evolution of our food system over the last century, but once manufacturers scrub off the egg’s protectant membrane, aka the bloom, the egg becomes susceptible to pathogens seeping into the egg. To slow down possible contamination through the shell, the cleaned eggs must be refrigerated.

Bacteria can get in through the shell once an egg is scrubbed, but an unwashed, dry egg is unlikely to become contaminated from the outside. Chickens themselves become infected with salmonella bacteria, often without symptoms of illness. Infected hens lay eggs that are contaminated inside the yolk. Scrubbed or not, those eggs will be contaminated until they’re cooked thoroughly. Because hens lay eggs that are already contaminated, scrubbing and refrigeration won’t stop salmonella. Only healthy hens prevent salmonella.

In countries that don’t scrub their eggs, the choice has as much to do with common sense as it does energy efficiency. Sometimes these countries vaccinate hens against salmonella to protect the egg supply at the source, but this isn’t mandated in the U.S. Then, they leave eggs unwashed with the protective bloom intact. Eggs can be stored this way safely for about three weeks, versus nearly two months with refrigeration. The unwashed egg protects itself for viability, as its purpose is for reproduction, so the Europeans often let nature do its job, while not expending non-renewable energy resources to chill eggs.

To Wash or Not?

Whether you wash your eggs before storing them is entirely up to you, but you can be confident that not washing your eggs isn’t gross, disgusting or unsanitary. Whatever you choose, here are some rules of thumb.

If you wash your eggs:

  • You must refrigerate them. Even if your hens are free from salmonella, once the bloom is washed away your eggs are susceptible to contamination through the shell.
  • Once chilled, keep them refrigerated until use.
  • Rotate stock, using the oldest eggs first. If you have many dozen at any one time, write the date for the week they were laid on the egg carton. This will help you keep track of the eggs’ ages.

If you do not wash your eggs:

  • Store them on the counter in an egg rack or in a pretty egg basket.
  • Always keep them dry.
  • Store them pointy end down to maximize freshness.
  • Rotate your room-temperature stock more regularly than you would refrigerated stock, and use the oldest eggs first. If you’re keeping them in a basket, write the date it was laid on the egg.

I use both methods—washing and not washing. Very dirty eggs get washed and refrigerated, which isn’t common. Usually, fresh eggs sit in a small ceramic egg container on my kitchen counter. We use warm eggs quickly, and they’re fabulous for baking. During the summer when laying is prolific, refrigerating makes more sense, a luxury non egg-washing countries usually don’t have.

Just like we avoid washing produce until we’re ready to eat it (to keep it fresher longer), I recommend the same for the eggs kept for personal use. An egg might look a little grubby on the outside, but it’s clean and fresh on the inside as long as the bloom is intact.

How do you prefer to store your eggss?

Categories
News

Come On, EPA, Do Something About Factory Farms

Come On, EPA, Do Something About Factory Farms - Photo by Socially Responsible Agriculture Project/Flickr (HobbyFarms.com) #CAFO #factoryfarms

McDonald’s hamburgers aren’t the only things disseminated from factory farms anymore. A new study out of Texas shows that antibiotics, feedlot-derived bacteria and DNA coded for antibiotic resistance are traveling off-farm, too. (Gulp.)

The study published by The Institute of Environmental & Human Health at Texas Tech University is extremely timely given a number of lawsuits filed last month, asking courts to make the Environmental Protection Agency do something about factory farming. While the air and water around concentrated animal feeding operations (CAFOs) have never been considered clean, the EPA hasn’t tried regulating it for whatever reason.

In 2009, the Humane Society of the United States petitioned the EPA, and in 2011, the Environmental Integrity Project petitioned the agency to regulate about 20,000 factory farms under the Clean Air Act, which would reduce ammonia, hydrogen sulfide, particulate matter and other air pollutants. The EPA never responded to these petitions, instigating the organizations—plus the Sierra Club, Friends of the Earth, the Center for Food Safety, Clean Wisconsin, Iowa Citizens for Community Improvement and the Association of Irritated Residents—to take action.

Beef to Back Up the Claims

The Southern High Plains, where the Texas Tech study took place, is a windy bit of land. Incidentally, so are a lot of the flat, open areas where CAFOs are often located. This wind can pick up bad-news particles and carry them off to far-away places—as far as hundreds of miles, and possibly even around the world.

The study isn’t a total shock: When you have farms producing between 1.2 to 1.37 billion tons of waste each year, there’s bound to be some bad stuff released into the environment. In fact, there’s so much to know about how CAFOs are affecting communities that the National Association of Local Boards of Health has a 30-page publication explaining it all. The hazardous effects of factory farming are certainly being noticed. Here are just a few stats that will make you cringe:

  • Livestock is responsible for 34 percent of U.S. methane emissions, a leading cause of environmental damage.
  • Poultry operations in the top-10 chicken-producing states release at least 700 million tons of ammonia annually. Ammonia causes nose, throat and eye irritation; respiratory issues; dizziness; and more health problems.
  • Dairy and swine CAFOs emit 100,000 pounds of hydrogen sulfide annually, contributing to extreme odors, acid rain and regional haze.
  • From 1982 to 1997, the number of U.S. farms with confined livestock fell by 27 percent, while the number of animals raised in CAFOs increased by 88 percent. The number of CAFOs increased by more than half.
  • There are approximately 20,000 factory farms in the U.S. today.

With this information, along with heightened public awareness of antibiotic-resistant bacteria resulting in part from antibiotic overuse in livestock, the organizations suing the EPA might have a good case. While overreaching government oversight isn’t something that’s nice to think about, neither is blatant disregard for environmental and human health in the name of meat production.

More Food For Thought

Unrelated to the study or the lawsuit, Food and Water Watch has an interesting history of factory-farm regulations, as well as a website where you can locate the CAFOs near you.

Categories
Homesteading

DIY Macramé Hanging Vase

Macramé might stir up visions of hippie communes and VW buses, but the art of knot-tying actually has its roots in sailing. This close sister to knitting lends itself to an organic crafting style and is accessible in terms of both skill and supplies.

The tutorial below requires only two materials—a rope and a container—as well as a basic knowledge of square knots and braids. Once you’ve mastered the skill of rope-tying, you can use it in endless variations, incorporating intricate knots and braids into your crafts. If cut flowers aren’t your thing, substitute a terra-cotta pot for the mason jar. I’m dying to see a set of these hanging in a kitchen window with fresh herbs at the ready.

What You’ll Need:

  • mason jar (or small plant container)
  • rope or sturdy twine
  • scissors

Step 1

DIY Macrame Vase - Photo by Emily Lawrence Mendoza (HobbyFarms.com) #crafts

Cut 4 long lengths of rope or twine, each one six times the height of the jar. Tie all four ropes together in a basic knot at their center. Alternately, you could connect the ropes with a friendship knot for a flatter resting point.

Step 2

DIY Macrame Vase - Photo by Emily Lawrence Mendoza (HobbyFarms.com) #crafts

Put your jar upside down on your work surface, and lay the center knot over the base.

Step 3

DIY Macrame Vase - Photo by Emily Lawrence Mendoza (HobbyFarms.com) #crafts

Gather two ropes and tie (hitch) them with a square knot about 1½ inches down from the starting knot. Repeat the process with the remaining three pairs of rope.

Step 4

DIY Macrame Vase - Photo by Emily Lawrence Mendoza (HobbyFarms.com) #crafts

Repeat step 3 for the next row, being sure to pair the ropes to hitch from side-by-side knots from the row above. You should be creating a fishnet like pattern. Strive to keep spacing equal but taught to the container. Continue adding rows as needed to fit the jar or planter.

Step 5

DIY Macrame Vase - Photo by Emily Lawrence Mendoza (HobbyFarms.com) #crafts

Gather the strands from two side-by-side knots at the base rim of the container, and tie them in a tight square knot. Run the pairs of ropes around the rim and tie again into a tight square knot.

Step 6

DIY Macrame Vase - Photo by Emily Lawrence Mendoza (HobbyFarms.com) #crafts

Braid the ropes in two groupings of four, with two strands from the top knot in each of the groupings.

Step 7

DIY Macrame Vase - Photo by Emily Lawrence Mendoza (HobbyFarms.com) #crafts

Once the two braids are finished tie them both together with one final square knot at the tops and trim the ropes.

Tip for Use

This is my favorite vase for collecting my cut garden roses. I can just hang it over my arm to collect my clippings in while still having two hands free.

Categories
Crops & Gardening

How to Grow Radishes

How to Grow Radishes 

Radishes are the first crop to find a home in my garden every spring, a fact that always surprises me because for many years, I was an unwavering “radish hater.” Until I turned 30, the only radishes I had ever tried were the shredded ones you sometimes find at salad bars. I still don’t like those radishes very much, but I can say without a second thought that homegrown radishes have become a favorite in my house. Their taste is a far cry from those shredded pieces of pith at the salad bar, and if you, too, consider yourself an unwavering “radish hater,” promise me you’ll try again. As with most vegetables, the only way to get a true taste is to grow your own.

Cool-Season Gardening

Radishes are a cool-season crop, meaning they prefer to grow in the cooler temperatures of spring and fall. They grow best in temperatures between 50 and 70 degrees F. Radishes will bolt (or flower) when the days begin to lengthen in late spring and the temperatures get warmer. If the plants begin to flower before the root has formed, no root will develop, or if the plant is gearing up to flower, it puts its energy into making the flower instead of fattening up the root. What this means is the earlier you plant your radishes, the better. I begin to sow radish seeds in my USDA zone 6 garden in mid- to late March.

Radishes tolerate frosts quite well, so you can sow your seeds about four to six weeks before your last expected frost. Harvests begin anywhere from 20 to 40 days after planting, depending on the variety. The tastiest harvests occur when the roots are quarter-sized. Waiting too long to harvest will result in woody, pithy roots. To stagger my harvest, I sow a handful of seeds every week or two through the spring up until early June. I also plant a fall crop in late summer.

Find Soil Balance

Another thing to keep in mind for good radish production is that root vegetables of all sorts need phosphorus to develop good roots. If your soil is deficient in phosphorus, work some bone meal or rock phosphate into the area in the fall. It will be readily available come spring.

Soil pH can also be a factor when growing radish. Because phosphorus becomes tied-up and unavailable for plant use at lower pH levels, it’s important to maintain an average soil pH of around 6.5 in the vegetable garden in order to enable the plants access to plenty of phosphorous. At this pH, the greatest variety of nutrients is available for plant use.

Having too much nitrogen in the soil is another no-no for radishes and other root crops. Nitrogen makes lots of green growth, which is not what you want, so skip the nitrogen fertilizers in the vegetable garden and turn to compost, aged manures and leaf compost instead to feed your garden a more balanced diet.

Pest Control

The only trouble I sometimes face in growing radishes are the little holes I find in the foliage. They are a clear sign of flea beetles, a common radish pest. To deter them, I cover my newly planted radish seeds with floating row covers. These lightweight, white fabric covers rest on the plant tops and create a physical barrier to all kinds of pests. If the row covers don’t work and the flea beetle pressure is extreme, I sometimes turn to neem oil or spinosad-based organic pesticides, but they are seldom needed, as radishes can outgrow almost anything.

Make these radish recipes from HobbyFarms.com:

« More Dirt on Gardening »