Categories
Beekeeping

How Honeybees Pollinate (And What They Do With Pollen)

Avid gardeners, homeowners and farmers—large and small—revere the honeybee and her native cousins (such as the bumblebee, mason bee and various wasps) for their ability to pollinate crops. Proper pollination of crops yields bigger harvests, and what’s not to like about that? But did you know that there’s something in it for the honeybee, too?

How Pollination Works

For such a critical event, the process of pollination is deceptively simple. A fruit-bearing plant will produce brightly colored flowers intended to attract pollinators. When the flower blooms, pollination may begin. The male part of the flower, called the stamen, produces the pollen. The center “stem” rising up through the center of the flower is the female part, called the pistil. At the top of the pistil is a sticky part, called the stigma, and this is where pollen must end up in order for the plant to set fruit. Seeds, which will eventually become the plant’s fruit or crop, are made in the ovule, which is at the base of the female pistil, and will only grow if the flower is properly pollinated.

So how does the pollen reach the stigma? This is where our friend the honeybee comes in. Covering her body are tiny hairs that collect pollen. As she floats from flower to flower, her body rubs up against the stamens, gathering pollen. A busy worker out in the field can often be spotted with tiny yellow, orange, red or even purple (depending on the cultivar) particles of pollen covering her body. She then visits another flower, where she transfers the pollen to the stigma of the next flower, pollinating it. The seeds at in the pistil’s ovule can now begin to grow into fruit.

It’s a neat trick, isn’t it? The honeybee is likely not aware of how crucial a role she plays in this process. She is initially attracted to the nectar produced by the flowers, and the pollination process appears to be inadvertent. One of the most incredible things about the whole dance is that there is no risk of cross-contamination of different crops beause a single forager bee out in the field will only visit one variety of plant per flight.

What’s In It For The Honeybee?

So what else does the honeybee get out of this deal? She seems to work a lot for the flowers, who, admittedly sit quietly and await her work. Well, nectar, for one. The honeybee collects nectar from the flowers and returns it to the hive, where her sisters store it into cells, add special enzymes, fan it with their wings, and turn it into honey.

She also gets any surplus pollen out of the deal, which is quite a perk. When the foraging honeybee takes a break, she cleans her body with her back legs. As she does so, the pollen collects into tiny balls on the tops of her back legs, called “pollen baskets.” She carries these baskets home with her to the hive, where they are stored in cells, and fed to all members of the hive. While honey provides the carbohydrate source to honeybees, through the winter and all year round, pollen, which has more protein pound for pound than beef, provides the bulk of her nutrition. The more variety in flowering plants in the colony’s foraging radius, the more variety of pollen the bees consume, and the better the hive’s health. Everybody wins.

Categories
Farm Management

Market Opportunity: Sell Seedlings At The Farmers Market

Seedlings are a great way to diversify your product offering, jazz up your display area and build a loyal customer base. How does that saying go? “Give a man a fish, and you’ll feed him for a day. Teach a man to fish, and you’ll feed him for life.” Well, the same motto applies to educating and empowering your market customers. Teaching local food patrons to grow their own food will help them understand where food comes from and develop a stronger appreciation for the produce you grow.

Don’t worry, your typical market-goer won’t load up on seedling starts and never return to the market again. Once they get a few of their own plants going, they’ll be even more enthusiastic about visiting the market, asking you questions and buying additional products.

Seedling Varieties To Sell

Market Favorites

Much like selling produce, your best-selling seedlings are going to be the basics: tomatoes, peppers, leafy greens and so on. Consumers prefer to grow what they know, and they all know that a homegrown tomato can’t be beat. If you focus your efforts on the big sellers, you’ll be able to upsell some more adventurous plant varieties. Eggplant, watermelon, artichoke, cucumber and kohlrabi might fall into this category.

Different species will need to be hardened off at different temperatures and will require various soil temperatures before planting. Be sure to research the seasonality of each plant to ensure optimum success, and relay that knowledge to your buyers.

Heirloom & Rare Varieties

Heirloom produce is rapidly growing in popularity and for good reason. Heirloom varieties are often more flavorful and colorful, albeit frequently lower yielding and more finicky in the garden. You can find heirloom seeds through companies like Seed Savers Exchange and Baker Creek Heirloom Seeds. Ideally, save your own seed or look for local seed from someone in the area. You might be able to locate an experienced gardener with a veritable seed library that he or she would be happy to share. Master Gardener associations are a great place to start if you’re looking for native varieties.

Herb Seedlings

basil hanging basket
Rachael Brugger

Fresh herbs are a great way to gain interest in seedlings. Nothing is better than fresh herbs to cook with at home, particularly given how expensive fresh herbs can be at the store or market; plus, they’re easy to keep on the windowsill or even on the porch. Unlike most other plants, your customer won’t need an actual garden to grow a wide variety of herbs. Herbs make great gateway plants, so be sure to explain these boons to your potential customers. Once you get someone to grow fresh herbs, they’ll be more likely to come back and try other produce.

Basil, rosemary, thyme and oregano are musts, as they’re commonly used and easy to grow. You can also offer lavender, stevia and cilantro to herb growers looking to expand their culinary selection.

Ditch The Plastic

What’s the first thing that comes to mind when you think of starting seeds? For me, it’s rows and rows of black plastic trays. We always try to avoid the use of plastic unless it’s absolutely necessary, and more and more consumers are veering away from plastic, as well. Who knows what’s leaching into the soil that’s feeding the roots of your plants? A couple alternatives to plastic include:

  • Soil blocks: These compact cubes of soil can be made at home with a simple tool. Your blocks will be free from any packaging and a great low-cost solution to starting seeds for sale. Block makers are generally $20 to $30, and that’s all you’ll need.
  • Peat pots: They look cute and make it easy for your customers to transport. The peat pot can be planted directly into the soil and makes a great starting environment for seeds of all types; they can be found at specialty gardening stores.

Scrap The Seasonal Schedule

cold-crop seedlings
Rachael Brugger

Seed starting doesn’t have to be seasonal. Most people associate starting seeds with springtime, but as farmers know, planting takes place year-round. In late summer and fall, you can sell starts for plants like kale, collards, winter squash, Brussels sprouts, cabbage and many more that are perfect cold-weather fare.

Teaching your customers about year-round gardening and planting techniques will need to be at the forefront. The use of cold frames and high/low tunnels are techniques many home gardeners would love to learn more about; print off fact sheets from your local extension that they can take with them.

Creative Displays For Your Seedlings

If you already have fresh produce available, interspersing seed starts with the same varieties of produce can be a neat way to show your customers how their food came to life. You could also make a tiered display for arranging starts without taking up valuable table space. Get creative to draw increasing interest.

Be A Garden Mentor

Growing plants might be new for your audience. For many customers, gardening is something their grandparents did. However, more folks are taking an interest in growing their own food. Uncertainties and mistrust of the industrialized food system are big factors. Educating people about where grocery-store food comes from can go a long way in making them want to grow their own food. Simple tips about planting locations, planting times, and water and sunlight needs are good to share when selling starts. Many of your buyers will be interested in growing their plants organically, so being familiar with organic pest control will be a plus.

The world needs more plants and people growing them; you can help spread the love! Not only do starts diversify your revenue stream, they also add flair to your display. What you don’t sell, you can use in your own garden or donate to a school or community garden.

Categories
Farm Management

Organic Farm Business: The Natural Trading Company

Farmer: Bryan Kaminsky
Location: Newcastle, Calif.
Specialty: Year-round organic vegetable and pastured-egg CSA; specialty greens

If sunny California seems like the perfect backdrop for growing a gastronomic spread of organic vegetables and eggs from pastured chickens, Bryan Kaminsky would surely agree. A lifelong farmer, who as an FFA student raised sheep and immersed himself in high-school ag classes, he set a goal of turning his farming hobby into a full-fledged business, and with great success.

Inspired by his mother’s natural-foods business—the farm’s namesake—Kaminsky launched Natural Trading Company, a 40-acre organic farm, in 1995. Kaminsky started small with what he knew, eventually adding a greenhouse and specialty products, including sunflower greens, pea shoots and wheatgrass, which can be found in co-ops and groceries in the surrounding area.

“We started to grow wheatgrass shortly after when we realized that health-conscious customers in the Sacramento region were looking for organic, high-quality wheatgrass,” he says. “Diversity is important in farming; when a crop doesn’t do well it’s helpful to have other crops as a backup to make up the difference and keep the business going.”

Kaminsky is a true businessman and has carved out a valuable niche in his community. His produce lineup includes a drool-worthy list of fruits and vegetables, including five varieties of kale, 30 varieties of tomatoes and persimmons from 50-plus-year-old trees, which he makes available to the community via farmers’ markets and a year-round CSA. But despite all the hard work that he puts into what could seemingly be a full year of production, like any good businessman, he knows the true value of honest rest.

“With the intensity that we work the land during the spring and summer, it makes sense to give both the people and the land a chance to take a break and rejuvenate over the winter,” he says.

natural-trading-co2

Biggest Success

Turning my dreams into reality and my passion and hobby into a successful, organic, diversified farm business.

Biggest Challenges

Weed pressure­—the constant concern of every grower, especially in organics, where our best defense against weeds is time and labor. These things are hard to come by at the height of the season when your immediate task is to get vegetables out to customers. On the business side, bureaucratic red tape and paperwork grow just as quickly and constantly.

Firsthand Advice

Hold tight onto your dreams and your intention because it’s a big ride—they’ll keep you inspired in the face of the many challenges of farming. At the same time, stay grounded in the realization that farming can be a business or a hobby. If you’re intending to farm for a livelihood, be in a business mindset and know your numbers from day one so you’ll set yourself up for long-term economic and environmental sustainability.

Categories
News

Do You Like Your Vegetables Ugly—Or Sexy?

Too plump. Too thin. Oddly shaped. We’re all worthy of love right? That’s the message being sent out on buses across San Francisco.

In a new ad campaign for the Ferry Plaza Farmers’ Market, the Center for Urban Education about Sustainable Agriculture is merging the popularity of “ugly” produce and online dating culture into several bold and colorful billboards featuring imperfect-looking fruits and vegetables. If you’re over the age of 25, some of the references may be lost on you—”Swipe ripe” refers to the dating app Tinder; “Casual encounters” to a thread on Craigslist; and “Eggplant envy” to the banana’s new phallic counterpart—but they’re sure to catch your eye.

casual encounters - farmers market ad
CUESA

“Farmers markets are sexy, especially in the summer,” says Executive Director Marcy Coburn in a press release. “At the Ferry Plaza Farmers Market, we’ve got sunshine, beautiful food, gorgeous views, and enticing people—all perfect conditions for finding love.”

eggplant envy - farmers market ad
CUESA

The ads tell us that its OK—perhaps even desirable—to shop outside the box. Strawberries that look like two smooshed together, forked carrots with the the prongs wrapped around each other and eggplants growing (ahem) appendages taste just as wonderful as their perfectly shaped counterparts and should be celebrated. At your local farmers market, of course.

The ads began making their debut on the Muni, San Francisco’s public transportation system starting in June. If you live there or are in the city for a visit, go find some sexy produce of your own to take home.

Categories
Animals Crops & Gardening Poultry

Rage Against The Monoculture: Grow A Yard Your Chickens Will Love

A commercially ideal lawn is a monoculture turf: one type of grass, cut to an optimal length, whose perfection requires maintenance with chemical applications, fossil fuels and a lot of water. The monoculture lawn became the homogenizing face of suburbia decades ago, and today, a lawn is often legally mandated in municipalities across the country, with gardening restricted to areas out of sight. Beyond cultural aesthetics, the manicured monocrop lawn has no useful function, nor is it environmentally sustainable.

Enter polyculture: gardening that mimics a natural ecosystem with many different kinds of organisms growing together in one place. Adding chickens into the polyculture mix creates a symbiotic system, where the chickens rely on the land and the land relies on the chickens.

A Yard With Purpose

In Joel Salatin’s book Folks, This Ain’t Normal: A Farmer’s Advice for Happier Hens, Healthier People, and a Better World (Center Street, 2011), Salatin describes his livestock pastures as a source of bursting nutrition:

“Each morning, I step out into the dew-speckled pastures, each drop a rainbow-studded diamond adorning orchardgrass, red clover, white clover, plantain, chicory—a whole salad bar bedazzled in morning’s solar glory.

I have thousands of expectant animals waiting for a fresh salad bar. They love me.”

Most of hobby farmers and chicken keepers don’t have thousands of livestock on acres of rolling beauty, but even for keepers of small flocks, it’s possible to shift expectations from a conformist lawn to growing a yard rich with nutritious forage for every egg in the nest box.

Growing A Yard Chickens Will Love

With chickens, what grows in the yard becomes their food, and, via the egg, eventually becomes our food. The more diverse an egg’s ingredients, the more complete the egg’s nutrition will be. Chickens have individual preferences for different foods just like we do, and giving them variety gives them choice, satisfying their natural chicken behaviors, personal tastes and individual dietary needs.

Inviting diversity into your living space increases chickens’ access to nutrition, reduces feed costs, invites and sustains beneficial pollinators, improves soil, builds rich compost through green manure mixed with chicken manure, and, in turn, grows better gardens to start the process all over again.

Rumor has it that one can’t garden with chickens because the chickens will lay waste to any and all growing plants. While chicken gardening does indeed pose some challenges, this isn’t entirely true. Author and chicken keeper Jessi Bloom motivates chicken keepers to create a garden one can tend ­successfully along with a flock of free-range chickens in her book, Free-Range Chicken Gardens (Timber Press, 2012). One chapter is even dedicated to plants with direct benefits to chickens, designed to create a supportive and self-sustaining environment that meets the flock’s needs. Ultimately, Bloom has created a tutorial for a chicken garden—that is, a garden directly for the chickens.

Chickens don’t disturb most plants once they’re well-established, especially deep-rooted bushes or hardy plants with deep taproots. If they can’t easily tear up the roots, they move on, so protecting plants at their most vulnerable is key.

Transforming a yard from monoculture to polyculture or permaculture—aka, permanent agriculture—takes time and even trial and error to find what plants work well for your space. As you begin raging against your monoculture, let these three chicken needs be your diversity guide: shelter, food and forage.

Shelter

All chickens are at risk of predator attacks, but the free-range flock is the most vulnerable. If our domestic chickens were wild like their jungle-fowl predecessors, living in a natural environment would provide natural shelters from would-be predators. Imagine a forest floor, thick with diverse undergrowth, protein sources living under the leaf litter and fallen trees providing shelter: This is one type of environment you can try to replicate. Living on a well-kept monoculture, chickens are more visible to predators. While some breeds are more predator-savvy than others, some plants can provide adequate free-range protection, especially from aerial predators.

Evergreen trees and shrubs, such as gooseberry, juniper, rugosa rose and wintergreen barberry, are excellent choices for garden shelters. Raspberry and blackberry canes eventually spread and can become large over time to fill space. Thorny bushes and canes will provide protection even when their leaves are lost.

“Large predators, especially airborne ones, will avoid getting tangled up in a mess of thorns,” Bloom says.

She also recommends using plants with spiny-looking leaves as another deterrent.

Food

Because chickens are omnivores, they’ll eat just about anything in the garden that’s edible. Growing a variety of seed­producing plants, grains and seeds can supplement their diet and help save on feed costs.

Plants that go to seed offer grain and essential fatty acids to a flock’s diet. Chickens like to peck seeds from the tops of long grass. Wheat is a great seed-producing grass, and chickens can eat these seeds whole without any processing. If you’re starting a garden with poor-quality soil, Bloom suggests growing winter rye, a hardy plant that tolerates poor soil environments. Rye can often be found in cover-crop mixes, and it can germinate in cool temperatures below 50 degrees F.

Corn is fun and easy to grow, and chickens love pecking at the kernels. Corn also stores well on the cob, and its high concentration of carbohydrates helps keep chickens warm through cold winter nights.

A sunflower patch can grow enough seeds to supplement a flock’s diet through winter, and provides them with something to do during the off months. Cut off the flower heads when the leaves turn brown and hang them to dry, or cover the heads with netting to keep wild birds from eating the seeds while they dry on the plant.

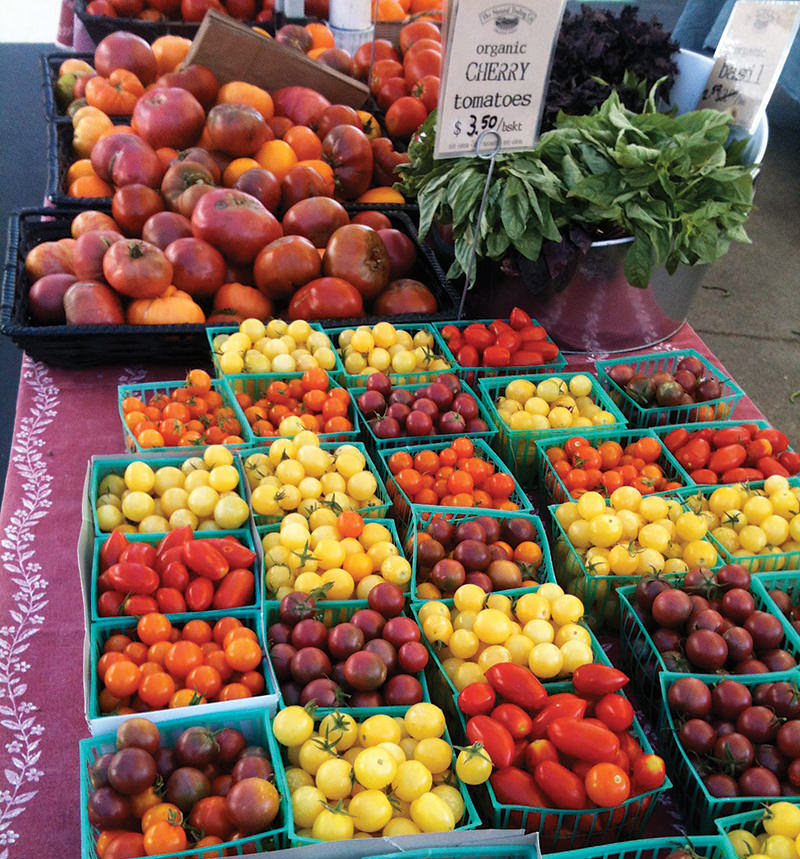
Many of the things we grow in the garden can be shared with chickens, with the notable exceptions of raw onions, green-skinned potatoes and unripe nightshades. Excess, broken, damaged or leftover watermelon, zucchini, cucumbers and tomatoes are just some of the garden foods that can help feed a hungry flock.

Forage

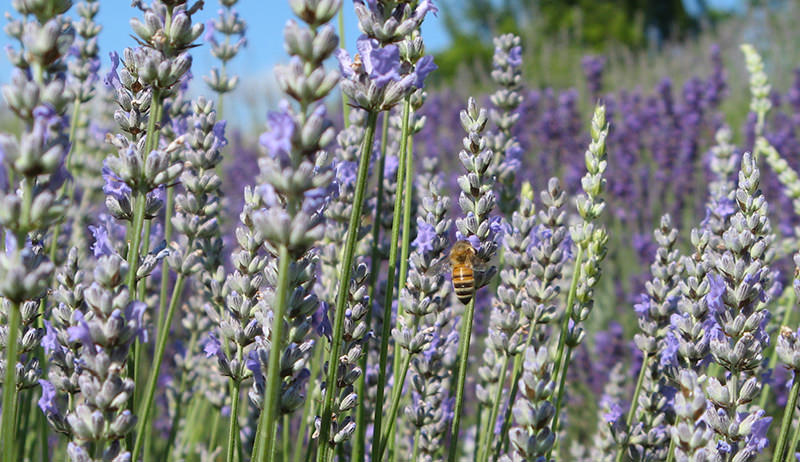
When chickens aren’t eating feed, they will forage from dawn until dusk, sweeping a yard and garden clean of ticks, pest larvae and the occasional whole mouse. Not only will chickens chase buzzing pollinators for amusement and eliminate weed sprouts from the garden, but they also enjoy hardy perennials (i.e., weeds) that are impossible for them to destroy.

  • Clover is a legume found easily in yards that aren’t treated with chemicals. However, if you do find your yard without clover, seeds can be scattered or confined to one area, but wherever it’s grown, it will always remain. Clover grows well where grass tends not to grow well. It doesn’t grow as tall as grass, so it can be mowed less often. Clover is a great nitrogen-fixing groundcover that fertilizes plants and grasses growing near it.
  • Alfalfa is another forage legume, but it can grow up to 3 feet tall. For foraging, alfalfa is best when it’s young or later when it’s mowed down for forage or mulch. Annuals, such as salad mixes, can be scattered and allowed to grow several ­inches until they’re ready for foraging.
  • Fruit trees work double duty in the yard. Aside from producing many pounds of food for humans, fruit trees provide both shelter and forage for chickens. Whatever falls to the earth will become chicken food, and the chickens will be more than happy to eat both the fruit and any pests that inhabit it. Apple, cherry, peach and plum trees are great additions to any diverse chicken garden.
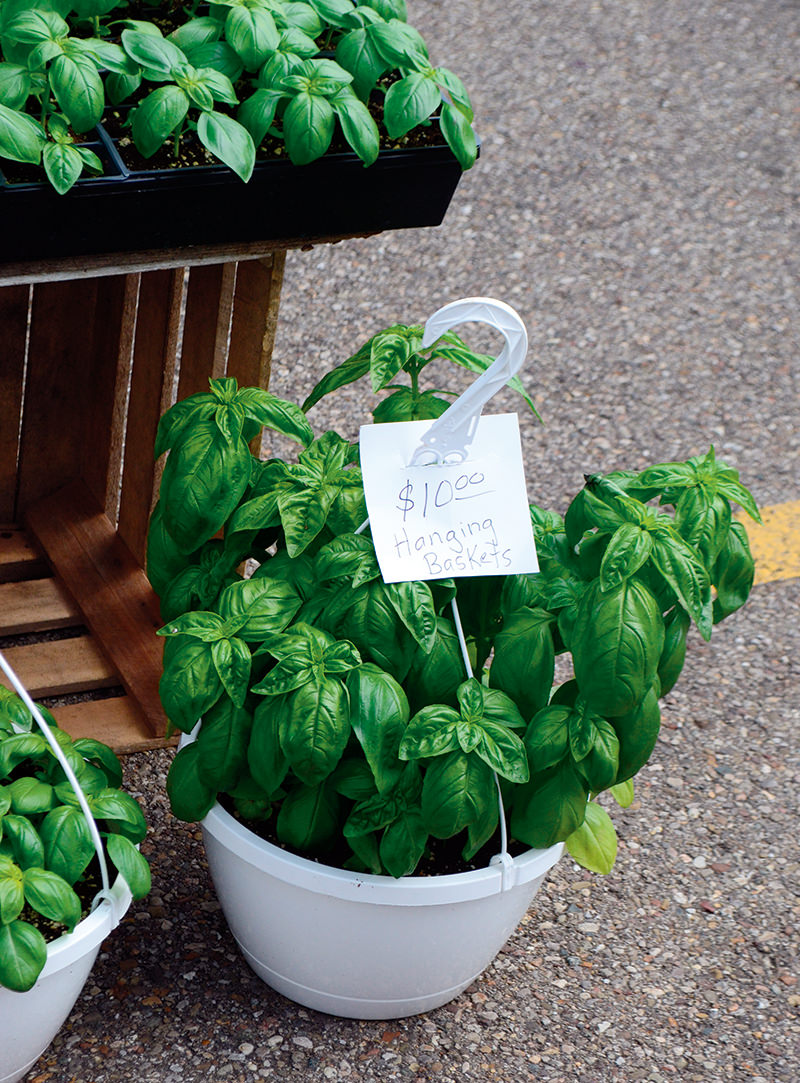
  • Edible flowers, mints and herbs can be valuable in the chicken garden for medicinal ­purposes when eaten. Perennials are hardier, and once established, chickens will use them as cover or forage, their roots strong enough to deter scratching. Many aromatic plants deter pests from the garden and the coop, too. However, many annuals aren’t strong enough to stand up to chicken abuse. Nasturtiums, for example, are edible and healthy snacks, but they should be grown in hanging baskets and allowed to cascade into reach.

Make The Chicken Garden Work For You

Chickens are ­motivated by food, but they’re also realists. Chickens will eat what they can reach or what falls to the ground, but they’ll leave the rest, opting for something that’s easier to get. To grow vegetables within your polyculture, grow vertically whenever possible and protect plants from the flock until they’re well established. Continue growing foods and forage for the chickens within their reach so they’re deterred from eating your veggies.

The more diverse a yard and garden, the less likely the flock will bother garden vegetables. Given enough low-lying options ­planted for them, chickens tend to stick with their personal favorites. If you happen to share favorites, plant enough for everyone.

An Alternative To The Polyculture Lawn

If you can’t give up the monoculture lawn for a more natural landscape, you can create a polyculture chickenscape in raised beds. For confined chickens, grazing frames made of shallow raised beds can grow forage right inside the ­chicken run. When the top of the bed is framed with hardware cloth, chickens can’t reach the roots of the plants, but they can forage as greens grow through the wire.

Go Wild

With a little controlled anarchy, nature will decide what your yard is missing, because it’s programmed for biodiversity. Continue mowing the areas you want to keep for yourself, while giving other areas back to nature for your chickens.

Start small by bringing in one new plant or seed at a time, scatter seeds in a protected spot, or block off a small section and plant a self-sustaining garden all at once. Soon, clover, dandelions and plantain will be growing wild among other so-called “weeds.” Your chickens will amuse you by plucking seeds from the tops of plants you’ve yet to name, and they’ll race to win their favorite berries that fall to the ground.

A polyculture yard is more carefree than a monoculture one, and it can be just as beautiful and enjoyable. It’s also more nutritious for chickens and for eaters via the egg. So say goodbye to the monoculture and hello to your new polyculture ecosystem.

This article originally appeared in the July/August 2016 issue of Chickens.

Categories
Crops & Gardening

Control Tomato Spotted Wilt Virus By Controlling Thrips

Tomato spotted wilt virus is a feared disease in many gardens, quickly turning once healthy crops into ruin. The classic symptoms of the virus on tomatoes include a yellowing or “bronzing” of the top sides of tender leaves, which quickly will lead to spotting necrosis and curling. Ripening fruit will show blotching with brown raised spots on green fruit and yellow spots and rings on mature fruit. Infected plants will be stunted with very limited fruit production.

This virus not only attacks its namesake, the tomato plant, but also a wide range of your favorite summer crops, including peppers, eggplants, lettuce and cucumbers. Symptoms of tomato spotted wilt virus differ among host plants and can only be positively identified through professional testing, which is readily available through your local county extension agents.

The Insect Link

It turns out that this destructive plant virus is almost solely spread by thrips, a tiny pest that is nearly invisible to the naked eye. The process begins when immature thrips are infected by feeding on wild or cultivated plants that harbor the virus. After maturation and a brief incubation period, adult thrips can then begin to transfer the wilt virus to any susceptible plants they feed on, including your vulnerable tomatoes, peppers and lettuces. In North America, only a few species of thrips, such as the western flower thrip, the onion thrip and the tobacco thrip, are capable of spreading the noxious virus. Unfortunately, many of these particular thrip species are quite widespread across the continent.

Controlling Tomato Spot Wilt

There is no treatment for plants infected with this wilt virus, so any plants that show signs of infection need to be removed immediately to help slow the spread of the disease in your sensitive crops.
If tomato spot wilt virus is an issue in your area, especially in the Southeast, take proactive steps to both prevent the virus and limit the population of thrips:

  • Select and plant cultivars resistant to or tolerant of TSWV. Fortunately, there are many hybrid tomato and pepper cultivars available today that fit this need.
  • Use reflective mulch and cultural weed control strategies to help keep thrip populations low.
  • Control native weeds around the farm or garden that may be hosts for thrips and TSWV. Some of the worst weed offenders are chickweed, dandelions, cheeseweed, purslane, sow thistle and buttercups, many of which show no visible signs of TSWV infection, but controlling all weeds in and around the garden will help lower thrip populations.

Sadly, organic and conventional insecticides that are available to home gardeners are largely ineffective for controlling thrips because of their moderate innate resistance due to their sheltered feeding sites inside flowers and vegetation.

Categories
Crops & Gardening Video

3 Free Mulches You Can Source From Home

An important component of any garden is mulch. Mulch keeps in moisture, adds organic matter, suppresses weeds and more, but it can also be a huge expense for a gardener on a budget. The good news, there are mulches available to you for free in your neighborhood or on your farm. Here are a few easy-to-find mulches and what to think when using them.

Leaves

Dried fallen leaves collected in fall make an excellent mulch, though be aware that they will breakdown quickly. (This could be a good thing if your soil is in need of organic matter.) To combat this quick degradation, layer leaf mulch on thick—about 1 to 1½ feet deep. If you have more than enough leaves for your mulching needs, consider fermenting them into leaf mold for a nice dark humus or shredding them for your compost. 

Grass Clippings

Another abundant (and regenerative) mulch source in your yard is grass clippings. Grass clippings are best used when dried out, because they can spread fungus and mold when fresh, so after collecting them in your mower bag, spread them out in the sun on a tarp or blacktop driveway to dry. One exception is to put the fresh grass clippings over newly planted potato beds—the clipping should dry out before the potatoes begin to sprout. Remember, if you’re using grass clippings as mulch, avoid grasses that have gone to see (you’ll spread the seeds causing weeds in your garden) and don’t use clippings from lawns that have been chemically treated.

Straw

Straw is a commonly used mulch, and if you don’t grow it yourself, you can obtain it fairly easily and inexpensively. Be aware that you want straw, not hay; straw is typically devoid of seeds, and hay is not. If you want, you can also use straw bales as container gardens or as the walls of a compost bin.

Categories
Farm Management

Why Your Farm Logo Matters—And How To Get The Best One Possible

Branding is valuable on every scale. From the grocery store to the farmers market, it helps your customers quickly recognize a food source they can trust. One of the biggest mistakes farmers make is not giving enough credit to the importance of their farm logo. Creating, updating or going so far as to redesign the farm logo, as insignificant as it may sound, might just be the business move you need to prepare for the increasingly competitive world of small-scale farming.

Why A Farm Logo is Important

Any businessperson will tell you, regardless of scale, logos are important. Let’s say you put up flyers all over town about your CSA. Someone who has seen those flyers and wants to buy a share can then recognizes your farm name and logo at a market and begin ask you more about it. We’ve seen this play out on our farm time and time again. A customer says, “Oh, I’ve seen your flyers, and I’ve been meaning to call you.” They may never have gotten around to calling us, but fortunately, they recognized our logo and that started the conversation. We’ve added many loyal customers because of this.

Once customers see your logo, it has to make enough of an impression to stick, even if they forget to call or just aren’t sure about it. Having a nice, recognizable farm logo that they see everywhere will eventually lead them to you.

What Makes a Good Farm Logo?

Big brands make different types of logos for different situations: with words, without words, with slogan, all together, and so on. Because you might have to pay someone for their design services, shoot for one solid logo that you can use everywhere—at least to start.

The most important thing your logo needs is your name. If you have a clever farm name, then it may need nothing else, but having an image attached helps draw customers in. This image should be bold but not complicated. A barn, a cow—something that represents you.

Some logos contain slogans, which can be nice, but I say keep it slick and simple. If it’s too cluttered with words, it will not stick with the customer.

Where to Look for Designers

If I didn’t have a talented artist as a wife, I would have had to find someone to design my logo. It’s important enough that designing it myself would have been a mistake—and, if I’m being honest, a disaster.

Googling “farm logo designers” will overwhelm you. It did me. There are sites where you can design your own, and sites that offer quotes. It’s a lot. Some of them, I’m sure, are good. but in trying the design your own, I found them to be too simplistic and lacking in individuality. Plus, they still take having at least a partial eye for design, which I do not.

If it were me, I would search Instagram for small designers. This is a great tool for meeting people, so why not use it to connect with talented young artists to help with your design? Look at the logos of your favorite farms and ask them who did theirs. Search relevant hashtags, like #farmlogo or #logodesign. Connecting through social media may be more affordable than going through an expensive design firm.

How Much To Pay For A Good Logo

A good farm logo should run you somewhere between $100 and $300, give or take. (Make sure the designer quotes you up front.) That may sound extreme if you’re just a small-time farmer, but you should only ever have to do it once. You may also be able to trade for it—trading always being the best option in my mind. You don’t need a thousand-dollar logo unless you are planning to be in supermarkets all over the state or country. Scale it to your market and ambition.

How Often Should You Update?

You may never need to update your logo, per se, but you may want to have it redrawn, or touched up, keeping the basic design mostly in tact. The idea is to retain enough of the original idea that people will still recognize it despite the updates. Trends and perspectives change, so keeping it up-to-date is important. Maybe right now people are really gravitating towards something earthier and less glossy, but in the five years want something slightly more industrial. Never be afraid to rebrand a little—keeping things fresh will keep fresh customers coming in.

Categories
Recipes

Creamy Coconut Cantaloupe Smoothie

When you get knee-deep into the hot, humid days of summer, sometimes a well-prepared meal goes out the window. After all, you’re busy tending the bumper crop that has swelled in your garden, and the warm temperatures do nothing to conjure up an appetite. But don’t overlook your body’s nutritional and hydration needs—especially when so many delicious fruits and vegetables are in season.

A highlight of the summer growing season is the crop of sweet melons in our gardens. Melons offer a refreshing flavor and essential fluids perfect for replacing those you’ve undeniably lost while sweating out in the sun. Add melons to a summertime smoothie that you can drink for breakfast, lunch or even an easy dinner. Paired with yogurt for some protein and coconut milk for a boost in hydration, a melon smoothie is the perfect summer treat—and it’s healthy, too.

Yield: 1 large smoothie

Ingredients

  • 1 cup chopped cantaloupe
  • 1/2 cup honey-flavored yogurt (or 1/2 cup plain yogurt plus 1 tsp. honey)
  • 1/2 cup light coconut milk (or substitute 1/2 cup of cow’s, goat’s or sheep’s milk)
  • 1/2 cup ice
  • 1 T. shredded unsweetened coconut, toasted

Preparation

Purée cantaloupe, yogurt and coconut milk in blender until smooth, 20 to 30 seconds. Add ice and purée until blended, about 15 more seconds. Pour smoothie into large glass and top with toasted coconut before serving.

Categories
Animals Poultry

The Egg Waiting Game

Your spring chicks are all grown up. They’ve moved from the brooder to the coop. They’re happily scratching in the dirt for bugs, lolling in the sun, taking dust baths and marching into the coop at dusk to perch on their roosting bars for the night.

And now the waiting game begins.

Where Are My Eggs?!

It can seem like forever from the time you first hold that tiny peeping ball of fluff in your hands until she lays her first egg. In reality, most chickens start laying between 18 to 24 weeks old, with the majority starting by week 28. Lighter breeds, such as Leghorns or Andalusians, usually start laying sooner, while heavier breeds, such as Buff Orpingtons, Australorps and Wyandottes, tend to start a bit later.

I’ve found that colored-egg layers start later than others — or maybe it just seems that way because I’m so eager to see that first blue or olive green egg in the nest! I’ve had a few that didn’t start laying until around week 30, and one of my Ameraucanas didn’t start laying until she was a whopping 39 weeks old! But her gorgeous blue eggs more than made up for the longer wait.

Even once young hens—called pullets until they are a year old—start laying, it can take them awhile to get on a regular schedule. You might collect an egg for several days in a row, and then nothing for another few days. It takes approximately 26 hours to produce an egg, but no hen lays an egg every single day, even once they are in the swing of things.

Often young layers will lay abnormally large or small eggs. If two yolks are released into the oviduct too close together, you’ll get a huge double-yolked egg. Sometimes, you might collect an egg no larger than a malt ball, commonly called a wind egg or a fairy egg. That’s a glitch in production where no yolk is released, and the white is encased in a miniature shell. Both can be common with new layers.

Feed For Good Eggs

An egg contains every nutrient our bodies need except vitamin C. To prepare for the big day, be sure your pullets have the proper nutrients in their bodies to create an egg. Around week 18, switch them from a grower feed to layer feed.

Switching to layer feed won’t make a chicken start laying; she’ll lay when she’s ready regardless of whether she’s eating grower or layer feed, but the layer feed has a higher calcium content and is formulated to give her all the nutrients she needs to lay eggs with strong shells. Starting your flock on layer feed too early can result in damage to their kidneys due to the high calcium content, so timing is important.

If chickens don’t get enough calcium in their diet, they’ll start to leach stored calcium from their bones, which is something you want to avoid. Putting out a separate container or dispenser with crushed eggshells or oyster shell is a good idea in addition to feeding calcium-rich layer feed. Feeding the supplement free-choice allows each hen to eat as much or as little as she wants, while non-laying hens and roosters will ignore it.

Teach Good Laying Habits

Around the same time you switch to the layer feed, try putting some decoys in the nesting boxes—wooden or ceramic eggs, golf balls or even stones—to show your pullets where they are supposed to lay their eggs. (If you’re adding to your flock and already have laying hens, you can skip this step, because the pullets will imitate the older hens.)

Chickens are inquisitive creatures; they will likely have already investigated the nesting boxes. The addition of the decoys, however, might encourage them to try out the various boxes and get comfortable sitting in them.

Signs That Laying Time Is Near

As a pullet reaches the time commonly called point of lay, her comb and wattles will get larger and turn bright red. Her vent will be pink or whitish, plump, and moist. She might become a bit more vocal, especially as she investigates the nesting area more carefully.

Once a hen starts laying, you will begin to hear her egg song after she lays an egg, which is a loud, triumphant call announcing her accomplishment. It’s thought that hens create a ruckus after laying their egg to ward off potential predators from the nest. She could also be calling the rest of flock, who may have wandered away, wanting to find and rejoin them. Either way, be prepared for lots of celebratory cackling from the coop as soon as eggs start to appear!

Another clear sign that your pullets are getting ready to start laying is the submissive squat. As a hen reaches sexual maturity, she will start to squat at your feet as you come near. She’ll bend her legs and crouch while flattening her back. Squatting is a sign of submission (usually to a rooster but also to you or a more dominant hen in the flock) and a sign she’s ready to mate. Mating and egg-laying go hand in hand, so if you have a pullet who starts to squat, you can be sure eggs will soon follow.

Matching Hens To Their Eggs

The excitement of visiting your coop and peering into each nest box hoping for a surprise never gets old. For me, it’s just as magical today as it was the very first time I put my hand into a nest box and pulled out a warm egg as a child. Adding breeds that lay colored eggs to your flock heightens the excitement, and it also makes it easier to tell which chickens are laying and which aren’t.

If you have a small flock of breeds that lay a variety of egg colors, it’s fairly simple to figure out who’s laying and who’s not, purely based on the color of eggs in the nest boxes. Otherwise, in a large flock made up of all the same breed, unless you catch a hen in the act, it can be difficult to see which hens are laying—but not impossible.

To determine which birds in your flock are laying and which aren’t, look each hen over carefully. A good layer will generally have a pale beak, legs and feet, while a poor layer or hens past the point of lay, have bright yellow appendages. This is because the pigment xanthophylls, which gives an egg yolk its bright-orange color and is found in many plants including leafy greens, marigolds, corn and parsley, is stored in the chicken’s body. Any excess not used for egg production will color the legs and feet of the chicken bright yellow.

A poor layer will generally have a small, shrunken comb; her abdomen will be small and tight; and her vent will be yellowish, dried and puckered. A laying hen will have a rosy red comb, moist vent and a softer, fatty abdomen. If you place your fingers across the vent of a laying hen, there should be ample space—at least three fingers—between her pubic bones and about three fingers (four on a larger breed) between the tip of her breast bone and her pelvis. The measurements on a non-laying hen will be shorter.

Ironically, your non-layers may be some of your more attractive hens with bright, shiny feathers. Good layers often have dull, broken feathers, because they are investing so much energy, and a good portion of the nutrients they ingest, back into their eggs.

If you absolutely need to know if a hen is laying and can’t figure out using one of these methods, then the easiest way to tell for sure is to separate her from the rest of the flock for a few days, or spend a day or two inside your coop watching the activity in the boxes first hand.

Some more unorthodox methods I’ve read to determine which hens are laying are kind of fun. The first requires applying charcoal or ashes along the top of the inside of your nest boxes. (I suppose flour would work better if you have darker-colored hens.) Then, check to see who has the telltale residue on their backs. Another method requires ringing the vent of each hen in a different color lipstick and then matching the smear of color on each egg to the proper hen. I personally think I would just pour myself a cup of coffee and camp out in the coop for a few mornings if I wanted to know that badly!

Once your hens start laying, you might notice one who always seems to be sitting in the nest box. If, upon further inspection, you see that she has plucked out all her breast feathers and puffs up and makes a fuss when you try to move her or collect the eggs, you have a broody hen on your hands. That’s a topic for another article, but suffice it to say a broody is a godsend if you want to hatch some chicks, but can be the bane of your existence if not.