Categories
Animals

Grow Your Own Livestock Feed

Eight dollars for a bale of grass hay, $11 for a bag of dehydrated alfalfa, $10 for 50 pounds of goat pellets, $25 for a 20-pound sack of organic layer feed—it all adds up and only continues to increase in cost year after year. Growing a portion of your livestock and poultry feed is easier than you might think. In days gone by, people like you and I raised or foraged a significant amount of feed for livestock—be it a household dairy cow or goat, a pig raised for slaughter, or a coop of hens. The knowledge is still out there, and we can do it today.

Consider garden and orchard waste: corn stalks, bolted lettuce, pea vines, lawn clippings (not treated with chemicals, of course). Why toss them on the compost heap when some of your animals could eat them? Chickens, for instance, swoon for leftover fruit, squash, pumpkins, cucumbers, corn, herbs and greens, such as lettuce and beet, carrot, radish and turnip tops. Goats, sheep and pigs love them, too. To be on the safe side, don’t feed rhubarb leaves, avocados, citrus, onions or potato vines, as they are toxic. Also, rotten or moldy foods can cause health issues or reduced productivity for livestock and poultry, especially when fed in large quantities.

Here are a few items to add to your feed-growing repertoire.

Corn

A staple in most livestock and poultry rations, corn is a high-energy feed that’s been given to animals for ages. If you have 1 to 2 acres available for planting feed, growing your own corn can cut down on traditional feed costs. Bonus: By choosing heirloom varieties, you can grow delicious corn that, unlike most garden and field corn grown today, is not genetically modified. Corn provides energy but not a lot of protein in animals’ diets. Look for varieties that have proven high forage yields, high digestibility, low fiber levels and high fiber digestibility.

Grazing Corn

Grow corn for your own consumption and share it with your livestock and poultry, or grow it specifically for its grazing qualities. According to Ohio State University Cooperative Extension, grazing immature corn is similar to grazing other annual forages. The biggest difference is that while cool-season forage is going dormant in the middle of summer, corn plants are thriving. Graze corn as a grass 70 to 90 days after planting. With proper management—not allowing the animals to graze down the corn plants to below 3 inches from the ground—you can rotate livestock back onto the field later in the season.

Another option is to allow the corn crop to mature and then turn out livestock into the field. OSU estimates 12 to 16 125-pound pigs per acre of grazed standing, mature corn can produce 1,500 to 2,000 pounds of pork.

Sweet Corn

When growing corn for fresh eating, freezing and canning, choose delicious, heirloom sweet-corn varieties that grow on tall, sturdy cornstalks so you can share them fresh from the garden with your animal friends. Two old-time, open-pollinated varieties ideal for this purpose are Stowell’s Evergreen and Country Gentleman.

Nathaniel Newman Stowell, of Burlington, N.J., developed Stowell’s Evergreen sweet corn in 1848. It grows on enormous stalks up to 10 feet, with two huge, plump ears of delicious, sugary, white kernels per stalk. It’s ready to eat in 95 to 110 days and matures over a long period, providing fresh corn fodder for weeks.

S.D. Woodruff & Sons introduced Country Gentleman in 1890. It also matures in 95 to 110 days, yielding two or three ears of white, milky sweet corn per 8-foot stalk. It’s a shoepeg variety, meaning its kernels grow irregularly instead of in rows.

Feed fresh cornstalks judiciously, rationing a stalk or two per sheep, goat or piglet, and a small armful for larger animals, like adult hogs and cattle; too much, too fast can cause digestive problems, including diarrhea and bloat.

Dent Corn

You could also grow 1 to 2 acres of dent corn to feed your stock. Dent corn is old-fashioned field corn—the kind our great-grandfathers raised for flour, cornmeal and animal feed. One variety is Reid’s Yellow Dent—at one time the most popular variety in the Corn Belt. Developed in 1846 by Robert Reid, of Tazwell County, Ill., and improved by his son James Reid from 1870 to 1900, it’s easy to grow, prolific and disease-resistant. It has large, yellow kernels and a skinny, red cob. It matures in 85 to 110 days. Reid’s Yellow Dent stalks are tall, heavy and leafy, providing plentiful dried corn stover to feed beef cattle during the winter.

Another option, especially if you’d like to grow a colorful Indian corn variety, is Bloody Butcher, a prolific field corn with red to almost-black kernels. It originated in Virginia around 1845. Bloody Butcher matures in 100 to 110 days and grows up to 12 feet. Both varieties are delicious when prepared like sweet corn while their kernels are in the soft, milk stage, and their green stalks can be fed to your livestock.

Store thoroughly dry dent corn in a cool, rodent-resistant location, shelled or on the cob. Improperly stored corn can mold and cause animals to become ill, to refuse the feed, or to experience reduced productivity. Feed corn shelled to prevent larger animals from choking on cobs, but realize shelling is a time-consuming process, if you have a large quantity to shell by hand.

Crop Residue

Allowing animals to graze the stalks and chaff left after corn harvest is the most economical use of these residues, particularly for beef cows, according to Colorado State University Cooperative Extension. Nutritional quality isn’t so high that you shouldn’t supplement other feed sources, especially for growing, lactating or pregnant animals, however. Also be aware that 60 to 150 pounds of corn might remain in the field per acre, and over-consumption can cause health issues, such as acidosis or founder. (Sorghum crop residue also makes good grazing ground for cattle and sheep.)

Pumpkins and Squash

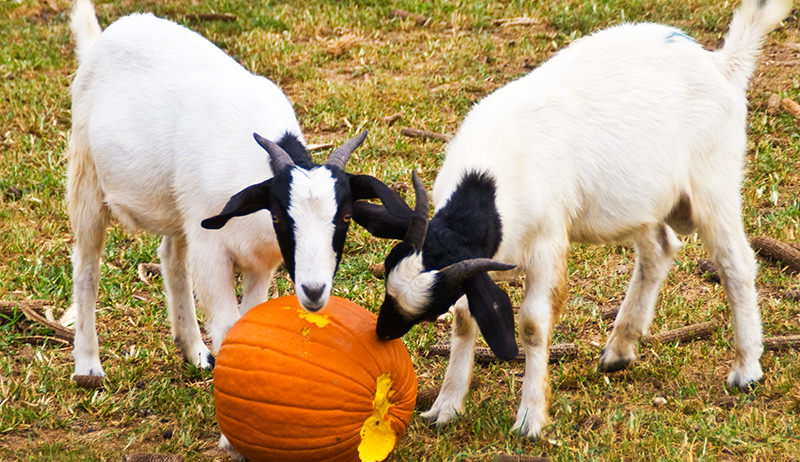
Poultry, pigs, sheep, cattle and goats all love pumpkins and winter squash. These vegetables are easy to grow and keep well in storage, providing feed with good fat, fiber and protein content through the winter months.

Connecticut Field pumpkin is a quintessential heirloom, medium-sized, jack-o’-lantern type. You can grow it to sell for Halloween, and feed the leftovers to your chickens and livestock. Introduced to America prior to 1700, it’s one of the oldest field pumpkins in existence. Under optimal growing conditions, Connecticut Field produces between 16 and 20 tons of pumpkins per acre.

To feed pumpkins, cut or break them in half and let fowl and livestock scoop out the seeds and flesh. Often, you can just break them open as you toss them into the field or pen for your animals.

Feed winter squash the same way. Even better winter keepers than pumpkins, most squash varieties store for three to six months. Two types to consider for livestock are the prolific Hubbard and butternut, as each are useful in cooking and baking, as well as in feeding to animals.

Harvest pumpkins and squash for animal feed when you cannot easily pierce their skins with a thumbnail. Make sure they’re full-grown; immature fruits don’t store well. Use pruning shears to cut them from the vine, leaving 1 inch or more of the stem attached. Wipe them clean with a damp cloth and cure them for two weeks at 70 to 80 degrees F. Store cured pumpkins and squash in a dry place, such as a barn stall, an unheated room or a cool cellar. Check them weekly for spoilage.

Root Crops

Root crops have been fed to livestock for centuries, and there is much historical documentation of the practice.

“Roots may be regarded as watered concentrates high in available energy for the dry matter they contain. … They are usually chopped or sliced before feeding, and should not be fed alone, but always with some dry feed, since they carry much water … . It is usual to put the cut roots into the feed box and sprinkle meal over them,” according to W.A. Henry in Feeds and Feeding; a Handbook for the Student and Stockman (published by the author, 1911).

Of the available root-crop varietals, potatoes, carrots and mangels are easily grown, stored and harvested by hand. All root crops have laxative qualities, so they should be introduced over a period of time, allowing the microbes in animals’ dietary tracts to adjust.

Carrots

Stock-feed carrots are grown like garden-variety carrots only on a larger scale; they yield between 29 and 40 tons per acre, depending on variety and crop-management practices. They’re nothing to sneeze at, even on a small-scale basis, as they contain about the same amount of protein, less fat and more minerals than corn. Carrots are especially valued for their high beta-carotene content and were traditionally used as a winter feed for dairy cattle so the cows would produce yellowish milk and cream. Washington State University research published in 2003 indicates that carrots increase the vitamin A and fatty acids in cows’ milk.

Cattle can be fed 40 to 60 pounds of carrots per day. A medium-sized adult sheep or goat can eat 5 to 10 pounds of chopped carrots per day. For poultry and pigs, substitute 8 pounds of carrots per pound of meal.

It’s best to choose a large variety, as big carrots tend to last longer than smaller table carrots in winter storage. Harvest them as late in the season as possible, just before the first killing frost. Trim their greens at least 1 inch from the carrot before storage, and feed the fresh greens to your livestock. Carrots store well for seven to nine months when held at a steady 32 degrees F and 99 percent humidity. Pack them in a spare refrigerator; store them in a cool, damp basement buried in boxes of sand; or in milder climates where winters aren’t too harsh, simply pile them up and overwinter them in the garden covered with a thick layer of sawdust and leaves. Heirloom varieties to consider for stock feed include Danvers and St. Valery carrots.

Danvers is a thick-rooted, cone-shaped, disease-resistant, dark-orange carrot with a small, yellowish core. Developed in Danvers, Mass., in 1871, it has broad shoulders measuring up to 2 inches across and a root up to 8 inches long. It matures in 70 to 80 days and thrives even in carrot-unfriendly, heavy soils and summer heat.

The St. Valery carrot is a French variety dating back to the 19th century. It has a smooth, bright-orange, 10- to 12-inch root and is 2 to 3 inches in diameter. Sweet and fine-grained, it’s enormously productive and an exceptionally good keeper.

Mangels

“While mangels, rutabagas and carrots are considered practically equal in value for hogs, mangels are consumed with the greatest relish,” according to Growing Root Crops for Livestock; Farmer’s Bulletin No. 1699 (USDA; 1937).

To say that mangels (aka mangel-wurzels, mangolds or fodder beets) yield astounding crops is a vast understatement. According to “Fodder Beets,” a Washington State University Extension fact sheet, Mammoth Long Red Mangel produced between 23,940 and 59,040 pounds of roots per acre in USDA tests conducted in 1918 in South Dakota; a 2008 trial in Pennsylvania yielded 13 to 48 tons per acre.

European farmers were growing mangels by the mid-1500s, both as animal feed and as table fare during food shortages. Every old textbook pertaining to livestock and poultry production mentions mangels, which demonstrates their value during that time.

Mangels are drought-tolerant and nutritious, offering 11.3 percent protein for roots and 17 percent for aerial parts. Their high water and sugar content makes them attractive to poultry and livestock. Historically, dairy and beef cattle were fed up to 30 pounds of chopped mangels per day.

Two heirloom mangels to investigate are Mammoth Long Red and Giant Yellow Eckendorf. Both mature to 20-pound roots in 90 to 100 days. Their nourishing tops can be harvested and fed green. Mammoth Long Red has red skin and white flesh; Giant Yellow Eckendorf has golden-yellow skin and light-yellow flesh. Both are easy to harvest, as one-half to two-thirds of the root matures above ground.

Root crops are injured by heavy frosts, so harvest mangels in late fall before a hard freeze. Cut back their tops to 2 to 4 inches from the root. Mangels frozen in the field quickly rot in storage; otherwise, they keep well through spring. They should be stored until late December to concentrate their sugar content and increase palatability. Feeding mangels to male sheep and goats contributes to urinary stones, so they shouldn’t be fed to wethers, rams or bucks.

Potatoes

According to the University of Maine Cooperative Extension, potatoes can be fed to livestock. Four-hundred to 500 pounds of potatoes supply as much feed value as 100 pounds of grain. Feeding 25 to 40 pounds per day per 1,000 pounds of an animal’s body weight is acceptable. Feed them raw to most livestock; cook before feeding to poultry and pigs. Chop or slice the potatoes to prevent choking and increase palatability. Do not feed green potatoes or potatoes with sprouts, as these can cause illness.

Ohio State University reports potatoes are an excellent energy source, but animals will still need supplemental feeds to provide adequate protein, minerals, vitamins and fiber.

These ideas are just the tip of the iceberg. Put up your own premium hay, plant a small orchard for your animals, or investigate additional easy-to-grow and -store crops. To truly have a balanced ration for your animals, get your alternative feeds tested for nutritional content and work with a veterinarian or nutritionist to develop the right feed program. Think outside the box and save money while feeding your fowl and livestock nutritious, GMO-free, farm-fresh food.

This article originally ran in the July/August 2014 issue of Hobby Farms.

Categories
News Urban Farming

Bee Swarm Rescued From NYC’s Grand Central Station

While fire departments are hard at work rescuing cats from trees, the NYPD has its hands full with another kind of rescue mission: a bee swarm.

Yup, New York City’s law enforcement has their own resident beekeepers: Detective Daniel Higgins & P.O. Darren Mays. Yesterday, the duo set out for Grand Central Station, which was abuzz with more than hectic travelers dashing between trains. A swarm of about 4,000 bees had landed on a light post outside of the station.

bee swarm outside Grand Central Station
@NYPDBees/Twitter

This swarm was smaller than most, the officers told NY1 News. Swarms typically have as many as 20,000 bees. Perhaps in the Big Apple, honeybees have to divide an conquer.

It took the beekeeping officers about an hour to capture the swarm. NBD. Just another day for our men in blue.

Categories
News

What’s Cuter Than Baby Goats? Baby Goats In Sweaters

At Sunflower Farm in Cumberland Center, Maine, the goats are more like family than livestock. As the Nigerian Dwarf herd comes in from the pasture, sounding their happy bleats, their caretakers can identify each one by its distinct voice. And, of course, they all have names.

These goats work hard to produce milk for the creamery’s fresh fetas and chevres, as well as caramel sweets, so they’re given top-notch treatment. Each is hand-milked with love and given its preferred treatment, whether that mean it’s milked one side at a time or given a head scratch before trotting back to the pasture. Once the weather gets nippy, you may even find the kids—the baby goats, that is—frolicking around in cozy sweaters.

baby goats in sweaters
Sunflower Farm/Facebook

Goats in sweaters? That’s too cute to handle. Sunflower Farm is actually giving away patterns for these adorable sweaters to anyone who makes a donation of their choosing to Sunflower Farm. So if you’re breeding your goats now and kidding will take place in the fall, gear up now—and support a small, local farm in the process. Get details on the farm’s Facebook page.

Categories
Beekeeping

8 Reasons Honey Should Always Be In Your Pantry

Whenever I look at a spoonful of honey, I remember that it took a single worker bee her entire lifespan to produce just 1/12 of that spoonful. Granted, a worker only lives for about three or four weeks in the summer, but that’s because she works herself ragged (and literally to death!) in the process of gathering nectar, storing it, fanning it, creating the honey and capping it. It’s a lot of work!

In our house, we revere honey—in its raw, unfiltered, unheated form, of course—for its simple sweetness, but also for a few more reasons.

1. Honey is the perfect burn and bug bite salve.

Put a tiny dab on mosquito bites, wasp or bee stings, and mild burns. It helps wounds heal faster, reduces swelling and redness, and provides much-needed moisture to burns, all while providing a protective barrier against bacteria that may cause infections. Any raw honey will do, but many swear by Manuka honey for medicinal purposes (available online and at health food stores), as it contains more powerful anti-inflammatory agents than other wildflower honeys.

2. It’s better for you than sugar.

It’s true that honey is mostly sugar—it’s the honeybees’ carbohydrate source, after all. But it’s not just sugar, like refined cane sugar, and it’s not packed with synthetics additives and possible carcinogens, like sugar substitutes. Compared to sugar, the glucose to fructose ratio of honey is easier for the body to convert to energy, meaning there isn’t as much leftover to be stored as fat. People that consume it, compared to those that consume other sweeteners, end up holding onto fewer calories because their bodies use more energy to break the honey down. It also contains trace nutrients that are actually good for you.

3. It’s anti-bacterial and anti-microbial.

Ancient cultures around the world knew years before modern scientists that honey possessed antimicrobial properties and was exceptional in its wound-healing abilities. It’s low pH level and high sugar content contribute to its ability to encumber microbial growth, among other factors. In lab studies, honey has been proven to hinder the growth of potentially harmful pathogens and bacteria, such as E. coli, salmonella, and Staphylococcus Aureus (staph infection).

You might notice that some honeys are a light, golden color, and others are dark and thicker. The varieties depend on the flowering plants that honeybees visit in their region. Generally speaking, the darker the honey, the more medicinally potent it is.

filling honey jars
Kristina Mercedes Urquhart

4. It helps fight seasonal allergies.

For seasonal allergy sufferers, local, raw honey may be the answer to your prayers for relief. It’s understood that fine particles of pollen are present in honey (one of the many reasons that raw, unfiltered and untreated honey is so important), providing an inoculation of sorts for allergy sufferers. For the best results at combating allergies, purchase and use honey produced within 50 miles of your home by a local beekeeper.

5. It coats a sore throat and helps the medicine go down.

This liquid gold works all sorts of wonders with the common cold. In addition to the benefits we’ve already explored, honey works brilliantly as a natural cough suppressant. Stirred into hot tea with a bit of lemon, it’s used as a soothing, healthy elixir to help fight just about any bug. My personal favorite way to use it during flu and cold season is to make an elderberry syrup with dried elderberries, filtered water and raw honey to take at the onset of a cold.

6. It’s a great natural energy booster.

Honey is the perfect pick-me-up. It’s a great source of carbohydrates, and won’t leave you with the same kind of crash as a candy bar or refined cane sugar would.

7. It’s the perfect cosmetic.

Honey is often added to cosmetics because it’s a natural humectant, meaning it attracts and retains moisture. Put it in homemade soaps, body lotions, shampoos or hair treatments.

8. It lasts forever—literally!

It’s true. Modern archaeologists have unearthed pots of honey from Egyptian tombs, and discovered that the 3,000-year-old honey was still preserved. Although it will ferment under certain circumstances, it otherwise doesn’t go bad, keeps well in a typical household environment, and doesn’t take up a lot of space. There’s no better reason to keep it around than that it’s just a great insurance policy.

Categories
Animals Homesteading Poultry

The No-Mess Chicken Feeding & Watering System

Sometimes, novice chicken-keepers find themselves frustrated when trying to find an ideal feeding-and-watering system for their new birds. Tipped feeders and soiled waterers are common complaints. If this sounds familiar, experiment with building your own spill-and-mess-resistant chicken feeder and waterer. These are easy projects within the abilities of almost any DIYer, and they’re built out of common materials that don’t cost much.

There are many varying ways to tackle this project, but most DIY feeders and waterers are just variations on the same theme. In this project, we’ll show you how to assemble one version each of a nonspill, easy-clean feeder and waterer, but keep in mind that these directions are easily adaptable for your own situation. You may want to lengthen or shorten certain components to make them fit into your coop or to suit your number of chickens, and you can add components to fill them from outside the coop.

Because of the way these dispensers are constructed, making adjustments can be as easy as purchasing additional sections of PVC—just adjust the height and lengths of the pipes to fit your situation and needs. There are no magic lengths, though longer pipes will hold more feed and water, which is important if you have a large flock. The lengths shown here are just for illustrative purposes.

Materials

feeder and waterer materials
Daniel Johnson

Feeder

  • 1 4-foot length of 2-inch PVC pipe
  • 2 2-inch PVC Wye adapters
  • 2 2-inch PVC end caps
  • assorted PVC fasteners/brackets

Waterer

  • 1 2-inch PVC 90-degree elbow joint
  • 2 5-foot lengths of 2-inch PVC pipe
  • 5 chicken waterer nipples (adjust number to your flock)

Tools

  • pencil
  • hacksaw
  • chalk line
  • electric drill
  • 1 1/32-inch drill bit
  • 11-mm socket or nut driver (This was the size for the water nipples we used; yours may need a different size.)

Building The Feeder

Step 1

cut PVC pipe
Daniel Johnson

Start by making cuts to the 4-foot PVC pipe. You’ll need two 2-inch pieces of PVC to serve as spacers, so measure and cut two of these with the hacksaw. You’ll also want to modify the remaining 44 inches of pipe to whatever length works for you and your coop; we shortened it to 38 inches.

Step 2

feeder pieces
Daniel Johnson

Next, assemble the lower section of the feeder, which is the part the chickens will actually eat out of. Combine a PVC end cap, a spacer, one PVC wye section, another spacer and another wye, as shown in the photo. You shouldn’t need any glue or PVC cement; the pieces should all fit together snugly on their own.

Step 3

assembled feeder
Daniel Johnson

The upper section of the feeder acts as feed storage. Add the remaining long length of PVC pipe to the lower section you already built, and then use another end cap for the top. You’ll remove this end cap each time you want to fill the feeder.

You’ll need some way to attach the feeders to your specific coop situation; this will vary depending on your setup, but purchasing a selection of PVC brackets/fasteners is probably a good starting point.

Building The Waterer

Step 1

mark holes
Daniel Johnson

Begin by marking a series of holes into one of the 5-foot PVC sections; these will be for the water nipples. The number of holes you choose depends on your flock, with approximately one nipple needed per one to three birds. For this sample project, we went with five.

To prevent leakage or dripping, it’s important to make sure that the water nipples hang vertically —not at an angle—when the waterer is finished, so the holes need to be straight. To help, use a carpenter’s chalk line. Space the holes evenly; we went with 12 inches apart.

Step 2

add nipples
Daniel Johnson

Once you have marks, drill them out with whatever drill bit size is required for your water nipples; ours needed an 1 1/32-inch drill bit. PVC is tough, hard and a little slippery, so take care drilling into it. A vise can help hold the pipes steady.

Follow the installation directions that come with your water nipples; some have a rubber seal built into them to prevent leakage, while others require a bit of thread sealing tape. Getting the nipples to thread into thick PVC can be a challenge. Once you’ve got them started, use a ratchet or a nut driver to tighten them all the way down.

Step 3

assembled chicken waterer
Daniel Johnson

To finish, add an end cap and the 90-degree elbow joint to each end of the 5-foot PVC, then add the other 5-foot length of PVC to the elbow joint. This vertical PVC section is for the water storage, and like the feeder, you can place another end cap on the top of it when you’re not filling it.

The chickens should be naturally curious of the red color of the water nipples, and they may discover on their own that water comes out. If not, you may need to attempt to demonstrate how they work.

Don’t remove your chicken’s current feed or water sources until you’re positive they are using the new systems.

This article was written with the help of Samantha Johnson. Daniel and Samantha are a brother-sister writing team and have collaborated on several books, including How to Build Chicken Coops (2015).

This article originally ran in the July/August issue of Chickens.

Categories
Crops & Gardening

What’s That Foam On My Plants?

As a child, I was fascinated by the frothy white masses commonly found on the strawberry plants in my parent’s garden. I investigated every one of these bubbly spit-like anomalies to get a glimpse of the strange green or yellow creatures that called them home. The insects that captivated my childhood imagination are known as spittlebugs, an insect closely related to leafhoppers.

Oh, That’s A Spittlebug

Immature spittlebug nymphs and their spittle homes are a common sight in many late-spring and early-summer gardens and yards. The foam is formed when the nymphs munch on plant sap and secrete the excess moisture. The function of this spittle is three fold. It:

  • provides refuge from predators
  • controls temperature extremes
  • regulates relative moisture of their immediate environment

The spittle masses can get up to 3/4 inch large and tend to occur at the junction between the leaf and stem. Once the spittlebug nymph matures, it stops producing spittle and ventures out in the wide world in search of a mate and more plant sap.

Adult spittlebugs have triangular-shaped bodies about 1/4 inch long and come in a wide variety of colorations based on the species. The adult is often called a froghopper due its hopping locomotion and its unique face, which reminds many gardeners of frogs.

So What’s That Spittle Doing To My Garden?

spittlebug
Kevin Fogle

There are 20 to 30 spittlebug species found throughout North America. The good news is that most of these spittlebug species are not interested in consuming your vegetable garden, though there are a few pest spittlebugs species, like the meadow spittlebug, that could affect crops like strawberries, legumes and some grains. Unless spittlebug populations are very high, the damage caused by their feeding is no big deal. While feeding nymphs can distort the strawberry fruit and leaves, plants likely won’t die even though productivity could go down. Also, while spittlebugs are capable of spreading bacterial and fungal plant diseases, they’re not that good at it, so you don’t usually have anything to worry about.

Kicking Spittlebugs To The Curb

When dealing with spittlebugs, the simplest organic control is through physical removal of the insects either by hand-picking or spraying water on all visible spittle masses. If populations grow out of hand and become troublesome, consider trying an organic insecticidal soap spray that is rated for spittlebugs—but be aware that the nymphs are rather well protected from chemical agents in their spittle dwellings.

Categories
Crops & Gardening Farm Management

My 3-Step Approach To Protecting My Garden From Squirrels—Humanely

Where I live in northern New England, the growing season is relatively short, generally starting around Memorial Day and ending sometime in early October. Every day you have and every seed you plant is important, so when you find your squash and pumpkin mounds torn up with the shells of the seeds scattered around, it is not a welcome sight. While later in the year my problems will be rabbits, woodchucks and the occasional deer, this early season destruction is the work of squirrels.

My friends ask me why I don’t just shoot the pests. Of course, they ask the same question about the woodchucks. Simply put, I never shoot anything if there’s another way to do it. While I do hunt and fish to help feed my family, I don’t like to kill things needlessly. Another friend recommended using live traps to catch the squirrels and then move them. Yeah, right. There are just too many squirrels to move, so that idea is not practical. I tried many different things, and while each worked for a few days, they quickly lost their effectiveness. Seeing that, I came up with a three-pronged approach, combining all of the things that I found to work on their own.

Step 1

black fabric
Dana Benner

Squirrels, like most animals, are creatures of habit. With that in mind, I watched my garden at different times of the day and made notes on what I observed. What I noticed was that the squirrels were raiding the garden very early in the morning, so I replanted my squash and pumpkins in the late morning. Then just as the sun was going down, I covered them with black garden cloth, staking it down at both ends. In the morning I pulled back the covering and repeated the process until the first young plants began to break the surface. This process will work until the squirrels figure out that they can wiggle their way under the fabric. When this happens it is time to go to step two.

Step 2

owl decoy
Dana Benner

While still using the black fabric, I placed an owl decoy on the roof edge of my shed. Like the fabric, this worked for a few days—the trick is to move the owl decoy every so often. Squirrels are pretty smart animals, and it doesn’t take them very long to figure out the hoax.

Step 3

fox urine pest repellent
Conquest Scent Sticks

By this point, hopefully Steps 1 and 2 have bought enough time for the seeds to germinate, but if not, you can add an extra layer of protection: predator urine. I know it sounds disgusting, but it works. I use fox urine, as foxes are plentiful in my area and eat squirrels. The urine comes in many different forms and can be picked up wherever hunting/trapping supplies are sold. I use DeadRun by Conquest Scent Sticks because comes in a solid form that looks like a deodorant stick. It applies easily and doesn’t make a mess.

Set four wooden stakes into the ground, one at each corner of the garden. (If you have a large garden, use more stakes.) Apply the fox urine to each stake every few days. While it does stink, especially if the wind blows in the wrong direction, you only have to put up with it for a short amount of time. I highly recommend that you wear gloves while using this product to keep the smell from getting on your skin.

While none of these methods is foolproof, when used collectively, they should buy you the time you need for your seeds to germinate. Once the plants have broken the surface, the squirrels will leave them alone. In most cases, the plants will not be bothered by four-legged pests until they start to produce fruit.

Categories
Animals Poultry Urban Farming

How To Give Your Chicken A Bath

Chickens don’t ordinarily need bathing. They maintain their personal hygiene by dust-bathing, which essentially involves rolling in dirt. At the end of a dust bath, the dirt is shaken off and the chicken proceeds to preen and groom its feathers back into place. However, there are times when an especially filthy fowl will need a bath, and when it does, don’t overthink it. Bathing a chicken is a lot like bathing an infant or a dog: The most important thing is to prevent drowning while accomplishing the task with reasonable speed.

Note: This article will cover the basics of bathing backyard chickens, not show chickens preparing for a poultry competition.

Why Bathe A Chicken?

The most common predicament requiring a bath involves poop. Either a bird poops on another bird from a higher roost or a bird’s vent feathers become caked with droppings due to diarrhea. Less common reasons for bathing a chicken include:

  • injury: in order to assess a bird’s condition and clean its wounds
  • skunked: being sprayed by a skunk, which requires special de-skunking solutions
  • sickness: to help an ill bird maintain its own hygiene, which it may not be able to do via ordinary dust bathing

When I give my dog a bath, she gets the head-to-toe treatment, but chickens can be spot-bathed more often than not. For example, if the vent feathers are filthy, I only wash that area.

Chickens spend a great deal of time arranging and conditioning their feathers with oil from their uropygial gland, aka preen gland or oil gland. Feathers are better left unstripped of these natural oils if possible. However, in some cases, a summer bath is a necessity.

Supplies You’ll Need

Before you get started, you’ll need the following supplies.

  • several towels
  • rubber shelf liner
  • gloves
  • apron
  • baby shampoo
  • large cup
  • a nail brush (if feet are implicated)
  • hair dryer

Lather, Rinse, Repeat

I like to bathe my chickens in a bathtub or a sink with a sprayer nozzle, but two large basins or buckets will do: one for washing and one for rinsing. Before adding any water, add a strip of rubber shelf liner to the bottom of the tub or bucket to prevent slipping. Then run lukewarm water into the container.

Holding the bird securely with one hand on the wings at all times, slowly place it into the tub. This is not a natural or welcome activity for a chicken, and there will initially be some flapping. If dried droppings or raw egg are stuck to the feathers, allow the bird to soak for awhile before attempting to clean the feathers.Using a sprayer nozzle or cup, soak the dirty areas well. Apply a small amount of baby shampoo to the feathers and skin, and lather it up.

When washing a chicken’s feet, particularly when treating a foot injury or bumblefoot infection, a nail brush can be helpful in removing dirt from toenails’ intact areas of skin. When you’re finished with the wash, rinse well with clear water. Then gently squeeze excess water from feathers, and wrap the bird securely in a large towel.

drying a chicken
Kathy Shea Mormino

If the weather is very warm, the chicken can air-dry; otherwise, dry the bird with a hair dryer on low heat. Leave the wet bird partially wrapped in a towel with its wings loosely secured to its back while turning on the hair dryer. The sound of the hair dryer may be startling initially, but chickens quickly adjust to the noise and sensation. Always keep one hand near the dryer airflow to be certain the temperature isn’t too warm.

Working one area at a time, fluff the feathers gently while directing the airflow at the target area until dry. As you can see in the photo above, the hen, which is being treated for a prolapsed uterus during cold weather, is standing on my leg voluntarily with no restraint. She enjoyed her first bath and blow dry quite a bit!

When A Skunk Strikes

Following a skunk-encounter post on Facebook, Shelly Wade shared this recipe for a de-skunking shampoo, safe for chickens, dogs and other farm animals. NOTE: Shampoo should be mixed prior to each use and never mixed and stored. Shampoo can be drying to the skin and may require follow-up with a leave-in conditioner. This solution may bleach fur or feathers.

Ingredients

  • 1 quart hydrogen peroxide
  • 1 T. baking soda
  • 1 T. dish detergent
  • 2 quarts warm water
  • de-skunking rinse (9 parts water to 1 part white vinegar)

Preparation

Mix the hydrogen peroxide, baking soda, dish detergent and warm water until the baking soda and detergent are dissolved. Work this solution into the chicken’s skin and feathers for at least five minutes. Rinse thoroughly with water. Repeat if necessary. Follow up by applying the de-skunking solution, but do not rinse it.

Water Worries

  • Never leave your bird in the sink, tub or bucket unattended. It’s an accident waiting to happen, which could have dire consequences.
  • Don’t use harsh detergents or vinegar (except for a de-skunking bath), which can strip the oil off feathers, dry the skin and make feathers brittle.
  • Don’t pull off dried poop from the feathers; this can pull away more than just debris, such as bits of feather and possibly even skin.

Bathing Do’s

When bathing your birds, there are several points to keep in mind. Here are some important “do’s” for you to adhere to:

  • Plan on getting wet. An apron may be in order.
  • Keep several towels handy.
  • Keep the water a comfortable, lukewarm temperature.
  • Hold onto the wings gently to discourage flapping and escape attempts.
  • Keep the bird’s head above water at all times. Expect extreme relaxation before long; many chickens enjoy baths so much that they fall asleep.
  • Consider rubber gloves if poop is involved.
  • Bleach the tub or bucket and thoroughly rinse it when you’re finished.

While your bird won’t be ready to walk the runway at the county fair or win a sanctioned poultry show, a nice bath given only when absolutely necessary will help keep your birds looking fresh. Most birds love it in the end, and it’ll make you feel better about your birds.

Categories
Crops & Gardening Video

Grow The Yacon

A native to the Andes Mountains in Peru, the yacon is a sweet, tender root vegetable that can be grown here at home. As relative of the sunflower, it can most easily be compared to the Jerusalem artichoke, which falls in the same family. The flavor—said to taste like a combination between a pear, apple, carrot and celery—is often thought of as fruit, though it’s the tubers you eat.

Depending on your hardiness zone, yacons can be grown as annuals (in the north) or perennials (in the south). They’re hardy to zone 8, but require a five- to six-month growing period, so keep that in mind if you plan to grow it as an annual in northern regions.

The yacon is an economical plant to grow, because after you purchase the original rhizome, you’ll be able to continue harvesting off of the plant for years to come. In the spring, you plant the rhizome, and roots form. Tubers will grow off of each root—with one plant yielding as much as 22 pounds of edible vegetable, according to research done by Master Gardeners in California. You can harvest the tuber after the five- to six-month growing period, or for northern climates, when the frost kills back the plant. Then you can dig up the rhizomes, and store them in sand in your refrigerator until the next growing season.

When planting yacons in the spring or early summer, remove all the weeds around the area in the garden where you’ll be siting the plant. Weed roots will compete with the yacon tubers, resulting in less yield. Amend the soil with bonemeal to promote root development, and if you’d like, and high-potassium fertilizer. (Avoid high-nitrogen fertilizers, as that will promote vegetative growth, taking energy away from the tubers.)

Yacon plants will grow as much as 8 feet tall. While caging or staking isn’t necessary, you may decide to play around with what works best in your garden.

If you’re itching to try something new in the garden this year, yacons could be the way to go. And we’re pretty sure their flavor will win over even the pickiest eaters in your family.

Categories
Farm Management

How To Fill Up Your CSA Membership

The community-supported agriculture model of farming is arguably the most ideal way to sell food. In essence, you are getting paid in bulk for veggies you haven’t grown yet. You are securing part of your income (thus budget) for an entire year. Plus, you get the opportunity to develop a relationship with your customer, watch their children grow and become a part of their lives. Maybe ideal is not a good enough word—it’s perfect.

The reality, however, is that it’s not always easy to fill up your CSA membership slots. it’s a lot to ask of someone to pay upfront—even in part—for their food, and for that reason, you may at some point find yourself struggling to fill all of your CSA spots. So if that is the case, or ever becomes the case, here’s a series of questions you can ask yourself if the CSA just isn’t coming together. In fact, they’re great questions to revisit every couple years or so to keep your farm business moving forward.

Getting New Customers

How’s Your Branding?

I want you to step back and look at what you have now. Your logo, for instance: Is it clean and memorable? Is your website logical and navigable? Do your CSA flyers pop? How are your business card? All of this matters for attracting new customers. When you take this step back to analyze your branding, have a friend, an objective stranger or even an existing CSA member tell you what they think. The reason your spots aren’t filling up could be as simply as someone not feeling compelled to take your card from the coffee shop.

Are You Everywhere?

Do you have your flier on every community board in town? Have you sent out a press release to all the major local publications? Do you have business cards in every gym, CrossFit studio, brewery, bar and coffee shop? What about libraries? (Librarians are, in our experience, some of our most loyal customers.) Wine shops? Natural food stores? Health department? These are all free ways to get your name out. Anywhere you can put a card or flier is where you should be.

How’s Your Social Media Game?

Yes, unfortunately, a farmer now not only has to be a salesman and horticulturalist, but tech-savvy to boot. Luckily, the social media you need to understand in order to have a successful business is fairly straightforward. Facebook and Instagram are sufficient. Twitter and Snapchat aren’t a bad idea, either. Don’t go nuts, just posting pictures of your family and your farm every week with a little story about what you have going on is enough to keep people engaged. Consider even starting a Facebook group for CSA members to share recipes. If you keep a blog, keep the content short and apolitical. Pictures of their food and their farmers is what most people want.

Keeping Old Customers

Is Your Product Consistent?

Once you have customers, cherish them. Really make sure that everything you give, to the best of your abilities, is clean and of the highest possible quality. Rough weather years can make this difficult, but a good rapport will help them understand. People join CSAs for the experience as much as the food—but they still need to receive good food or else they won’t come back.

Are You Giving Too Much Food?

Farmers love to share the bounty, but people hate to waste it. If a customer ends up throwing out lettuce after lettuce every week then they’re going to feel guilty and potentially skip the CSA next year. If you can’t help yourself, give them a way to bring their excess back to you. You could provide compost buckets or set up a food swapping system so they’re not wasting it, just turning what they can’t eat back into food.

Have You Involved Them In Your Farm?

Do you share your farm with your customers? I am not just asking, “Do they come to the farm?” Rather, I’m asking if you invite them to take part in some of the decisions— make them feel like farmers? Making a customer feel as though your farm is their farm is a great way to keep them coming back. They will see their decisions—perhaps more fruit in the basket, more asparagus or other perennials—over time and know they played a role in that.